When and how to photograph the annular solar eclipse
Take photos of the spectacular ring of fire this Sunday without harming your camera (or your vision).


- Webby Award ("How To, Explainer, and DIY Video"); Folio Changemaker Award, 2020
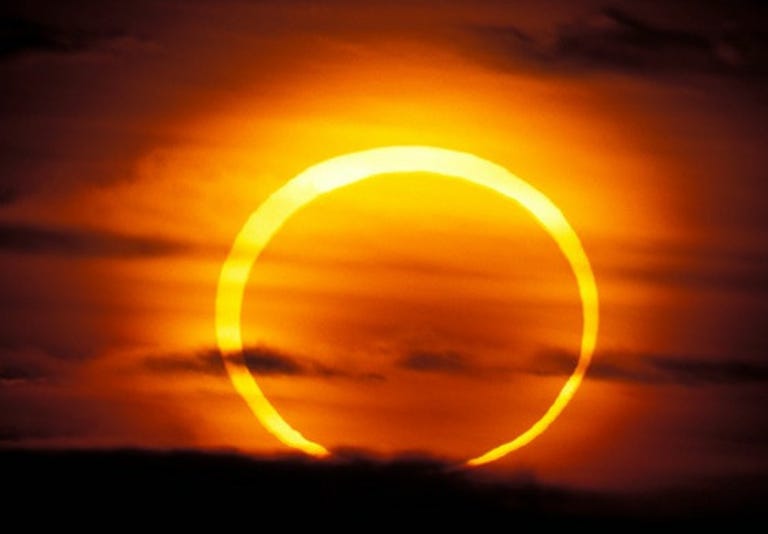
Unlike the common solar eclipse, the annular solar eclipse results in a ring of fire you may only catch twice or thrice in your lifetime. The last annular eclipse appeared in 1994, and NASA projects the next to occur in 2023.
Weather permitting, the full extent of the eclipse (including the ring of fire) will be visible in Asia, the Pacific region, and parts of the United States (like California and Texas). Other parts of the U.S. will still be able to view the eclipse, but will miss out on the unique ring of fire.
Sadly, the East Coast will miss out on the event entirely.
To find out when the eclipse will peak in your area, use this free tracking tool. You'll also want to find out if the sky will be clear during that time. (A few passing clouds are OK, but you won't be able to see the eclipse with an overcast sky.)
At its peak, the ring of fire will last about 4 minutes, giving you plenty of time to get a snapshot of the event. I consulted with CNET's photographers, James Martin and Josh Miller, to bring you this guide.
Step 1: Know your sun safety
In no circumstances should you look at the sun during the eclipse (or anytime for that matter). Even at its peak, the sky will still be very bright, since the sun will only be partially covered.
Likewise, it's not recommended that you point your camera lens at the sun, as its bright rays can fry your camera's sensor. At your own risk, you may be able to get away with pointing your camera at the sun during the peak, but otherwise, you'll need a solar filter.
Solar filters are simply placed over your lens to protect the camera from the sun and filter the rays. Unfortunately, however, it's likely that most photography stores are sold out of solar filters.
Alternatively, you can use No. 14 welder's glass and hold it in place. Call your local hardware store to see if it carries it.
Step 2: Grab your equipment
If you have a tripod, use it. Doing so will allow you to position your camera just once so that you can focus on other things, like adjusting your settings (which we'll discuss next).
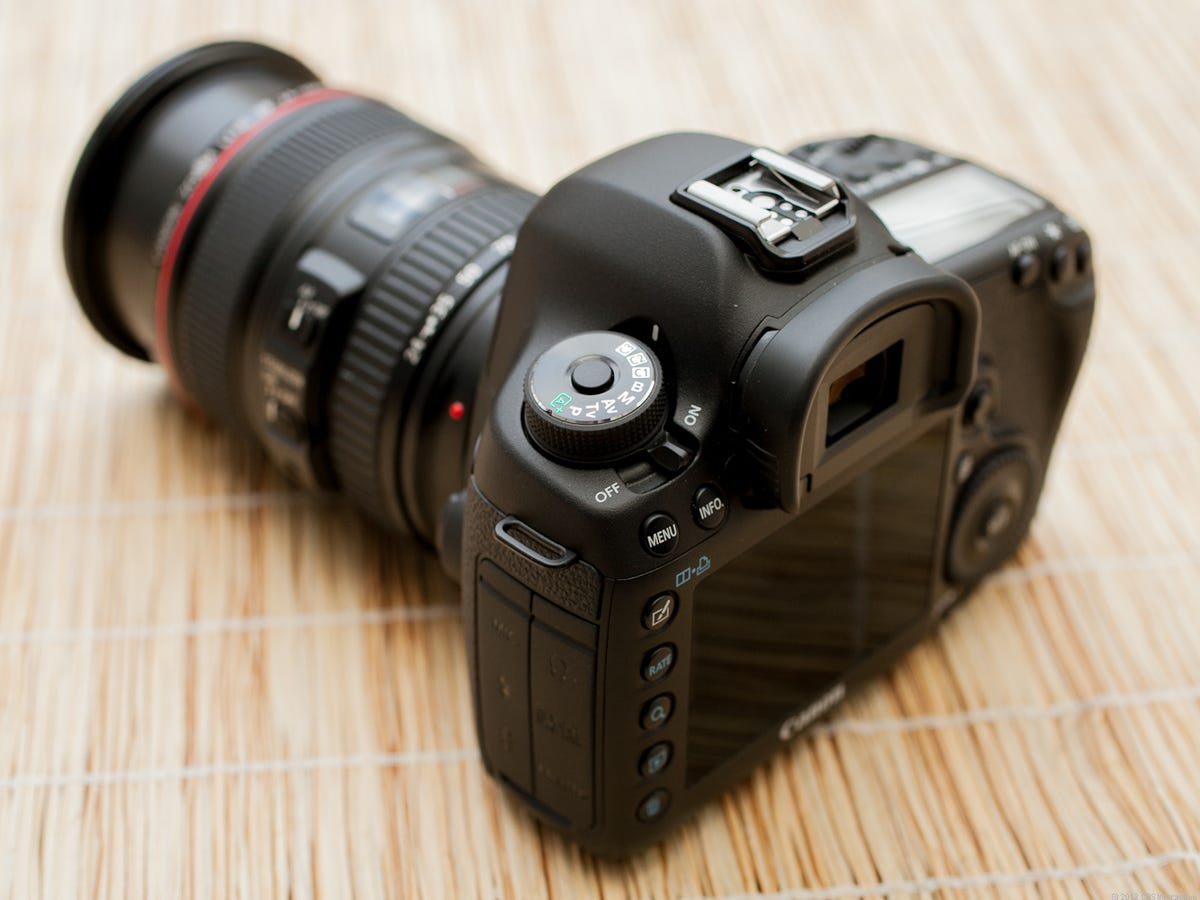
Most importantly, use the right camera. Compact, or point-and-shoot cameras, are not good for this application since you (usually) can't tweak settings like shutter speed and exposure.
Instead, use a dSLR camera. If all you have is a standard kit lens, that's fine, but if you have a telephoto lens, now's the time to put it to use. The sun is nearly 93 million miles away, so even with a 200mm lens, it will appear small.
If you don't own a telephoto lens, you might consider renting one from your local photography store.
Step 3: Use the right camera settings
As the peak of the eclipse approaches, adjust your camera to the following settings:
- Shoot in raw mode
- 100 ISO
- F 8.0
- 1/1,000 shutter speed
- Set to manual focus, and focus to infinity
The above settings are a rough estimate, but a good starting point. They're designed to prevent too much light from blowing out the photo. The fast shutter speed will ensure that your lens doesn't let too much light enter, and the low ISO will make the image less bright, allowing you to capture the moon.
These are not definitive settings, though, so adjust up or down in small increments as necessary. You'll have about 4 minutes when the eclipse is at its peak to adjust the settings, so don't panic.
Step 4: Shoot
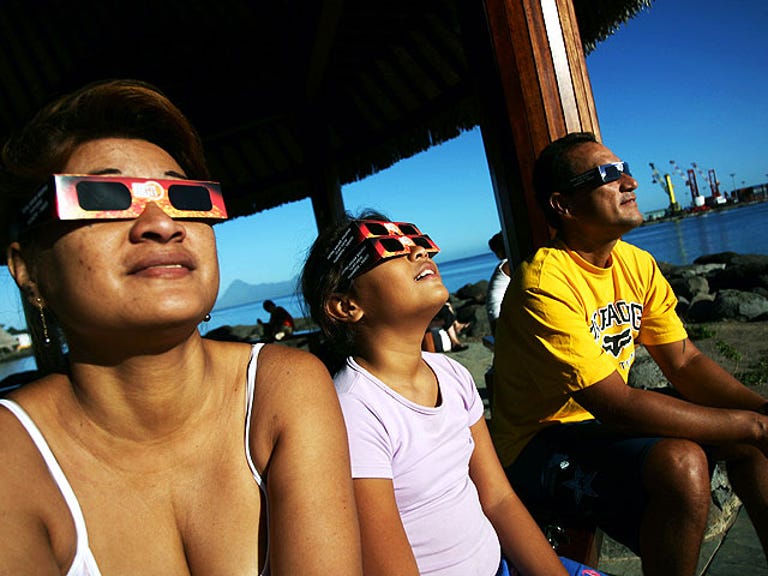
As the eclipse approaches, you'll want to monitor its progress. Do not ever look directly into the sun, nor should you look in your camera's viewfinder without the proper eye gear. Special "eclipse glasses," No. 14 welder's glass, or a pinhole projector (instructions here) are a few ways to safely monitor the eclipse.
When the ring of fire appears, start shooting. During the 4 minutes of this event, tweak your camera settings as necessary, but avoid looking directly into the viewfinder, as you can seriously damage your eyes.
As the moon cruises away from the sun, take a look at the ground. The eclipse will produce beautiful crescent shadows, creating a scene you'll want to capture with your digital camera. This is a great opportunity for those with nonmanual point-and-shoot cameras to take advantage of the event as well.
Step 5: Edit
Unless you have a telephoto lens with a great zoom range, the eclipse will likely appear very small in your photos. So before you go sharing them on Facebook, process your photos in a program that can handle raw images, like Photoshop or Lightroom. (If you didn't shoot in raw, any photo-editing program will do.)
Crop in closer to the eclipse and make any necessary adjustments before exporting the image as a JPEG.
Have fun! Just remember: safety first. Never look directly into the sun, and never point your camera lens at it without the proper filtering equipment.