Ten essential OS X Lion tips
Not all the tweaks in Apple's Mac Lion operating system are everyone's cup of tea. Here's how to reverse some of the new features that might get your goat, among other tips.


When Apple shipped OS X Lion, it made some brave decisions about what to include, what to miss out, and what to fiddle with. Most of the adjustments are genuine time-savers, but they're not all to everyone's taste.
Fortunately, much of what you don't like can be disabled, and much of the rest given a suitable tweak. Here's our run-down of ten essential Lion tips and tricks.
How to revert to old-style scrolling
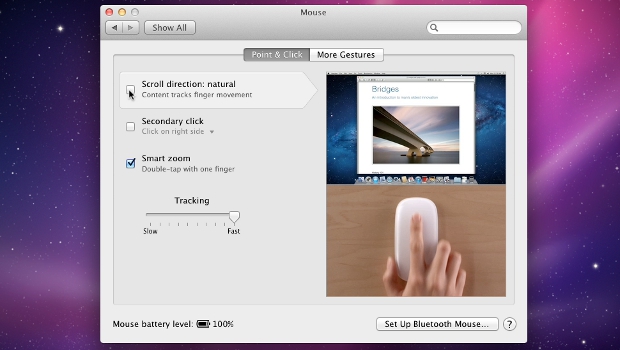
Inverted scrolling is Lion's most controversial change. We've spent years scrolling down to make our pages move up, and vice versa, and now it's all been reversed. You can blame the iPad for that.
On tablets, you move the virtual page with your finger, so, as you slide down the screen, the page goes with it. The same is now true for Lion, but, as your mouse or trackpad is detached from the on-screen image, it's somewhat confusing.
To revert to the old-style scrolling used in Windows and previous versions of OS X, open System Preferences/Mouse, or System Preferences/Trackpad, and untick the box besides 'scroll direction: natural'.
How to get the old Mail interface back
Recognising that most of its customers will be using wide-screen displays, Apple has moved Mail's preview pane to the right of the message list. This lets you run it full height, and preview more of each message (see image below).
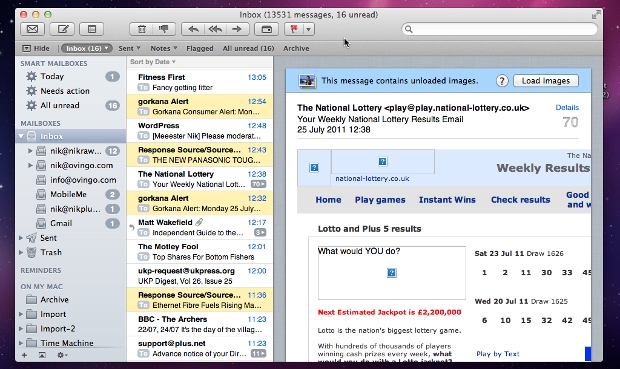
If you have Mail set to automatically download external images in HTML emails, though, preview panes can be risky, as it means that, every time you click on spam -- even just to delete it -- its full contents will be shown, including any saucy images, which could indicate to the sender that your address is valid.
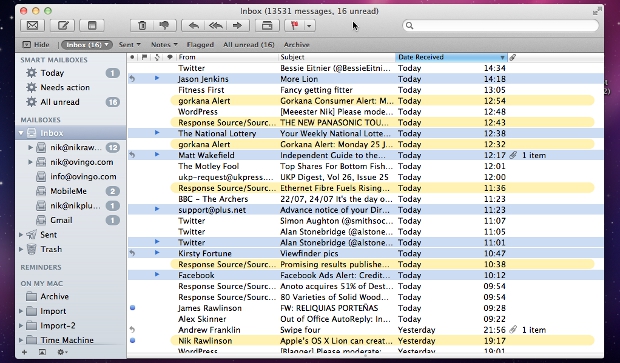
To get around this, hide the preview pane by dragging the message list's right-hand divider all the way to the far right of the window, or use the old Mail layout, wherein the preview pane could be collapsed below the message list. To accomplish the latter, pick Mail/Preferences/Viewing, and check the 'use classic layout' box.
Add Gmail, Yahoo and AOL accounts more easily
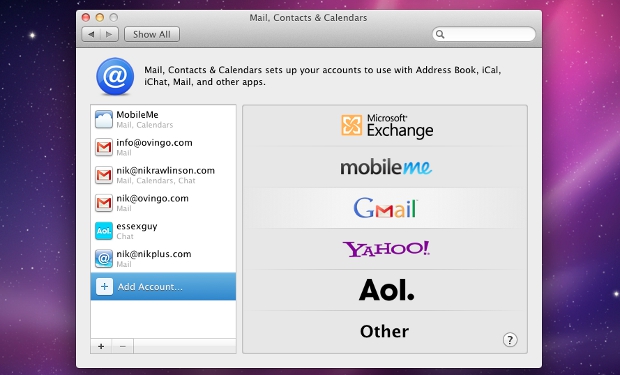
The next time you need to add a Gmail, Yahoo or AOL account to Mail, forget about adding it inside the app itself. Instead turn to System Preferences/Mail, Contacts & Calendars, and pick the service you need from the options on the right, which, alongside the three already mentioned, also include Exchange and MobileMe.
This smart preference pane already knows the server settings for each service, so you only need to enter your name, email address and password to get up and running. The Gmail option also supports mailboxes hosted on Google Apps accounts.
How to get your scroll bars back
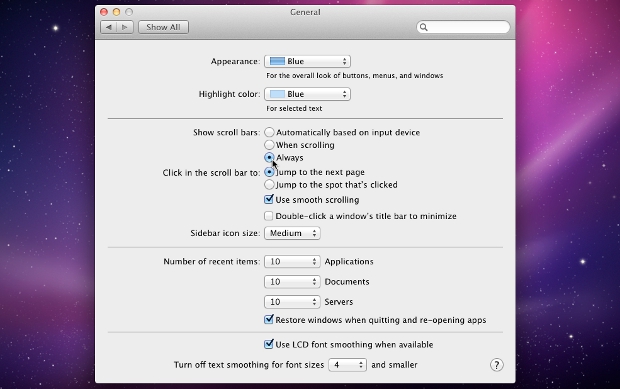
Any app that uses Lion's default settings will lose its scroll bar when you're not actually scrolling. This keeps things neat and reserves more of the application window for working in, but it does make it hard to know where you are in a lengthy document. To keep the bars permanently on view, go to System Preferences/General and, in the 'show scroll bars' section, select 'always'.
How to enter appointments more quickly in iCal
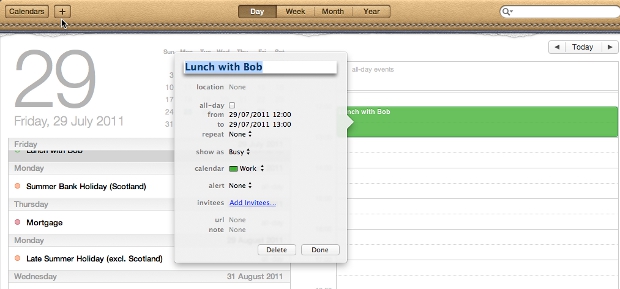
iCal now understands plain English commands, allowing you to enter appointments much more quickly than before. Press Command+N to open the quick event dialogue and enter 'Dentist at 9am on Tuesday' or 'Lunch with Kenneth on Friday' and they'll be entered into your calendar at the appropriate time. iCal reckons lunchtime is noon and lasts for an hour, but you can drag it to a new position.
iCal can handle whole-day events, too, so 'Thursday school sports day' puts that event not into a time slot, but within the 'all-day events' box at the top of that day's calendar page.
How to open Spotlight results in the app of your choice
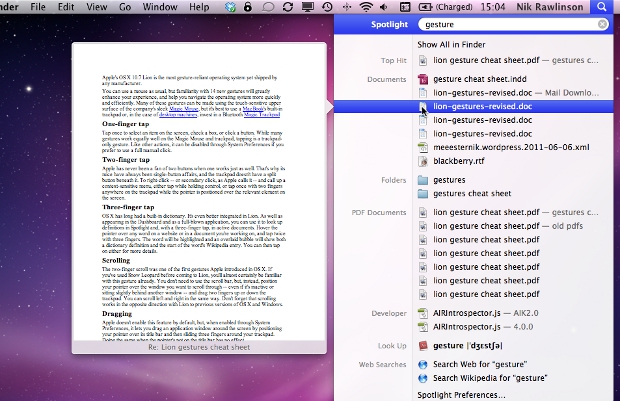
Spotlight is the fastest way to launch applications and open files on your Mac. When you click a result, though, it automatically opens in the default application. That's not always appropriate, which is why Lion has introduced draggable Spotlight results. When the file you want appears in the Spotlight results list, drag it onto the desktop to create a copy, or drag it directly onto an alternative application icon on the dock.
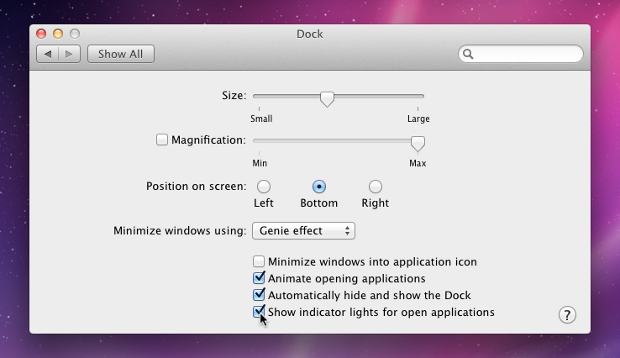
Get back your dock indicators for active applications
By default, Lion no longer displays activity lights under running applications in the dock. It's certainly a neater and less cluttered approach, but it's less clear what's open and what's not. To get the lights back, right-click (or hold control while clicking if you only have one button) on the divider between the two halves of the dock and pick 'dock preferences'. Then tick the checkbox at the bottom of the dialogue box besides 'show indicator lights for open applications'.
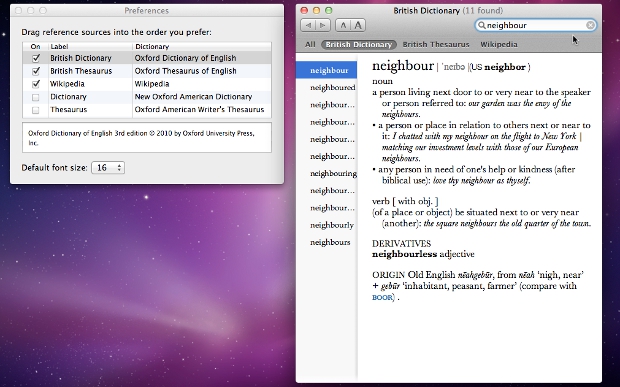
Enable the new Oxford 'British' English Dictionary
If you have neighbours, not neighbors, and paint your house using colours rather than colors, you'll want to switch the dictionary app to using proper English. Fire it up and click Dictionary/Preferences. Uncheck the default dictionary and thesaurus sources and then scroll to the bottom of the list and make sure that 'British dictionary' and 'British thesaurus' are checked.
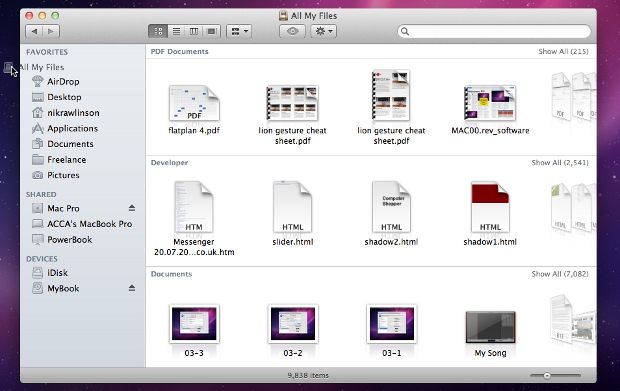
How to get rid of the Finder's new 'All my files' view
'All my files', the new Finder view that organises everything on your hard drive by type, rather than location, is great if you only have a few files on your drive. We have over 9,000, at which point this view starts to lose its usefulness. You can't simply drag it out of the sidebar to get rid of it, as, every time you do so, it pops back into place. But try doing so while holding down Command, and it'll disappear in a puff of animated smoke.
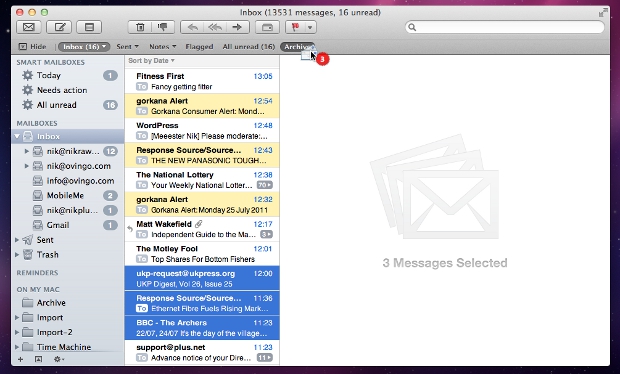
How to use Mail's new 'favourites' toolbar to tame your inbox
Finally, do what you've long promised, and sort out the contents of your mailboxes. If it isn't already visible, activate Mail's 'favourites bar' by picking View/Show Favourites Bar, create some new subject-based folders using the '+' button at the bottom of the sidebar, and drag them onto the favourites bar (see picture below).
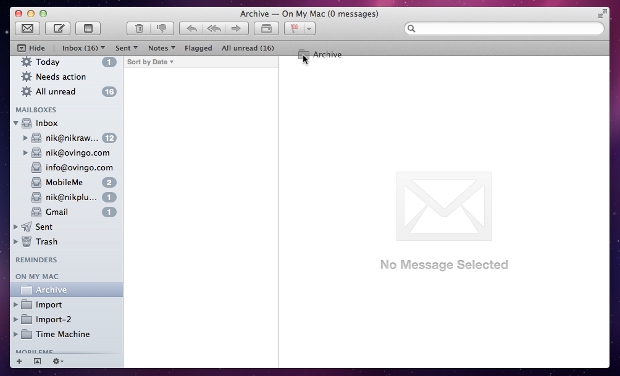
Keep them descriptive and use names that are easily understood, such as 'bank', 'summer holiday' and 'work'. Now, when messages come in and you've dealt with them, you can drag them straight out of the inbox and onto the favourites bar, releasing them over whichever folder is appropriate. It takes no time at all, and makes your email far easier to control.