Simple format tweaks give Word docs more impact
Whether by applying prebuilt effects to images, adding columns and borders, or placing text over images, you can improve the eye-appeal of your Word documents with just a few clicks and settings changes.


Microsoft Word is arguably the most widely used business application in the world, yet few Word users think twice about the format of their documents. People may change Word's default font size and style or switch between a single space or double space between lines, but that's about it. If you'd like a simple way to communicate your message more effectively without looking flashy, try these simple Word format tweaks.
First, a word of warning: nearly any document can benefit from a little creative formatting, but it can be easy to overdo the effects. Remember, the goal is to get your message across as clearly and succinctly as possible: don't let the sizzle get in the way of the steak. Still, small effects--applied appropriately--can have a big impact on your audience.
These techniques will help enliven your Word documents.
Highlight text with columns, borders, and shading
When it comes to emphasis, Word users know three methods: bold, italic, and underline (hopefully not at the same time). But overuse of any or all of these attention-getting techniques can have the opposite effect: your message gets lost in jumble of text treatments.
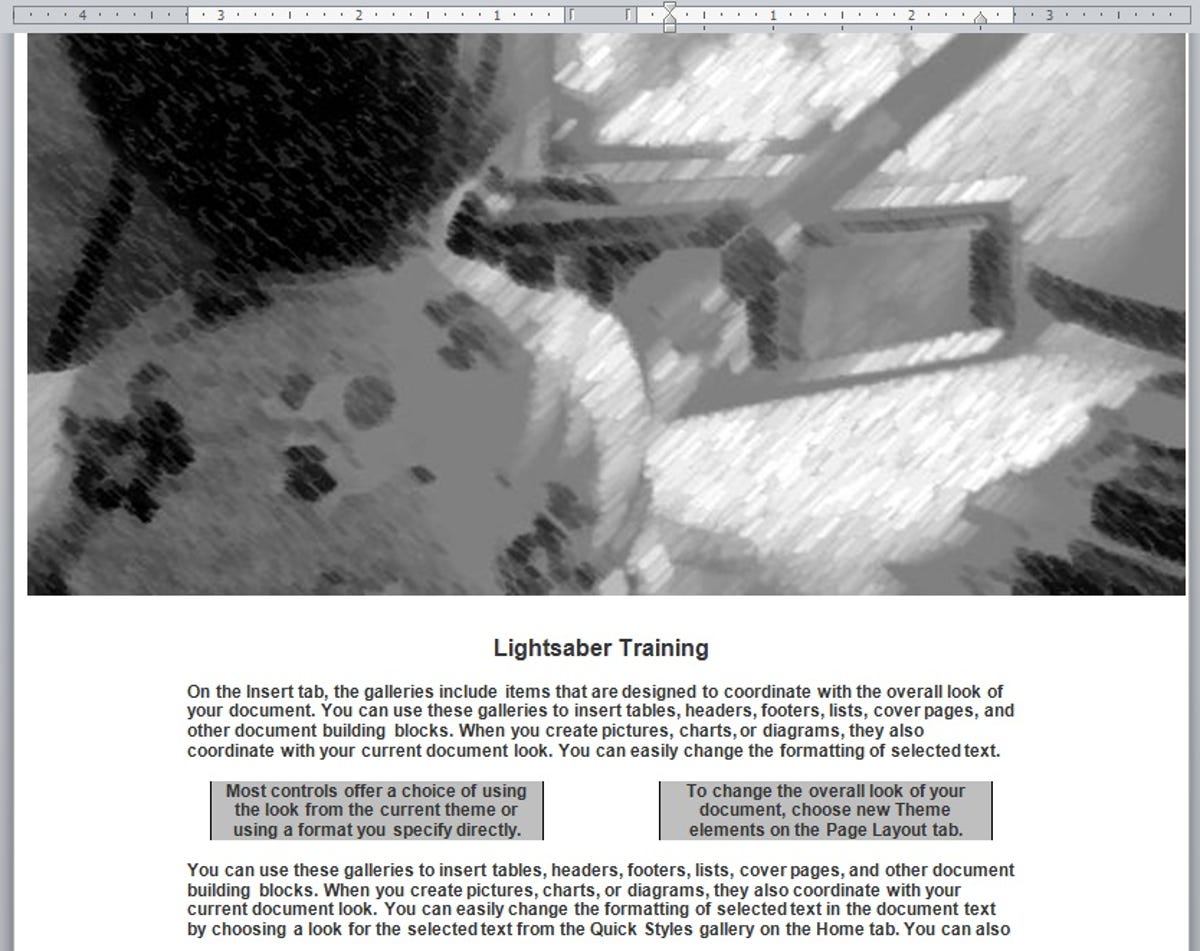
Newspapers and magazines use text callouts to highlight important sentences and phrases. A simple way to add a callout-like effect in a Word document is by indenting the important text section, adding a simple border or shading, and for longer selections, using a two-column layout.
Start by selecting the callout text and pressing Tab to indent it. Manually drag the left and right tab markers on the ruler at the top of the main window to adjust the left and right margins of the highlighted text. (Click View > Ruler if it isn't visible.)
Another option is to use the Increase Indent buttons, which are in the Paragraph section of the Home ribbon in Word 2010 and 2007 and on the Formatting toolbar in Word 2003. You may also want to center the selection by pressing Ctrl+E or by choosing the Center icon in the Paragraph section of the Page Layout ribbon (Word 2010 and 2007) or on the Formatting toolbar (Word 2003).
As I mentioned above, the simplest way to make the text stand out is by pressing Ctrl+B to make it bold. Add more impact by applying a line border to the callout text: in Word 2010 and 2007, click Page Borders in the Page Background section of the Page Layout ribbon; in Word 2003 choose Format > Page Borders. In the Borders and Shading dialog box, click the Borders tab and select a style, color, and line width.
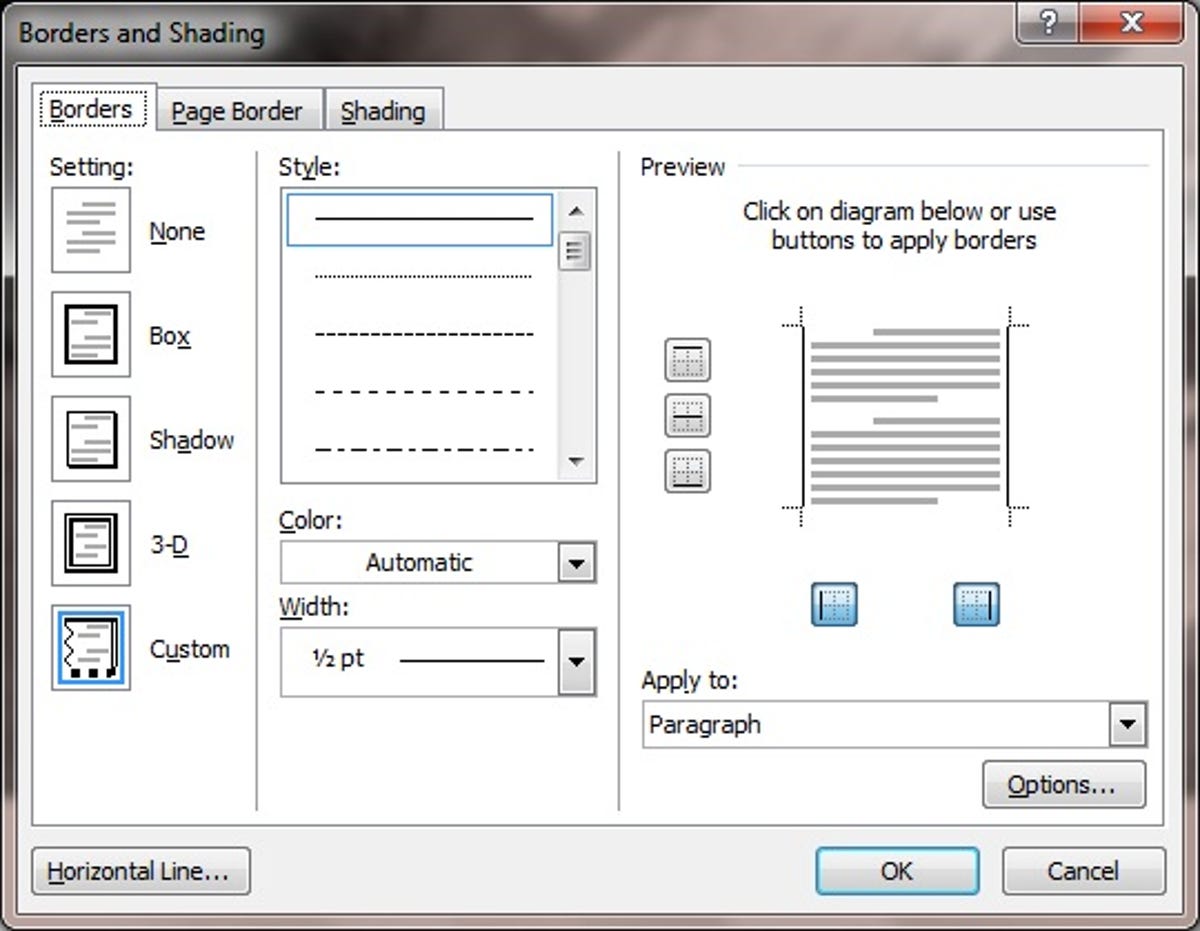
In the Preview area on the right side of the Borders tab, choose the places in the callout you want to add a border, or use the buttons on the left side of the preview area. Click the Options button to adjust the location of the borders in the text you selected.
To add a background to the callout text, click the Shading tab, select Paragraph in the Apply to drop-down menu on the right, choose a color in the Fill drop-down box on the left, and pick a transparency level or pattern on the Style drop-down menu.
Another formatting option to highlight longer passages is to switch to two columns. In Word 2010 and 2007, click Columns in the Page Setup box of the Page Layout ribbon. In Word 2003 click the Columns icon on the standard toolbar or choose Format > Columns. Select the two-column option.
Apply a canned effect to an image in Word 2010
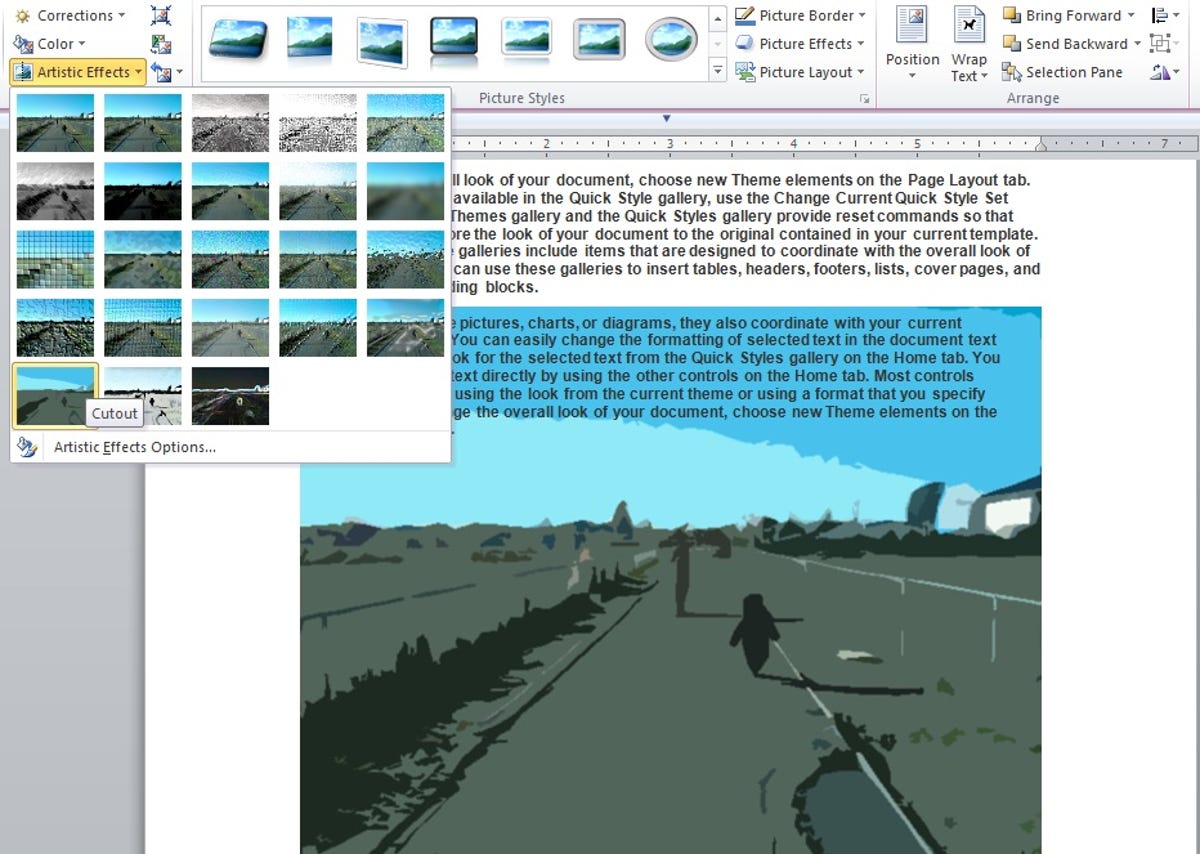
The meager image-editing options built into Word have been given a boost in Word 2010 by the addition of Artistic Effects. The prefab effects won't make professional photographers drop their custom Photoshop palettes, but for us amateurs, the one-click image effects can spiff up a drab document quickly and simply.
In the wrong hands, canned image effects can render a Word document unreadable, but with a little discretion, the effects can help you make your point by giving your Word documents some sparkle.
To apply an effect to an image in Word 2010 and 2007, select the image to open the Picture Tools ribbon. The Picture Styles options on the Picture Tools ribbon let you add 3D and other effects, change the image's shape and layout, and apply borders. Hold the pointer over the effect to preview it in your document.
In Word 2010, click Artistic Effects in the Adjust section of the Picture Tools ribbon and hold the pointer over one of the 20-or-so effects to preview it. Choose the Artistic Effects Options button at the bottom of the effects pop-up window to fine-tune your selected effect.
To access the image-formatting options in Word 2003, right-click the image and choose Show Picture Toolbar, or click View > Toolbars > Picture. There's not much in the way of effects available on the Word 2003 Picture Toolbar, but you can adjust the picture's colors, contrast, and brightness.
Other options let you rotate the image, compress it, crop it, or add a border. (Note that all of these image-editing features have been enhanced in Word 2010 and 2007, including the ability to preview effects before applying them to the image.)
Visit the Microsoft Word 2003 Help & How-to site for more information on working with graphics in that version, or the equivalent Microsoft help sites for picture formatting in Word 2010 and in Word 2007.
The Microsoft Word Help & How-to site provides more information on Word 2010's SmartArt features. The site also provides hundreds of royalty-free images, videos, and sound files.
Convert an image into a Word background
Another formatting trick that can enhance a drab Word document--when applied subtly--is the use of an image as a backdrop for the text. In the Page Background section of the Page Layout ribbon are options for adding a watermark or a background color to the page. In the Page Color drop-down box is an option for Fill Effects that lets you apply and customize a gradient, texture, pattern or picture for the page background.
You can shade the background to only a section of the page by choosing Page Background > Shading and making your selection.
To apply a background in Word 2003, click Format > Background and choose a color or select Fill Effects to access options for adding a background gradient, texture, pattern, or picture.
Place text atop the image in Word 2010 and 2007 by right-clicking the image and choosing Send to Back > Send Behind Text; in Word 2003, click the Text Wrapping icon (the one with the dog silhouette) on the Picture toolbar and select Behind Text. Reposition the image behind the text by highlighting the picture and using the arrow keys to move it up, down, left, or right, or use your mouse to drag the image into place.