Partitioning USB hard drives that fail in Disk Utility with 'POSIX' error
When trying to partition and format various USB hard drives, a number of users are getting errors in Disk Utility that states "Disk Erase failed with the error: POSIX reports: The operation couldn't be completed. Cannot allocate memory".


When trying to partition and format various USB hard drives, a number of users are getting errors in Disk Utility that states "Disk Erase failed with the error: POSIX reports: The operation couldn't be completed. Cannot allocate memory". This problem does not happen for all disks, and may be specific for the USB chipsets and firmware versions or settings in certain drive enclosures.
For those affected, standard troubleshooting procedures such as resetting the devices and performing SMC and PRAM resets on the computer have not helped. The problem is specific for USB connections, since those with drives that allow for alternative connections (e.g. Firewire) are able to properly format through those connections.
Furthermore, people who were able to format the drive through alternative means have found the drive to start working normally, indicating a problem with how Disk Utility itself is managing specific partition setups over the USB connection.
If the problem is just a matter of overcoming a default partition scheme or format incompatibility over USB connections when using Disk Utility, you can use terminal commands as alternatives to initially format the drive and hopefully allow it to be accessible via Disk Utility again.
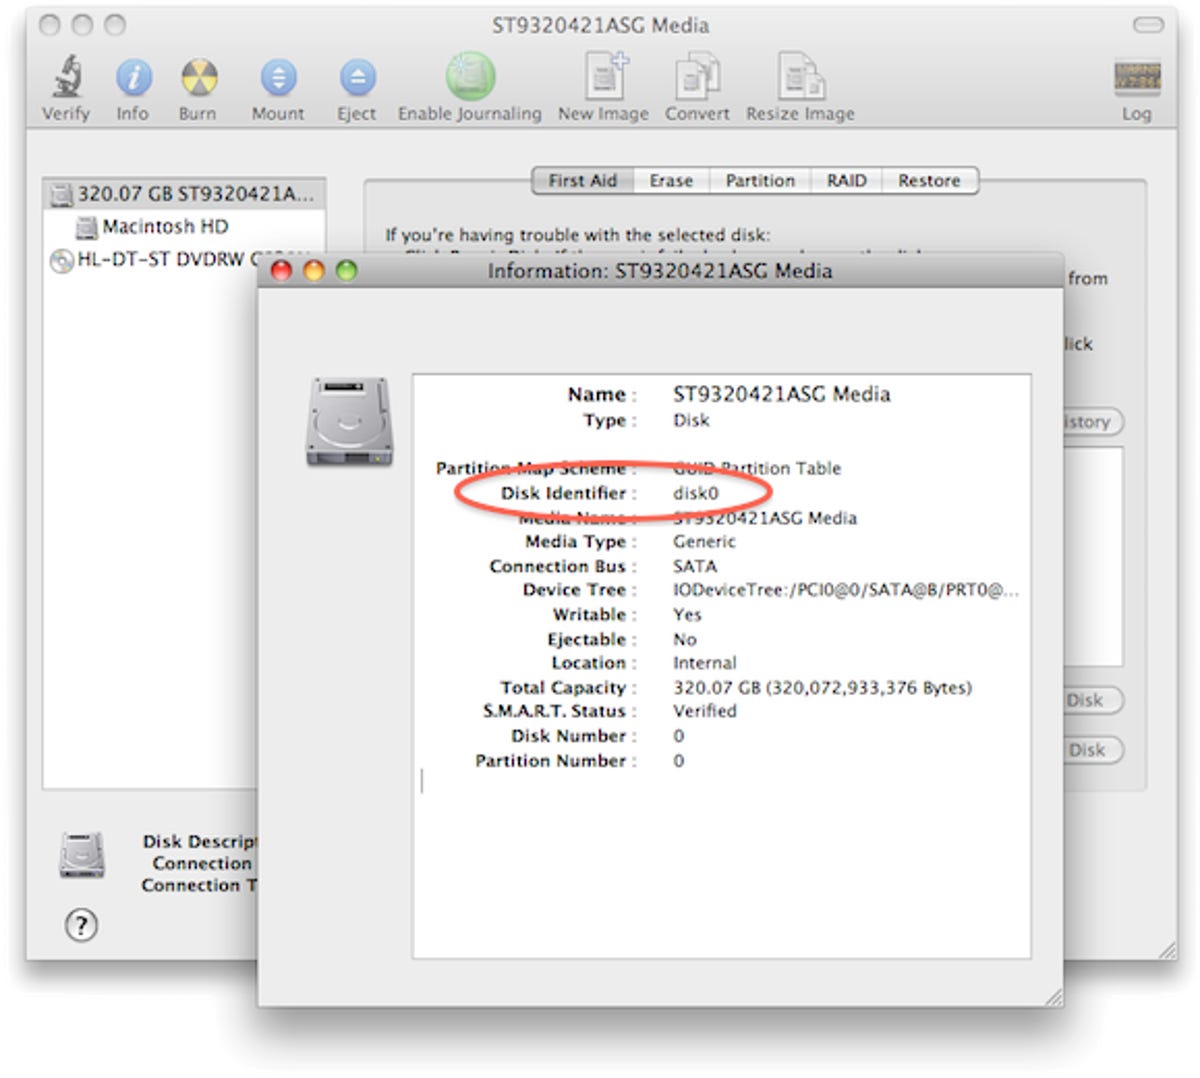
Before running these commands, you will need to find the disk identifier for the attached USB drive device. To do this, open Disk Utility and select the drive device itself. Then click the "info" button and note the name of the "Disk Identifier" field.
1. Use the "diskutil" command.
To format the drive with the diskutil command, enter the following command in the Terminal, replacing "NAME" with the desired name of the drive, and "IDENTIFIER" with the drive's ID found in Disk Utility:
diskutil eraseVolume HFS+ NAME IDENTIFIER
2. Use the "fdisk" command.
An alternative to the "diskutil" command is the older "fdisk" command, which can be used to partition and set up the drive. As with the diskutil command, replace the IDENTIFIER portion with the ID found in Disk Utility:
fdisk -a hfs /dev/IDENTIFIER
After one (or both) of these commands have been run, try managing the drive again in Disk Utility.
Questions? Comments? Post them below or email us!
Be sure to check us out on Twitter and the CNET Mac forums.