iCloud: How to set up email reminders and memos
Here's how to set up iCloud so you can email yourself reminders that won't get lost in your inbox. You'll never forget to buy milk again.


iCloud is Apple's replacement online service for MobileMe. It introduces a range of new features, including app synchronisation, iWork backup and Photo Stream.
At the same time, it carries across many of MobileMe's better features, including its rock-solid email service. Signing up for an iCloud account is free and, in the process, you'll bag yourself your own @me.com email address.
In this guide, we'll use iCloud's online filters to automatically file incoming emails with specific keywords in their subject line. You can adapt this to your own needs, but we'll use this set-up so that messages with the subject line 'memo' are filed in a specified mailbox, appearing as notes in OS X Mail on the Mac. That means we can email ourselves reminders and memos.
Setting up filters in iCloud mail
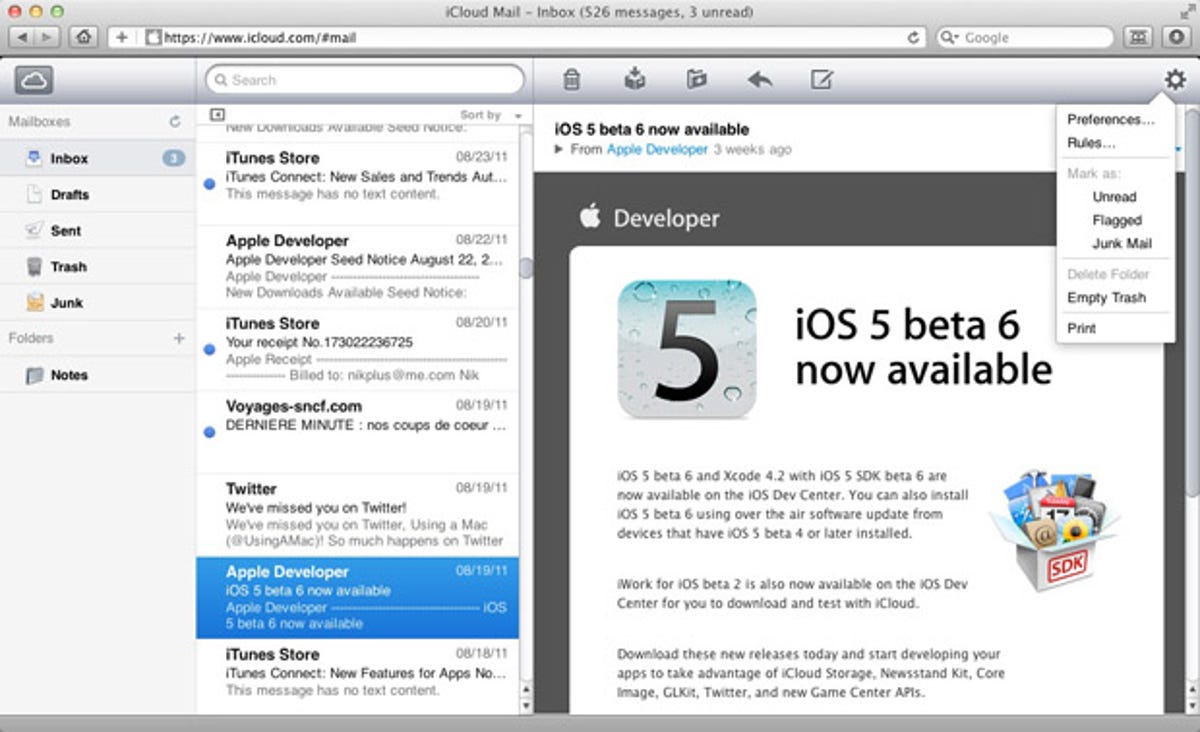
1. Log into your account at icloud.com. If you're not already in the Mail application, click the cloud icon in the upper left corner and select Mail. Apple calls its email filters 'rules'. Click the cog icon in the top right-hand corner of the browser and select 'rules'.
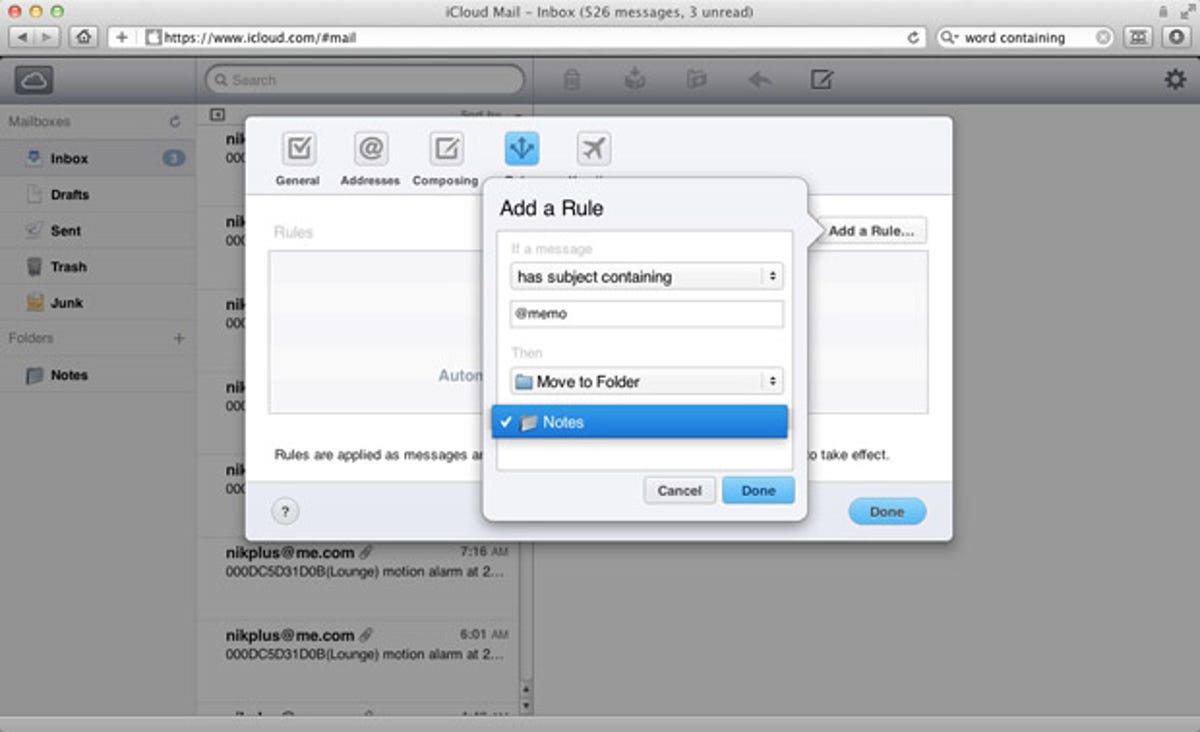
2. Rules let you set auto-responders that will bounce back messages when you're on holiday or redirect your mail into specified folders, which is what we want in this case. Each iCloud mailbox already has a folder called 'Notes', which we'll use to file our memos. This is the same folder used by the iPhone's Notes application to file your jottings when you synchronise the handset with a Mac.
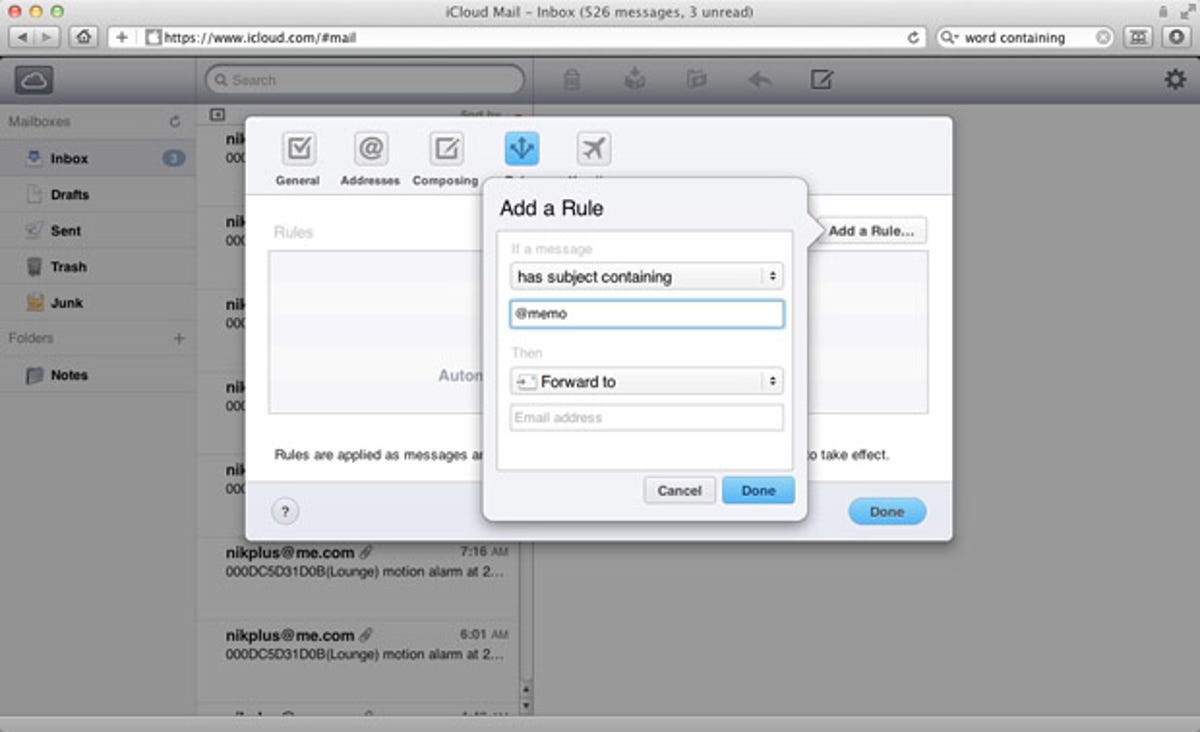
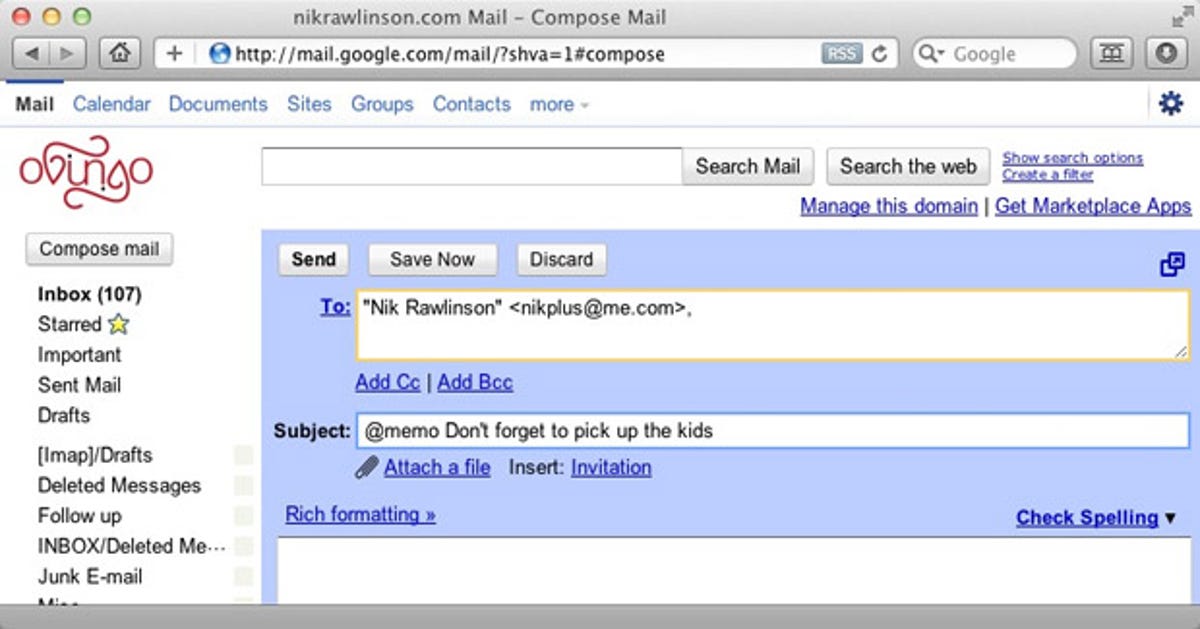
Click 'add a rule' and then use the drop-down menus to select 'If a message has subject containing' and enter '@memo' in the subject box. We've chosen to include the @ symbol so that the filter doesn't catch any unexpected emails talking about 'memorable' trips, 'memorised' lessons and so on. If you prefer not to use @ (perhaps because you have a Twitter username that incorporates @memo) then you can use any alternative modifier you prefer.
3. Now we need to file the message. Select 'send to folder' from the second set of drop-down menus and choose Notes as the destination. Right now, Notes will be the only option in that menu. Should you later want to file your messages in other folders, you'll need to create them first in the main webmail interface by pressing the '+' on the folders divider.
If you're looking for somewhere to send old emails that you've already dealt with, don't choose the name 'archive', as that's a special name that will jump up into the mailboxes section. 'Archived', on the other hand, will stay down within the folders.
4. Use any alternative account to send a message to your iCloud account, prefacing the subject with @memo. You don't need to include anything in the body of the email unless you'd like to include some further notes for yourself that relate to the task in question.
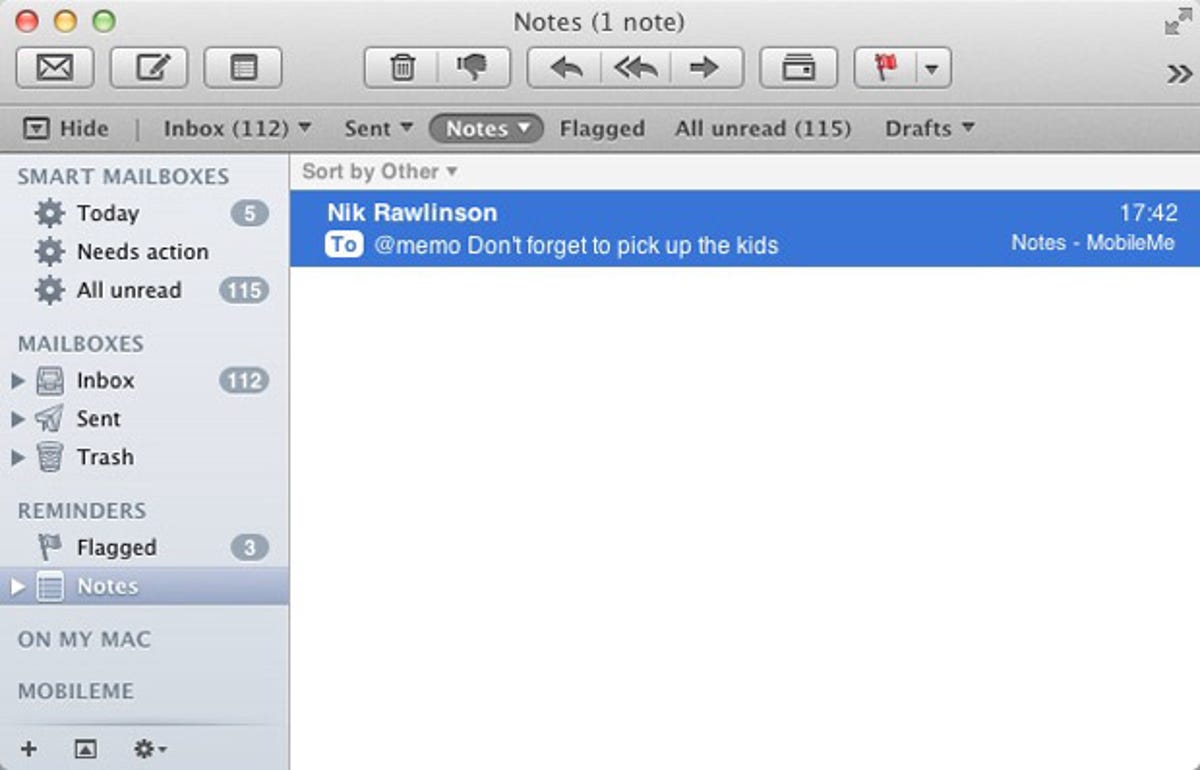
5. After a few seconds, the email will appear in the iCloud webmail interface and be immediately moved to the Notes folder. At the same time, it appears in the matching Notes folder in OS X Mail, along with the reminders you tapped out in the iPhone Notes app.
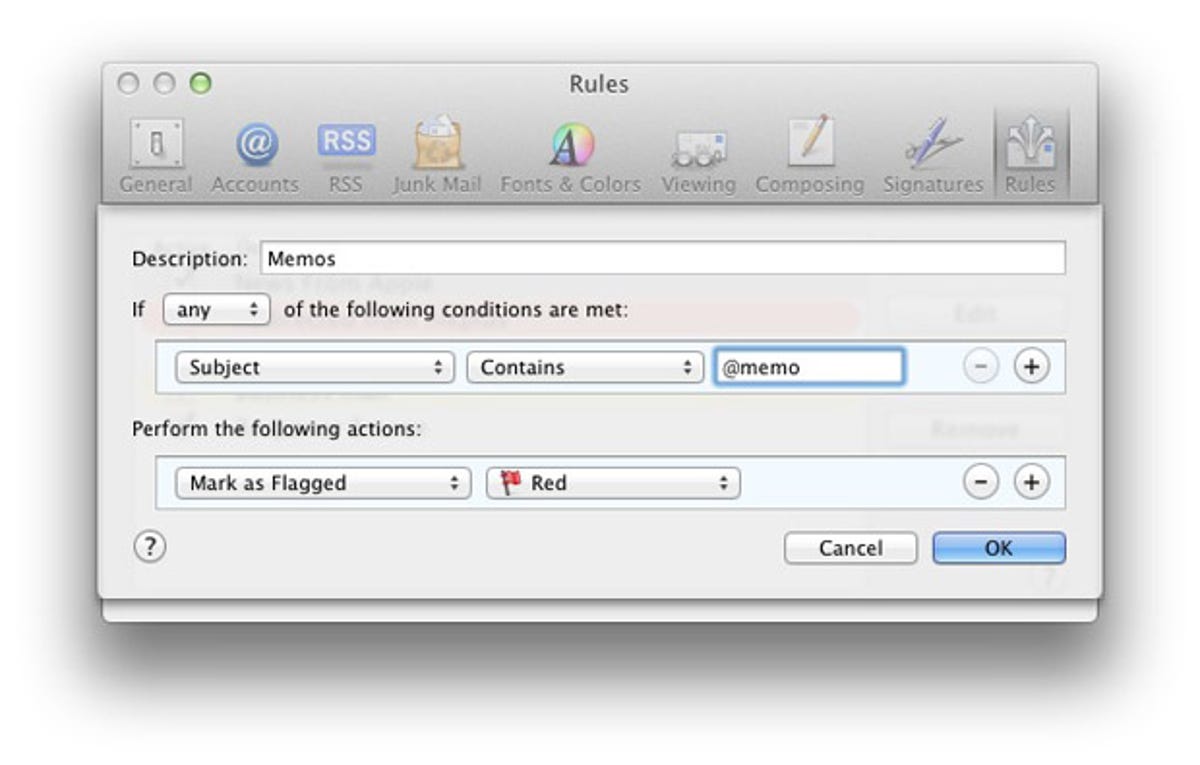
6. Although our note has already been filed inside OS X Mail's reminders subsection, there's nothing to draw our attention to it. We'll fix this by applying a marker, which will promote it to the flagged part of the reminders subsection, where a notification badge will show how many jobs need taking care of.
Select 'Mail', 'preferences', 'rules' and click 'add rule'. Copy our settings in the screenshot below so that Mail searches incoming messages' subject lines for the @memo marker and flags them. Click 'OK' and then close the preferences pane, opting to apply the rule to the selected folder so that each of your existing tasks is marked for your attention.