How to use WebDAV in Pages, Keynote, or Numbers with Dropbox
One of the features of Apple's iWork suite on iOS is being able to sync documents with a WebDAV. If you aren't fortunate enough to have one readily available to you, but you have a Dropbox account, we have a solution for you! We are going to show you how to turn your Dropbox account into a WebDAV for free.


Apple recently updated its Pages, Numbers, and Keynote (iTunes links) apps for iOS. The latest update brings the apps iWork trio to the iPhone and iPod touch, as well as updated the iPad version. With the additional exposure and use that is sure to follow with the new release, being able to quickly find documents on the go is something users are going to want to do.
This guide will show you how to use your Dropbox account as a WebDAV to share your documents with minimal effort.
In order to use any of the services we are going to discuss you will need to have any of the three iWork apps installed on your iOS device, as well as a free Dropbox account.
There are currently two services set up to allow access to a Dropbox account as a WebDAV (a fancy word for sharing files over the Internet), which is a feature built into Pages, Keynote, and Numbers.
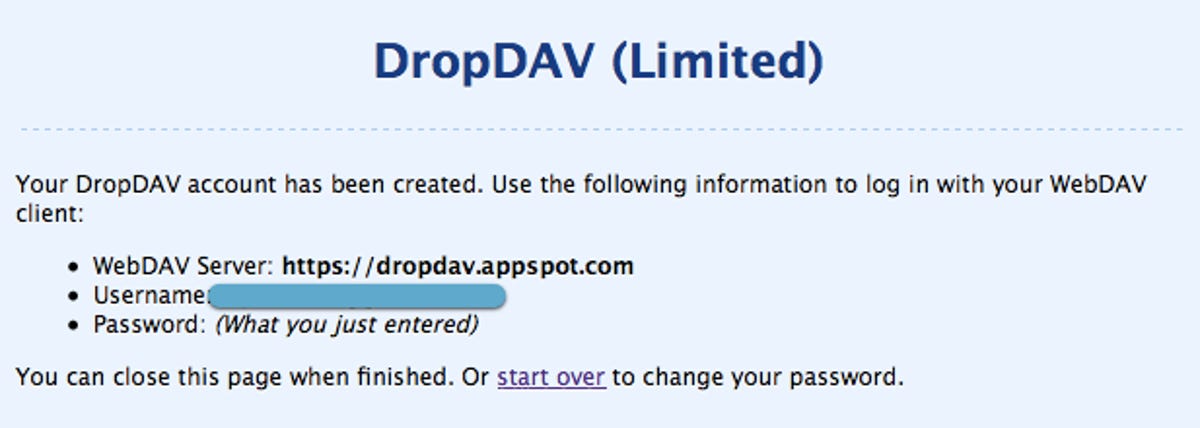
DropDAV (Limited), which is currently free, is a service that provides file uploads to your Dropbox account of up to 1MB. In order to use the service, visit the home page and click on the button at the bottom of the page. You will be redirected to Dropbox, where you will need to give DropDAV (Limited) permission to access your Dropbox files.
After granting the service permission to access your Dropbox account, you will then be allowed to set your password for DropDAV (Limited); your e-mail address will be the e-mail address you use for your Dropbox account. You should be presented with a screen like the one below. Make sure to take note of the information on this screen; we will need it later.
The limitation of 1MB files for DropDAV (Limited) may be an issue for some. Thankfully, another service called DropDAV (no relation to the "Limited" version) allows for larger files. This service is not free, however; it carries a $5 monthly fee. DropDAV does offer a free two-week trial when you first sign up for the service.
To get set up, sign up for the service, allow DropDAV to connect to your Dropbox account, and set your password. When you are all done setting up DropDAV you should see a screen like the one below. Again, take note of this information, as you will need it.


Open up Pages (or Numbers/Keynote) and tap on the + sign in the upper left-hand corner. You will then see an icon with the text "WebDAV" below it. Tap on this icon.
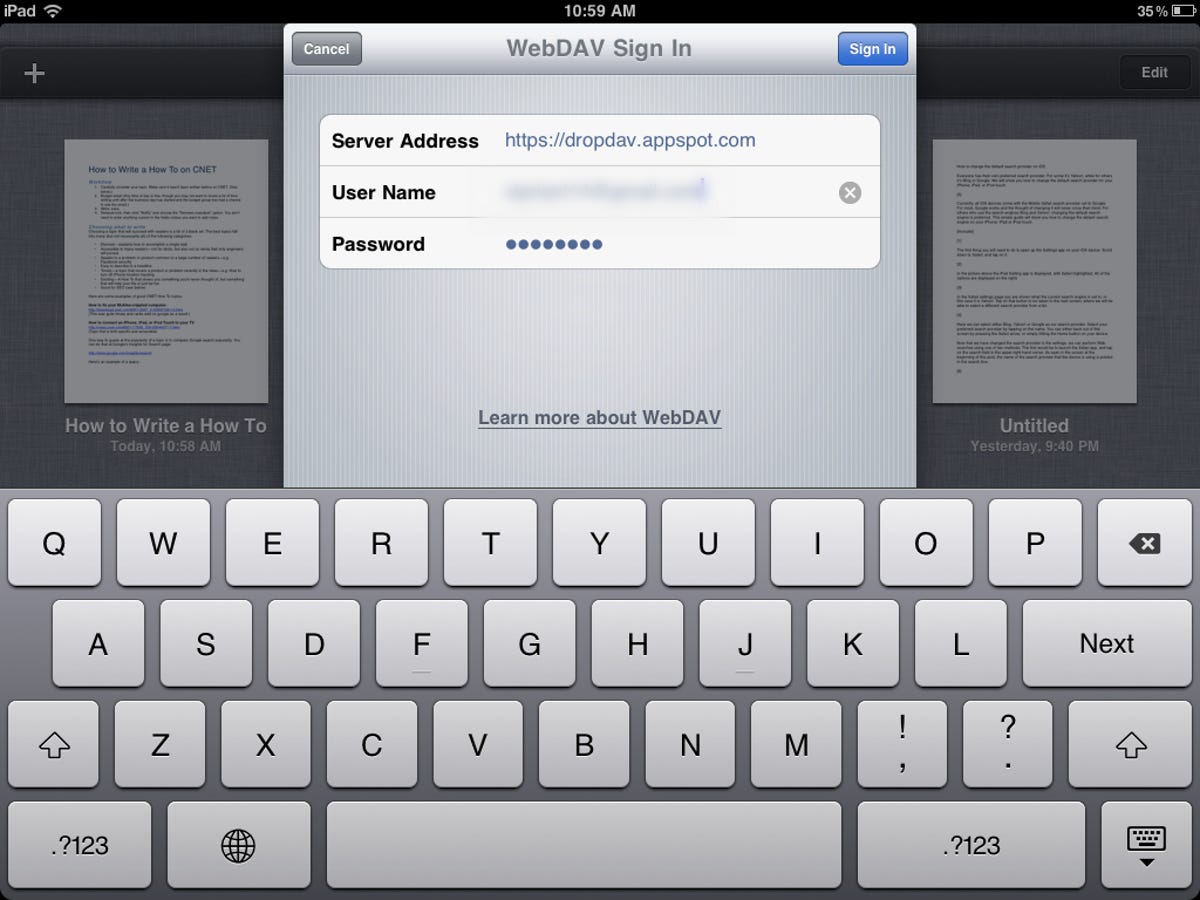
You will then be prompted to enter the information for your WebDAV account. Using the information you saved earlier, enter the URL, User Name, and Password in these fields. It is very important that you enter the Server Address exactly as it's listed. (In testing, we made the mistake of leaving the "s" off of "https," and it caused a bunch of issues for us.)
The app should verify your information; once it has, you will be presented with a list of your Dropbox folders. Now you will be able to navigate to a folder containing any document you wish to copy to your iOS device and work on at your leisure.

To save a document to your Dropbox account, open the document you wish to save and tap on the wrench icon. You will then see a drop-down; tap on Share and Print.
At the bottom of the next list is Copy to WebDAV. Tap on this option. You will then be prompted to select the file type you wish to create and save your document as. Next, you will be presented with a list of your Dropbox folders, navigate to the folder you wish to save the document to and tap on Copy.
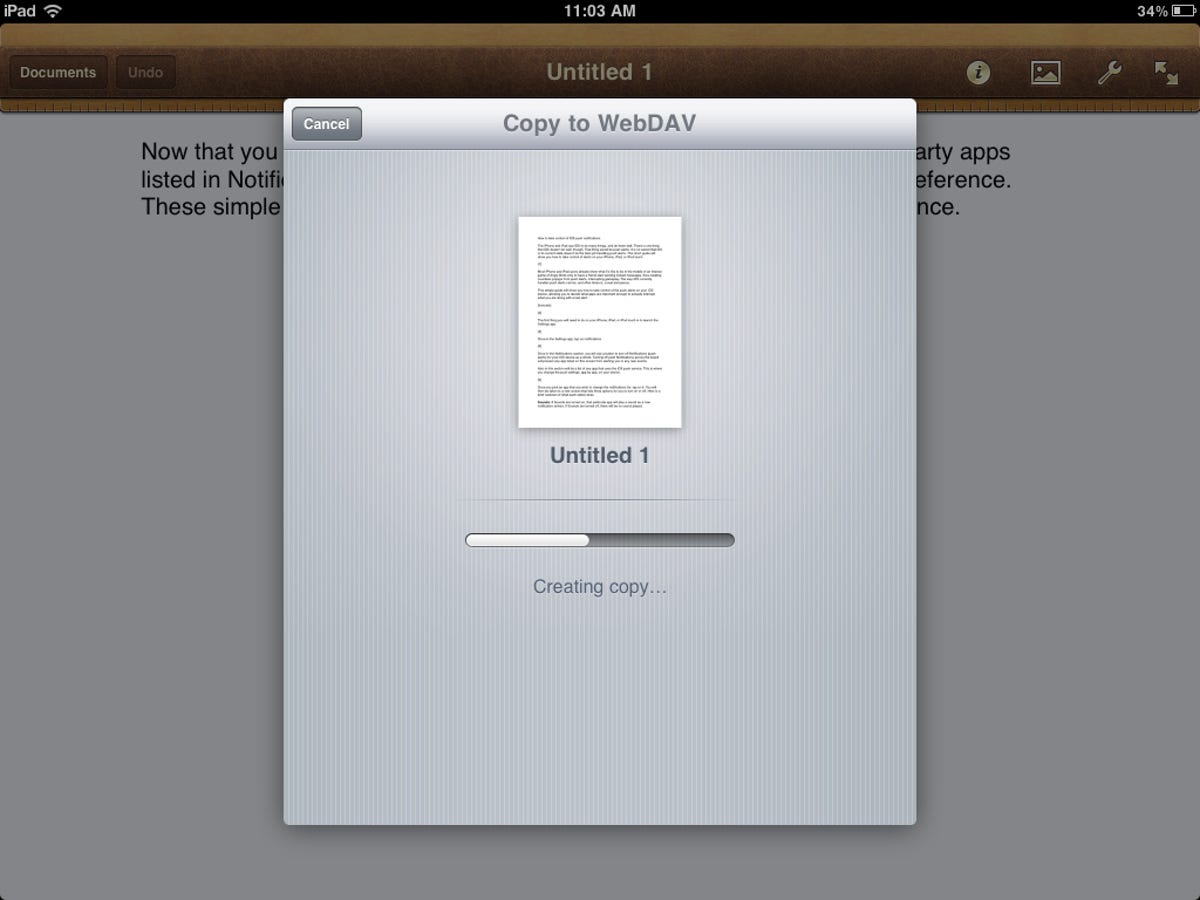
You will see a progress bar and details surrounding the upload and a confirmation once it has finished.
Either of the services mentioned here make for a great WebDAV solution, depending on your usage. If you deal primarily with text documents, the Limited service is perfect for you. If you deal with a lot of spreadsheets or presentations, it may be worth spending the $5 a month to have access to your files on the go. The guide used an iPad for demonstration purposes only; the iPhone or iPod Touch process is identical.