How to share your iTunes music library on a home network
The built-in sharing tools on iTunes make it easy to listen to a library of music on several machines on your home network. Here's how.


The built-in sharing tools on iTunes make it easy to listen to a single library of music on several machines on your home or office network.
By tweaking a few setting through iTunes preference panes, you can control who can access your network, what they'll find there, and how your own remote listening habits can update your shared playlists and stats.
Traditional network sharing
This was the first -- and at one time the only -- choice if you wanted to share your iTunes library. It's a simple one-click operation, with a few options that let you control precisely what's shared, and with who.
Mac users will find the setting at 'iTunes', 'Preferences' then 'Sharing'. On iTunes for Windows it's at 'Edit', 'Preferences' then 'Sharing'. If you're happy to share everything, check the box beside 'Share my library on my local network' and leave the other settings on their defaults.
iTunes only shares your content across your local subnet, so it won't be available beyond your network. If you're using iTunes in an office, you may find that it's not available throughout your workplace, depending on how your corporate network has been structured.
However, if you want to control what's available, rather than broadcast everything, select 'Share selected playlists' and choose which playlists you'd like to make public by checking the boxes beside them. Applying restrictions this way means you can share a single track or album by creating a new playlist for just that item.

You can beef up your security further still by setting a password. Combine each of these measures and you can share selected tracks with only those who you choose to give a password, and only then if they're logged on to the same network as yourself.
It's a good start, but it's not perfect...
Home sharing
The traditional network sharing model outlined above is a fundamentally read-only method of sharing your music. If you've set up your library on a home server and shared it in this way, you'll have access to all of your tracks, but your master library won't know anything about your interactions.
That's a problem if you've set up smart libraries to track your most listened to, least heard, recently played tracks and so on, as they won't reflect your listening habits. Worse, if you're using that master library to download podcasts, it won't be long before your master library stops updating.
iTunes automatically stops downloading new podcast episodes if it notices that you haven't recently listened to them. The network sharing method described above isn't reflected in your shared master library, which means that as far as iTunes is concerned, you've lost interest in your downloads, and it'll suspend your subscription.

The Home Sharing feature on iTunes can be set to update your master file though, where traditional network sharing can't.
Home Sharing uses your Apple ID -- the same username and password you use to download apps and tracks from the iTunes Store -- to log you into your remote library and keep a record of your listening habits. So, if you play an episode of your podcast subscriptions remotely, it's marked as listened to in your master iTunes library, which consequently won't stop downloading new episodes.
You'll need to change two settings to get it working. First, click 'Advanced', then 'Turn on Home Sharing', enter your Apple ID and password and click 'Create Home Share'. That makes your tracks visible on the network to anyone else who is logged into your account using the same Apple ID (up to a maximum of five devices).

Now, to make sure your remote listening habits are recorded in your master iTunes library, return to the Preferences pane's Sharing section and check the box beside 'Home Sharing computers and devices update play counts'.
Now that you've set up Home Sharing, you can also playback your master library on your iPhone, iPad or iPod touch when you're connected to the same network. This lets you access your complete music library without installing it onto your device or paying for an iTunes Match subscription.
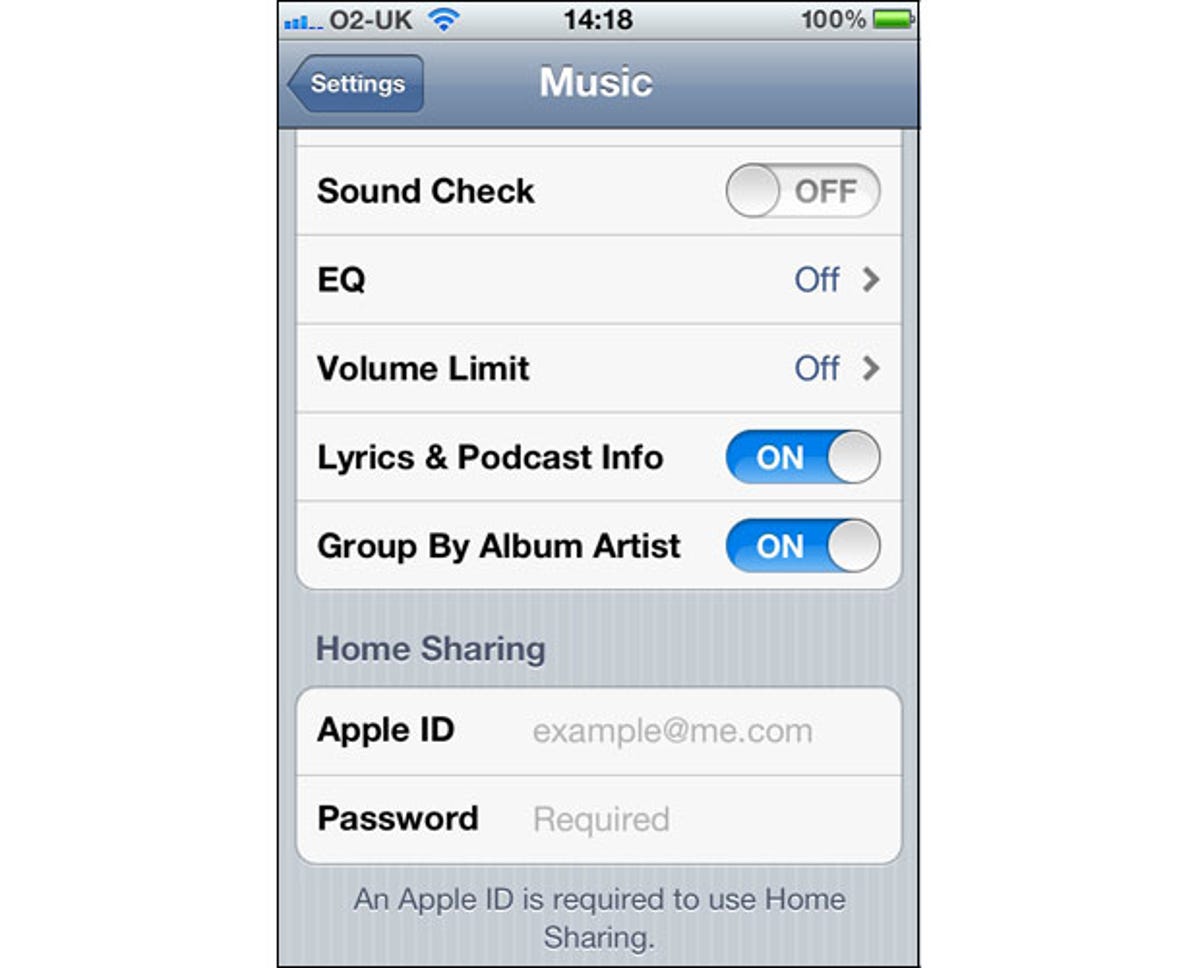
To enable it, open the Settings app, scroll down to Music and enter your Apple ID and password in the Home Sharing section.
Now, when you want to browse your shared library, open the iOS Music app and tap 'More', then 'Shared'. This calls up a short menu showing all of the shared libraries on your network to which you have access. Tap the one you just created to access its contents. A grey strap at the top of the screen warns you that you're not browsing the media stored on your device.

Note that if you haven't changed Music's default menu bar, you'll need to tap 'More' to find your podcasts.
Synchronised sharing
Apple's sharing tools only make your library available on your local network. This is why it introduced its paid-for iTunes Match service, which makes a copy of your library available through its iCloud servers for access wherever you happen to be, on whichever device you're using.
However, there are some instances when iTunes Match is overkill. Video editors, for example, who use iMovie to compile their footage, will often use royalty-free sound effects and licensed tracks direct from the iTunes library, thanks to the excellent and quite simple media browser that lets you share iTunes, iPhoto and iMovie assets between each application.
If you need to maintain a licensed or royalty-free library of this sort for work you'll conduct on more than one machine, it makes sense to have the same library available in each location, which could be tricky if not all of your machines are located on the same network.
However, because you don't have to store your library in the folder Apple dictates, two simple solutions present themselves. Firstly, you can store your library on a portable hard drive that you can carry from one workplace to the another. Secondly, you could move your library to a synchronised folder, such as one linked to a Dropbox account.
Don't try sharing a large library full of music this way as it will take a long time to synchronise, but for small working libraries, it's a simple fix. Drag your library to its new location in your Dropbox, open iTunes' preferences pane again and click 'Advanced', then 'Change...' and point iTunes at your library's new home.

You shouldn't notice any difference to the way your first computer works, but you'll have to make a similar change to your second machine, pointing it at your Dropbox library to access your synchronised tracks there too. If you're using a Mac and can't get this setting to stick, then quit iTunes and restart while holding 'Alt' to call up a dialogue through which you can choose your synchronised library.