How to share your iPhone photos with AirDrop
Quite possibly the best iOS feature you're not using, AirDrop makes in-person photo-sharing a snap.


You know the drill: everyone gathers around for photos, and then everyone in the photos says, "Hey, can you send me those?"
Now comes the hassle of sending a bunch of text messages and/or emails -- provided you have all the necessary phone numbers and email addresses, of course. That's how most of us learned to share photos, but surely there must be a better way?
If you're an iPhone user, there is: AirDrop. Baked into iOS, AirDrop makes it extremely simple to share photos with other nearby iDevice users. But what's really surprising is how few people seem to know about it -- or how to use it. Let's fix both issues right now:
Step 1: Make sure both Bluetooth and Wi-Fi are turned on. Any intended recipients will need to do likewise -- and perform the next two steps as well.

Step 2: Access AirDrop settings by swiping up from the bottom of the screen to access Control Center. (This is the only way to do so; AirDrop doesn't appear anywhere in the actual Settings app.)
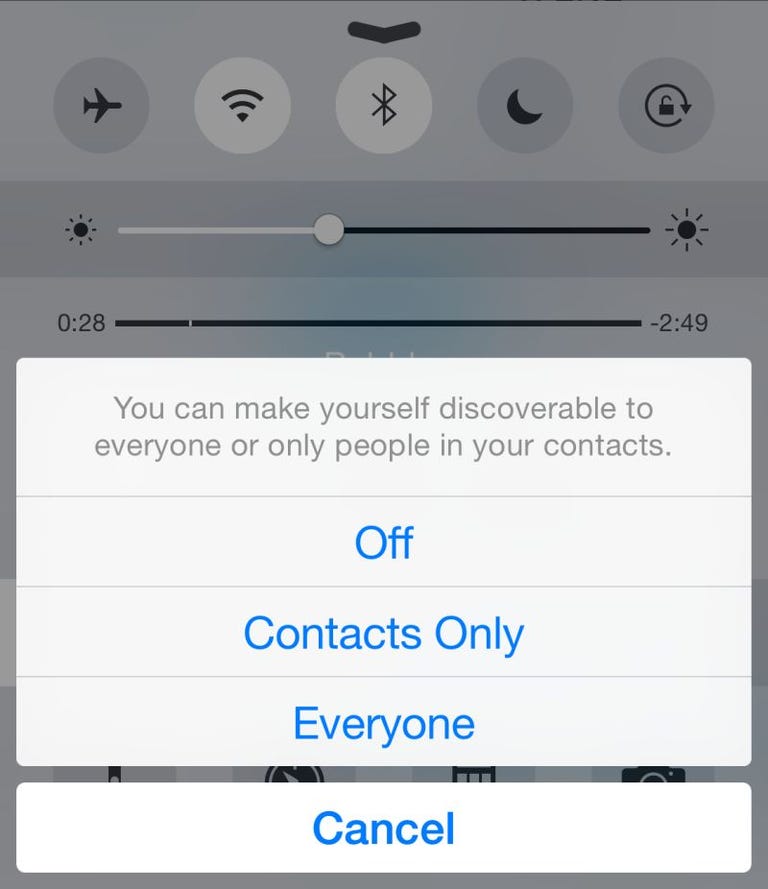
Step 3: Tap AirDrop, then choose your visibility as Contacts Only or Everyone. I suggest opting for the latter, otherwise you'll be limited to just those folks who are already in your Contacts database -- and if something doesn't line up, you won't be able to send or receive.
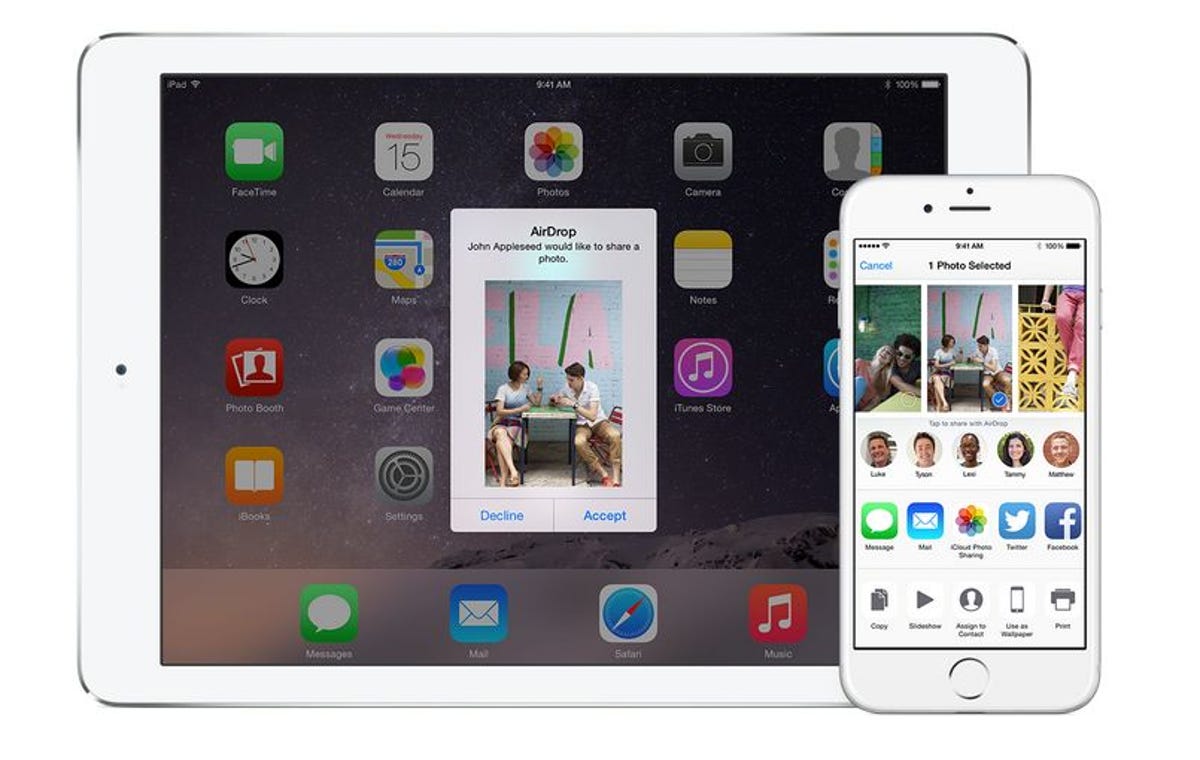
Step 4: Now it's time to share. Open the Photos app, select one or more photos and then tap the Share button (located in the lower-left corner and represented by a square with an arrow pointing up out of it).
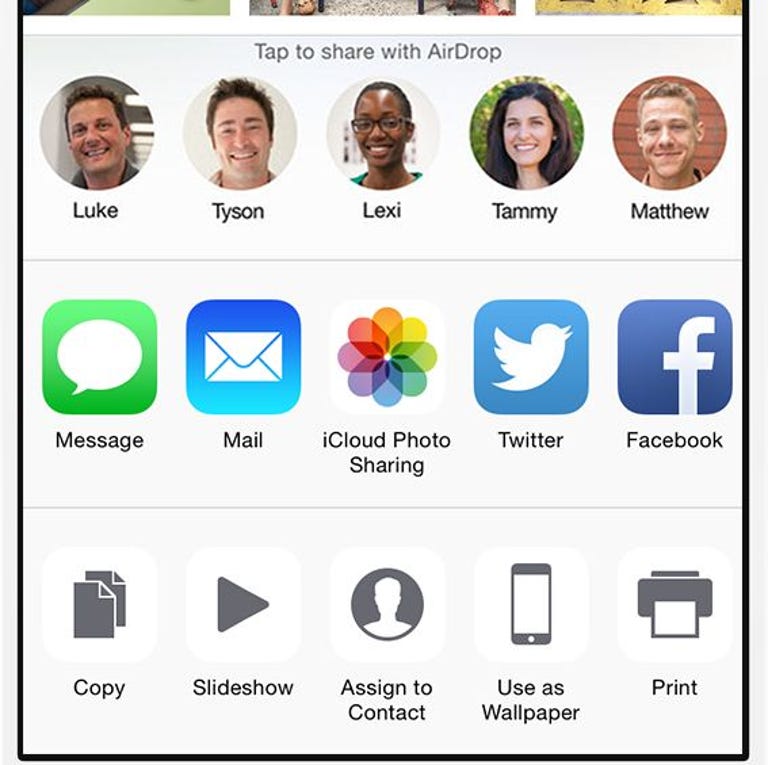
Step 5: Above the row of icons representing your various sharing options (Message, Mail, etc.), you should see the name of one or more nearby AirDrop users. Tap the desired recipient and presto: The photo gets delivered in an instant. (Multiple photos may take a little longer, naturally.) You should see a little "Sent" confirmation below the person's name.
If you don't see the recipient's name in the AirDrop list, make sure his or her phone is unlocked and that both Bluetooth and Wi-Fi are active.
And that's it! By the way, you can use AirDrop to quick-share other items as well: notes, contacts, Web pages (from Safari), even documents from apps like Pages.