How to set up and configure a HomeGroup in Windows 7
Windows 7 makes it easier to set up and manage network connections, and share files across the network, than it is with Vista. Here's how to do it all

Windows 7 offers a variety of home-networking enhancements over its predecessor, Vista. It's not only easier to set up and manage network connections, but sharing files across the network is also simpler, thanks to the new HomeGroup feature. Here we take you through the process of connecting to a wireless network and setting up a HomeGroup.
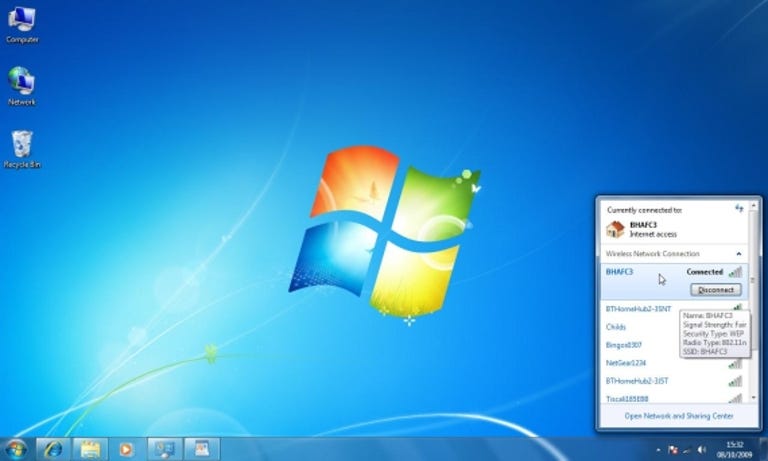
1. The process of connecting to a wireless network in Windows 7 is much the same as in Vista, but it's slightly quicker. To see what networks are available, all you need to do is click once on the wireless-network icon in the system tray. A new window will pop up. Click on the wireless network you want to connect to and, if required, enter the security key.
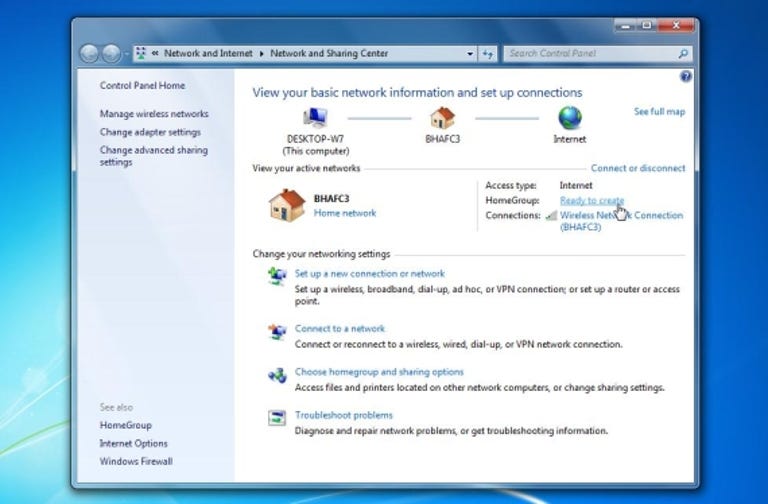
2. You'll be prompted to set up or join a HomeGroup when you connect to a network for the first time, but you can also manually create one by opening the 'Network and Sharing Center' from within the Control Panel. At the top right of the window, where it says 'HomeGroup', click on the 'Ready to create' link.
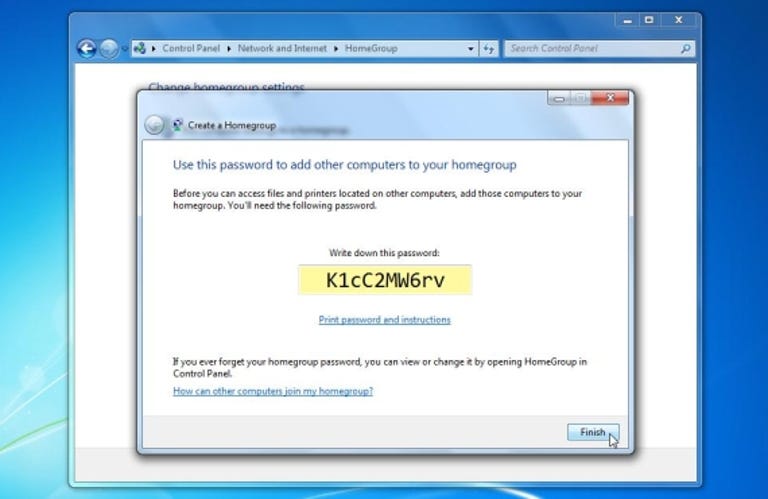
3. You can now choose what types of file you want to share. We'll show you how to share specific folders in a moment. For now, click 'Next' and Windows 7 will generate a password. Make a note of this, since you'll need it when adding additional computers to the HomeGroup.
4. The HomeGroup settings window will now appear. You can reach this at any time by clicking on the 'Choose HomeGroup and sharing options' link from the Network and Sharing Center. To quickly adjust sharing settings, click the 'Change advanced sharing settings' option, which is located at the bottom of the window.
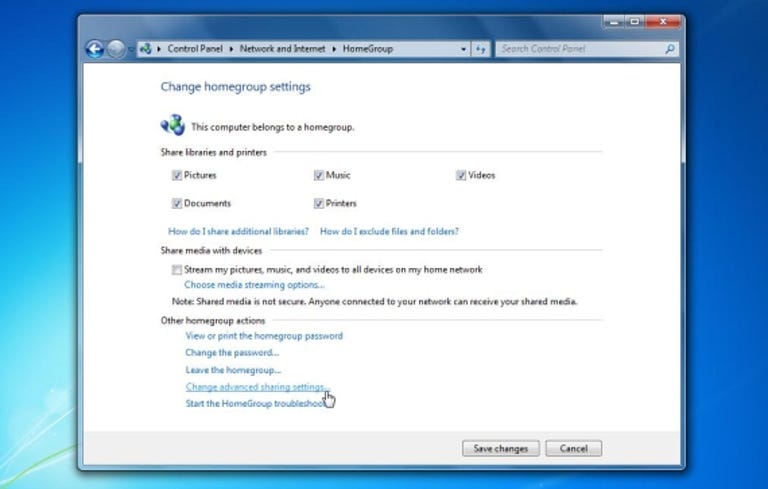
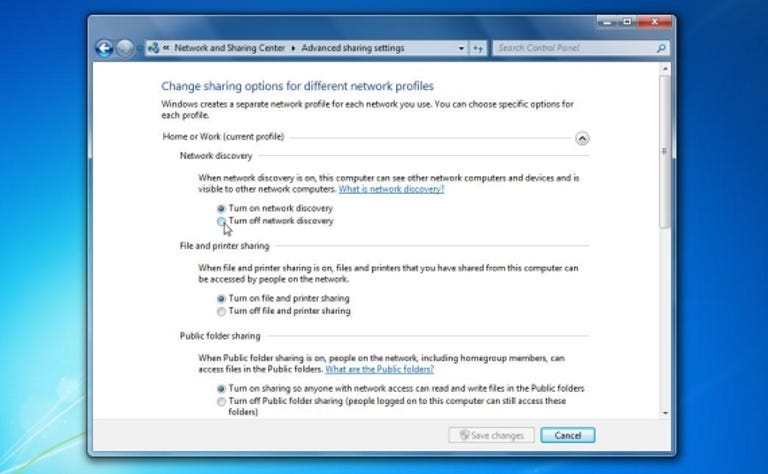
5. Here you can activate or deactivate network discovery so as to make your computer visible or invisible to the network. You can also enable or disable sharing of folders, printers and files with other computers on the network. Scroll down, and you'll find additional options, concerning, for example, how files should be encrypted and whether a password is required for the HomeGroup.
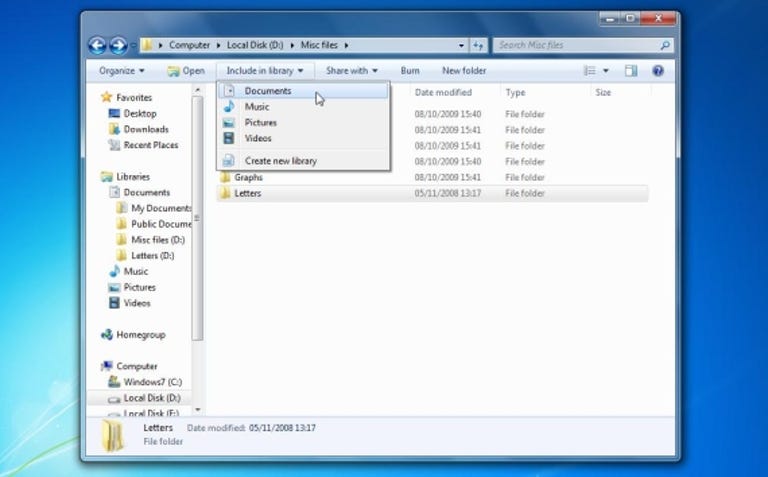
6. To share additional folders, simply navigate to the relevant folder within Explorer and highlight it. A new button labelled 'Include in library' will appear in the top toolbar. Click this and then select which library to add it to. If that library (in this example Documents) is shared within your HomeGroup settings, the new folder and all files within it will instantly become available to all computers on your network.
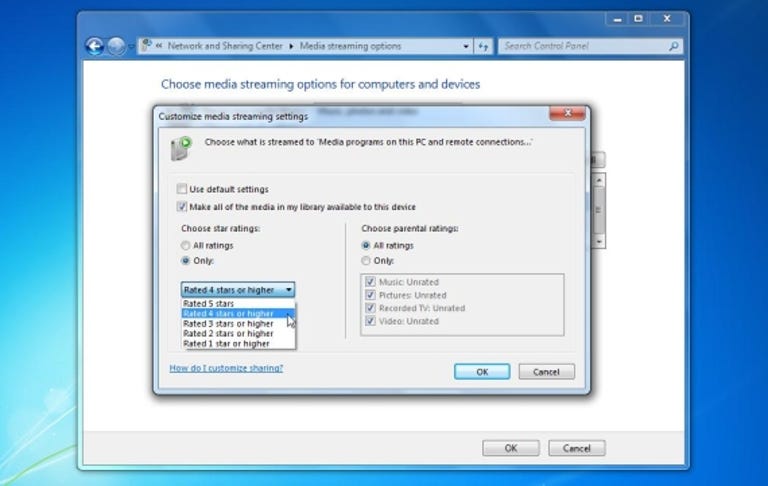
7. If you want all the music, videos and photos that are stored on your PC to be available to devices on your network, such as media streamers, head back to the HomeGroup settings window and place a tick in the 'Stream my pictures, music and videos' box. You can further customise what media is shared by clicking on the 'Choose media streaming options' box. You can choose whether to allow or block individual devices.
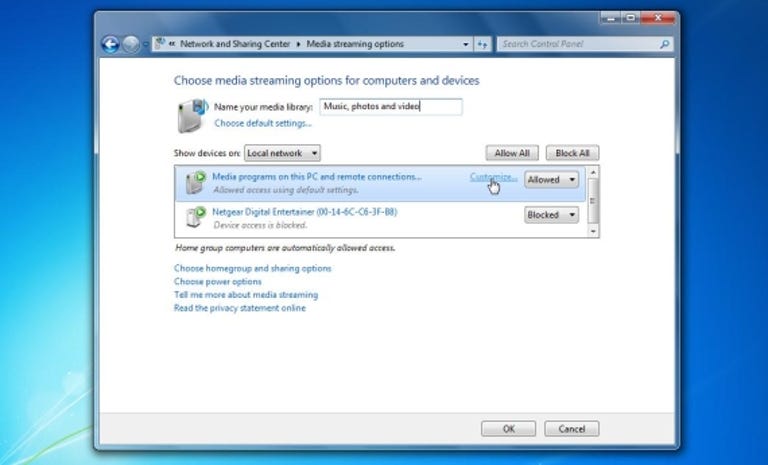
8. Clicking on the 'Customize' link for any of the devices lets you further specify what types of media should be shared. For example, it's possible to share all your music, but not your videos or photos. Alternatively, you could restrict music to tracks that have been rated at four stars or above. To change these settings, you first need to remove the tick from the 'Use default settings' box.