How to restrict printer sharing in OS X
Printer sharing in OS X is convenient to have in small office and school settings; however, you may wish to restrict printing to specific users, especially on more open networks.


Sharing non-network printers in OS X has been a relatively simple and convenient feature to set up, where all you have to do is enable sharing on a configured printer and anyone on the local network could access it, using your computer as a print server. In OS X 10.5 and earlier, this feature had no restrictions, so shared printers could be accessed by anyone, but starting in OS X 10.6 Apple introduced the option to allow or deny specific users and groups access to the shared printer. Here is how to set this up and configure it on your system.
Enable printer sharing
The first step is to enable printer sharing, by going to your Sharing system preferences and checking the box next to Printer Sharing in the services list. This will enable the print-sharing daemons and turn your system into a print server.
Enable specific printers
Now highlight the Printer Sharing service; next to it you will see some options for configuring the service, including a list of the available printers on your system. Your local USB printers should be shown in this list, so check the boxes next to the ones you wish to share, and leave unchecked any that you wish to keep private.
Add users
This is where the true configuration comes in, and in the user settings you have two options:
Allow everyone access--this is the default behavior, where everyone gets access to the printer.
Restrict to specific users and groups--by clicking the plus button, you can add specific users or groups to the list of allowed individuals. The lists is for allowed users and groups only, so to deny users access to the printer just remove them from this list. When you add any users, the "Everyone" group will be set to "No Access," but if you change this to "Can Print," then all of your added users will be removed from the list.
In configuring the users and groups, you can add local system users, you can add network user accounts that are on a network domain or directory service that your system is bound to (common in workplaces), or you can even specify a new user to add, which will create a "sharing" user account (these cannot log into the system) that can only be used to authenticate for sharing purposes such as accessing the printer. Sharing accounts are convenient for setting up highly restricted access for guests.

Done! At this point the system is all set up to share printers only to the people you have specified. Now to see this in action you will need to set up the printer on another system on the network by doing the following steps:
Set up the printer
Go to the Print & Fax system preferences in OS X and add the shared printer. Even though you set the printer to be restricted, it will still show up for everyone to add, so browse for it and add it, or otherwise specify it by IP address or other connection options available to you. Configure the driver, and then add it to your system, and you should be good to go.

Add the shared printer as you normally would. Print
With the printer added, you will now see the account restrictions come into play when you try to print a document. Open a program that supports printing and press Command-P to print a document. The standard print dialogue box should come up with options to configure the print job, but when you press the Print button the system will prompt you for the appropriate username and password. Supplying the appropriate credentials will allow the print job to complete, and for convenience you can save your credentials to your keychain.
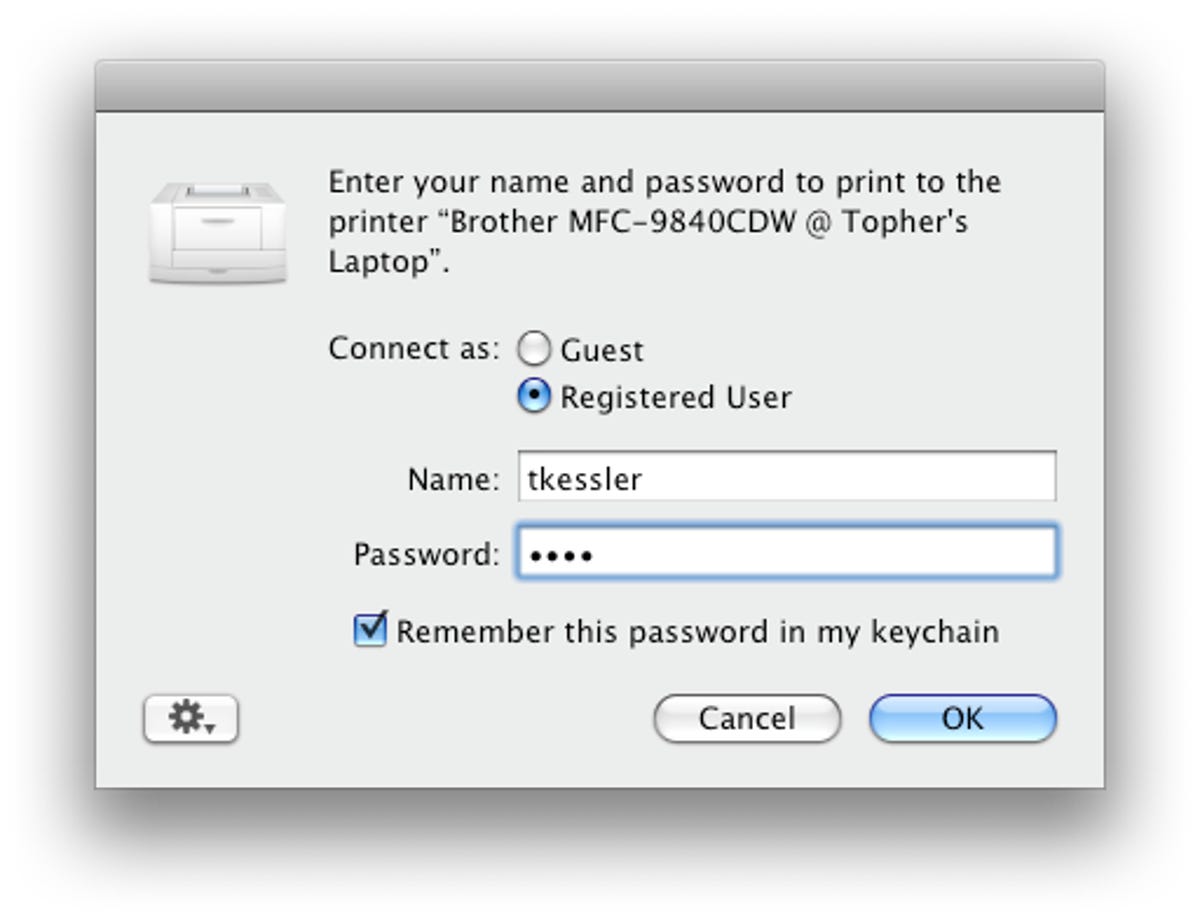
Supply the proper credentials to allow your print job to complete. As an option here you can save the credentials to your keychain for convenience If you do not give the appropriate credentials, then the print job will still continue with your supplied credentials, but will be kept on hold in your print queue with a message that authentication is required. To continue the job, click the Resume button in the print queue toolbar and when prompted, supply the appropriate credentials again.
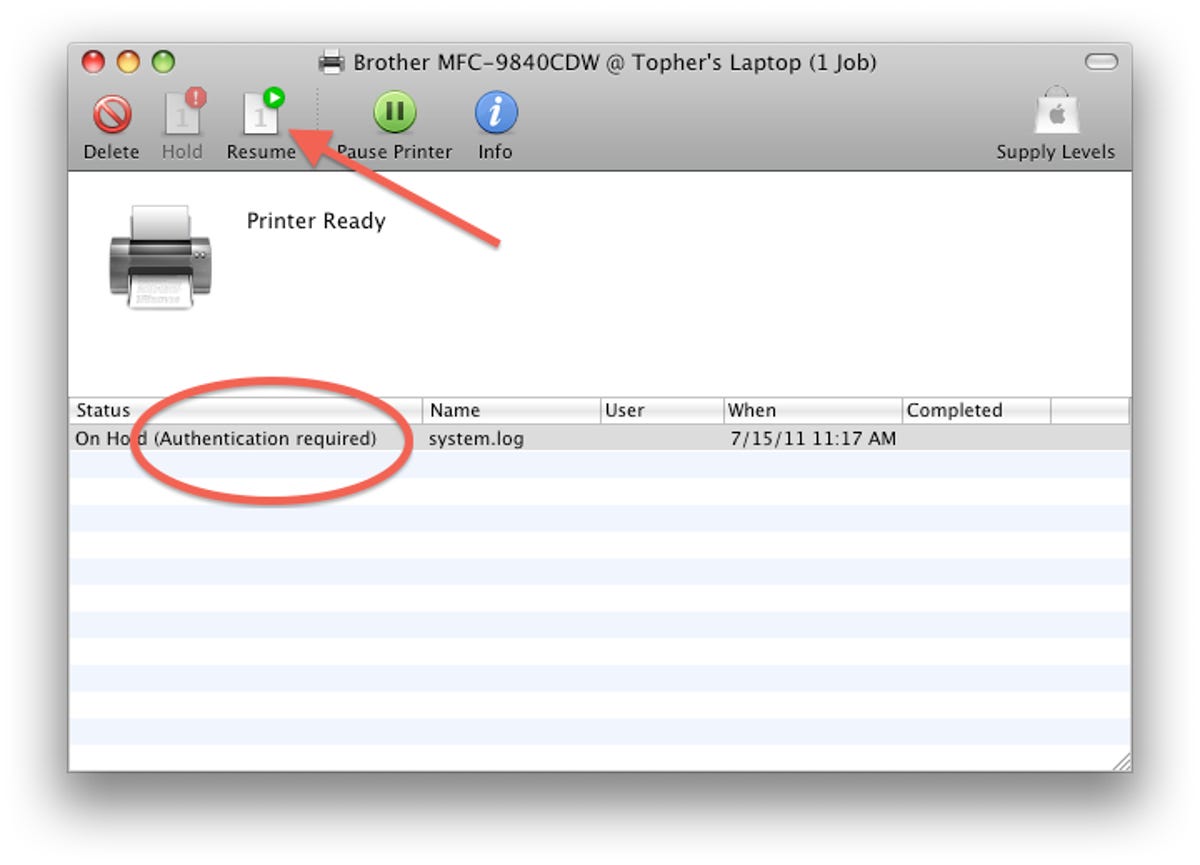
If you supplied the wrong credentials, click the Resume button in the print queue to be prompted for your credentials again.


Questions? Comments? Have a fix? Post them below or e-mail us!
Be sure to check us out on Twitter and the CNET Mac forums.