How to podcast, Part 4: Tagging and posting your show online
Find out how to get your show ready to be online and downloaded by your adoring public.


Last time in our series, we showed you how to edit your audio show using Audacity. This time, we're going to tag your audio file, compress it, and then post it online.

Tagging
There are a number of different ways to tag your audio file. In this case, we're going to use iTunes. Now before you pull out the pitchforks saying iTunes is terrible -- it's free, available for both Windows and Mac, and it can handle the tasks at hand.
If you don't already have Apple iTunes, go download it. Once installed, import the audio file you created at the end of part three by either dragging and dropping the file into iTunes or going to File > Add to Library and selecting your file.
You'll see your audio file in the iTunes library at this point. Right click the audio and select Get Info. Click the Info tab and fill in the fields. For Name, put in your episode title. The rest of the fields are pretty self-explanatory. For Genre, type in Podcast. If you've created awesome artwork for your show, select the Artwork tab, then drag and drop the image you've made in the empty space. When you're done, hit OK.
What you've done is create a tagged version of your source file, but you'll want to compress it so it can be easily downloaded by the millions of people in your audience.
Compressing
To create a compressed version of your show, you're going to have print out your show in binary on paper then carefully fold it into a paper airplane. OK, that's not true. To compress the episode of your show, you can use iTunes (see? I told you it was useful).
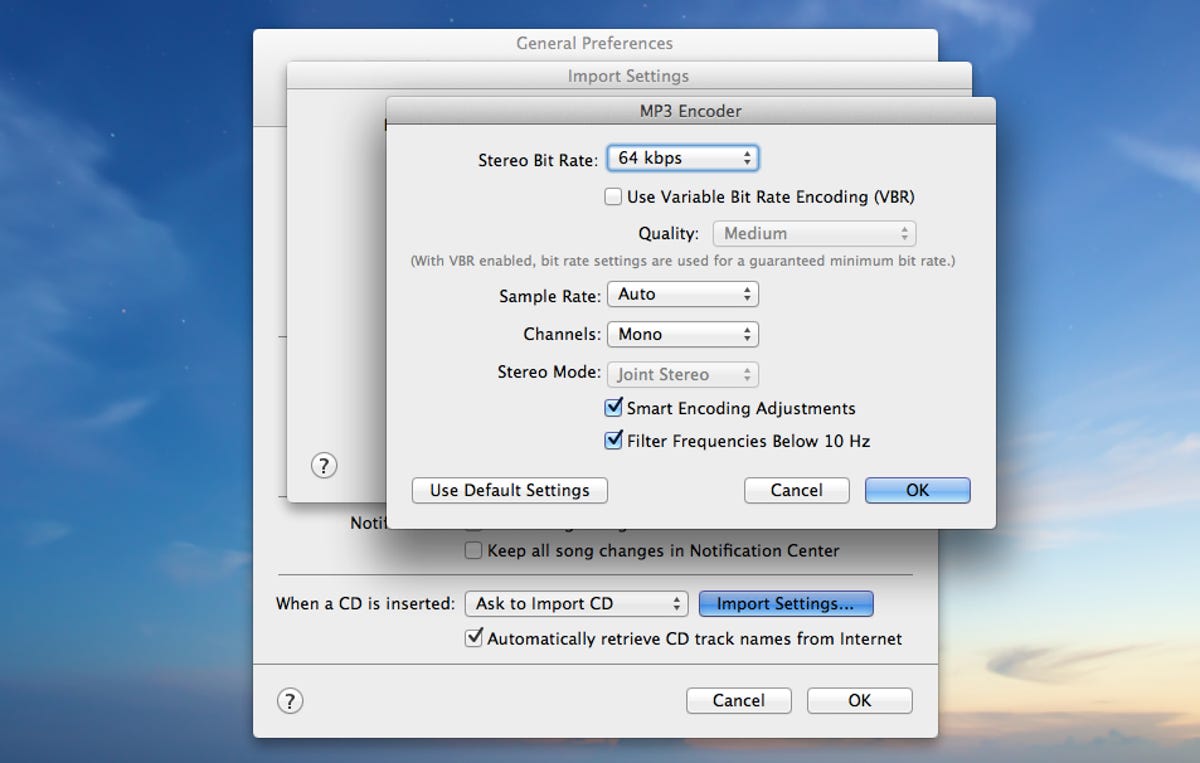
Go into iTunes preferences. On a Mac, choose iTunes, then click Preferences. On Windows, select Edit, then click Preferences.
- Under the General tab, click Import Settings near the bottom of the dialog window.
- Under Import Using, select MP3 encoder.
- Under Settings, select Custom. If your show is pretty much just talking (and not a lot of music), you can compress the file a lot. I suggest selecting 64Kbps for spoken word.
- Then select Mono under Channels. Leave the rest of the settings alone, then hit OK.
In the iTunes window, right click your tagged show and select Create MP3 version. All the tags and art will carry over to your new MP3 file. iTunes will automatically place your new file in its library. To find it on your PC, right click the MP3 and select Show in Finder if you're on a Mac or Show in Windows Explorer.
Now you've found your tagged and compressed file. It's time to upload it to the Internet.
Uploading and posting
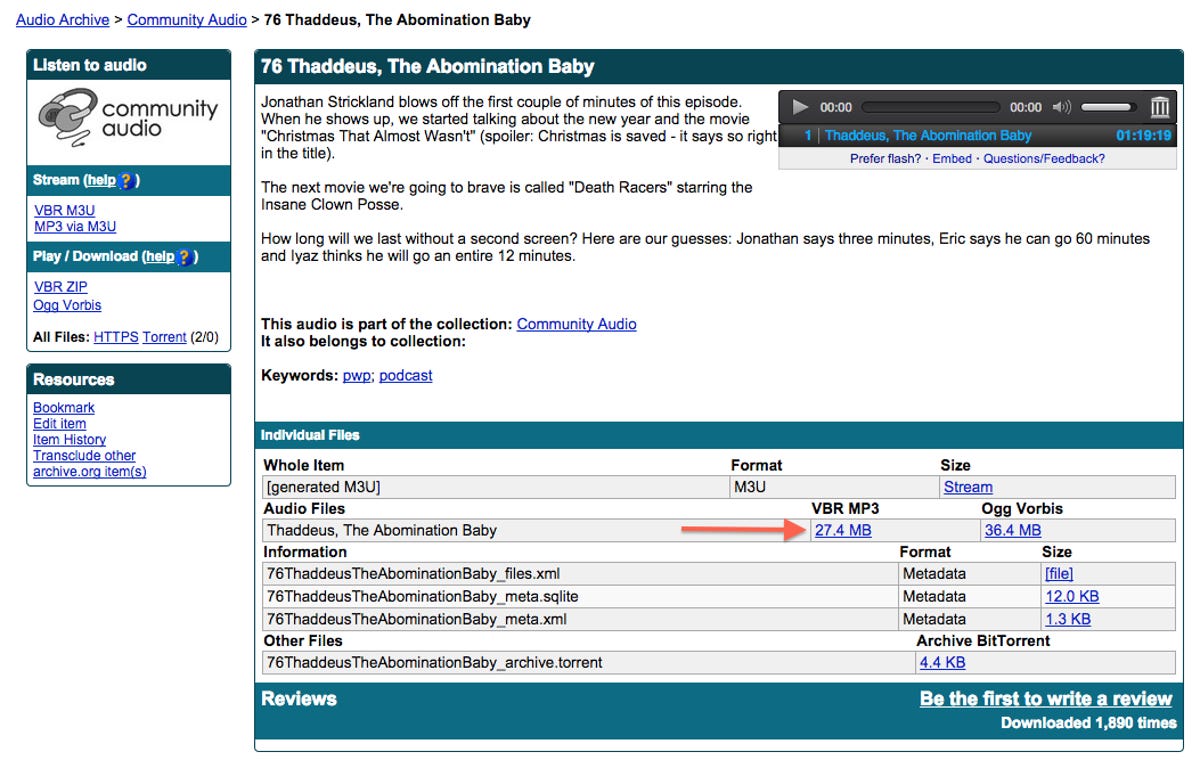
To host your file online, go to Archive.org and sign up for a free account. Once you've done that, you can upload your show to Archive.org and it will be hosted for free. When the file is uploaded, you will be taken to a page that shows you an embeddable audio player and information about the file you uploaded.
Now, we need to get a link to our show. Under the Individual Files section, look for VBR MP3 and you should see a link with text that tells you the file size below. Right click that link and choose Copy Link Address. Paste that information somewhere like Notepad or Evernote. You'll need it in a bit.
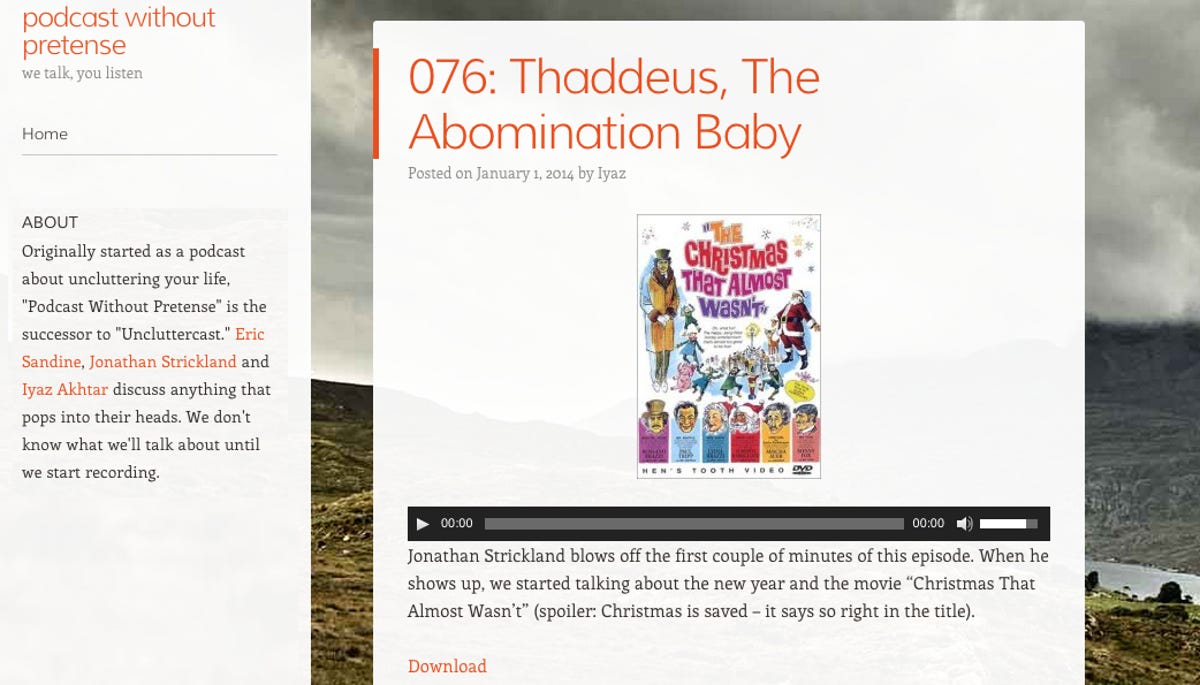
Next up, you're going to need an online home for people to find your show. One of the simplest ways to do that is sign up for a Wordpress account and set up a blog. Wordpress has a full tutorial on how to do this.
Once you've set up your blog, add a new post.
- Fill in your title and description.
- Get the link you saved before.
- To use the built-in audio player in Wordpress write "[audio <your link here>
]" (without the quotes). This will allow your audience to stream your show from your site without needing to download it.
Next time
For what should be the final installment of this series, we'll submit our show to iTunes and then talk a bit about promoting your work online. Missed a part of this series? Here are links to part 1, part 2, and part 3.