How to migrate to Gmail
Are you still hanging onto that old AOL e-mail account, or worse, the e-mail account your ISP handed you? If so, it might be time for you to consider switching to a Web-based e-mail service like Gmail.


If you're still holding onto an old AOL e-mail account or using the one your ISP (Internet Service Provider) gave you, it might be time to consider switching to Gmail. Gmail offers a ton of storage (currently at 10GB and growing), spam filtering at the server-level, two-step verification, and access from any Web browser or mobile device. In other words, it's secure, reliable, and convenient. And if you spend any time at all on a tablet or smartphone, the Gmail apps provide an unrivaled experience.
Migrating your old e-mail account to Gmail isn't that difficult and Gmail actually makes it pretty painless. So if you're ready to go ahead and migrate your old e-mail to Gmail, sign up for your free Gmail account, then come back to this tutorial and follow the steps below:
Importing mail
Your old e-mail messages can be imported into Gmail as long as you haven't deleted them from the mail server. This way, you can store all of your old messages in Gmail for later reference, while receiving new messages at your new Gmail address.
Step 1: Go to Settings > Accounts, then under "Check mail from other accounts (using POP3)," click "Add a POP3 mail account you own."
Step 2: Enter the e-mail address of the account you want to migrate (your old e-mail address).
Step 3: Enter the password for the e-mail account you're migrating, as well as your e-mail provider's POP server name and port number. For example, AOL's POP server is "pop.aol.com" and Comcast's is "mail.comcast.net." Gmail will enter the settings of known providers for you, but if you run into any problems, check with your provider to make sure the settings are correct.
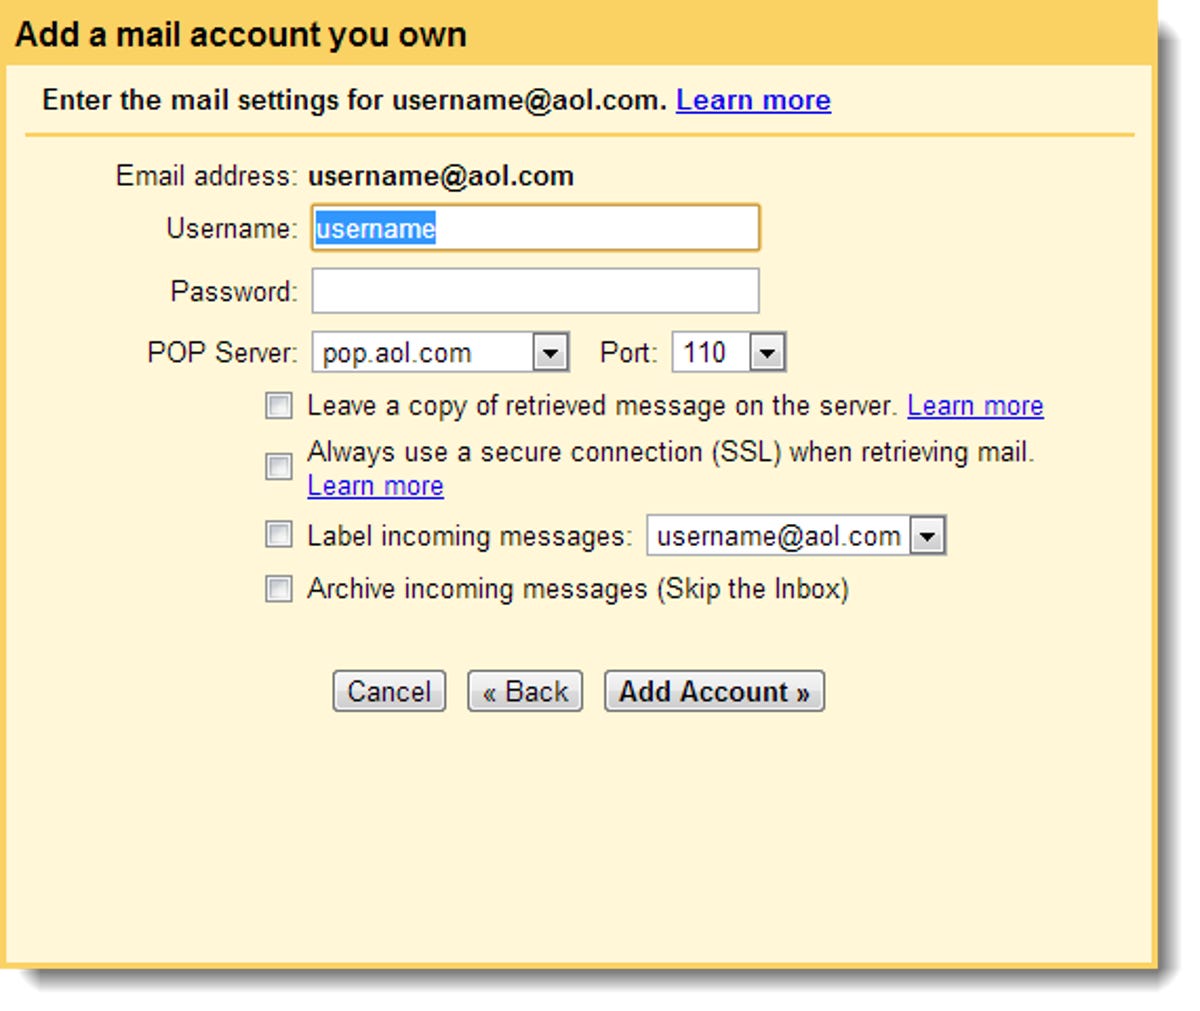
Step 4: Decide on other import settings.
- If you want to delete your old e-mail messages off of your old account provider's server after Gmail imports them, check the box.
- We recommend using SSL to check for new messages. SSL is more secure and will help protect you when you're using Gmail in public Wi-Fi networks.
- You can label incoming messages if you'd like. Using the default label of your old e-mail address might help you find older messages a little easier, but this is totally up to you.
- Archiving incoming messages is probably a good idea so you don't fill up your Inbox with all your old e-mail.
Step 5: Click the Add Account button.
Step 6: Click "Yes" if you want to set up a custom From address for the account you just added. Click "No" if you don't want to set up the custom From address or want to come back to it later.
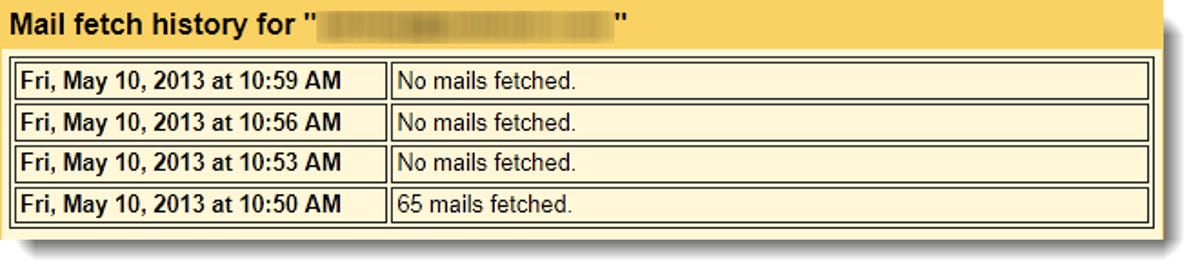
Step 7: Check your mail fetch history to make sure your messages are being imported. Go back to Settings > Accounts, then under "Check mail from other accounts (using POP3)," click on "View history."
Depending on how much old e-mail you have, the import process shouldn't take very long, and the mail fetch history should help you figure out if the process is complete.
Once you've verified that the import is done, you can remove the account from Gmail. It wouldn't hurt to leave it enabled, though, just in case you get new messages there in the future. If you're sure you want to delete it from Gmail, go back to Settings > Accounts, then under "Check mail from other accounts (using POP3)," click "delete" next to the account.
Importing contacts
If you only have a handful of contacts in your old e-mail account, you're probably OK to just enter them in manually in Gmail. However, if you have a large number of contacts, you may want to try exporting them to a CSV file (comma-separated values), so you can import them to Gmail. The steps for exporting your contact list will differ based on the e-mail provider or e-mail client. Once you've successfully exported your contacts to a CSV file, follow these steps:
Step 1: Click on "Gmail" in the upper-left hand corner, then choose "Contacts."
Step 2: Click on the "More" button, the select "Import."
Step 3: Click the "Choose file" button to browse to the location of your CSV file, then click on "Import."
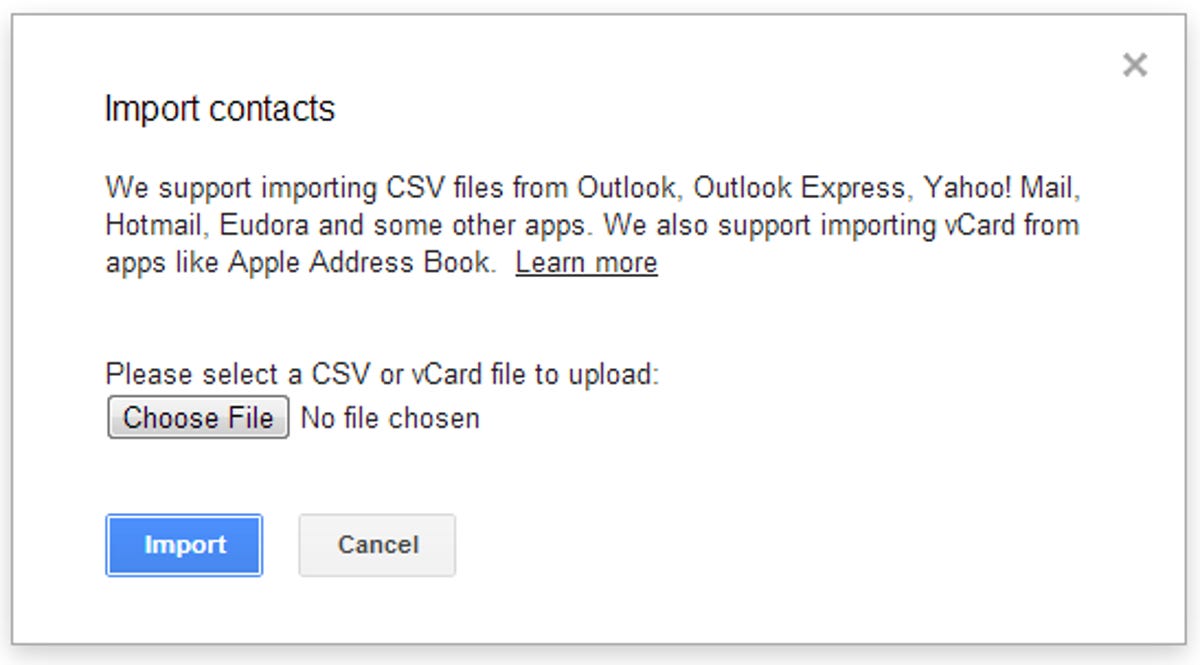
When the import process is finished, Gmail will tell you how many contacts were imported. Keep in mind that importing CSV files can sometimes be hit or miss. Common fields, like name and address, will likely import just fine. However, if your old contact list had photos, attachments, or other uncommon fields, they may not import properly into Gmail. To be extra cautious, it might be a good idea to print a copy of your old contacts to keep as a backup, either to a PDF or to actual paper.
Before deleting your old e-mail account...
Unless you're paying for your old e-mail account, it might be beneficial to keep it open for a while, at least until you're absolutely sure that you've updated all your online accounts with your new Gmail address. Some sites will send a verification e-mail to your old e-mail address before allowing you to update it to the new address.
Also consider setting up an autoresponder for a short period of time to let your contacts know that you've switched e-mail providers. Some systems refer to the autoresponder setting as a vacation message. Of course, if you only want to let some contacts know and not others, you can always send out a mass e-mail to just the people you want to notify. The proper etiquette would be to put yourself in the To: field and enter your contacts in the Bcc: field.
That's it. Welcome to Gmail, a modern e-mail experience. And if you've got a smartphone or tablet, you can now take your e-mail with you where ever you go. If you've got any e-mail migration tips of your own, please share them with us in the comments below.