How to map your SkyDrive folder in Windows 7
SkyDrive is a great way to store lots of files in the cloud for easy access remotely. Windows 7 will let you map your SkyDrive folders as network drives, making access even simpler.


Rob Lightner
Rob Lightner is a tech and gaming writer based in Seattle. He has reviewed games, gadgets, and technical manuals, written copy for space travel gear, and composed horoscopes for cats.
2 min read
If you have a Windows Live account (or an old Hotmail account, for that matter), then you have 25GB of free storage on SkyDrive.
If not, it's easy to set up your free account, and that much storage should be incentive enough for almost anyone. Windows 7 users can make life even easier on themselves by mapping their SkyDrive public folder as a network drive. Here's how to do it:
- First, link your computer with your Windows Live ID. Start up the Control Panel, then select User Accounts and Family Safety, then User Accounts, then Link Online IDs, then Link Online ID next to WindowsLiveID. (You may need to download and install the Windows Live ID provider first, but it's quite simple and can be done from the same window.)
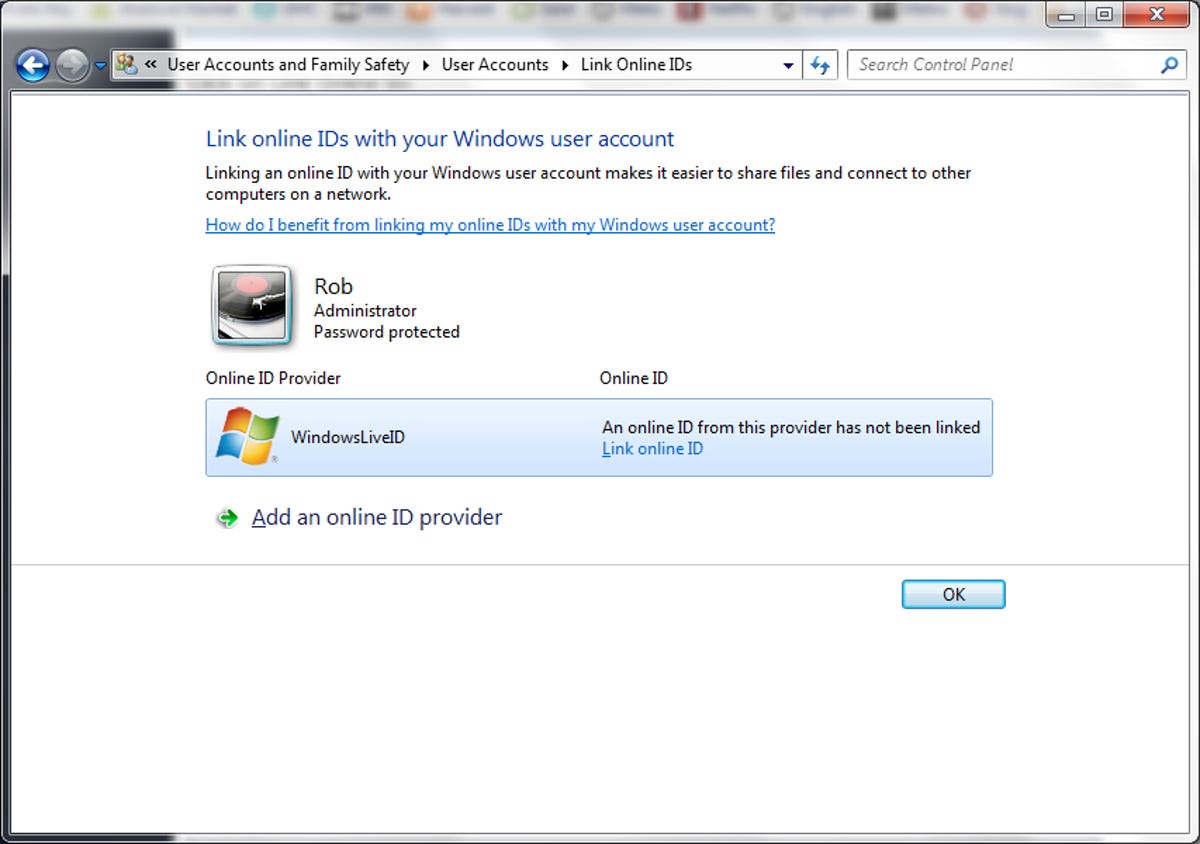
Step 1: Link computer to Windows Live ID. - Sign in to your Windows Live account. (If you ever change your password, you will need to go back to the Link Online ID page in the Control Panel and change it there as well.)
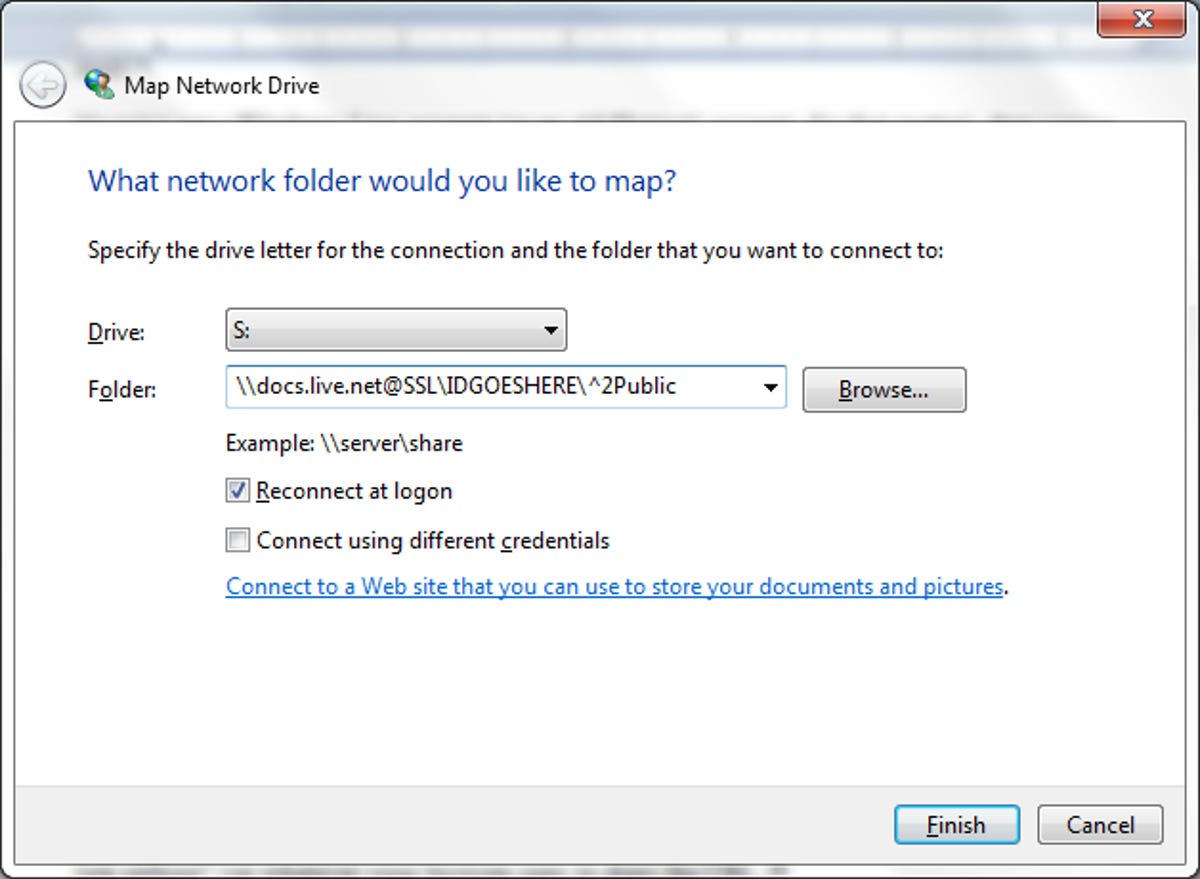
- Now you need to get the address of your SkyDrive folder, which is unfortunately not immediately obvious. Open My Computer, then select "Map network drive" near the top.
- Select the drive letter you want, then paste the following in bold into the text bar next to "Folder": \\docs.live.net@SSL\IDGOESHERE\^2Public (Don't click "Finish" yet.)
Step 4: Start mapping network drive. - To find your ID number, go to your SkyDrive page, then right-click on "Files," then select "Copy link address" (or whatever your browser uses to copy the URL.)

Step 5: Copy URL. - Paste the URL into Notepad or some other text editor, then copy the text following "cid=".

Step 6: Copy ID number. - Go back to the Map Network Drive folder and paste the ID number over "IDGOESHERE" then click "Finish." It will take some time to connect, most likely.
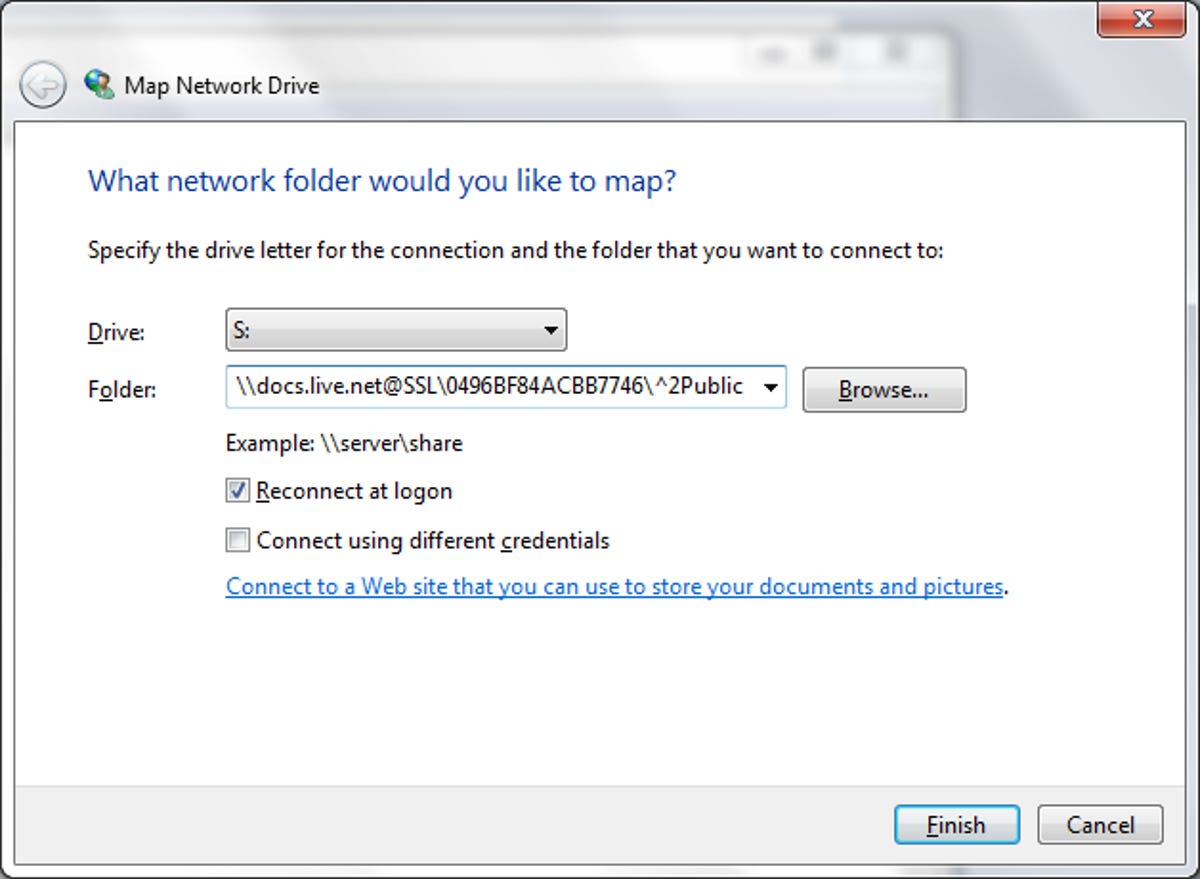
Step 7: Paste ID number into network drive location. - Log in using your Windows Live ID. Your new drive should pop right up.
- The folder name is pretty ugly, so you may want to rename it. Just right-click the folder name, select "Rename," and type in a short, memorable label.

Step 9: Rename folder.
That's it! You can now easily add files to your Public folder, or check them in Windows Explorer at your leisure.