How to create custom PDF compression filters in OS X
You can make your own filters for reducing or otherwise adjusting images when exporting in OS X's Preview application.


Apple's Preview program is the default PDF viewer in OS X, and has a number of options for annotating and otherwise managing PDF files. One of its features is support for Quartz filters, which can be applied to PDFs and image files to convert them, for example into sepia, black-and-white, or gray scale. A Quartz filter can be used to reduce the PDF's file size, but while it's effective at doing so, you may find images in the resulting PDF too grainy to use.
These compression routines are done by adjusting the embedded image quality of the PDF, so if you have a PDF with many large, high-resolution images in it then it will show a greater reduction in size than one with only a few, lower-quality images.

Apple does not offer any settings for fine-tuning this filtration process. However, if necessary you can adjust the settings manually, or even create your own set of filter settings to use.
To do this, you will need a good text editor such as TextWrangler, or a property list file editor such as PlistEdit Pro or Apple's Property List Editor that was included as a component past versions of Xcode (though no longer included with the development suite). TextWrangler and some other text editors are available from the Mac App Store.
First, go to the Macintosh HD > System > Library > Filters folder and copy the file called "Reduce File Size.qfilter" to your Desktop.
Next, open the file with your property list editor or text editor program, where you can adjust some of the settings. If you are using a property list editor, then you can expand the Root > FilterData > CoreSettings > ImageSettings fields where you will be able to adjust the values for ImageCompression, and then expand the ImageScaleSettings field to access the image-scaling factor, and size maximum and minimums. If you are using a standard text editor, then you will see the paired key-and-value XML formatting of this document, but the hierarchical structure will be the same.
The first of these settings is ImageCompression, which will adjust the overall quality of the resulting image in a range of -1 for greatest compression to 1 for least compression.

The ImageScaleFactor setting is the resolution adjustment ratio, which in Apple's filter is 0.5 to reduce the resolution by half, so if a PDF has two images that are 500 and 300 pixels across, they will be resampled to 250 and 150 pixels. This will make them grainier, but significantly reduce their file sizes.
Along with this are the ImageSizeMax and ImageSizeMin settings, which limit the resolution range, this time in direct pixel values. The default range in Apple's filter is 128 to 512 pixels, but you can change this to whatever you would like.
These options collectively adjust images relative to their current sizes, but another option is to forgo any relative adjustments and set all images to a single resolution.
To do this, you will need to create a new property field in the file called ImageResolution. If you are using a property list editor, then you can do this by selecting the ImageScaleSettings field and then adding a new child field with the name "ImageResolution," and setting this field's type to be a Number. If you are using a text editor, then create a new key-and-value pair and place it within the "dict" tags of the ImageScaleSettings field, and then edit it so it looks like the highlighted text in the following image:
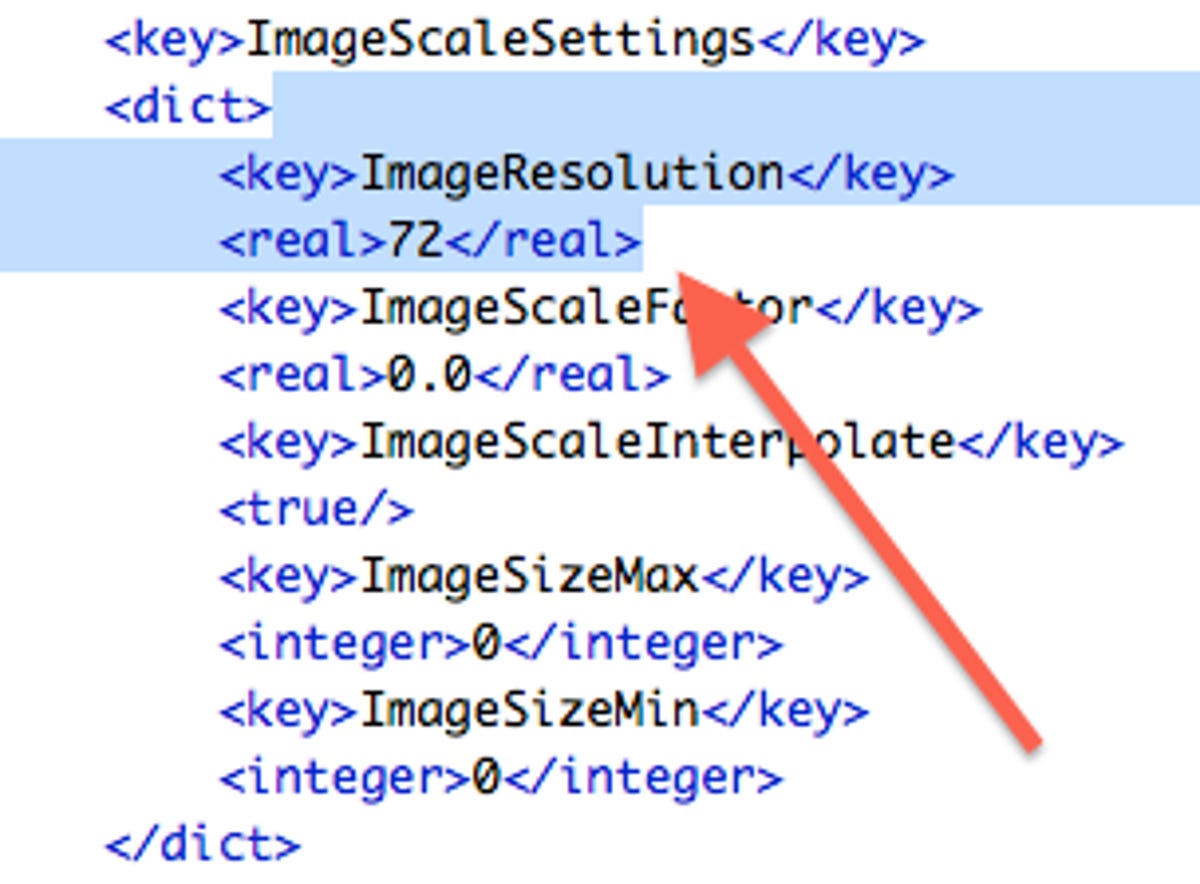
Now give this new key the desired pixel resolution such as 72, 150, or 300, and set the scaling factor and minimum and maximum fields to zero. The Mac's default screen resolution is 72dpi, so if the PDF is only going to be viewed on your system then this may be an appropriate size; however, if you are planning on printing or zooming in on images then a higher resolution will be more appropriate.
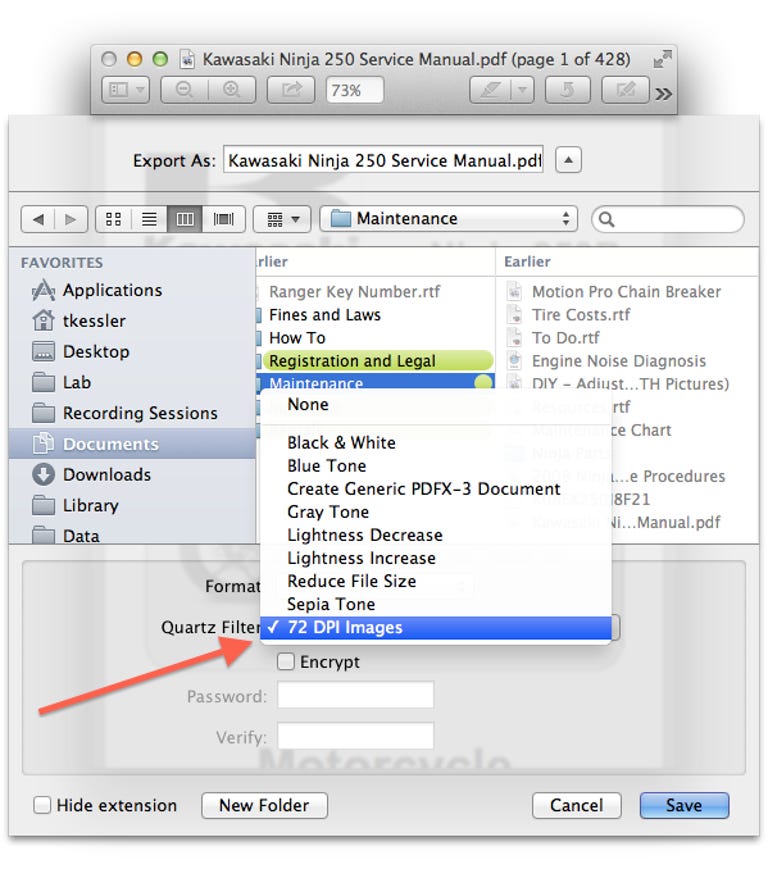
The last alteration is to give the filter a new name, so go down to the Name field and change it to a small description of what the filter does, such as "72 DPI Images" if the filter will set all images to 72dpi. Be sure to also change the file name to reflect the same description.
You can use this approach to create multiple filters by duplicating them and adjusting them according to your preferences, and when you are finished you can copy them either back to the Macintosh HD > System > Library > Filters folder, or preferably to the Macintosh HD > Library > PDF Services folder. When doing so you may be prompted to authenticate as an administrator.
To make use of these filters, you can now open a PDF in Preview, chose Export from the File menu, and then select your filter from the Quartz Filters menu.
Questions? Comments? Have a fix? Post them below or
e-mail us!
Be sure to check us out on Twitter and the CNET Mac forums.