How to create a bootable OS X Mavericks USB install drive
Now that Apple has released OS X 10.9 Mavericks, you might want to consider creating a USB install drive for clean installs and future use.


On Tuesday, Apple released the latest version of their desktop operating system, OS X 10.9 Mavericks. Available as a free download via the App Store, OS X Mavericks is supposed to bring power and performance improvements, as well as some new features, including the new Maps app.
Creating an OS X USB installer from the App Store download hasn't been very straightforward in the past, and the old methods no longer work for OS X 10.9. However, there's a new Apple utility with Mavericks that makes it relatively simple, and thanks to MacForums member, tywebb13, we know how to use it. With a USB installer, you'll be able to perform a clean installation of Mavericks whenever you want and without having to download it again from the App Store. Here's how to create a bootable OS X Mavericks install drive:
Step 1: Download the OS X Mavericks installer from the App Store, but don't run the installer yet. If you've already upgraded, you'll have to download the installer again from the App Store, since it deletes itself after the upgrade. Make sure the installer is located in the Applications folder.
Step 2: Format a USB flash drive that's at least 8GB, as Mac OS Extended (Journaled) and keep the default name as "Untitled." Make sure that you don't have another volume with the same name. If you do, unmount the other volume or rename it temporarily. You can also name the USB flash drive to something other than "Untitled," but just make sure to change the command in Step 3 to reflect the correct name.

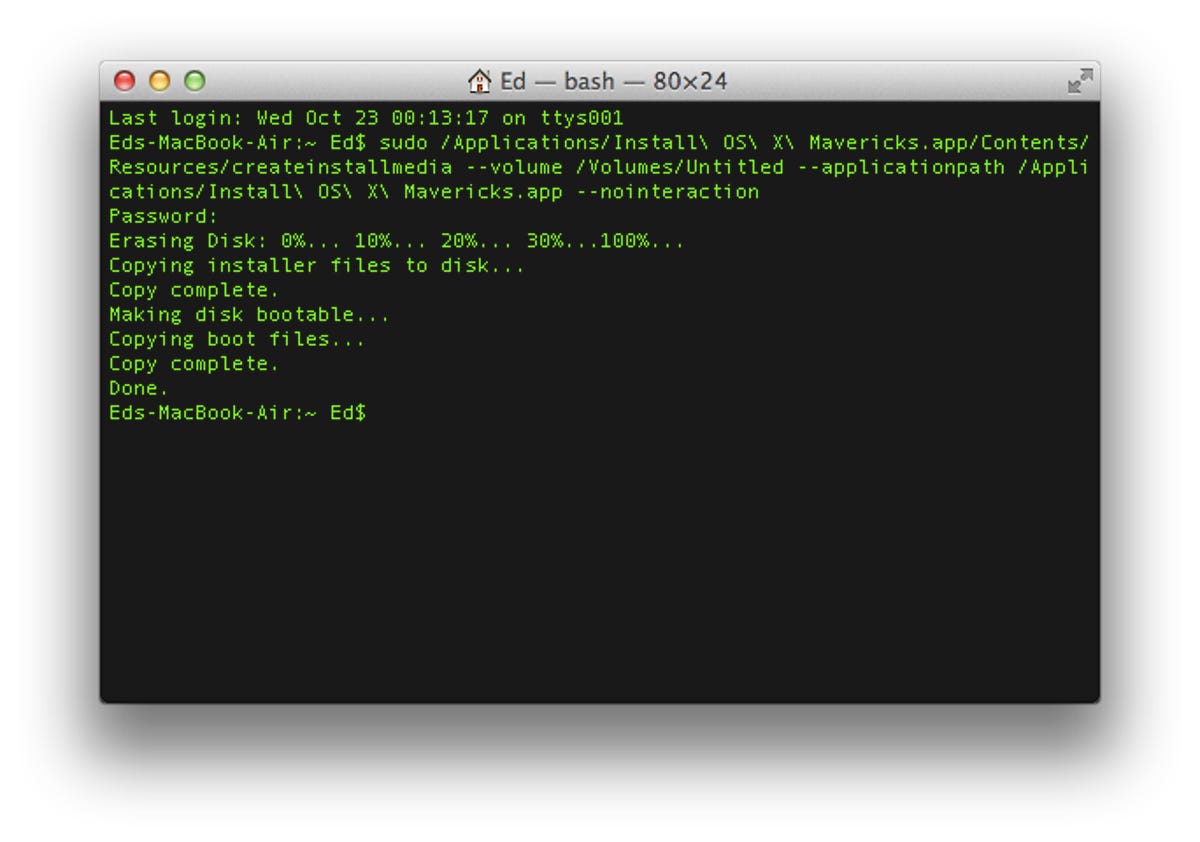
Step 3: Open a terminal window and enter the following command:
sudo /Applications/Install\ OS\ X\ Mavericks.app/Contents/Resources/createinstallmedia --volume /Volumes/Untitled --applicationpath /Applications/Install\ OS\ X\ Mavericks.app --nointeraction
Since the utility requires root privileges, you'll need to enter your password to continue. It shouldn't take more than 20 minutes or so for it to complete.