How to adjust Autoplay options in Windows
As an added security measure, or even a convenience, this a setting worth looking into.


Autoplay can be a great tool to help your computer react to new media being inserted into a drive. It can automatically open your music player for an audio CD or a file browsing window when you plug in a USB thumbdrive. But what if, at the time, you don't want to listen to the audio CD, or browse the files on your USB drive. Follow these steps to adjust, or even disable outright, your Autoplay settings.
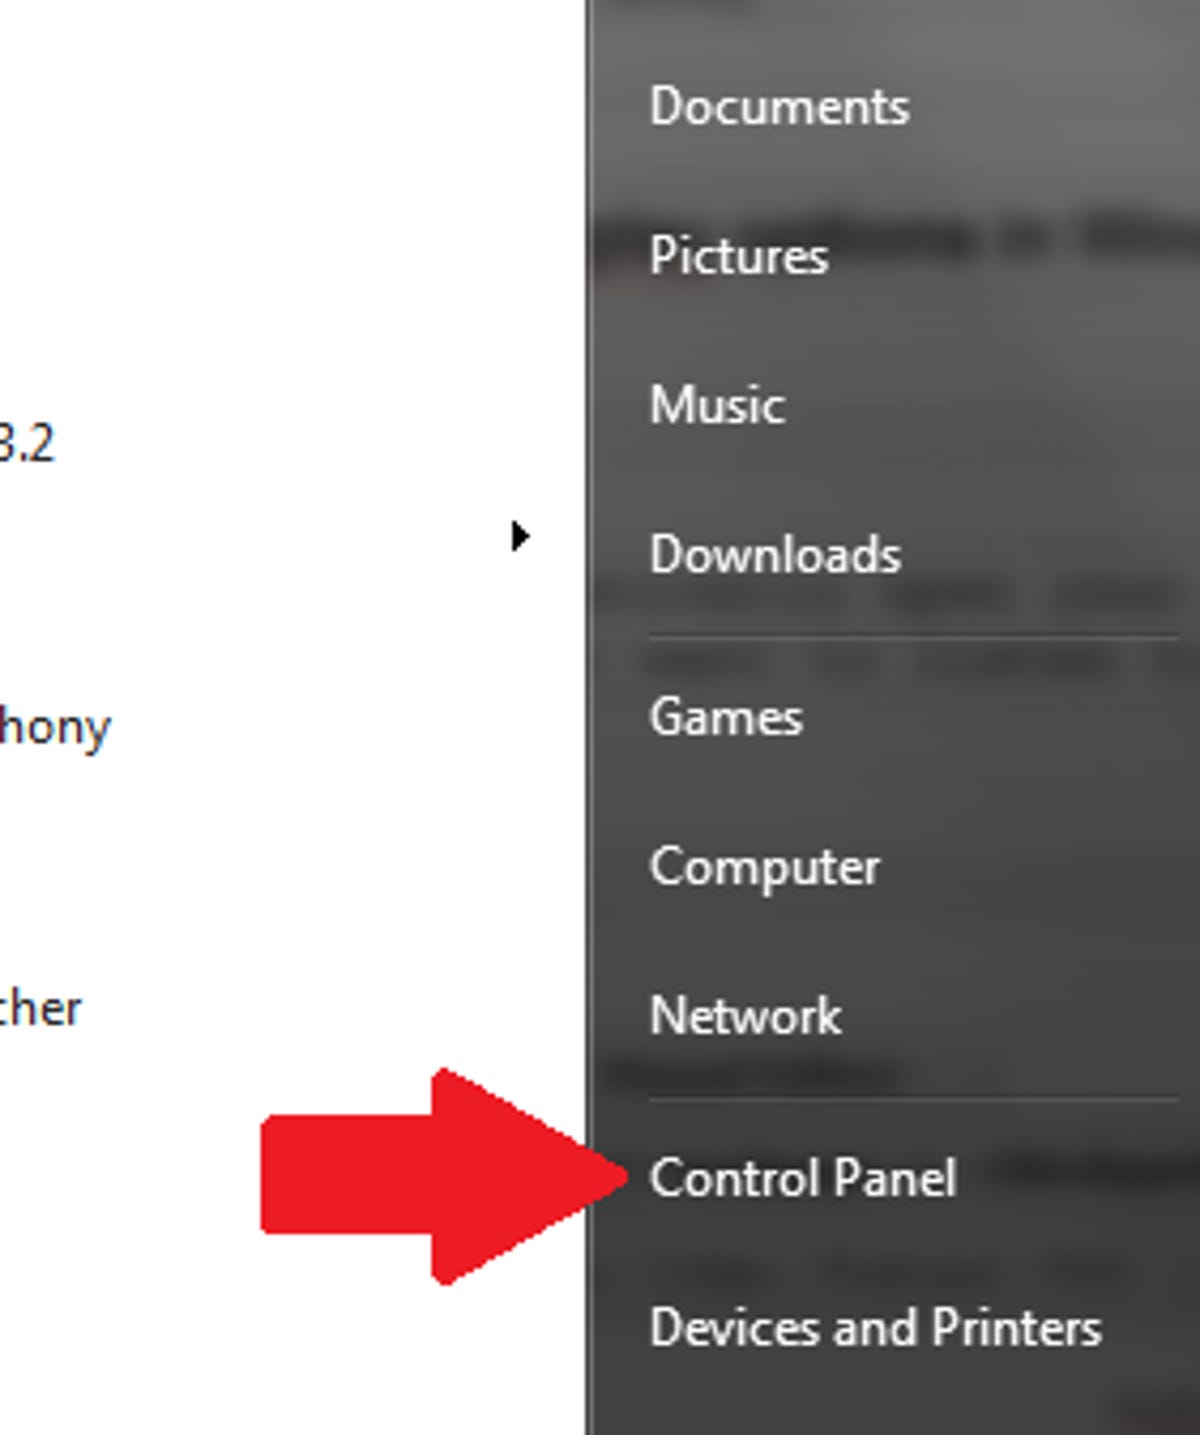
Step 1: Open the Control Panel from the Start menu.

Step 2: Click on the small triangle next to Control Panel in the Navigation Box and select All Control Panel Items from the drop-down menu that appears.
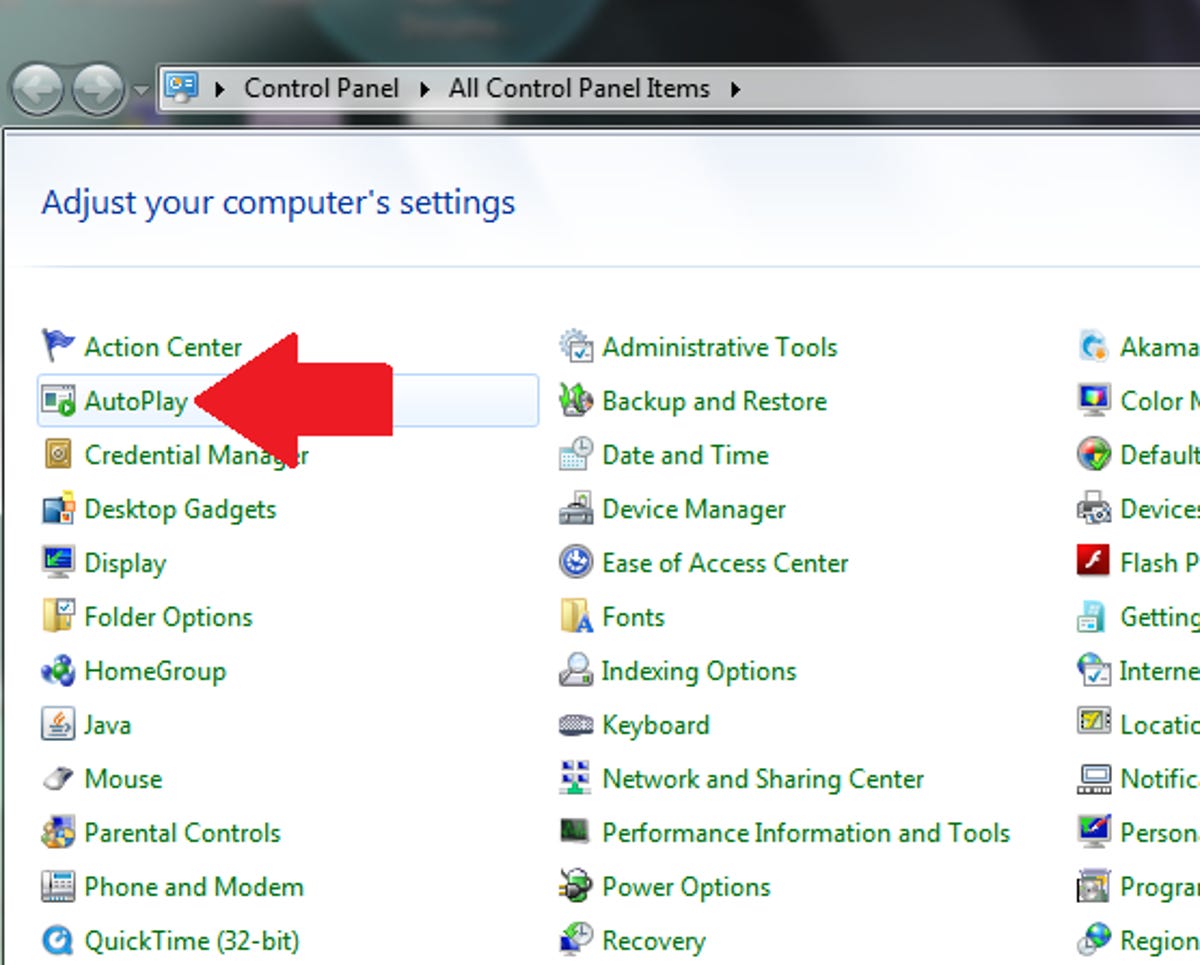
Step 3: Select AutoPlay from the list of options.
Step 4: From this window you can adjust the default action of each media type recognized by Windows. The AutoPlay function can be disabled by unchecking the check box at the top of the window.

(Optional) Step 5: You can reset all the options by clicking the Reset all defaults button at the bottom of the window (chances are you'll have to scroll down to see it).
The next time you plug in media your PC will do just what you want it to do.