Get a new PC ready for everyday use
Install security software, clear out the clutter, restore your data, and customize Windows' appearance to your liking.


Four hours. That's how long it took me to prepare my new notebook computer for the workaday world. And that includes restoring all my data files and e-mail.
I've got the process down to 12 steps:
Step 1: Establish a network connection.
My computer is pretty useless without an Internet link. (Well, less useless than it was before Google Gears arrived; more on that in Step 12 below.) I discovered this fact last fall when I was networkless in the wilds of southeastern Maine. Getting on my home's wireless network was a breeze using Vista's Network and Sharing Center. Click "Connect to a network" in the left pane, choose your network, click Connect, enter your network's password, and click Connect again.
I described my search for a solution to a recurring wireless-network problem in a post from last July. Microsoft's Help and Support site offers help with XP wireless-connection glitches and Vista wireless woes.
Step 2: Update Windows.
No matter how recently the machine's version of Windows was installed, there's probably an important security patch--perhaps several--waiting for it on the Microsoft Update site. To download and install it, click Start > All Programs > Windows Update. The Microsoft service will determine whether your system is missing any critical updates.
Step 3: Download Firefox.
It's ironic that the one and only time I'm likely to open Internet Explorer is to download Mozilla's Firefox browser. (Actually, I need to use IE to restore my online data backups; see Step 11 below.) Then I used Firefox to download the Opera and Google Chrome browsers as well. You never know when you're going to need another browser, and they don't cost anything.
Step 4: Download NoScript.
Giorgio Maone's NoScript script-blocking plug-in (donationware) is the one-and-only Firefox add-on I consider mandatory. The program lets you block scripts on a site-by-site and source-by-source basis.
Step 5: Install security software.
Personally, I prefer the convenience and relative simplicity of an all-in-one security suite. However, lots of PC users want to avoid the heavy-handedness of security suites from such big-name vendors as Symantec and McAfee. Choosing best-of-breed antivirus, antispyware, and software-firewall programs gives you more control over your security settings. However, using multiple security utilities increases the chances of a conflicts with Windows.
People tend to have strong opinions about their security software. The fact is, a security configuration that works great on one person's PC will crash and burn someone else's system. You have to experiment to find the right security-software strategy for your machine and tastes.
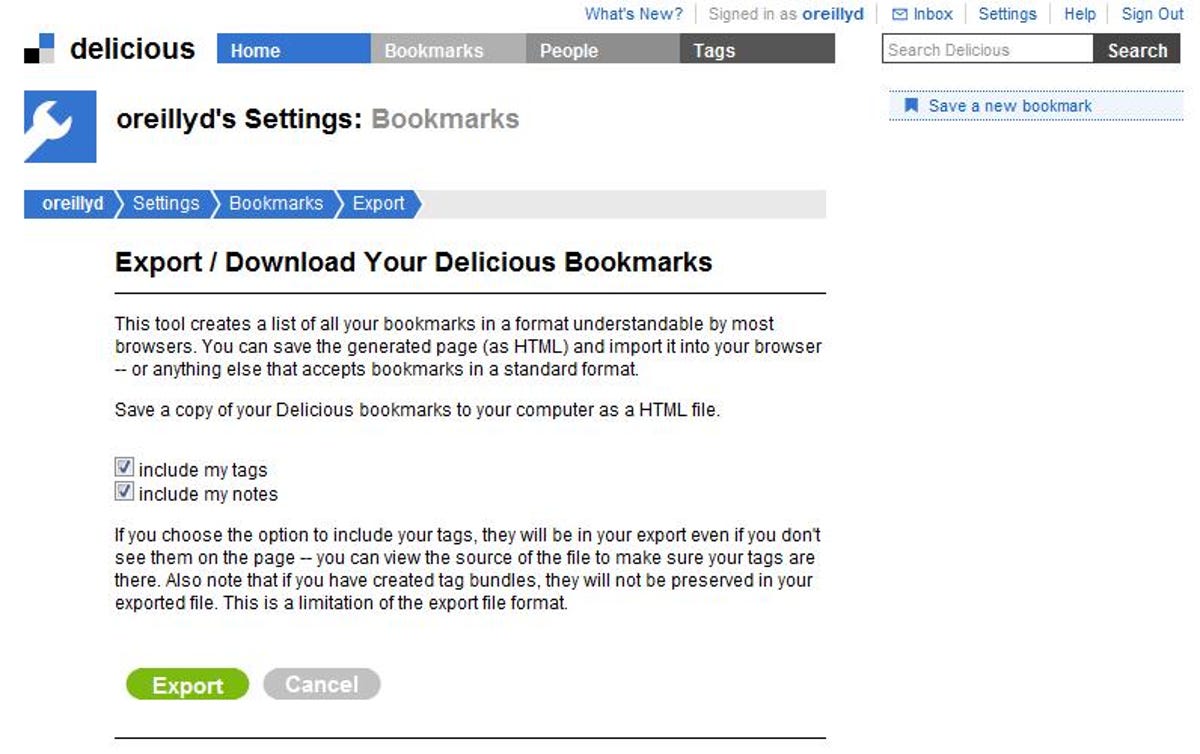
Step 6: Download and install your bookmarks from Delicious.
Last October, I described how to upload your bookmarks to the Delicious bookmark site. To export your bookmarks from Delicious, click Settings in the top-right corner of the Delicious site, choose Export/Backup Bookmarks in the Bookmarks section, and click Export.
To add the bookmarks to Firefox, click Bookmarks > Organize Bookmarks > Import and Backup > Import HTML. In the Import HTML wizard, choose From an HTML File, click Next, browse to and select the file you just exported from Delicious, and click Open. Your bookmarks should be back where they belong.
Step 7: Clear out the trialware.
There are plenty of utilities that will help you remove the trialware versions of programs that your PC vendor likely loaded onto your hard drive. I use Piriform's free CCleaner for this and other system-maintenance chores. CCleaner makes it easy to uninstall the adware and other programs your system can do without.
Click Tools in the left pane, choose Uninstall, select the programs you want to remove one at a time, and click Run Uninstaller on the right side of the program window. You can also use CCleaner to pare down the list of apps that start automatically with Windows, among other useful tools in the program.
Step 8: Customize your desktop.
I like an iconless desktop, but that doesn't keep me from having easy access to the items I place on my desktop. I'd rather choose them from a Desktop menu that pops out of the taskbar. To clear the icons from the desktop, right-click anywhere on it, choose View, and deselect Show Desktop Icons.
Now right-click the taskbar, uncheck Lock the Taskbar, and choose Toolbars > Desktop. Drag the Desktop toolbar to the right--toward the notification area (aka the system tray)--until only the word "Desktop" and the double chevron are showing. To reach one of your desktop items, click the double chevron and select it from the menu that pops up.
My next stop is the Web Museum, where I choose my desktop wallpaper. Once you find a painting you like (and that generally matches your desktop dimensions), right-click it and choose Set as Desktop Background (in Firefox). Click Stretch to ensure that the picture will fill your screen. Just be sure you don't violate any copyrights for the artwork you select.
Step 9: Install and update Office (optional).
This is the step I would like to skip, but for now, my work requires that I have Office on my system. Installing Office 2007 from disc is one of the most time-consuming of the 12 steps, in part because you have to install Service Pack 1 via Microsoft Update after the disc installation completes. One of these days....
Step 10: Download your Outlook mail.
I have my ISP e-mail account set to save all messages on the server, so once I create the new account in Outlook, all my mail downloads automatically. Likewise, I use the Flexadex online contact manager, which I described in a post last month. Flexadex lets you export your contacts as a .csv file that you can import to Outlook.
Once you have the .csv file saved locally, open Outlook, click File > Import and Export > Import from another program or file > Next > Comma Separated Values (Windows) > Next. Browse to and select the .csv file, click Next, choose Contacts in the folder tree, click Next again, choose the appropriate fields for the data (if necessary), and click Finish. Your contacts may require a little cleanup, but the process beats relying on Outlook for your contacts backup (in my humble opinion).
Step 11: Download your online data backup.
I use the IDrive online-backup service, which does a good job of backing up my data in the background. To restore a backup, log into your account on the IDrive site (using Internet Explorer--the service doesn't support Firefox, unfortunately), choose Folder Restore, and follow the prompts.
Step 12: Download Google Gears.
I waited a long time for Google's offline component to support Gmail, which finally arrived early last month. The service also lets you work with your Google Docs & Spreadsheets and other Web services without an Internet connection. I'm happy to report that I haven't yet needed offline access to my Gmail account or other online services, but I know it's only a matter of time. With Gears in place, I'll be ready for my next network failure. Well, sort of.