Fifty iOS 5 tips
Watch our iOS 5 video with the 50 essential tips that will help you get the most out of the latest software for the iPhone, iPad and iPod touch.


Nik Rawlinson
Nik Rawlinson has been writing about tech since Windows 95 was looking distinctly futuristic. He is a former Editor of MacUser magazine and one-time scribe for Personal Computer World. Nik is a freelance writer and is not an employee of CNET.
12 min read

iOS 5 for the iPhone, iPad and iPod touch has landed. We've corralled 50 useful tips into one video to help you get the most out of the latest version of Apple's mobile operating system.
Photography

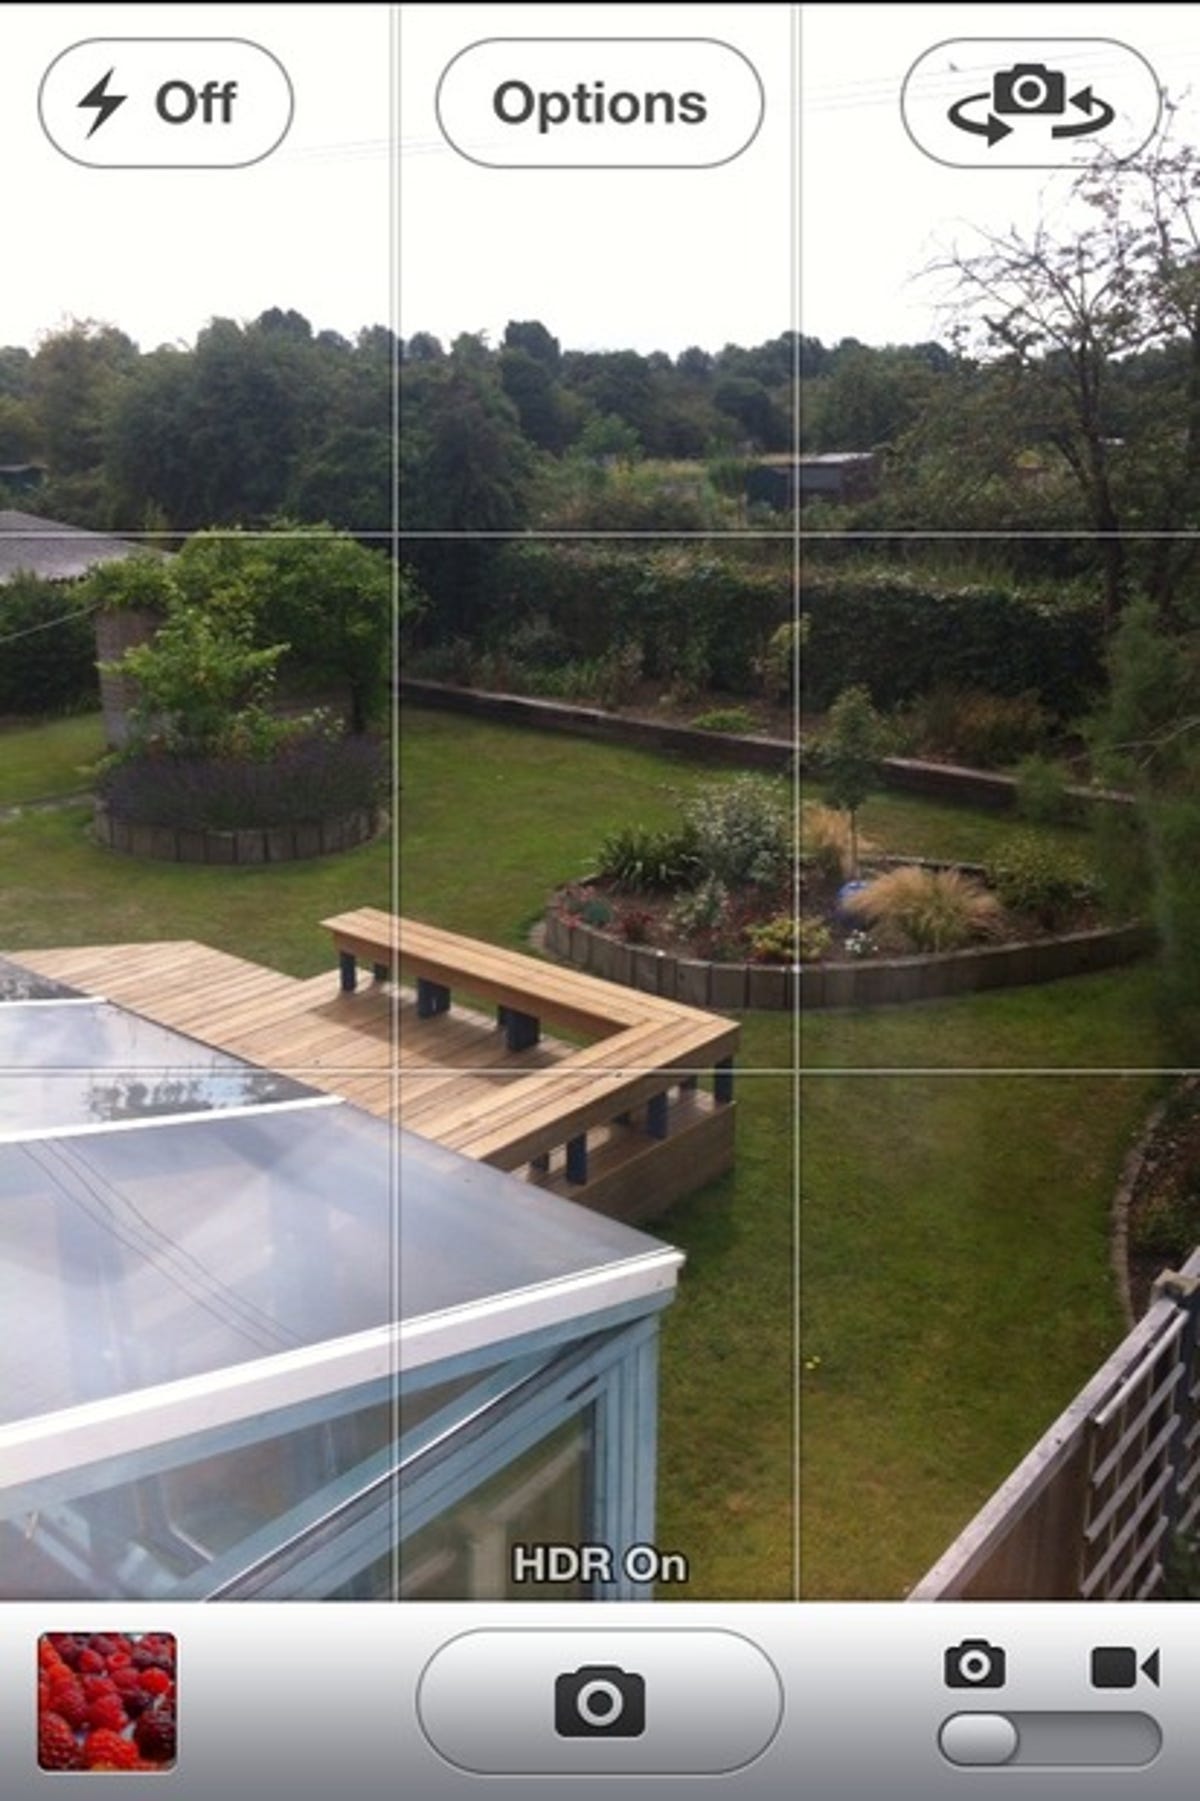
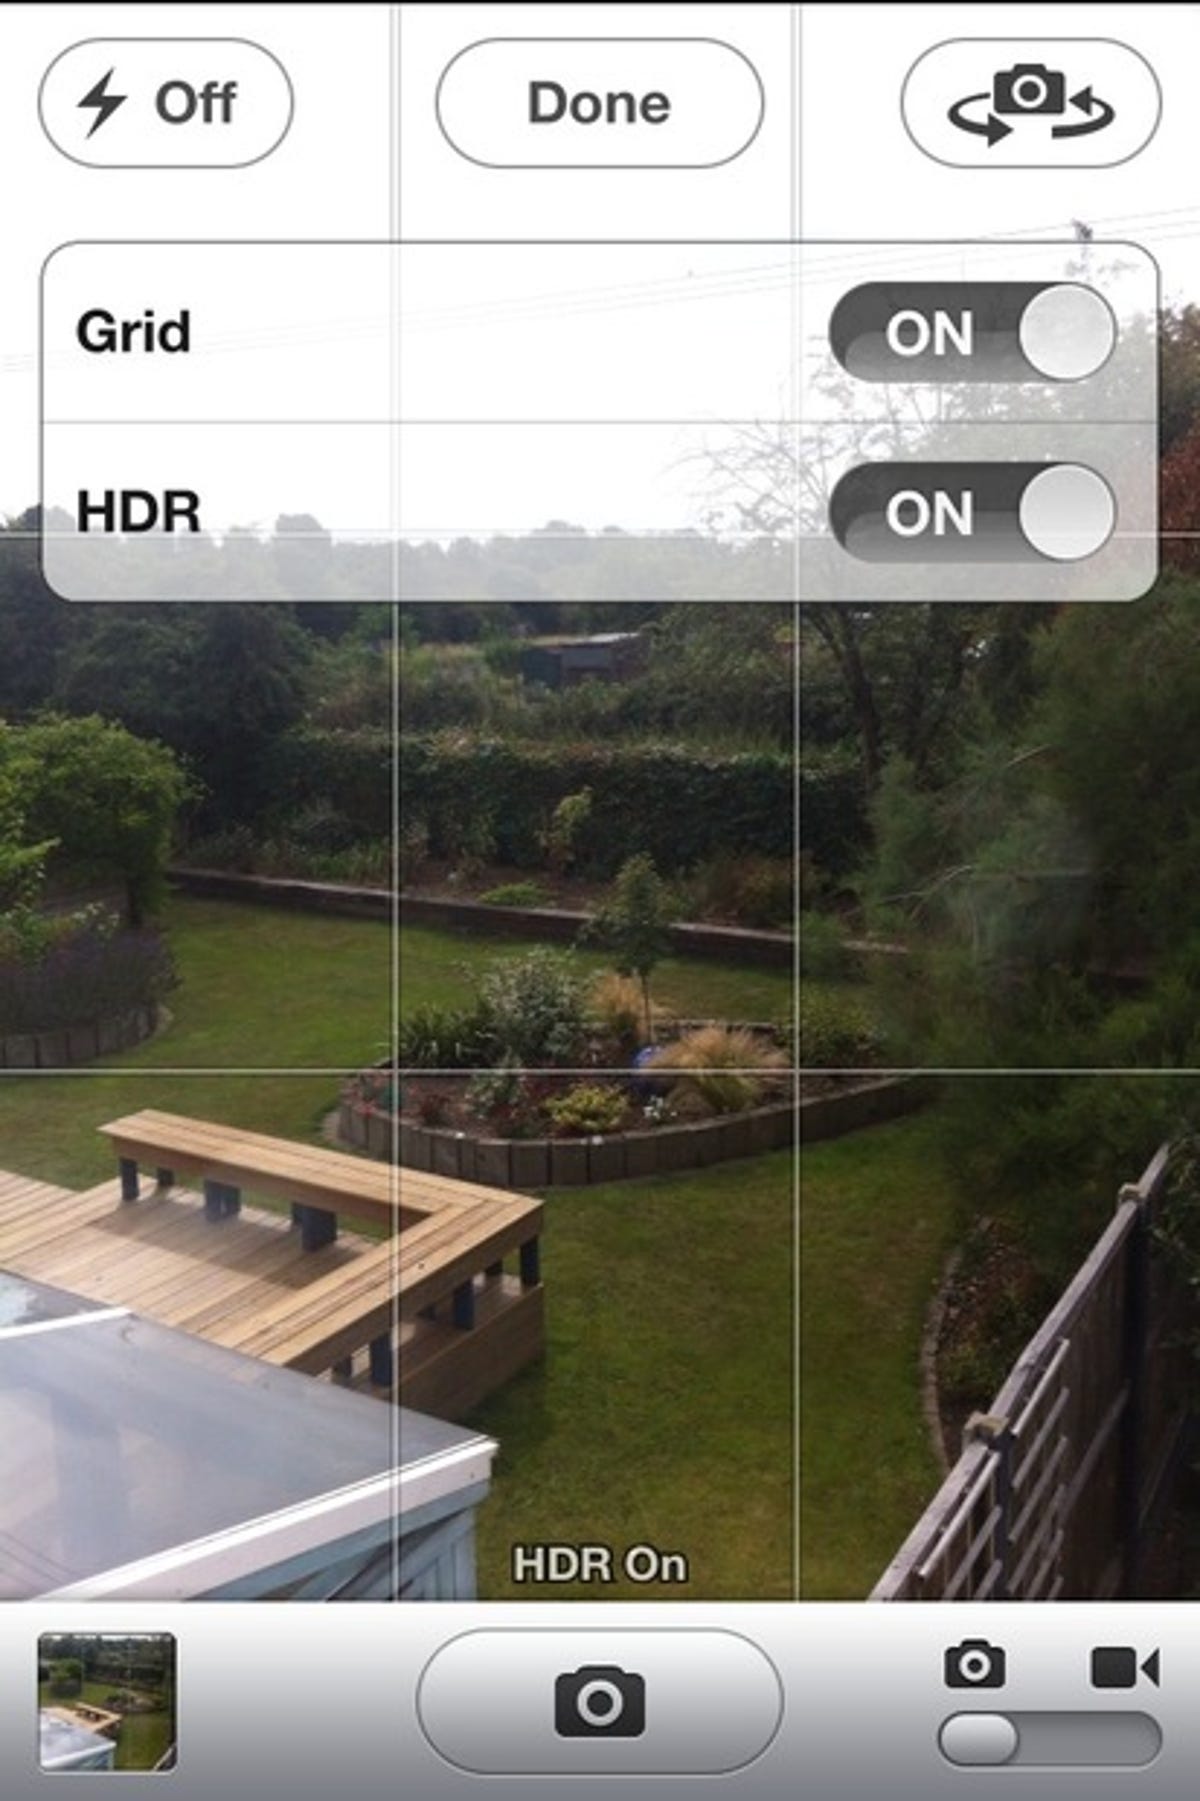
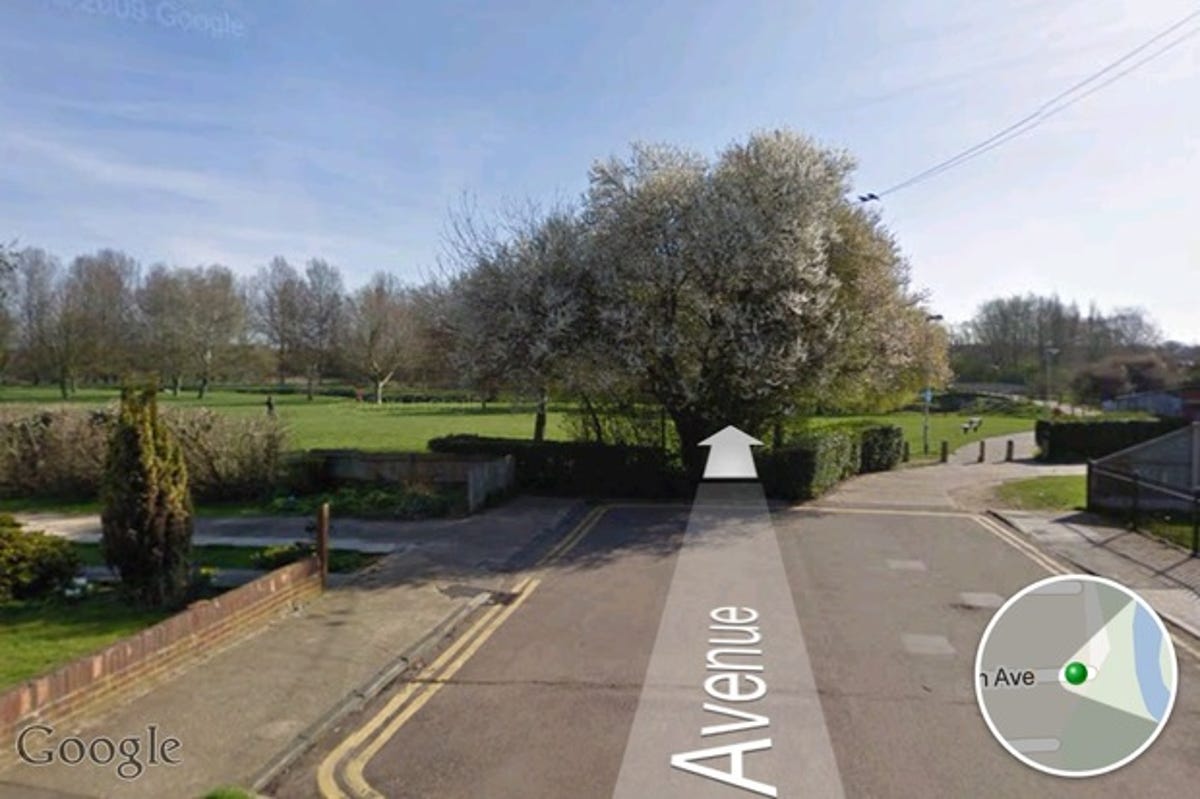
- 1. Put an end to wonky horizons. The upgraded camera app in iOS 5 has a smart grid overlay (see image above). Tap 'options', followed by the grid slider. For the most striking images, obey the rule of thirds and put key features on the lines, with the most important part of each image -- faces, landmarks and so on -- at the points where the lines intersect.
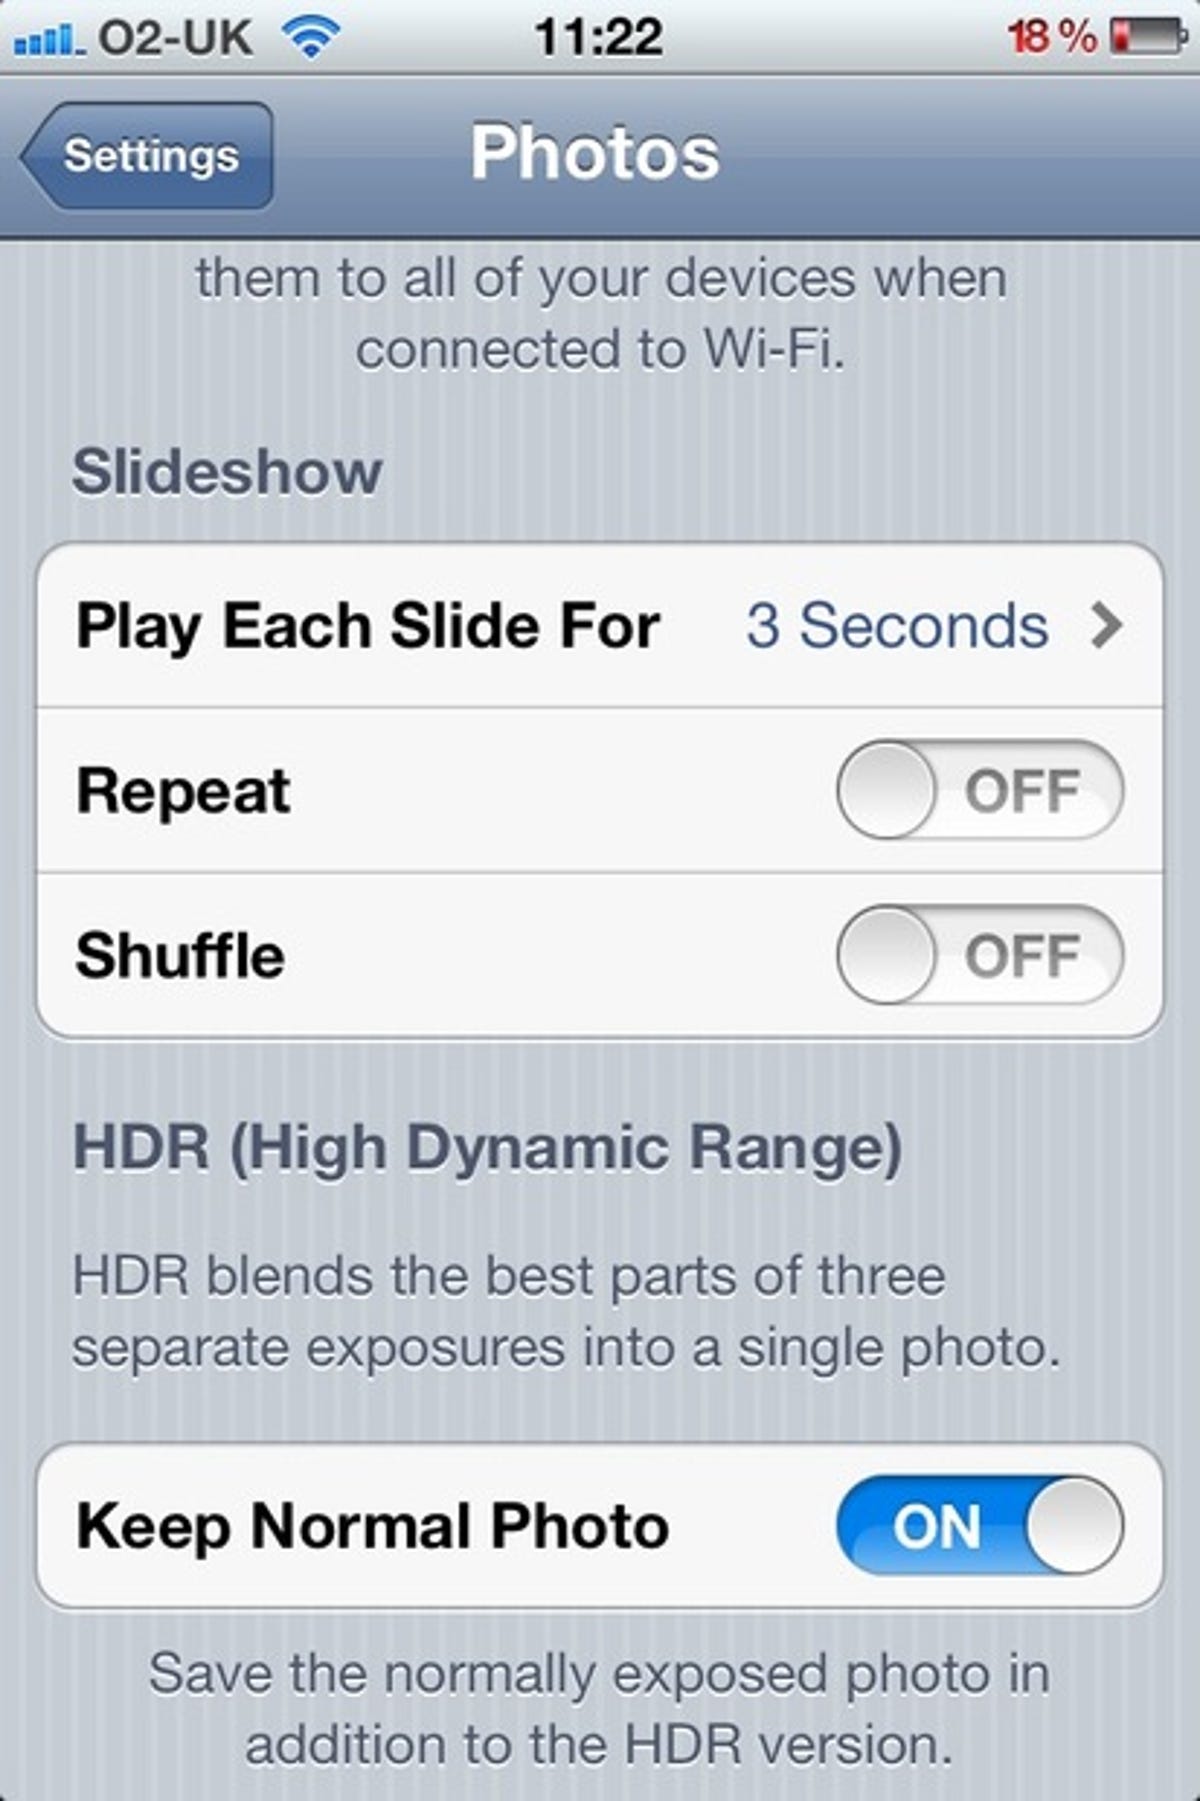
- 2. While you're there, enable the HDR feature. HDR stands for 'high dynamic range'. This feature is a method for balancing the shadows and highlights in an image to preserve the greatest amount of detail. It's easy to over-egg this particular pudding when manually creating HDR images, but the iPhone's careful tweaking works a treat.
- 3. Whenever you shoot an HDR image, your iPhone keeps a copy of the original, unadulterated snap. This is a good safety measure, but it consumes extra space and it's rare that the HDR result is inferior, so why not automatically delete the original attempts? Stop the iPhone from hanging on to them by going to 'settings', and then 'photos', where you should tap the slider beside 'keep normal photo' to turn this feature off.
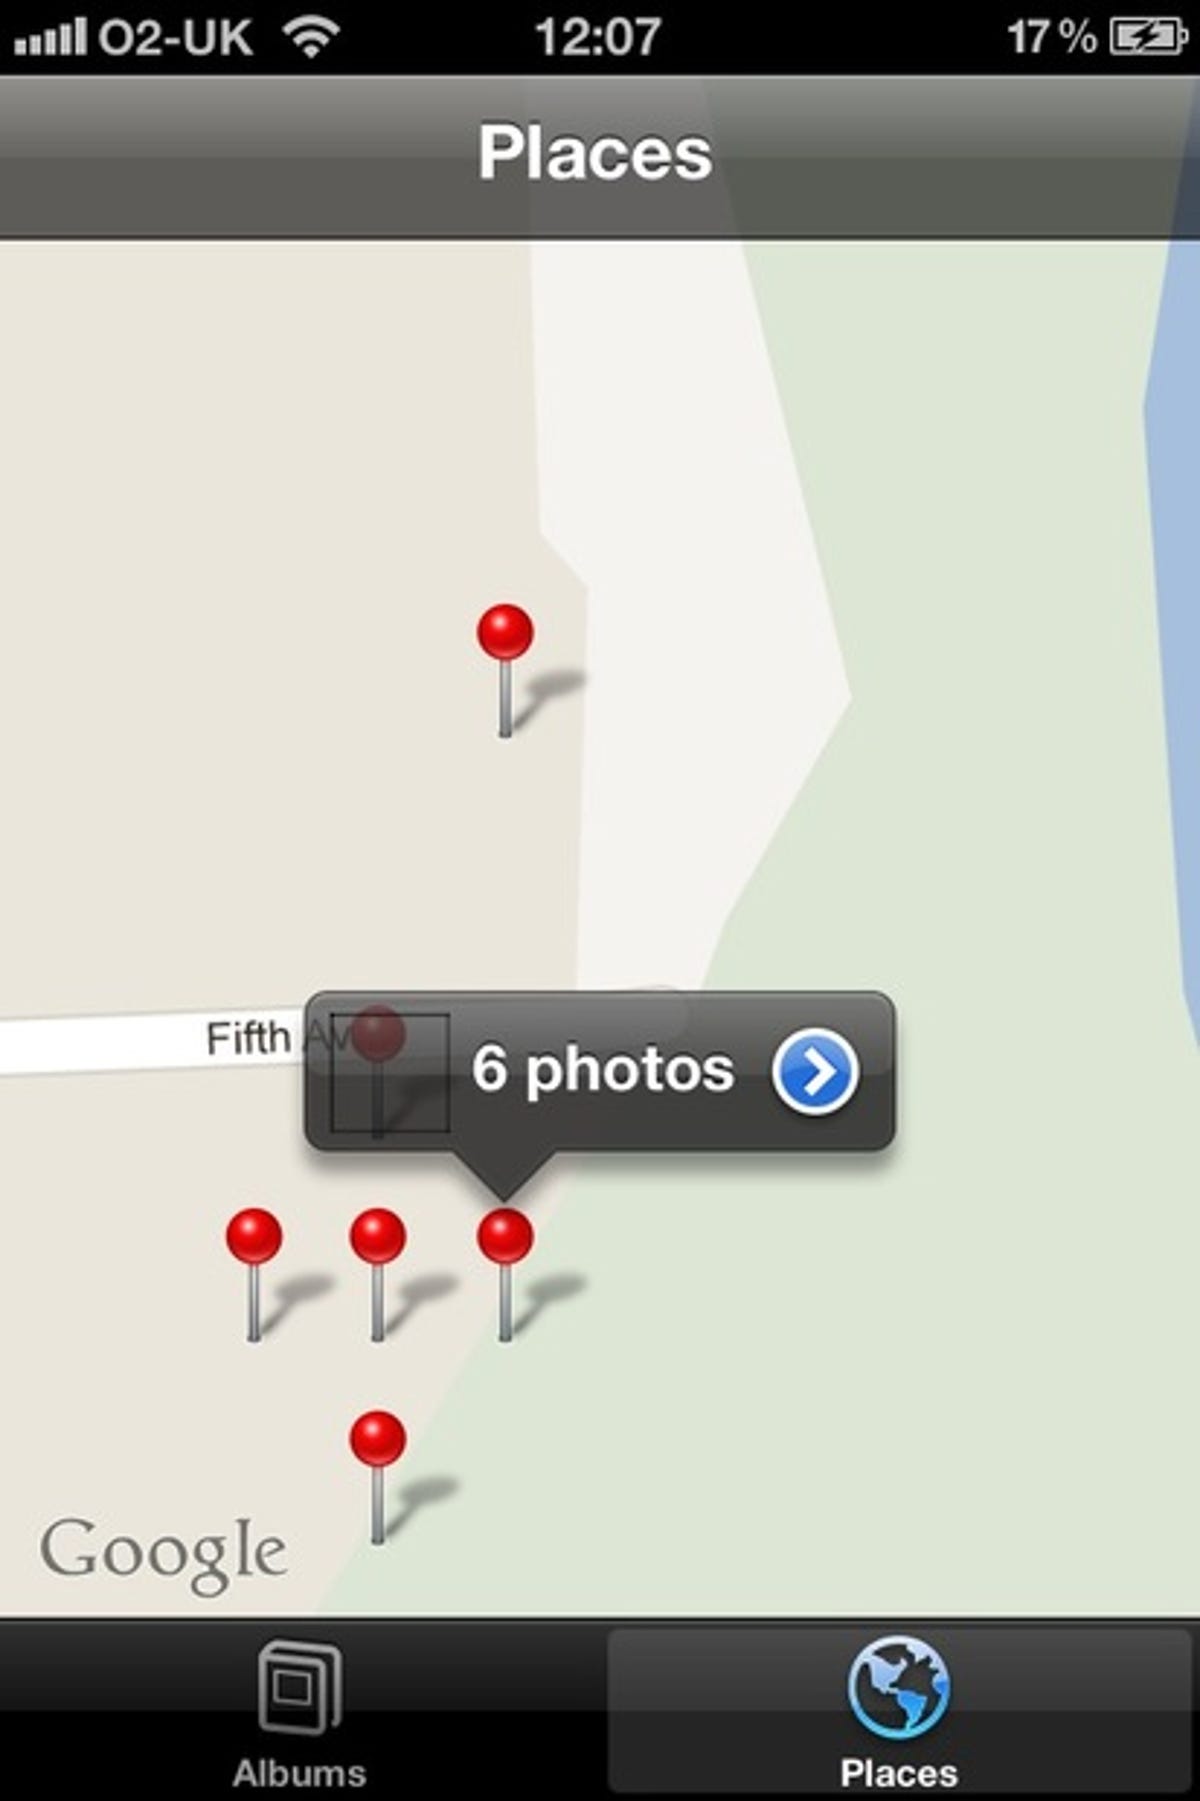
- 4. Put your photos on the map. Every picture you take with your iPhone is geotagged so that it can be plotted on maps in Aperture and iPhoto, or on photo-sharing sites like Flickr. You don't need to wait until you've downloaded them to see where they were taken, though. Open the Photos app, step back to the albums overview and tap 'places' on the toolbar. Each group of images is represented by a pin which, when you zoom in closer, splits to show the locations of individual shots.
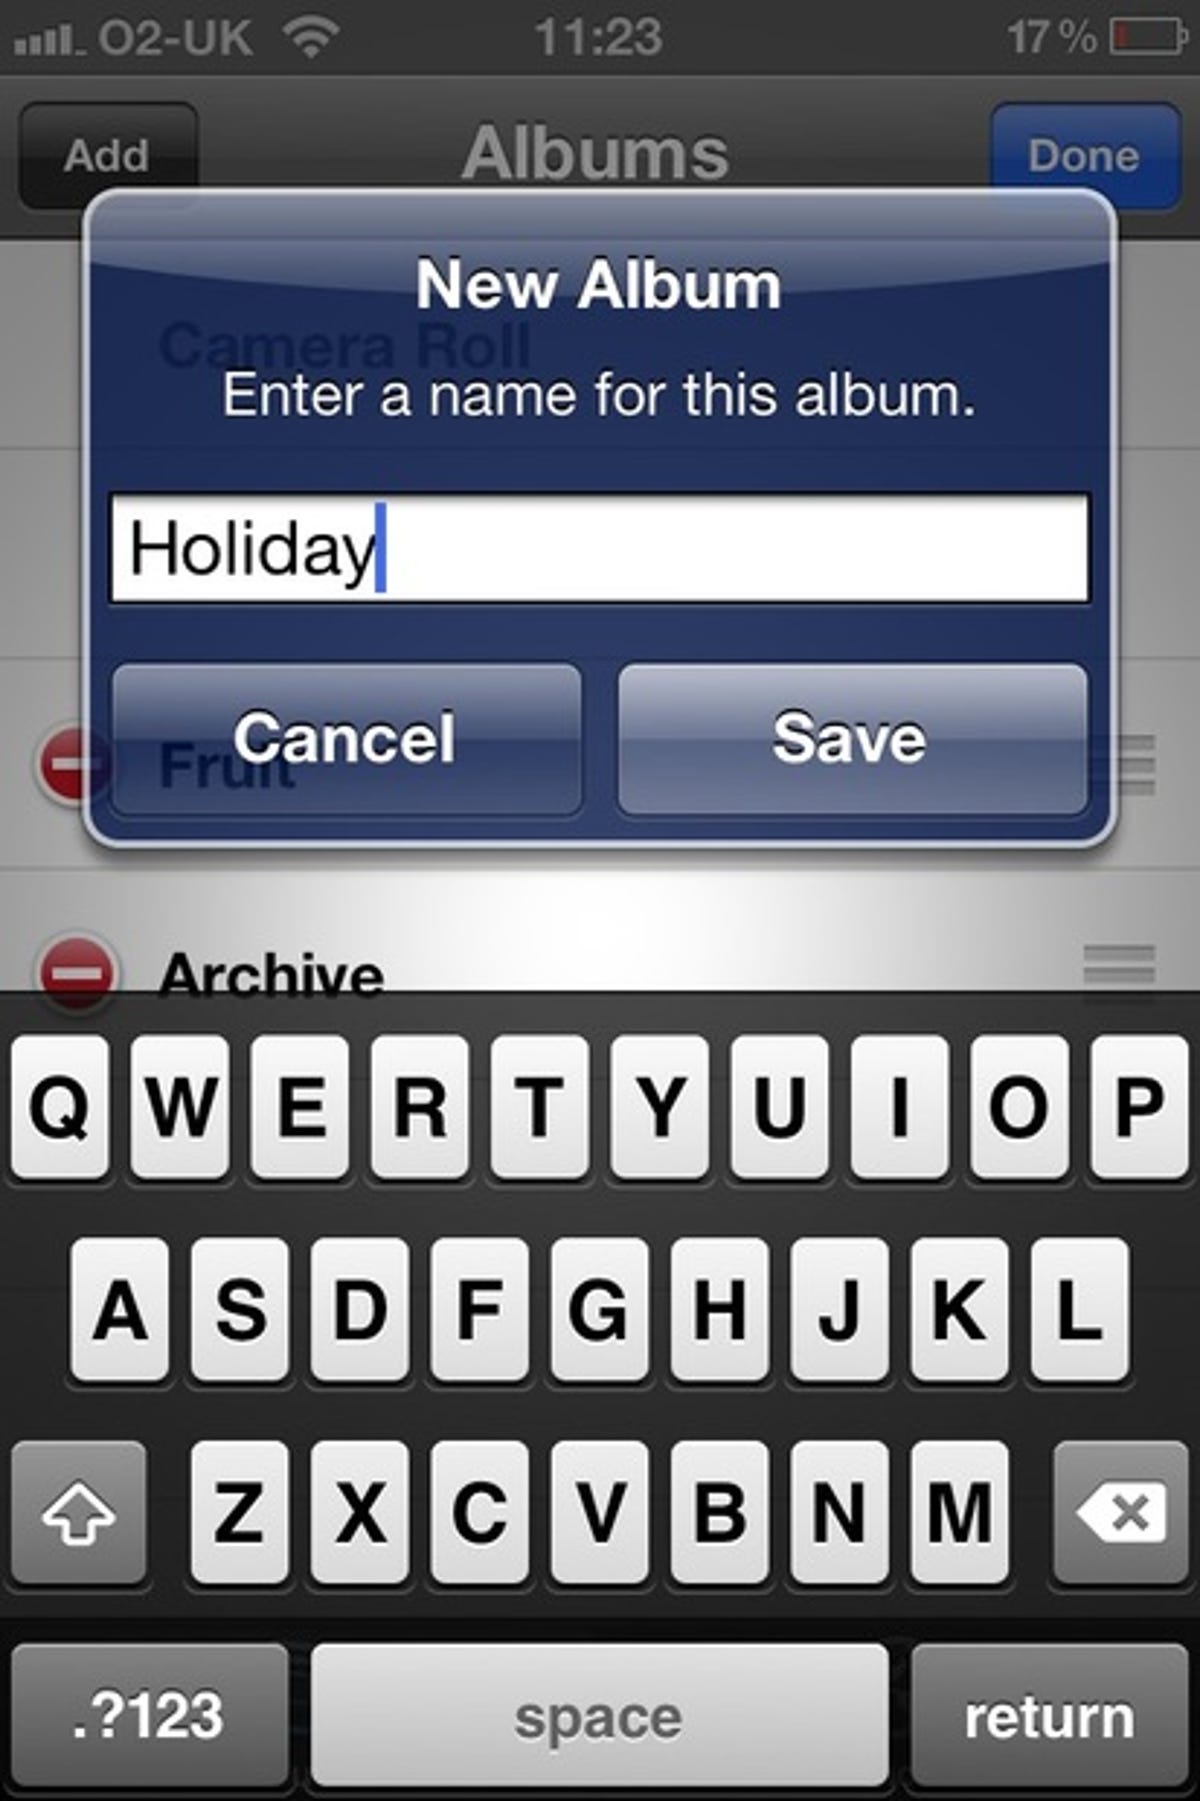
- 5. Make your pictures easier to find. By default, your iPhone drops all of your images into a single folder called 'camera roll', which can quickly become cluttered. Create new folders by tapping 'edit' from the albums overview, followed by 'add'. To file your images, tap your new folder, then click the shortcut button (the curved arrow coming out of a box), followed by 'add'. Navigate to existing images you want to add, select them and then tap 'done' to complete the operation.
Communicating
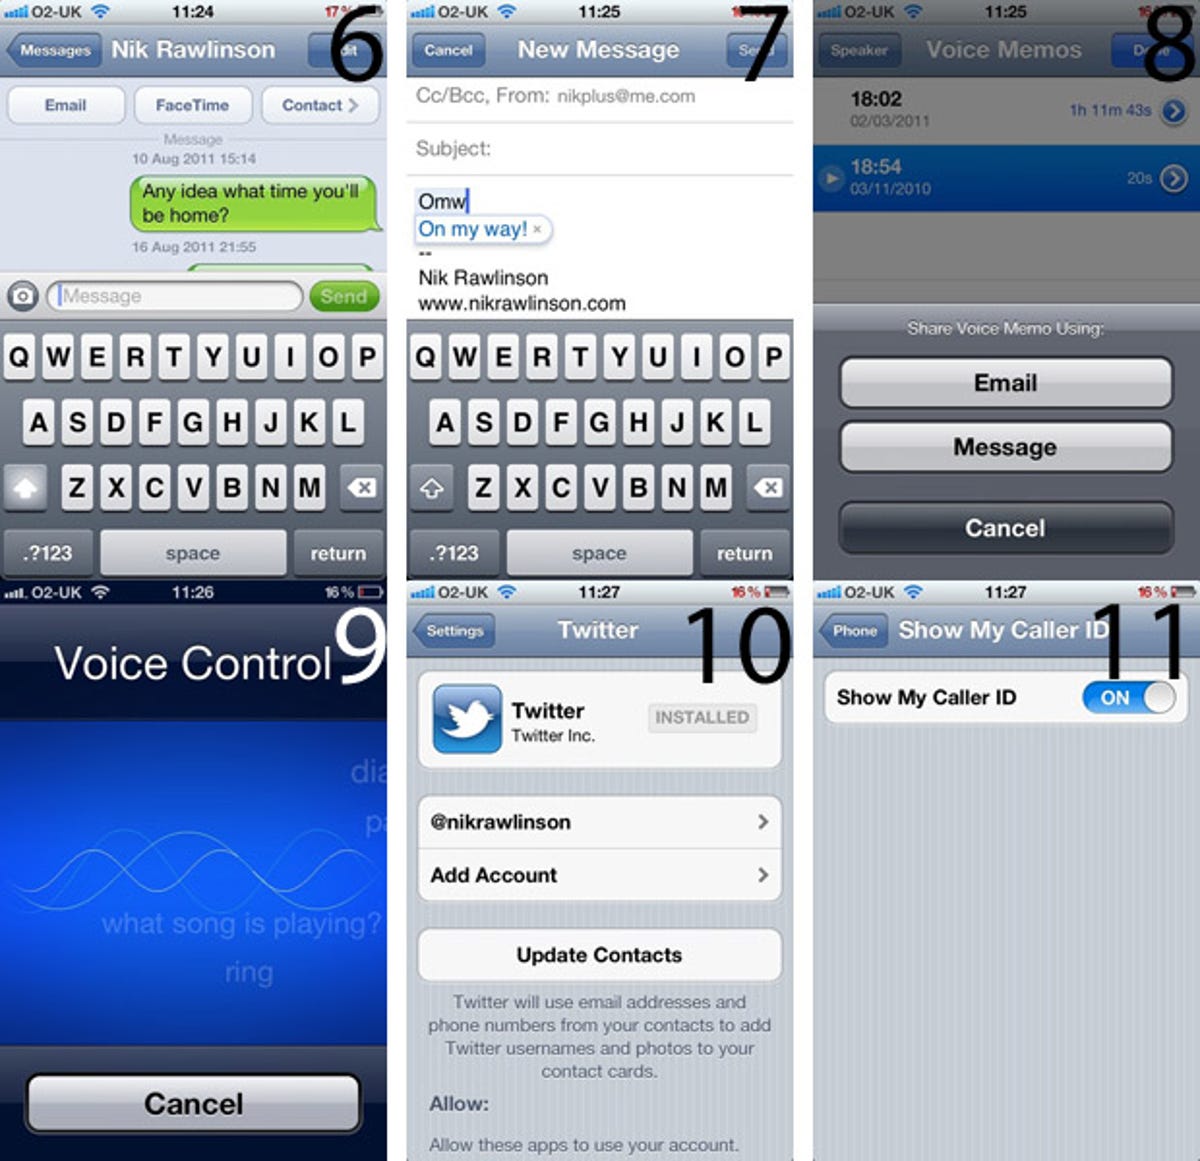
- 6. Send free messages to other iPhone, iPad and iPod touch owners with iMessage. Built into the same Messages app used to send SMS and MMS messages, it directly addresses other iOS 5 users, so, if your family and friends have all upgraded, you won't end up cutting into your bundled text allowance.
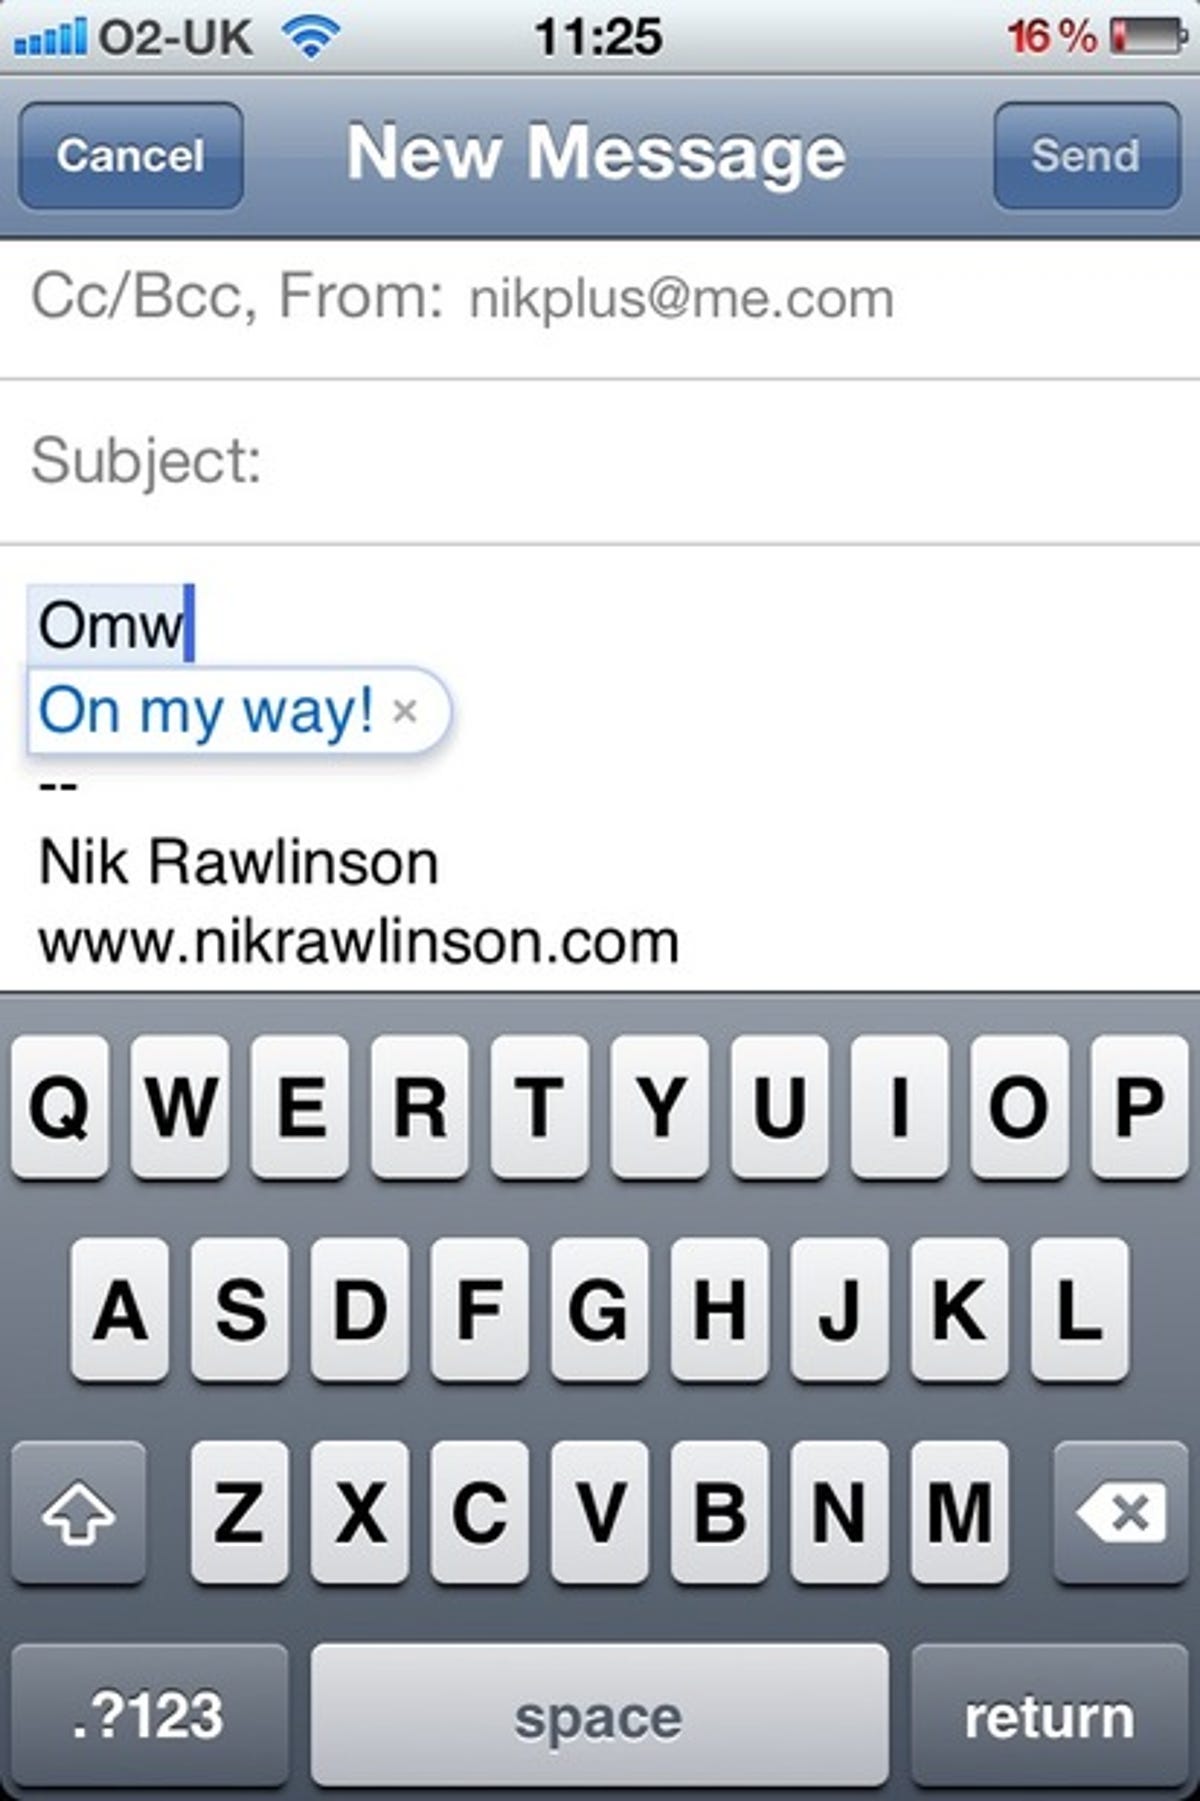
- 7. Save time when typing emails or texts by defining a set of shortcut replacements. Apple has already defined 'omw' for you as 'On my way!'. To see how this works, open a new email and tap in those three letters, followed by a space, and you'll see they expand to the full expression. Define your own shortcuts by going to 'settings', and selecting 'general', then 'keyboard' and then 'shortcuts'.
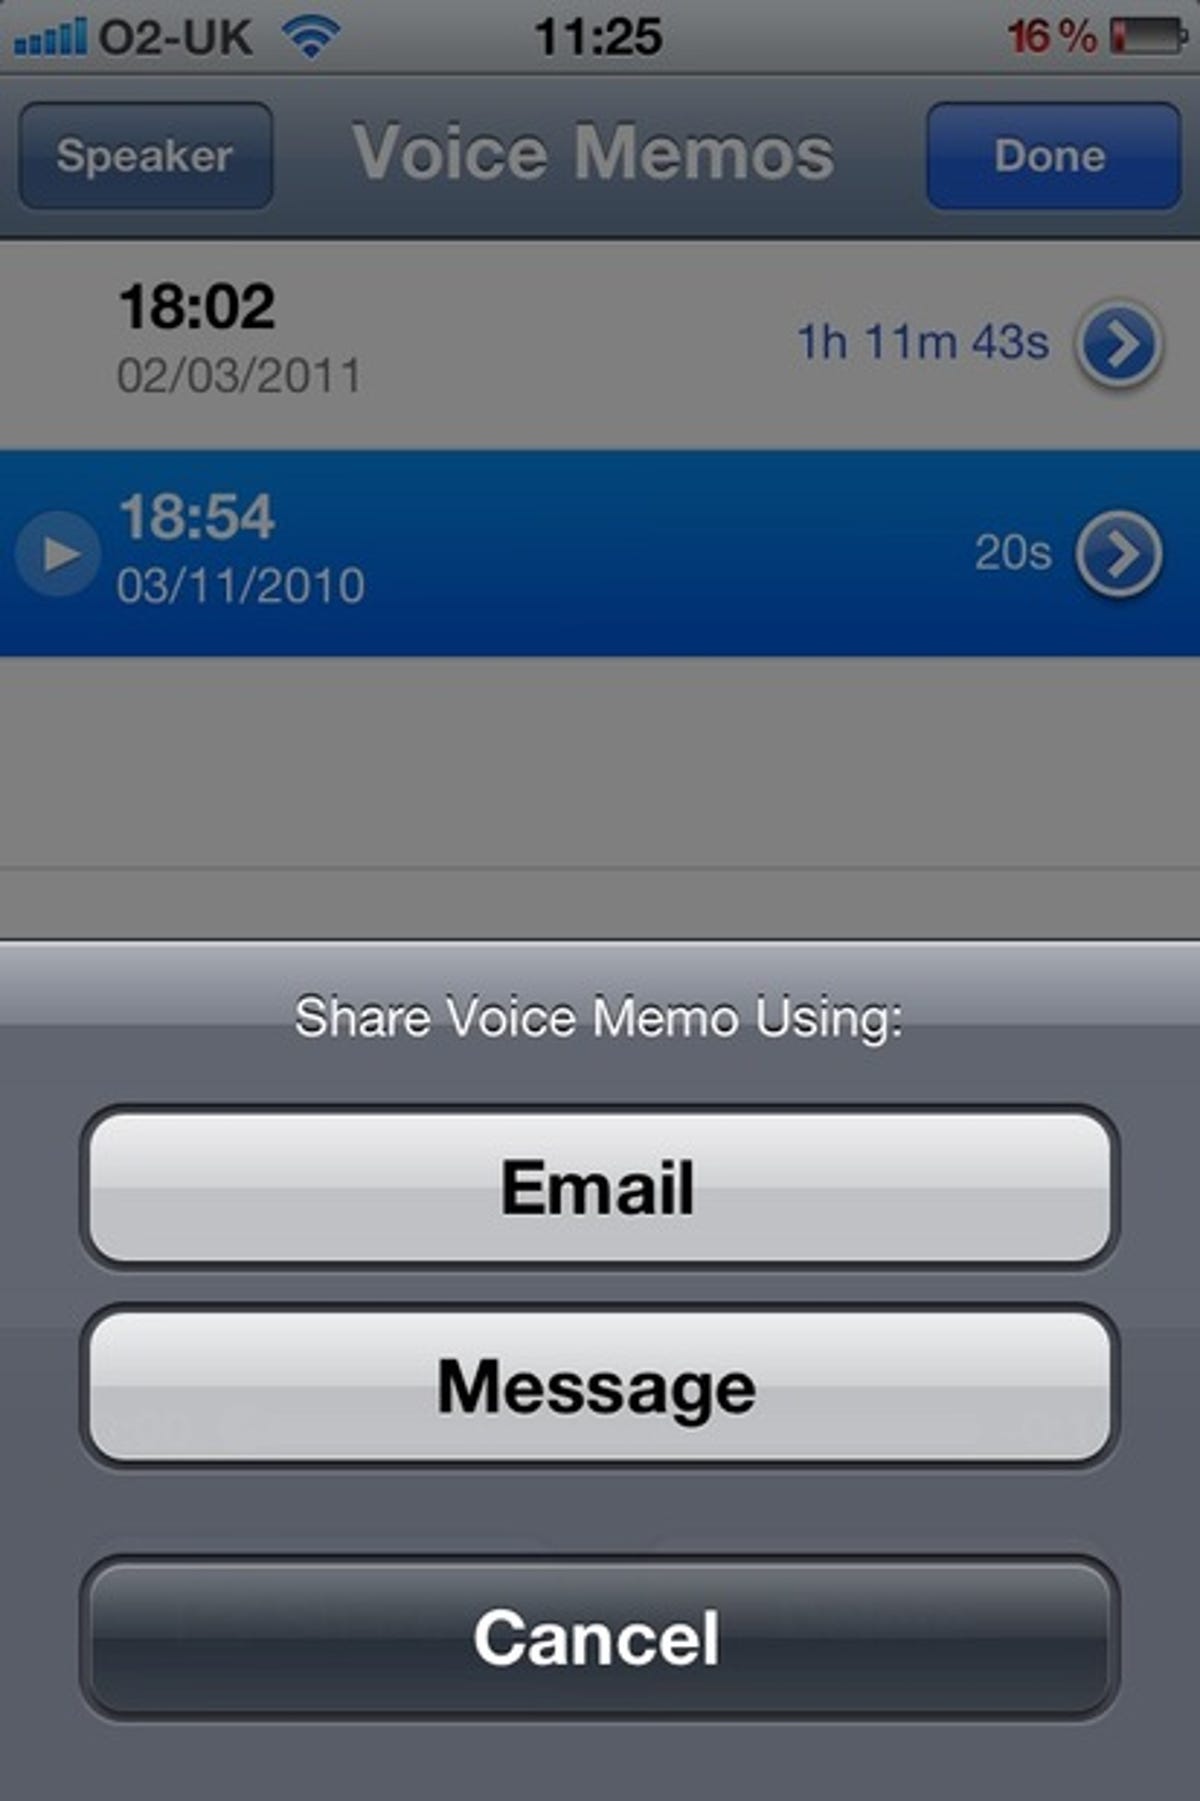
- 8. Send your beloved a romantic sonnet, read aloud, rather than typed. Use the Voice Memos app to record your performance, then tap the menu button (the horizontal lines in a silver circle). Tap the recording, followed by 'share' and then 'message' to send it to another iOS 5 user, or 'share' and then 'email' to send it to their inbox.
- 9. Stay safe while driving by activating Voice Control. Hold the home button for three seconds to switch from tapping to talking as a method of input. Then tell your iPhone what you want it to do. We've had mixed results, so it's fortunate that the iPhone confirms what it's going to do before obeying your command. If it's going to call Denise instead of Dennis, you can stop it in time.
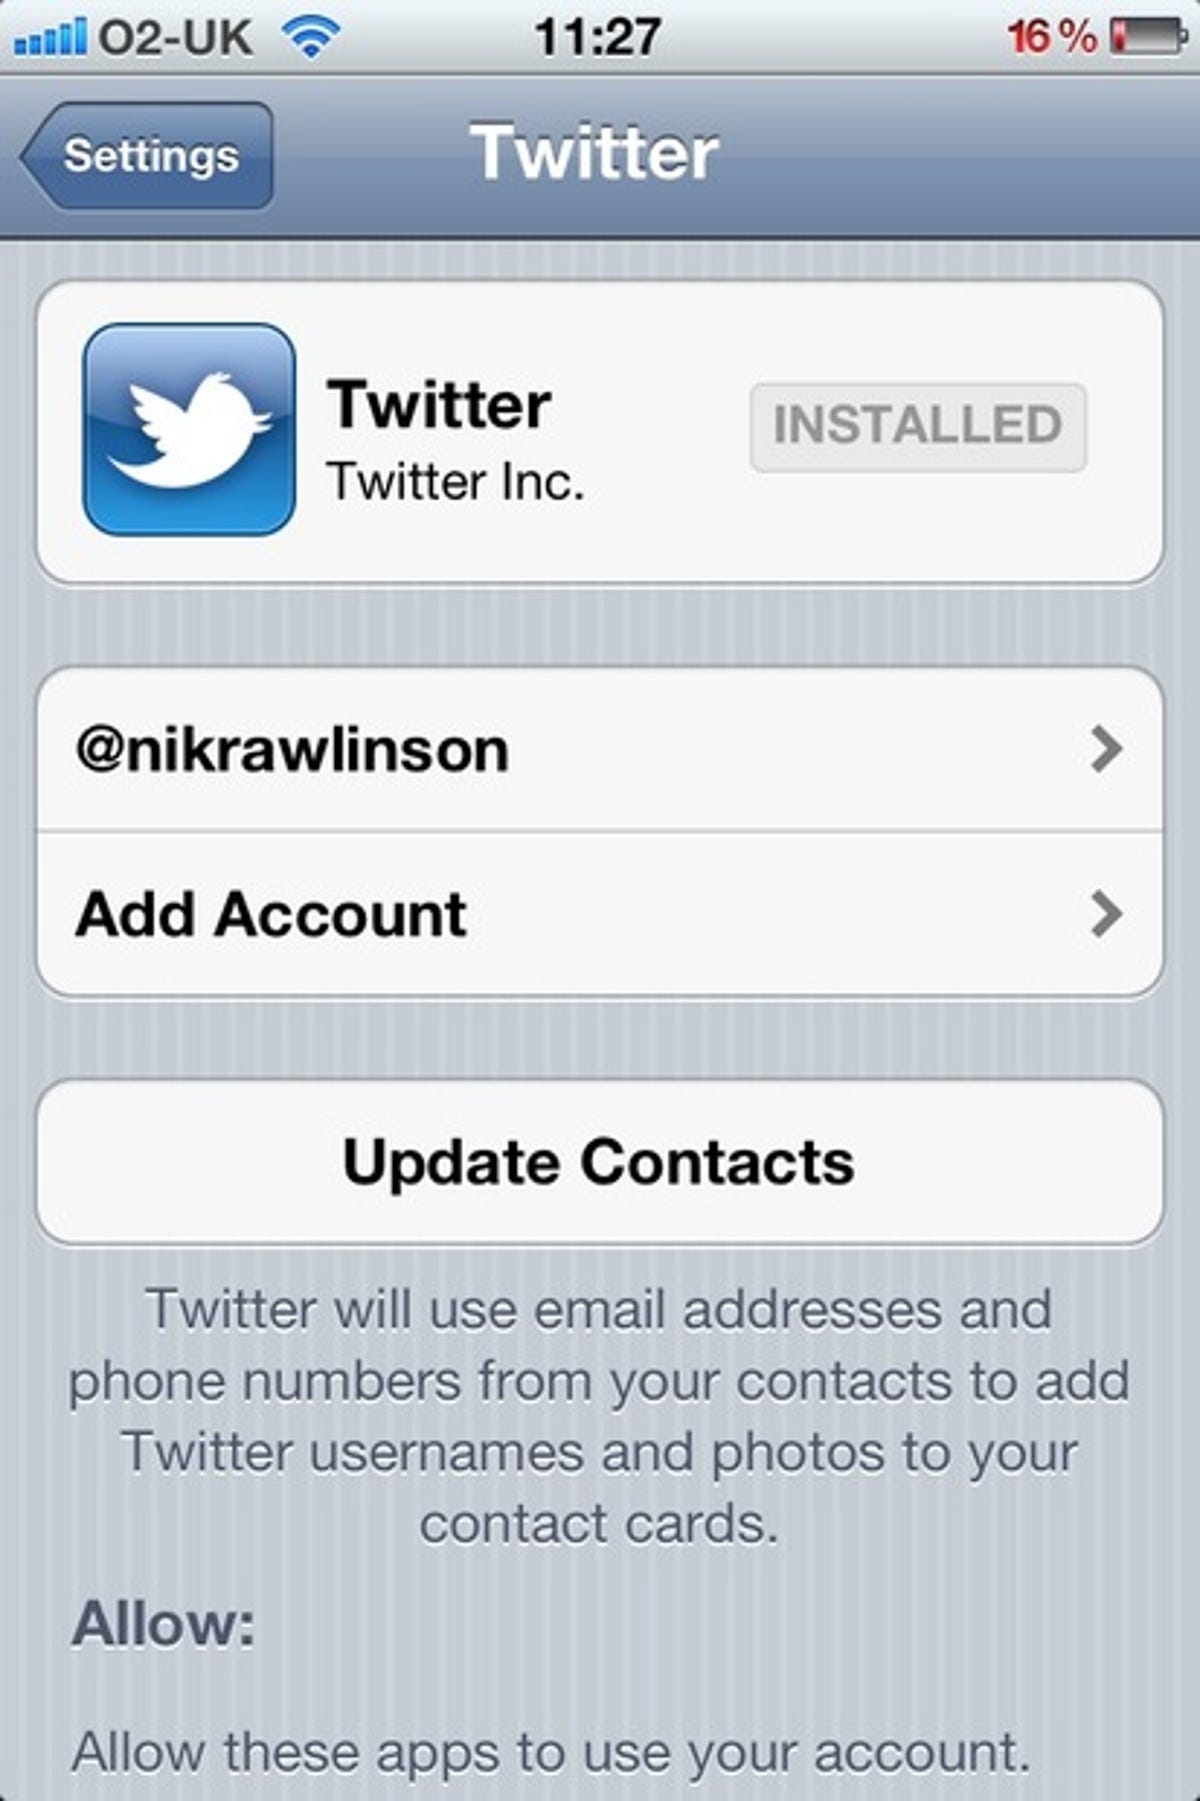
- 10. iOS 5 introduced full Twitter integration, allowing you to tweet links to your favourite YouTube clips or Web pages, or check in by posting your location. It needs your Twitter login details to do this, so tap 'settings' and then 'Twitter' to enter your user name and password for one or more accounts.
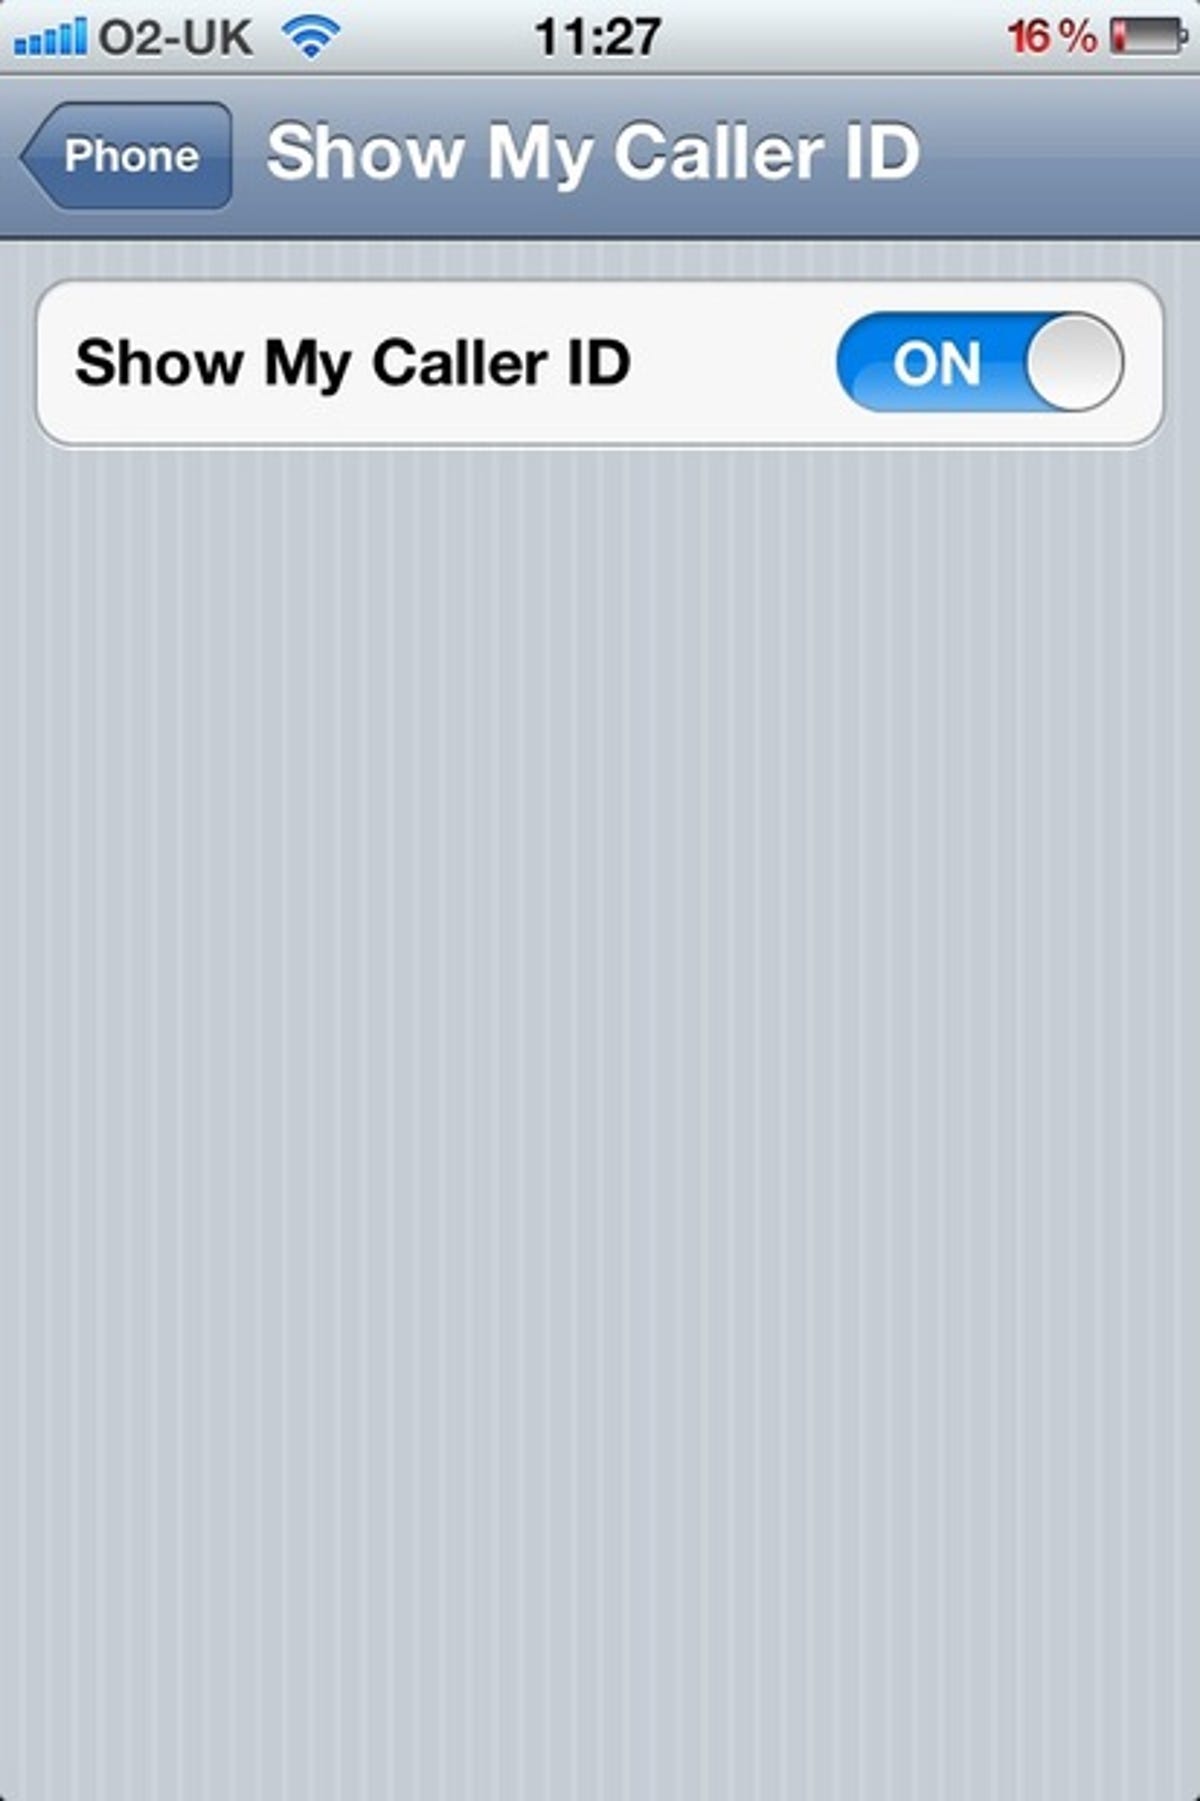
- 11. By default, your iPhone sends out your caller ID when making calls. If you'd rather not have people screening you, and you'd prefer not to give out your number to anyone you call, turn this off at 'settings', 'phone', and then 'show my caller ID'.
Notes and Weather
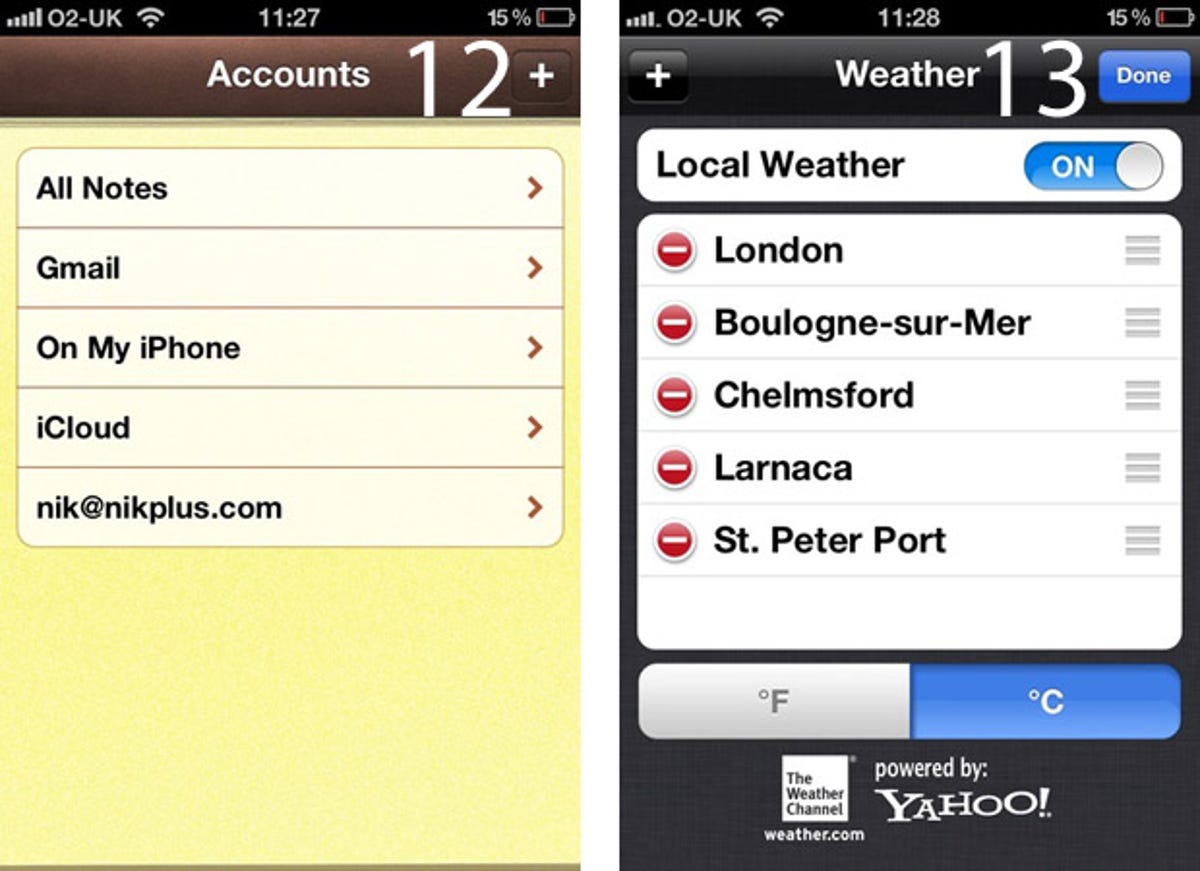
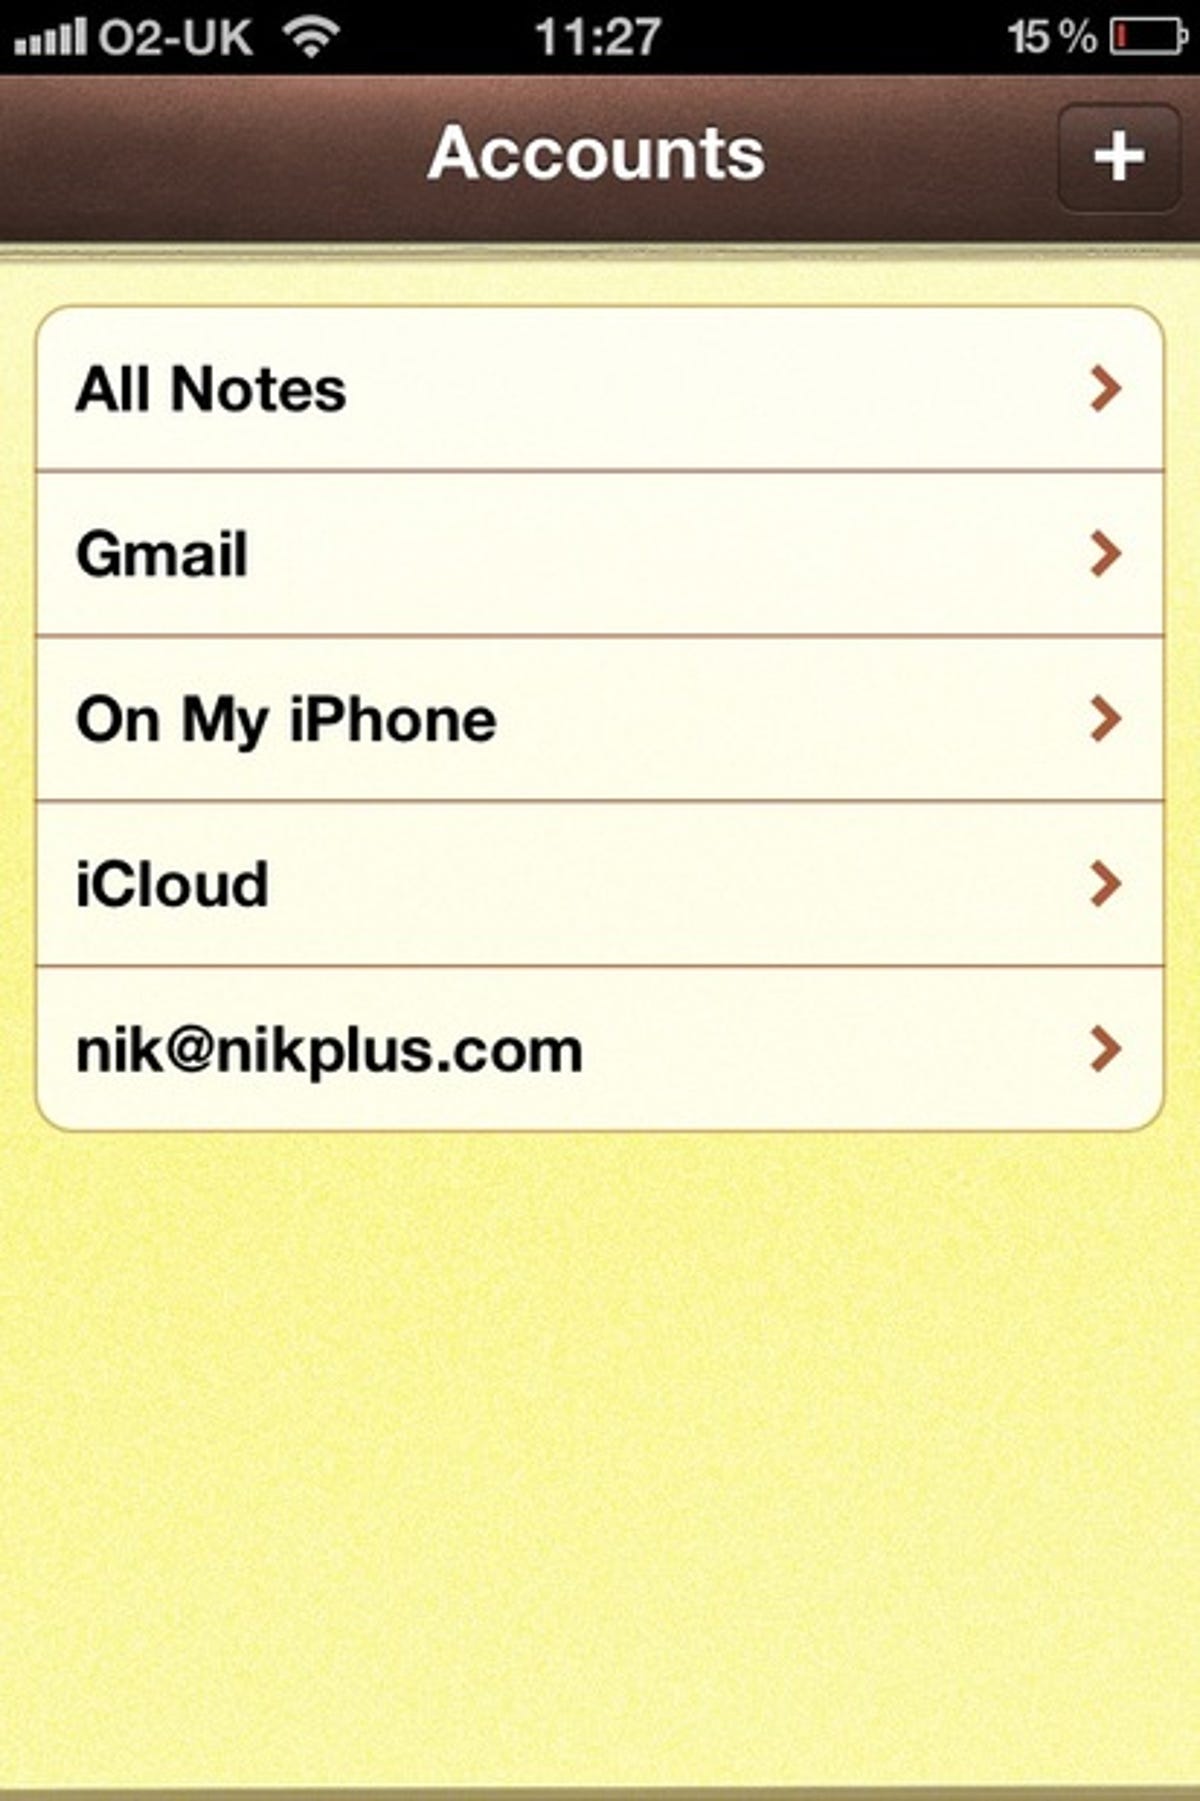
- 12. Notes automatically syncs with iCloud so that your jottings appear in Mail on your Mac. If you've switched your online communications to Google Apps, though, change this feature so that it syncs with Google's offerings. Open Notes, tap 'accounts', and select your Gmail account or Google-hosted domain as your container for new notes.
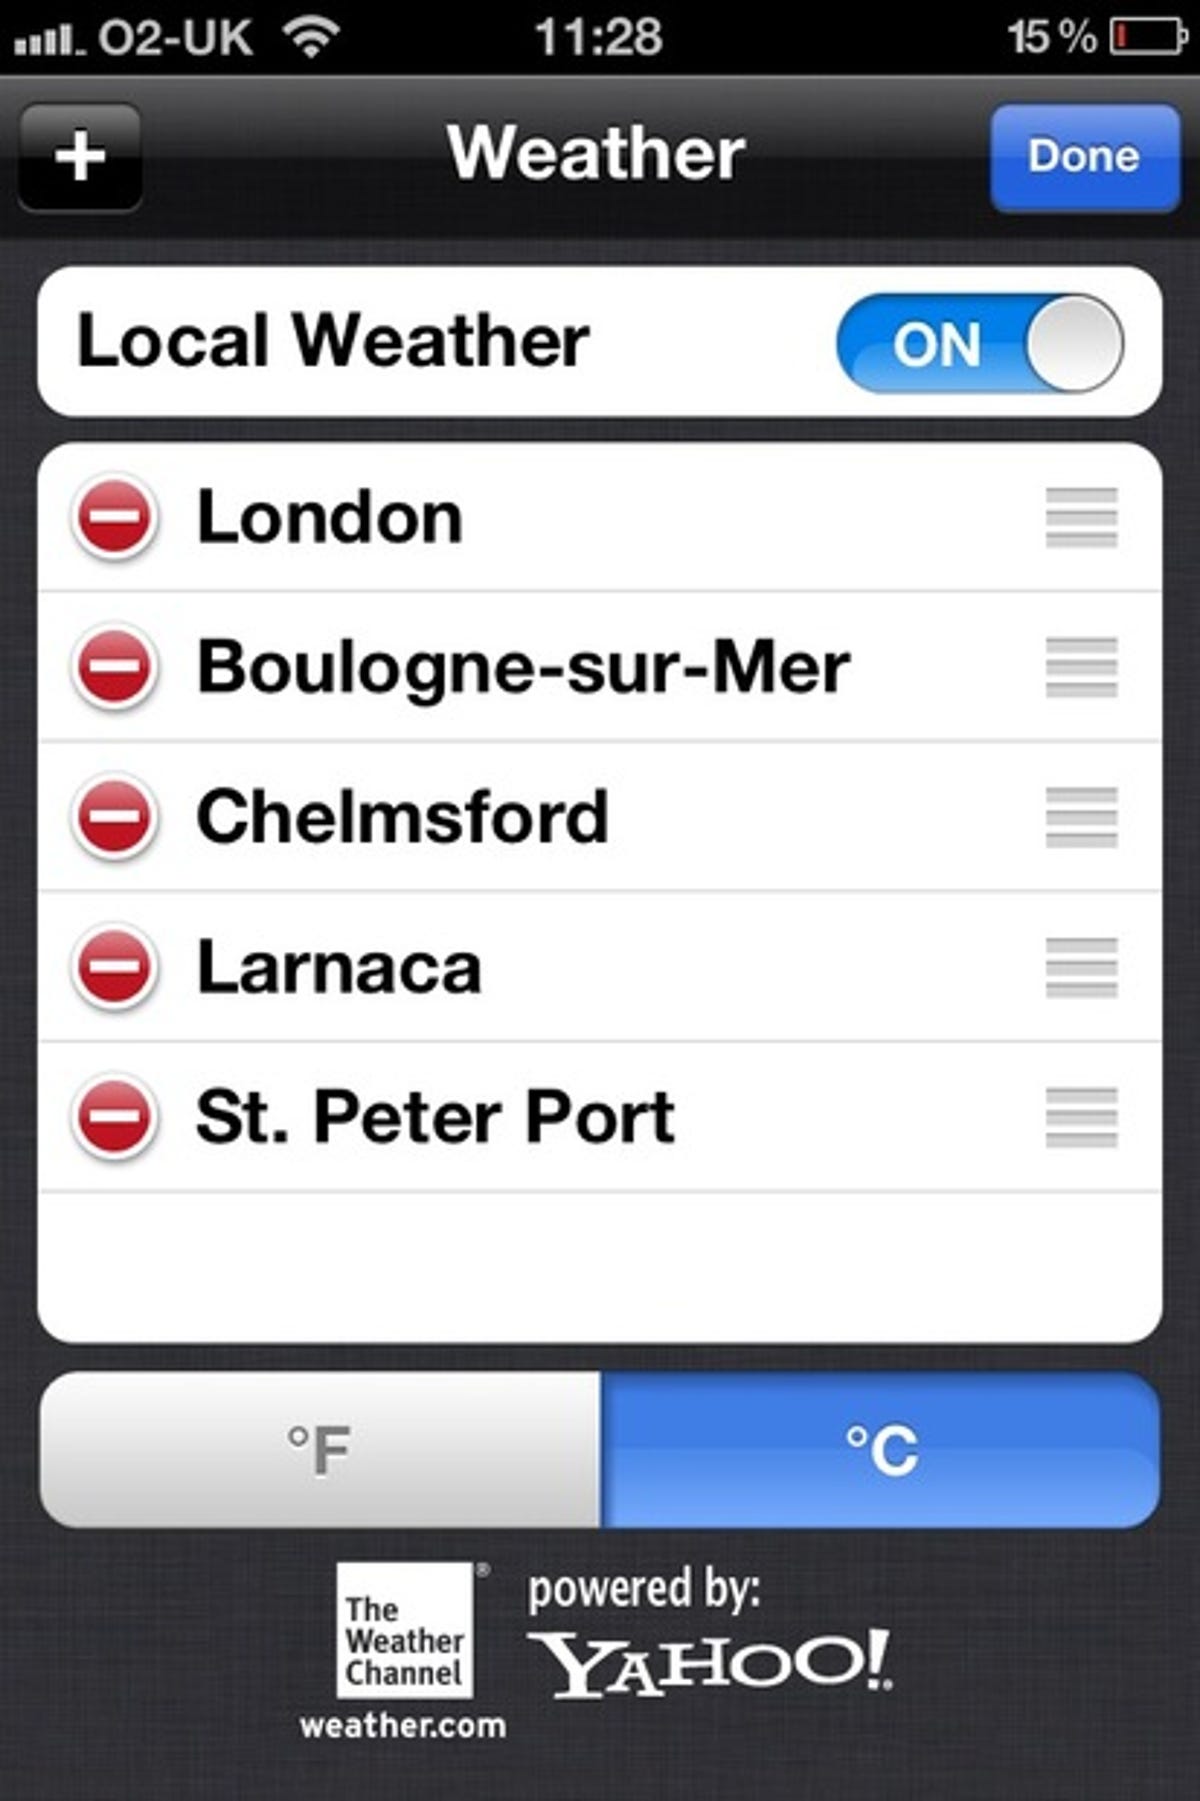
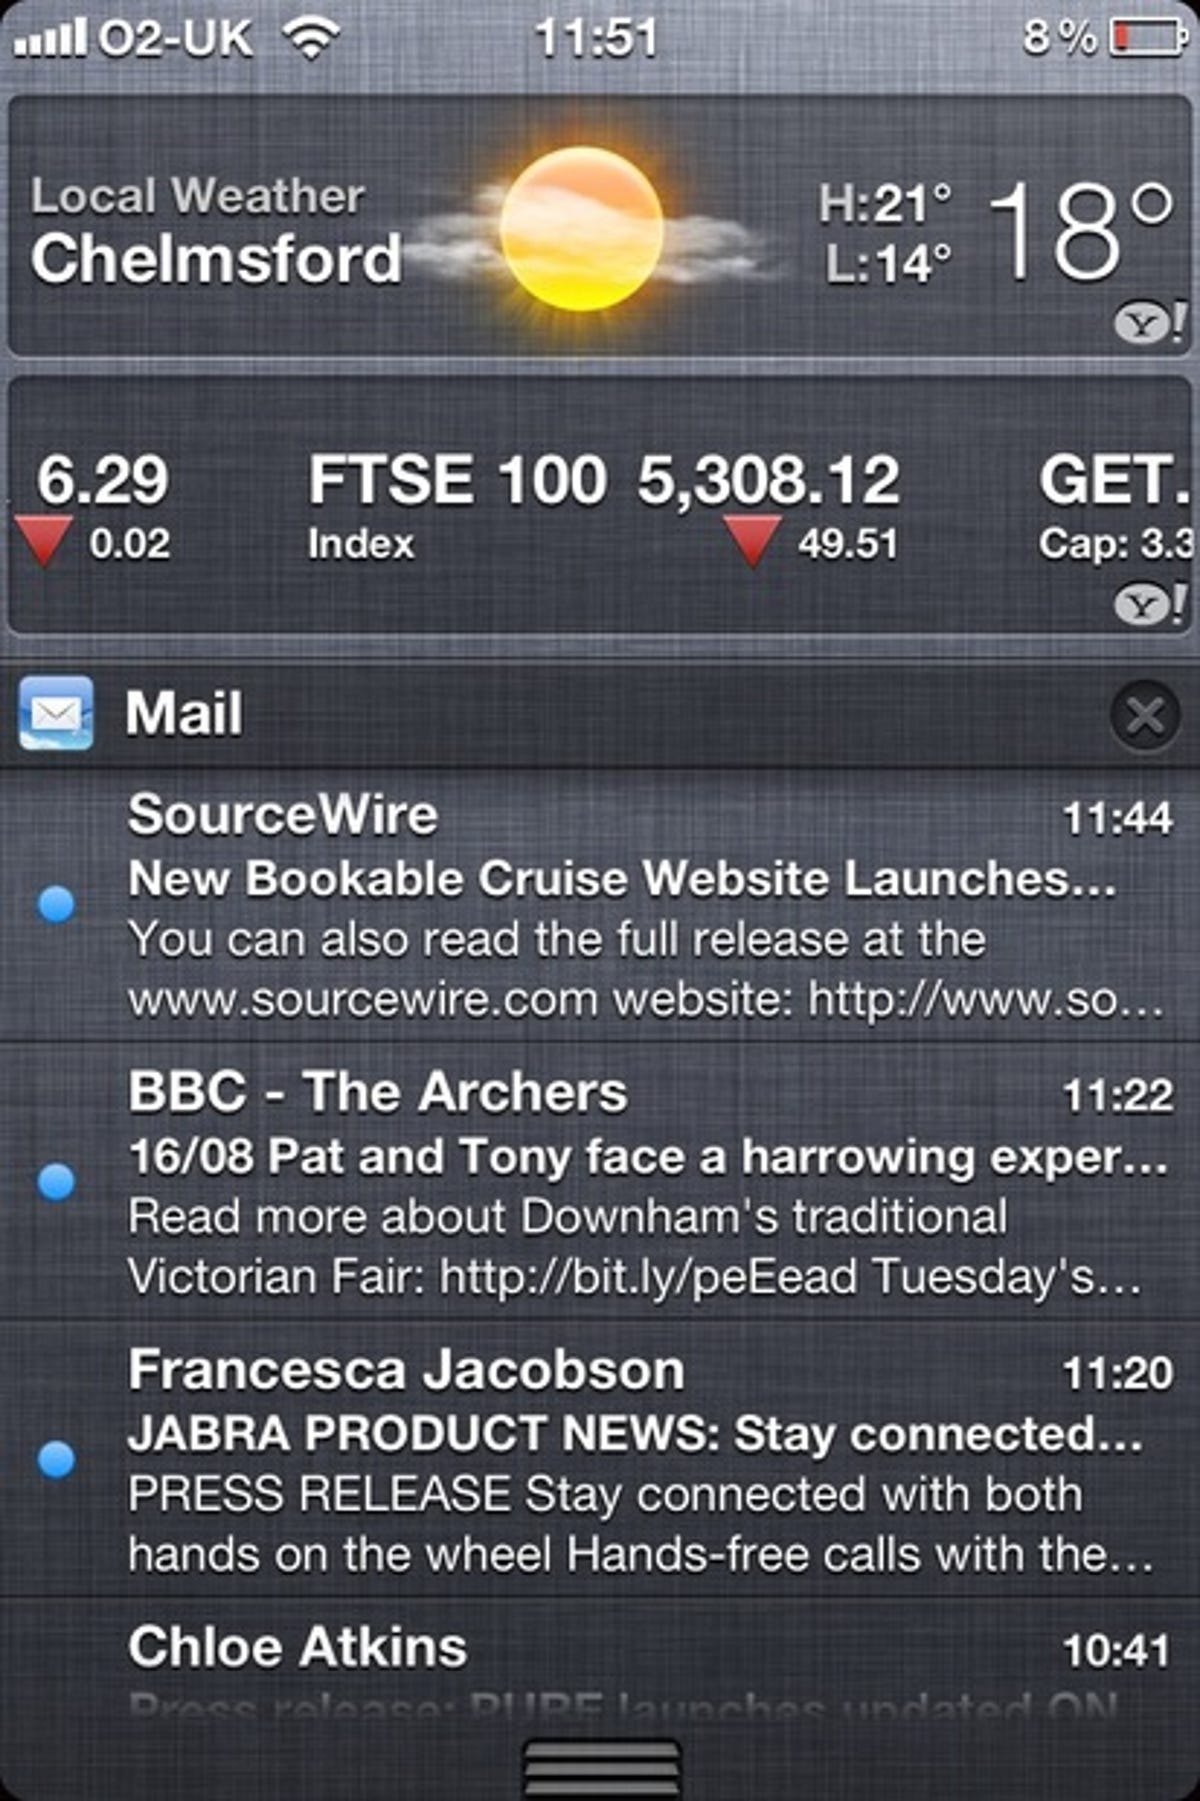
- 13. Forget about hunting around for the closest city in the Weather app -- use your iPhone's built-in GPS feature to find out about the local conditions. Tap the 'i' in Weather's lower-right corner and tap the slider for 'local weather'. You'll see that the left-most dot on the saved cities slider is now a direction pointer, indicating that the app's tracking your location.
Entertainment
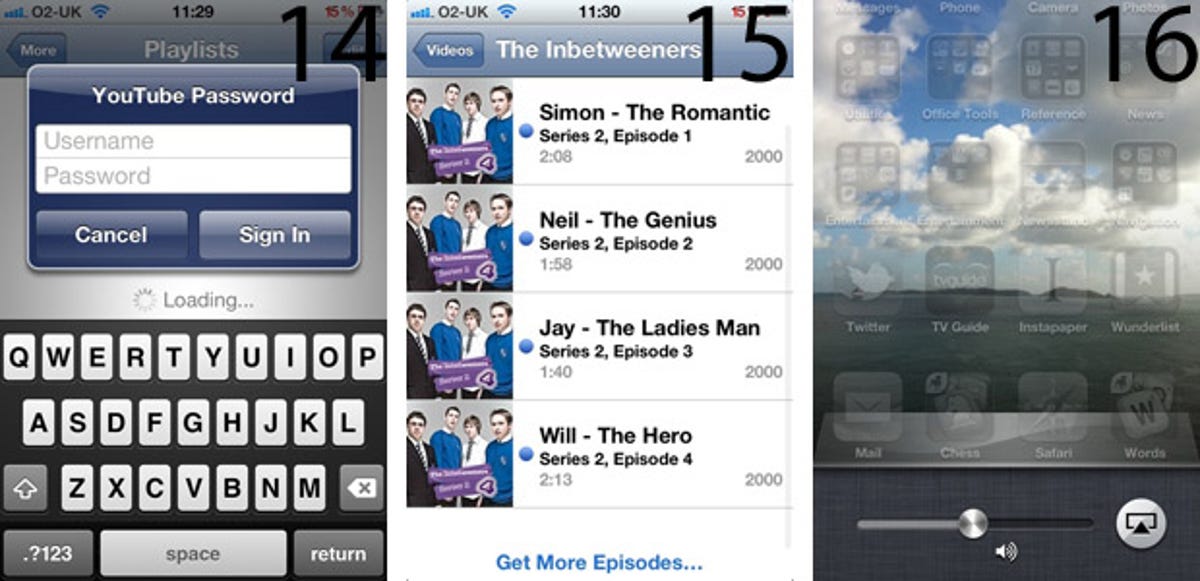
- 14. Are you a YouTube fanatic? If so, you'll want to synchronise your iPhone with your YouTube account so that your favourites and playlists follow you from your browser to your pocket. Open the YouTube app and tap 'more' and then 'playlists'. Supply your login credentials, and your playlists, subscriptions and uploaded videos will appear.
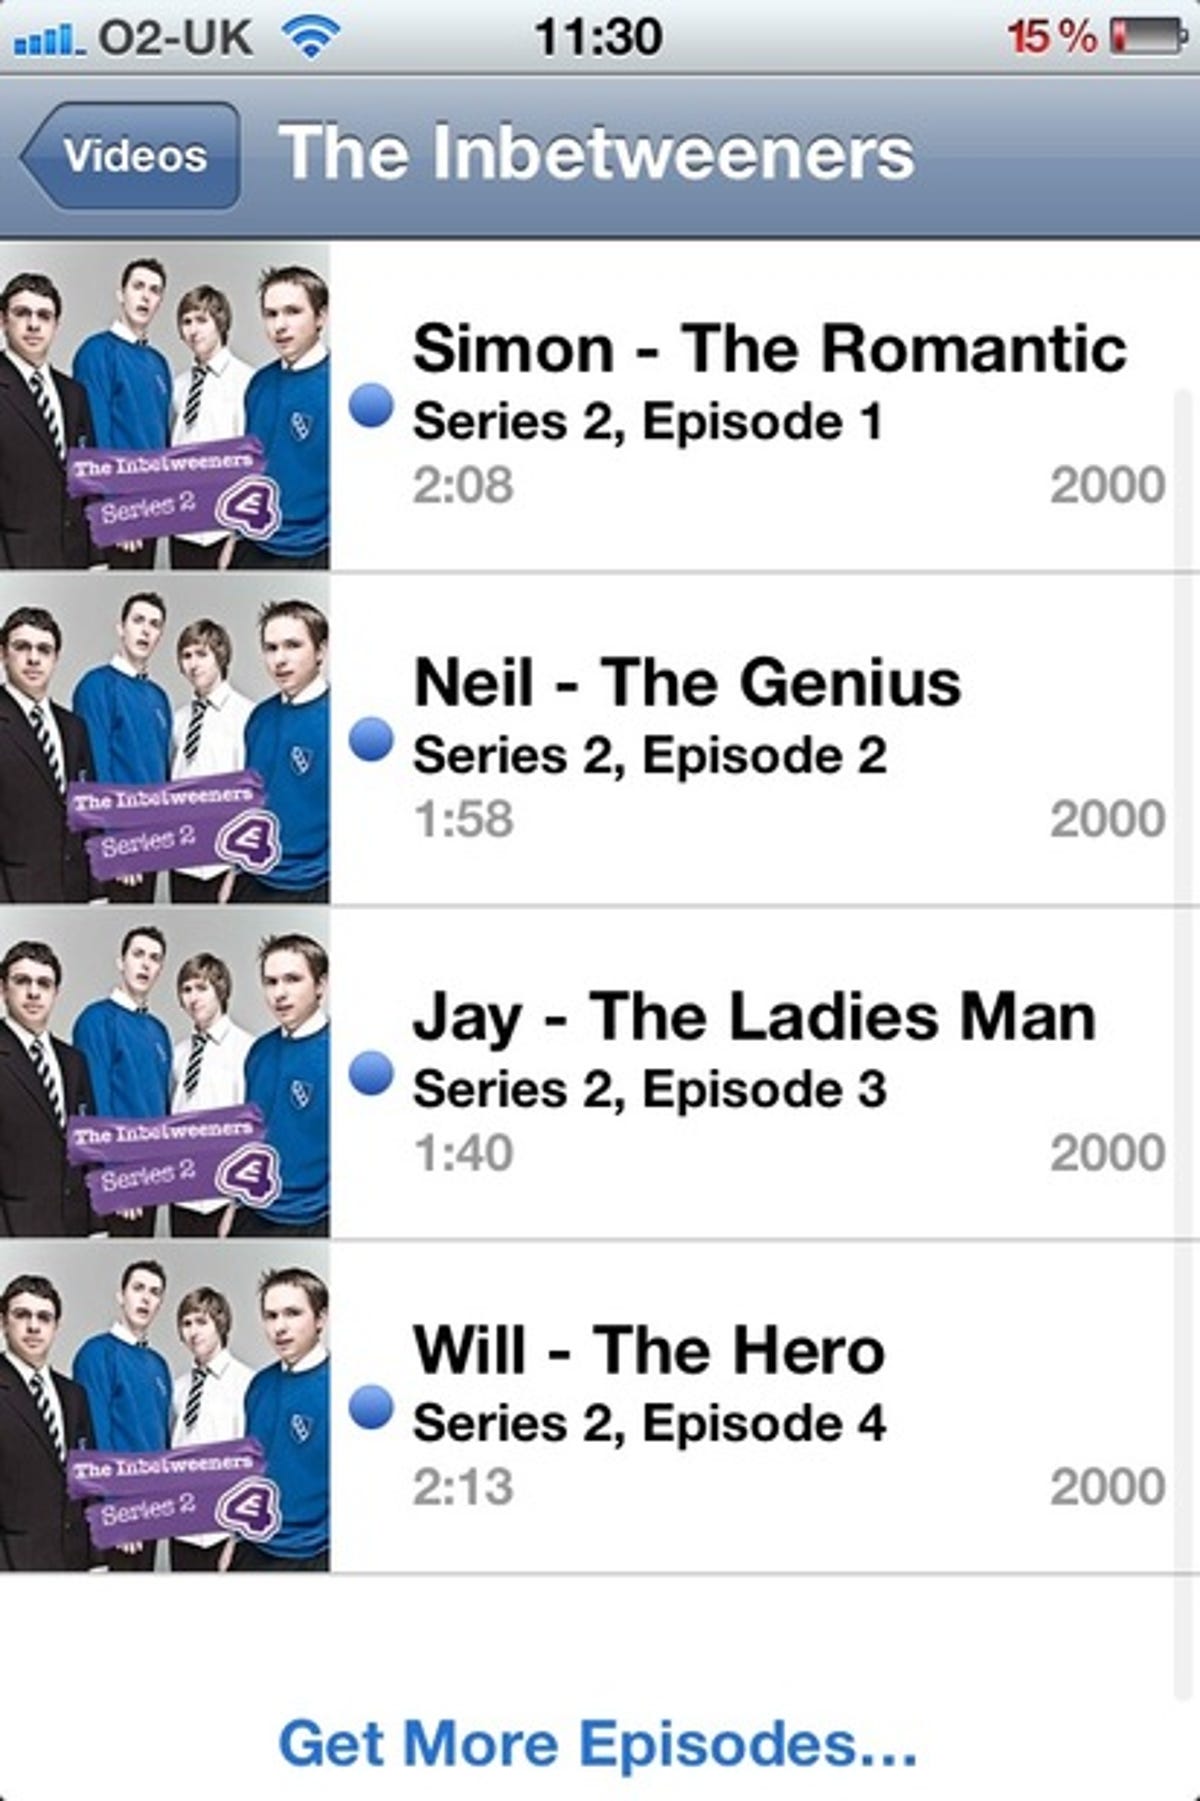
- 15. Apple has killed the iPhone's iPod app, replacing it with a Music app. The app still offers broadly matching features. In focusing more clearly on tunes, though, Apple's removed the video features. To find your downloaded and ripped movies and TV shows, use the new matching Videos app.
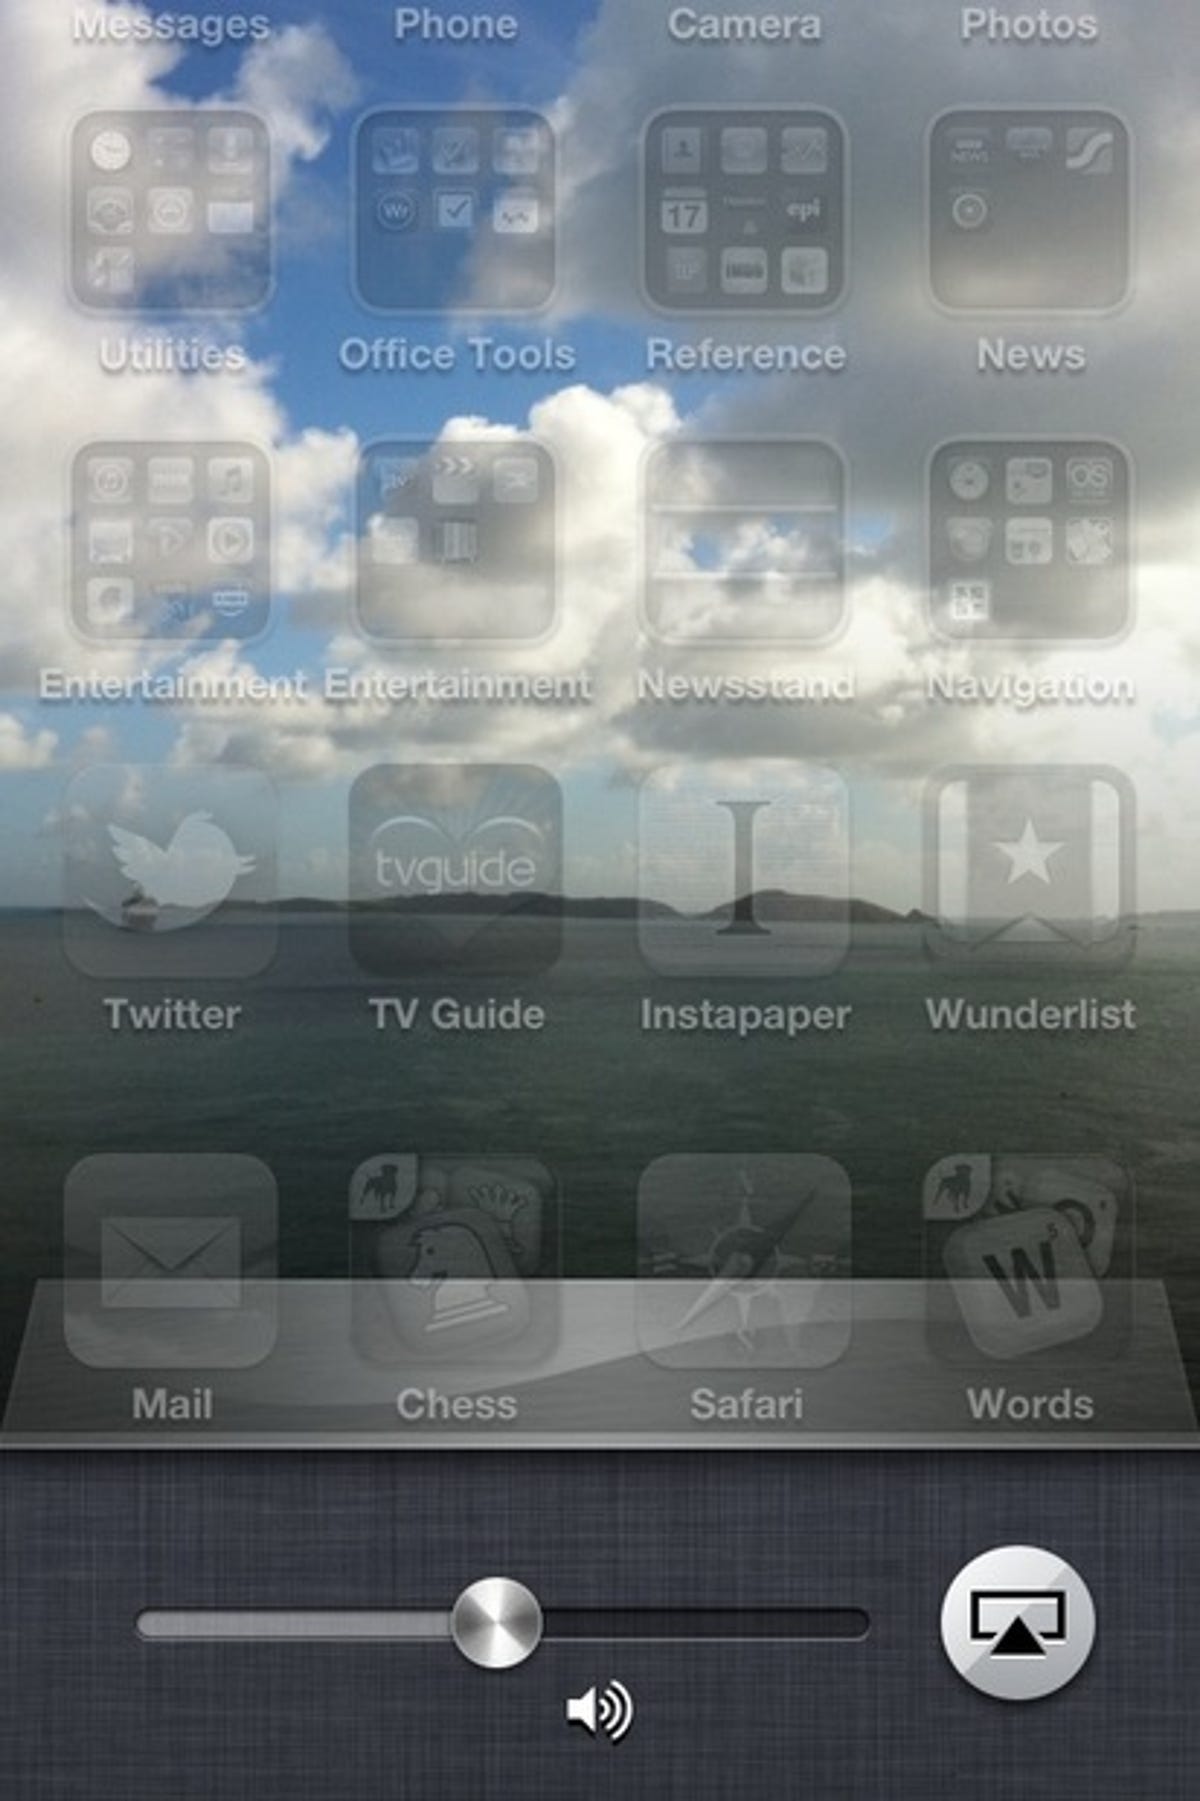
- 16. Send whichever track your iPhone is playing to your AirPlay-enabled speakers without returning to the Music app. Simple double-click the home button, swipe the toolbar twice to the right and tap the AirPlay icon.
iBooks
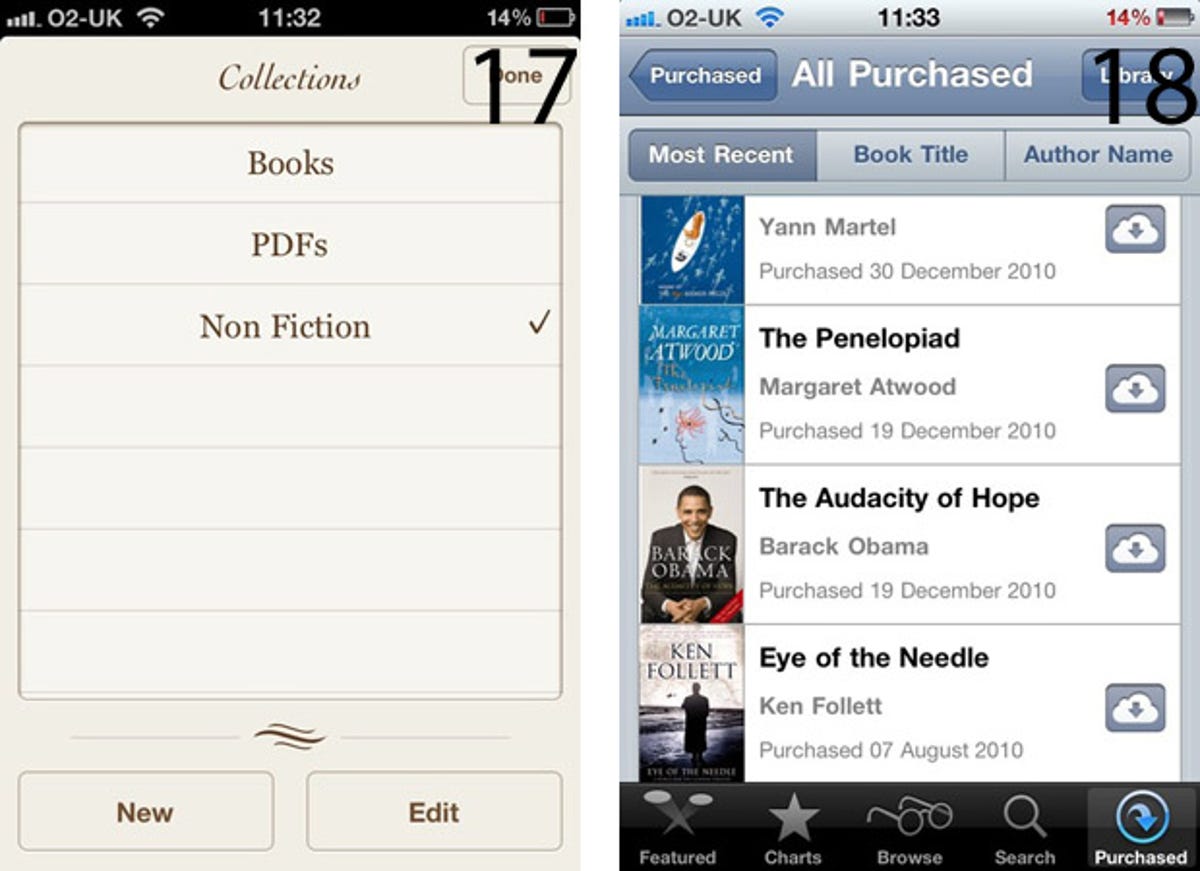
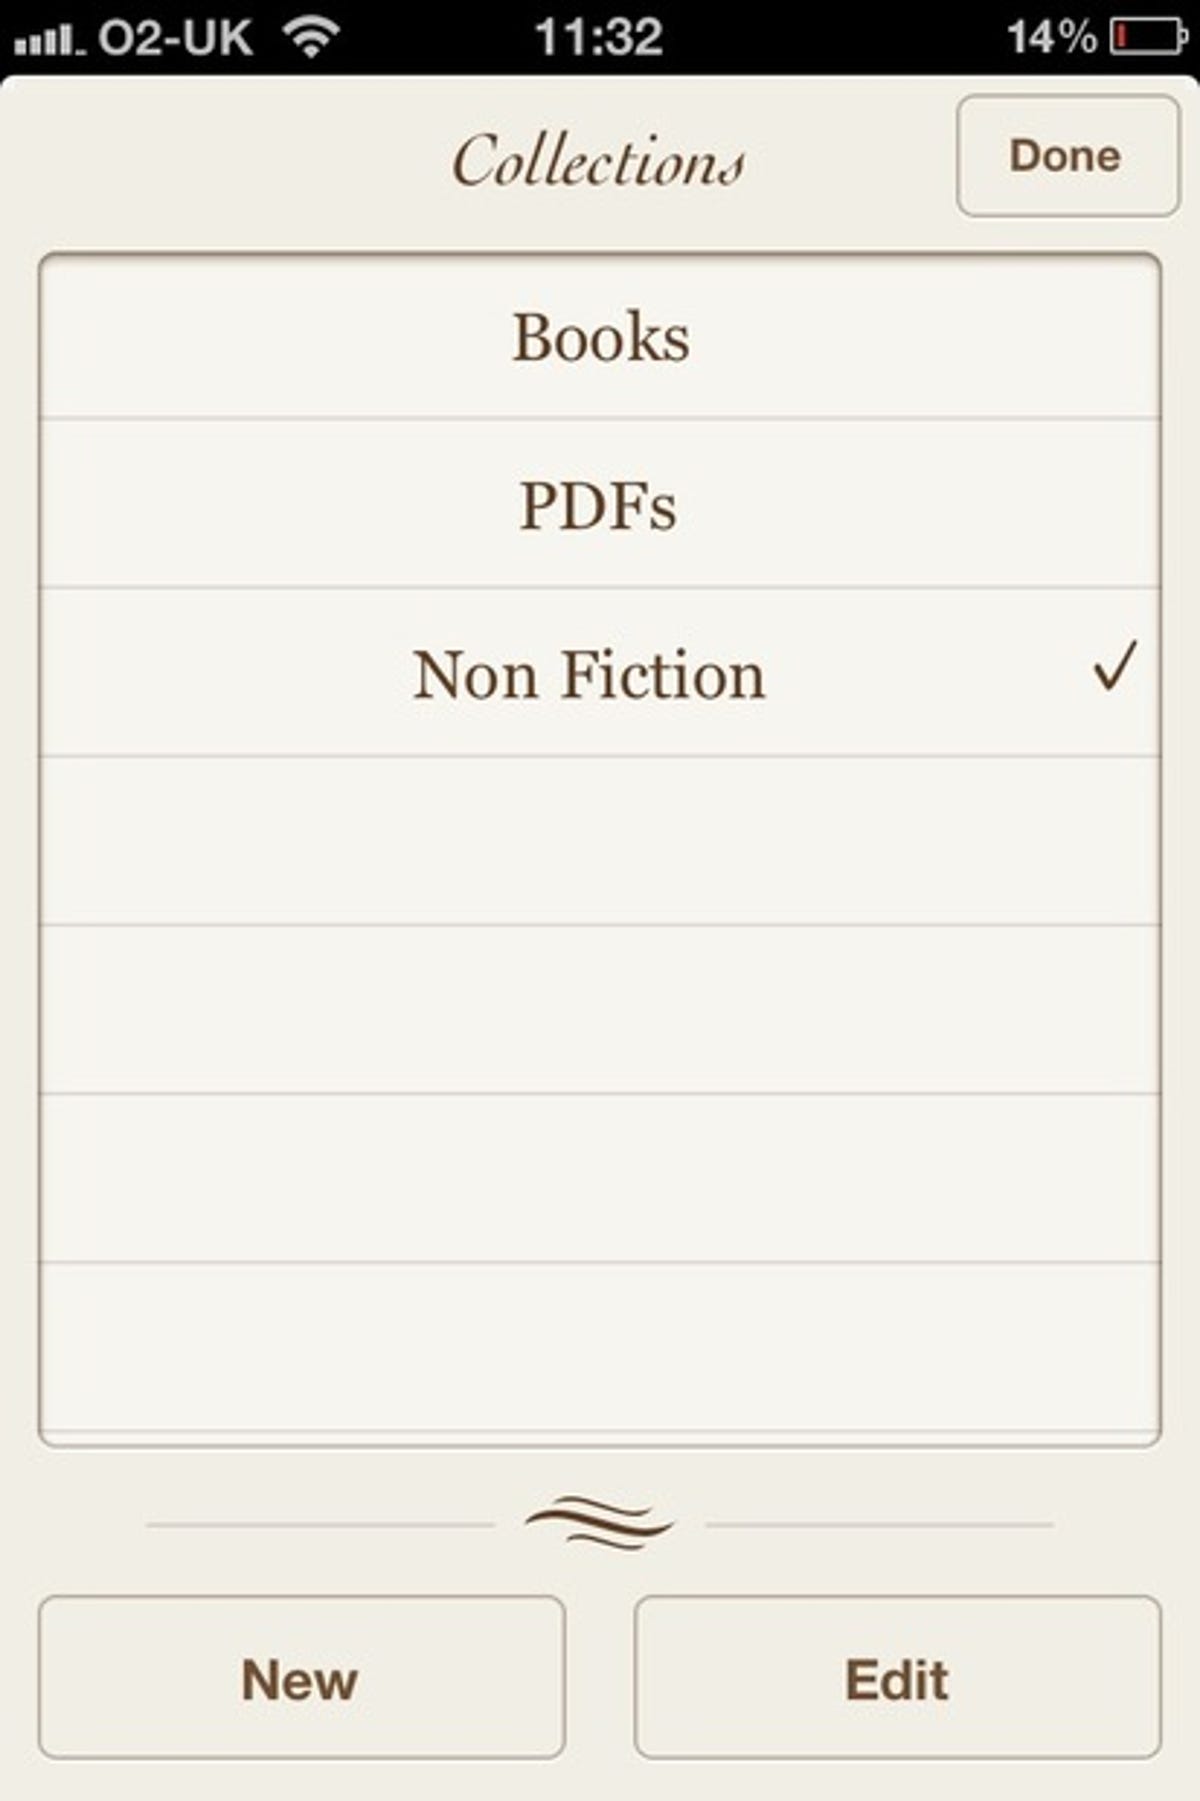
- 17. iBooks does a good job of stacking your books on its beautiful virtual shelves, but, as your collection starts to grow, its one-size-fits-all approach means those shelves will start to tower far beyond the top of the screen. Organise your books into more logical collections on the basis of subject, author, read status or whatever suits you best. Tap 'books' and then 'new' to define a new collection. Now, to file your books, return to your shelves and tap 'edit'. Select the books you want to move to your new collection and tap 'move'. Select the collection from the screen that pops up to complete the move.
- 18. iTunes has lost track of a couple of the books we've downloaded over time. Although it won't let you download lost books again through the store on your computer, you can do it through iOS. Tap 'store', 'purchased', 'not on this iPhone' and tap the cloud beside the books you want to retrieve.
Maps
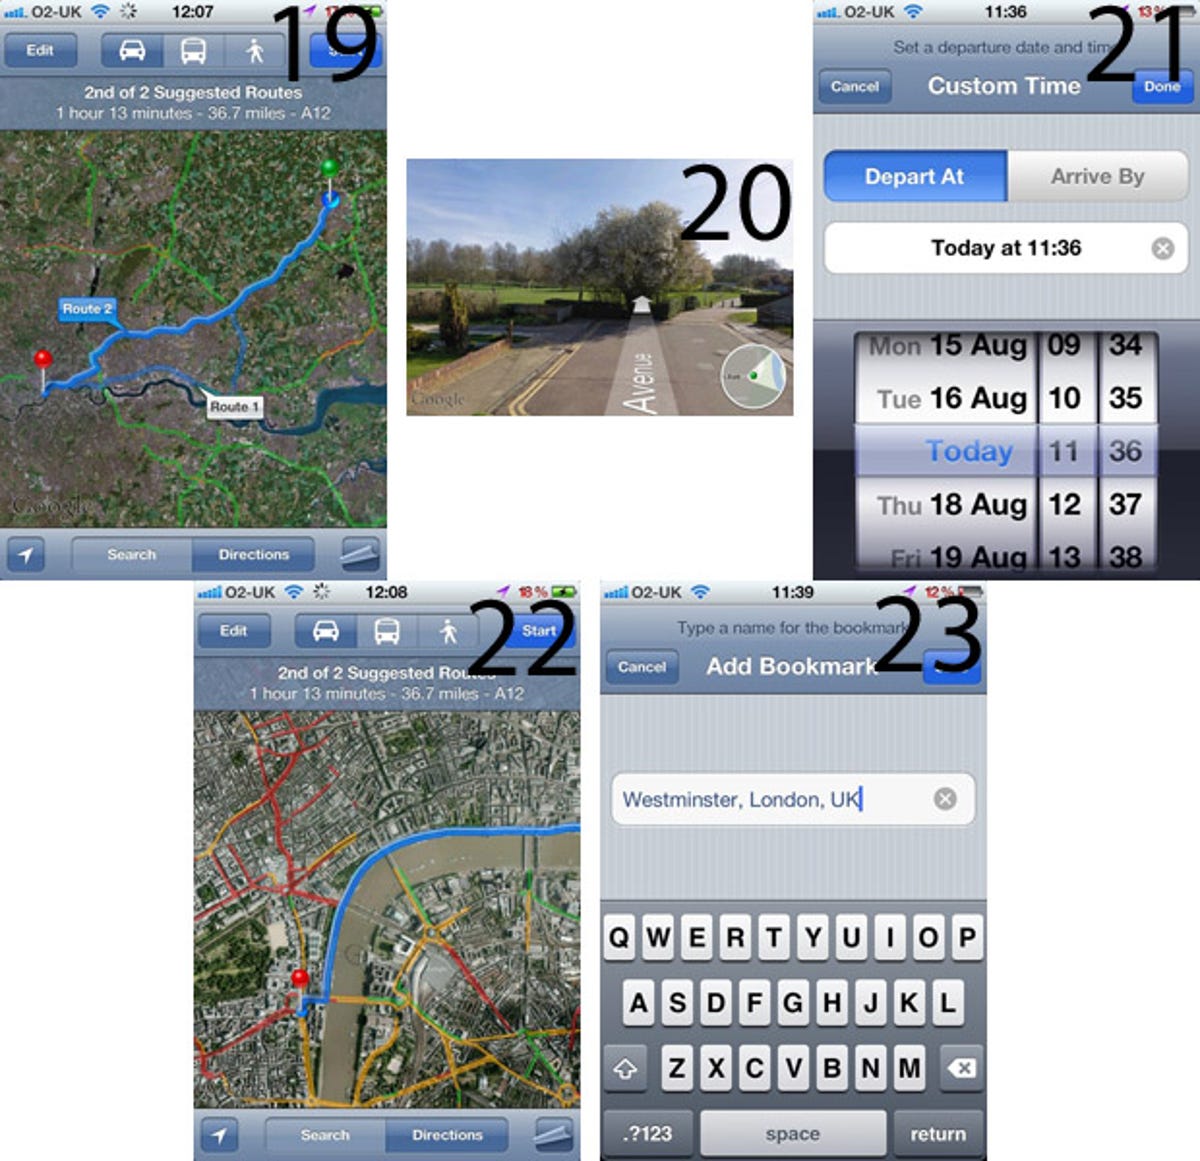
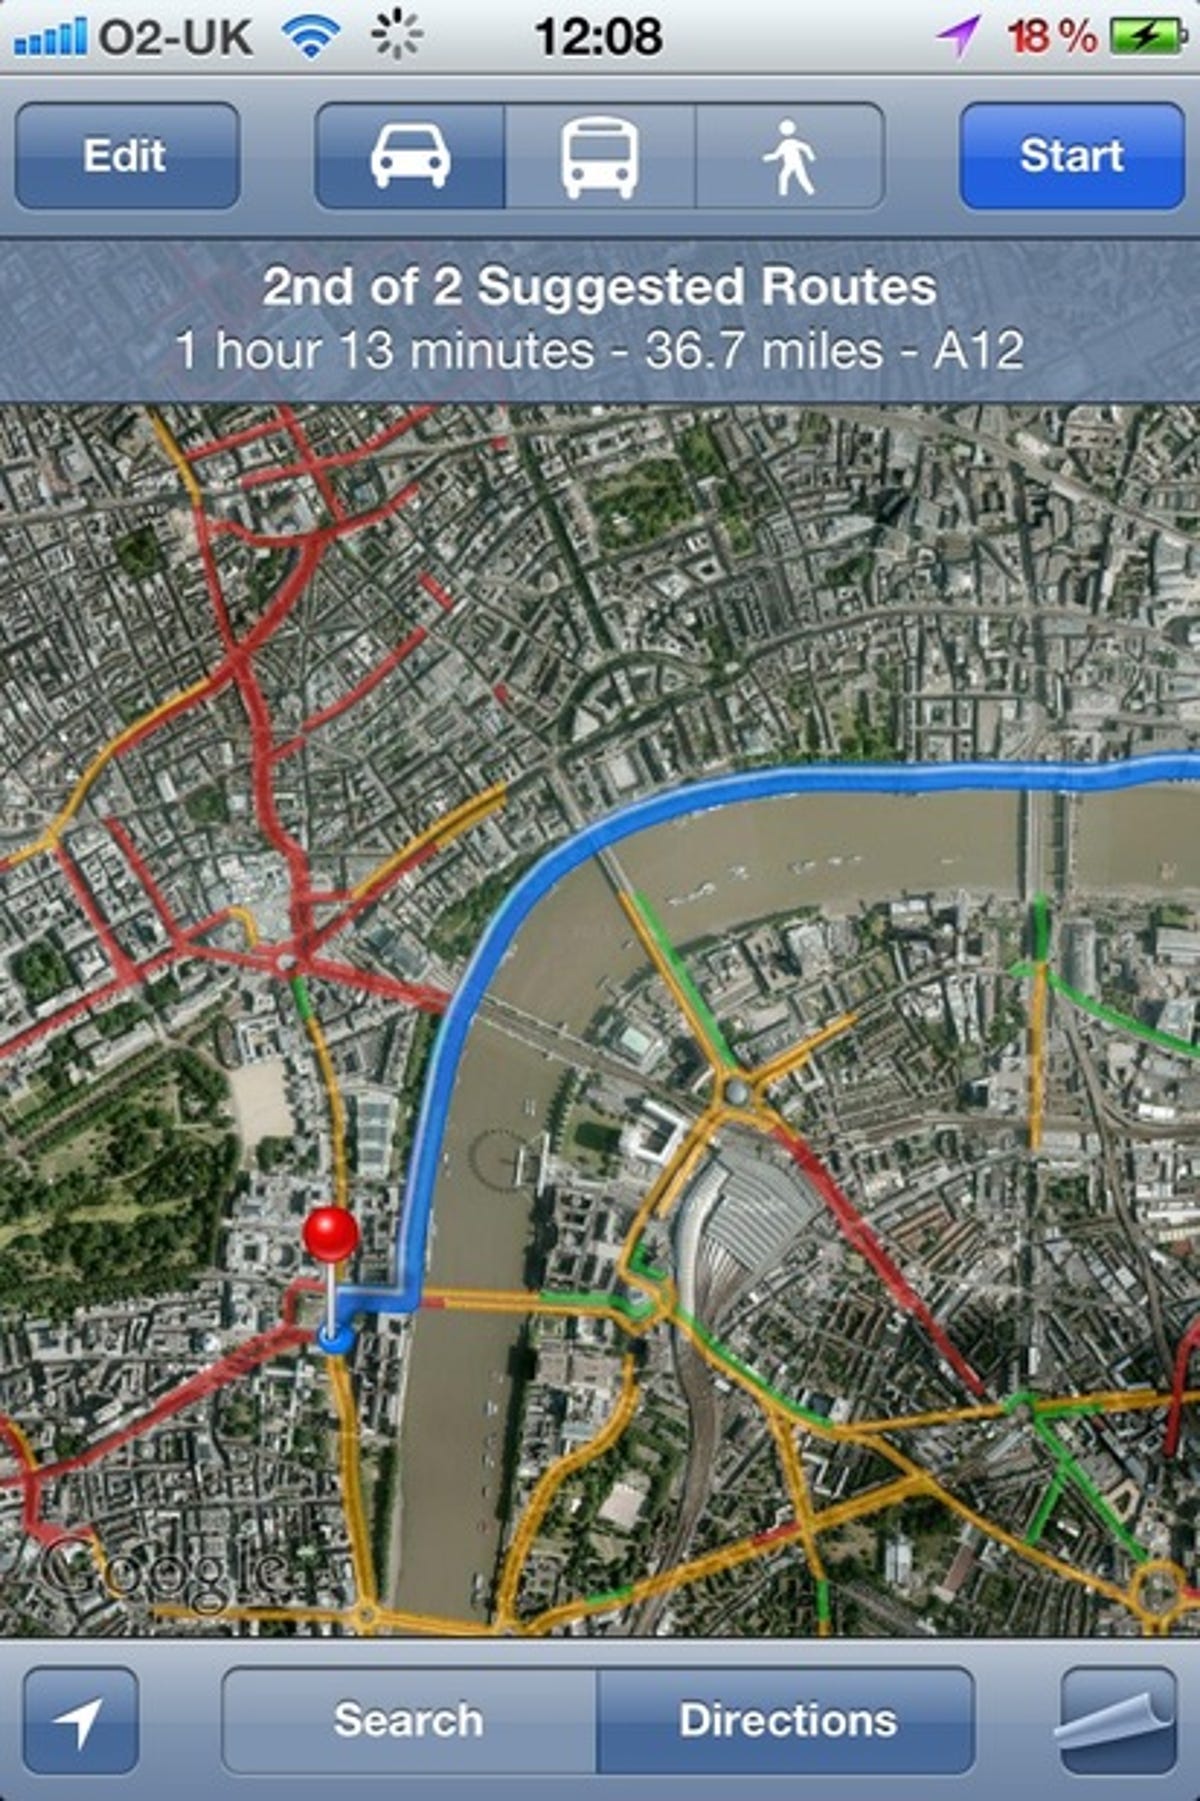
- 19. Maps was previously an all-or-nothing app, always insisting it knew best when planning routes. If you didn't like its suggestion, tough luck. In iOS 5, it now gives you options, so you can easily avoid known trouble spots. Tap each route on the map to see what difference it makes to your journey time. This largely gets around the inability to drag routes along alternative roads the way you can through a regular browser.
- 20. Maps incorporates Google Street View, but it's not immediately obvious how to find it. Start by looking up a location. Be as accurate as you can, as you want it to drop a pin as close as possible to the Street View scene you're after. Tap the pin, and then the man in the amber circle on the left of the pop-up to zoom into the street.
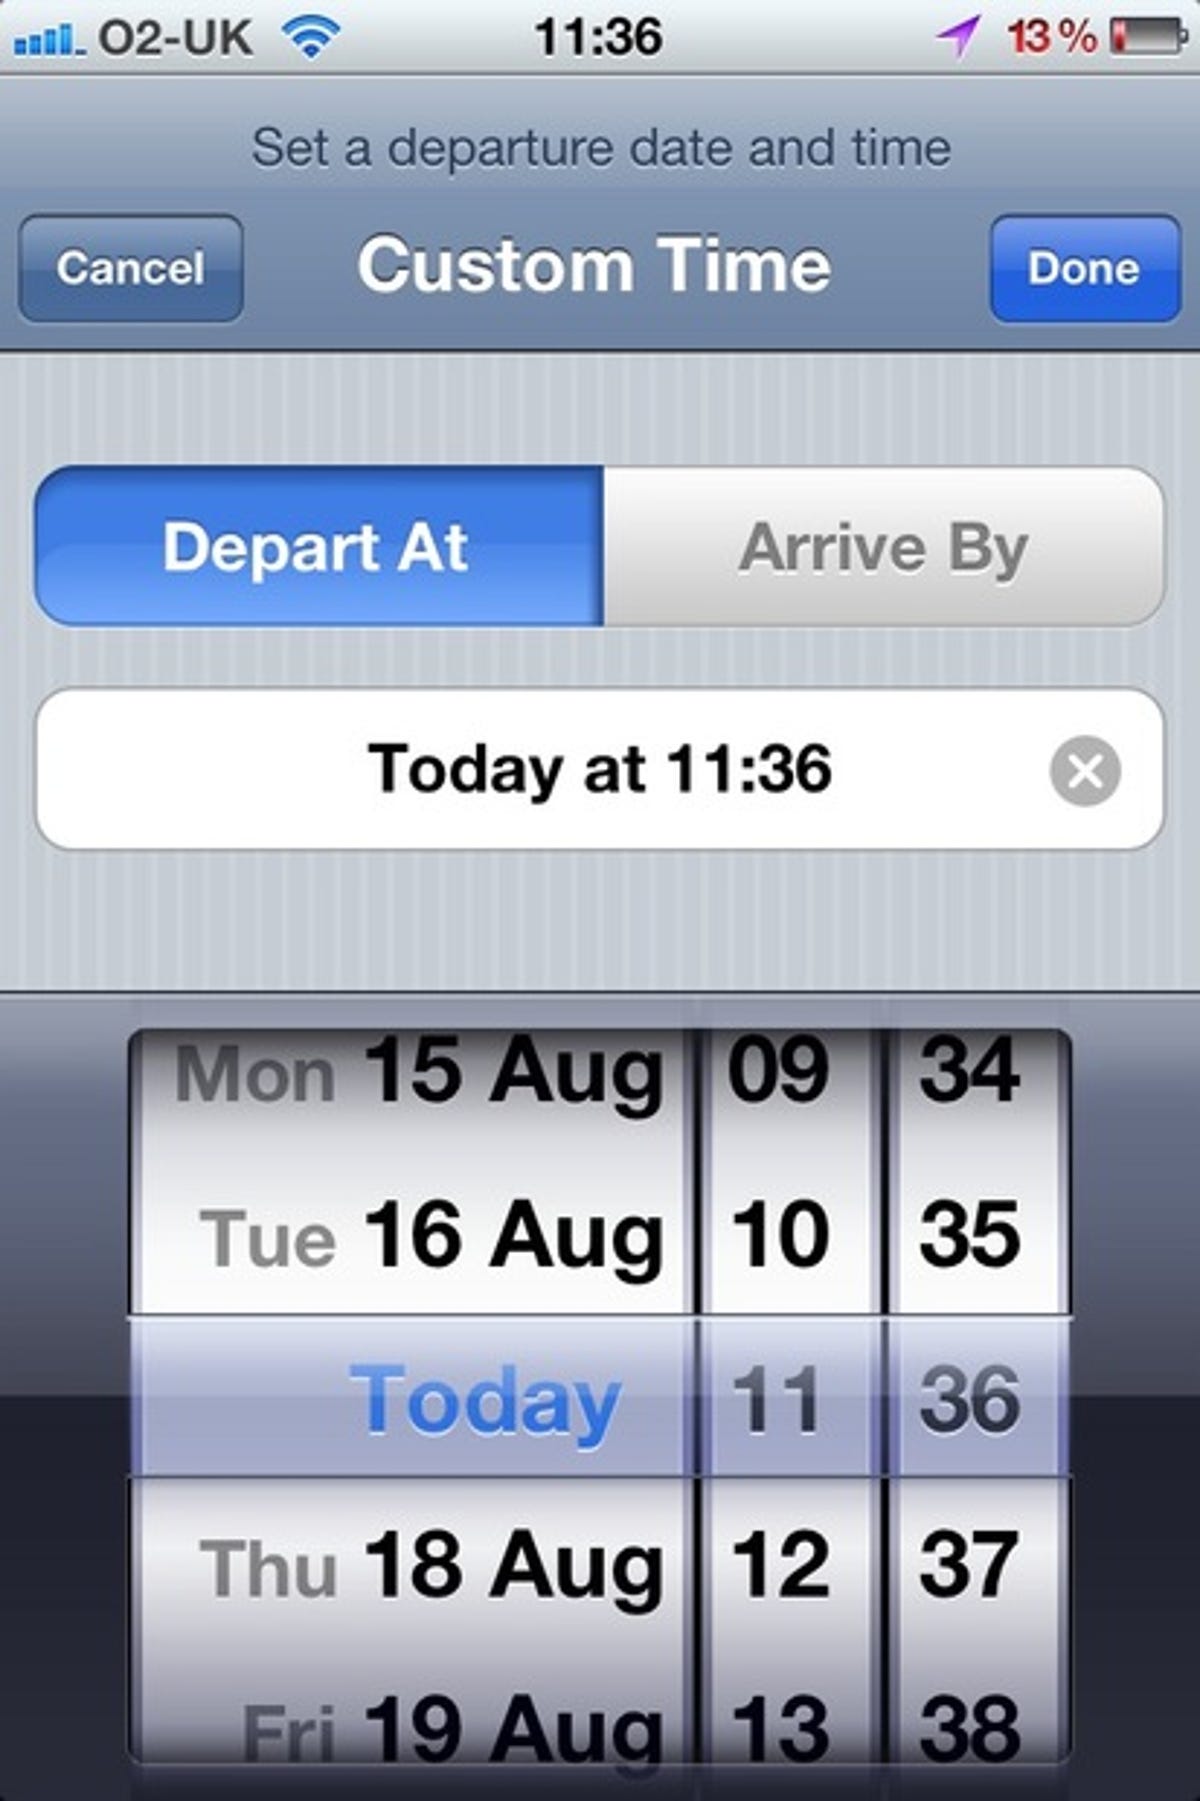
- 21. The iPhone's in such a hurry that, if you plan a journey by public transport, it wants you to leave right away. If that's not practical, tap the clock beside the departure and arrival details, followed by the 'depart' box. Use the tumblers to select a day and time, and select whether this is when you want to leave or arrive, then tap 'done' to update the route details.
- 22. Apple's traffic coverage has been steadily improving, with many of the UK's major roads and city centres now covered. Enable the traffic overlay by tapping the toolbar's curled icon to lift the map, and then select 'show traffic'. Roads are colour-coded green for free-flowing, amber for slow and red for stopped.
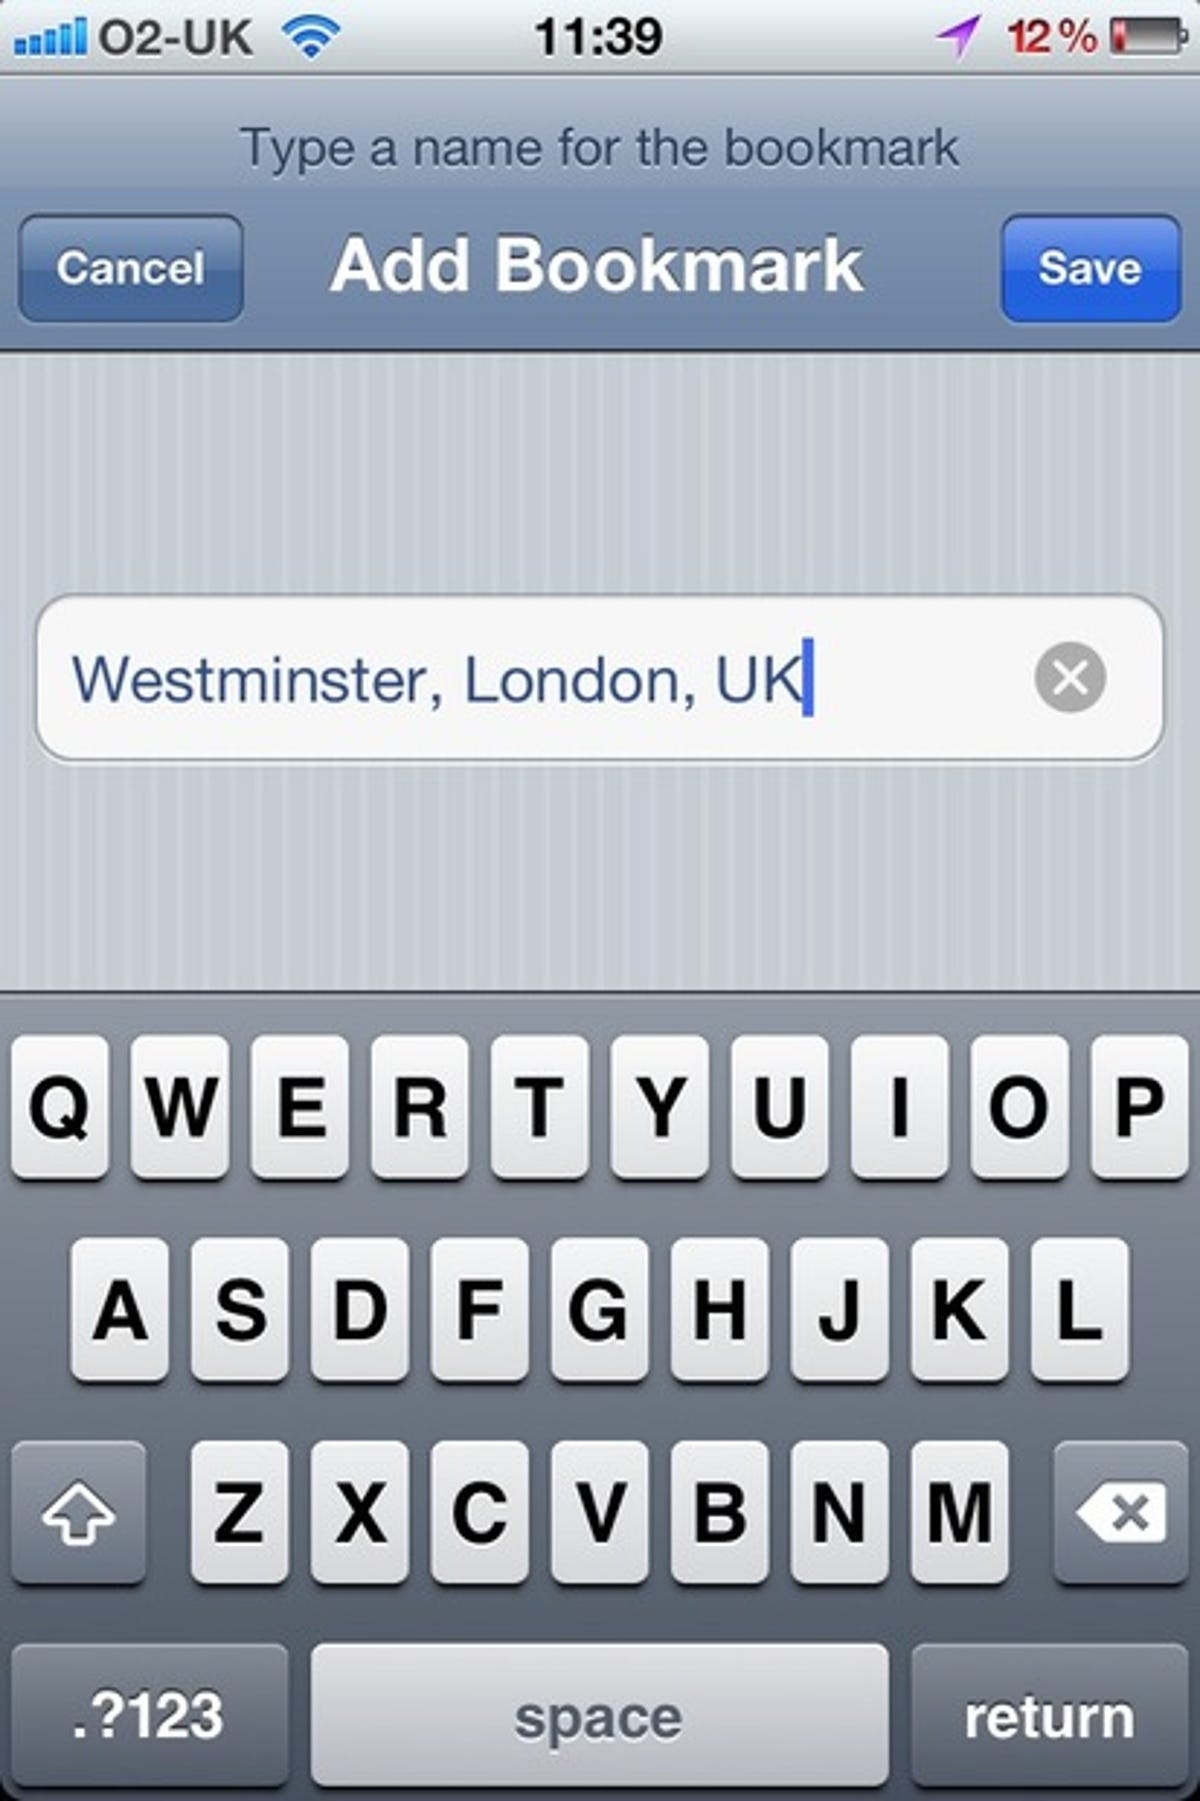
- 23. If you regularly plan routes to or from a particular location, save that spot for future use so you don't have to type it in every time you want to use it. Use the search box to find the venue, and tap the pin that Maps displays, then the blue arrow on the pop-up bubble. Tap 'add to bookmarks' and give the location a name. The next time you're planning a route, tap the open book icon at the end of the input box, and select the newly saved location as your start or end point.
iCloud
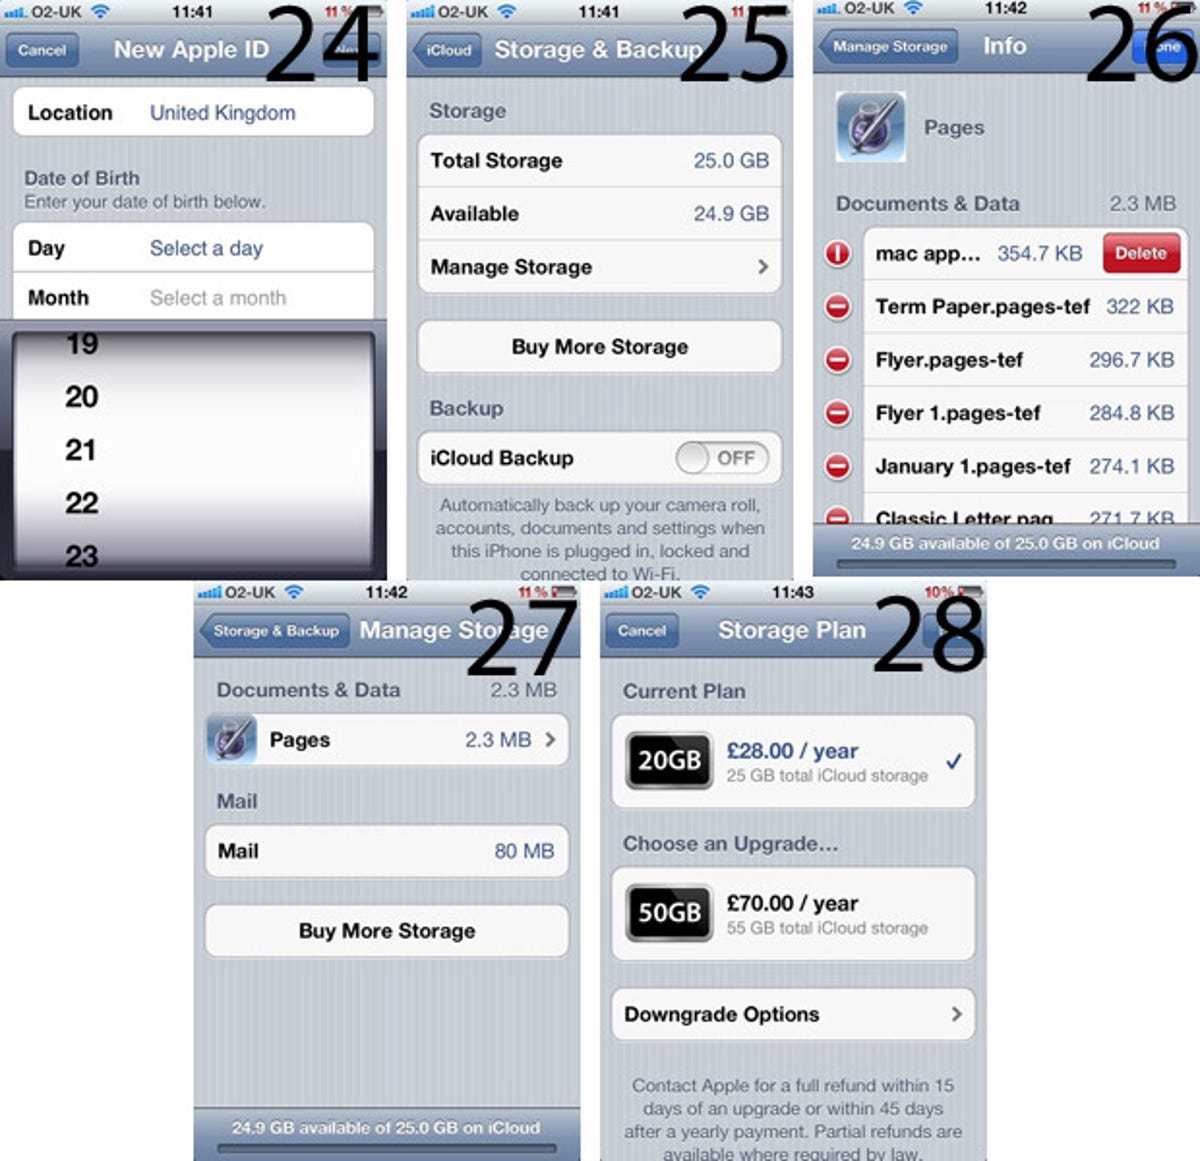
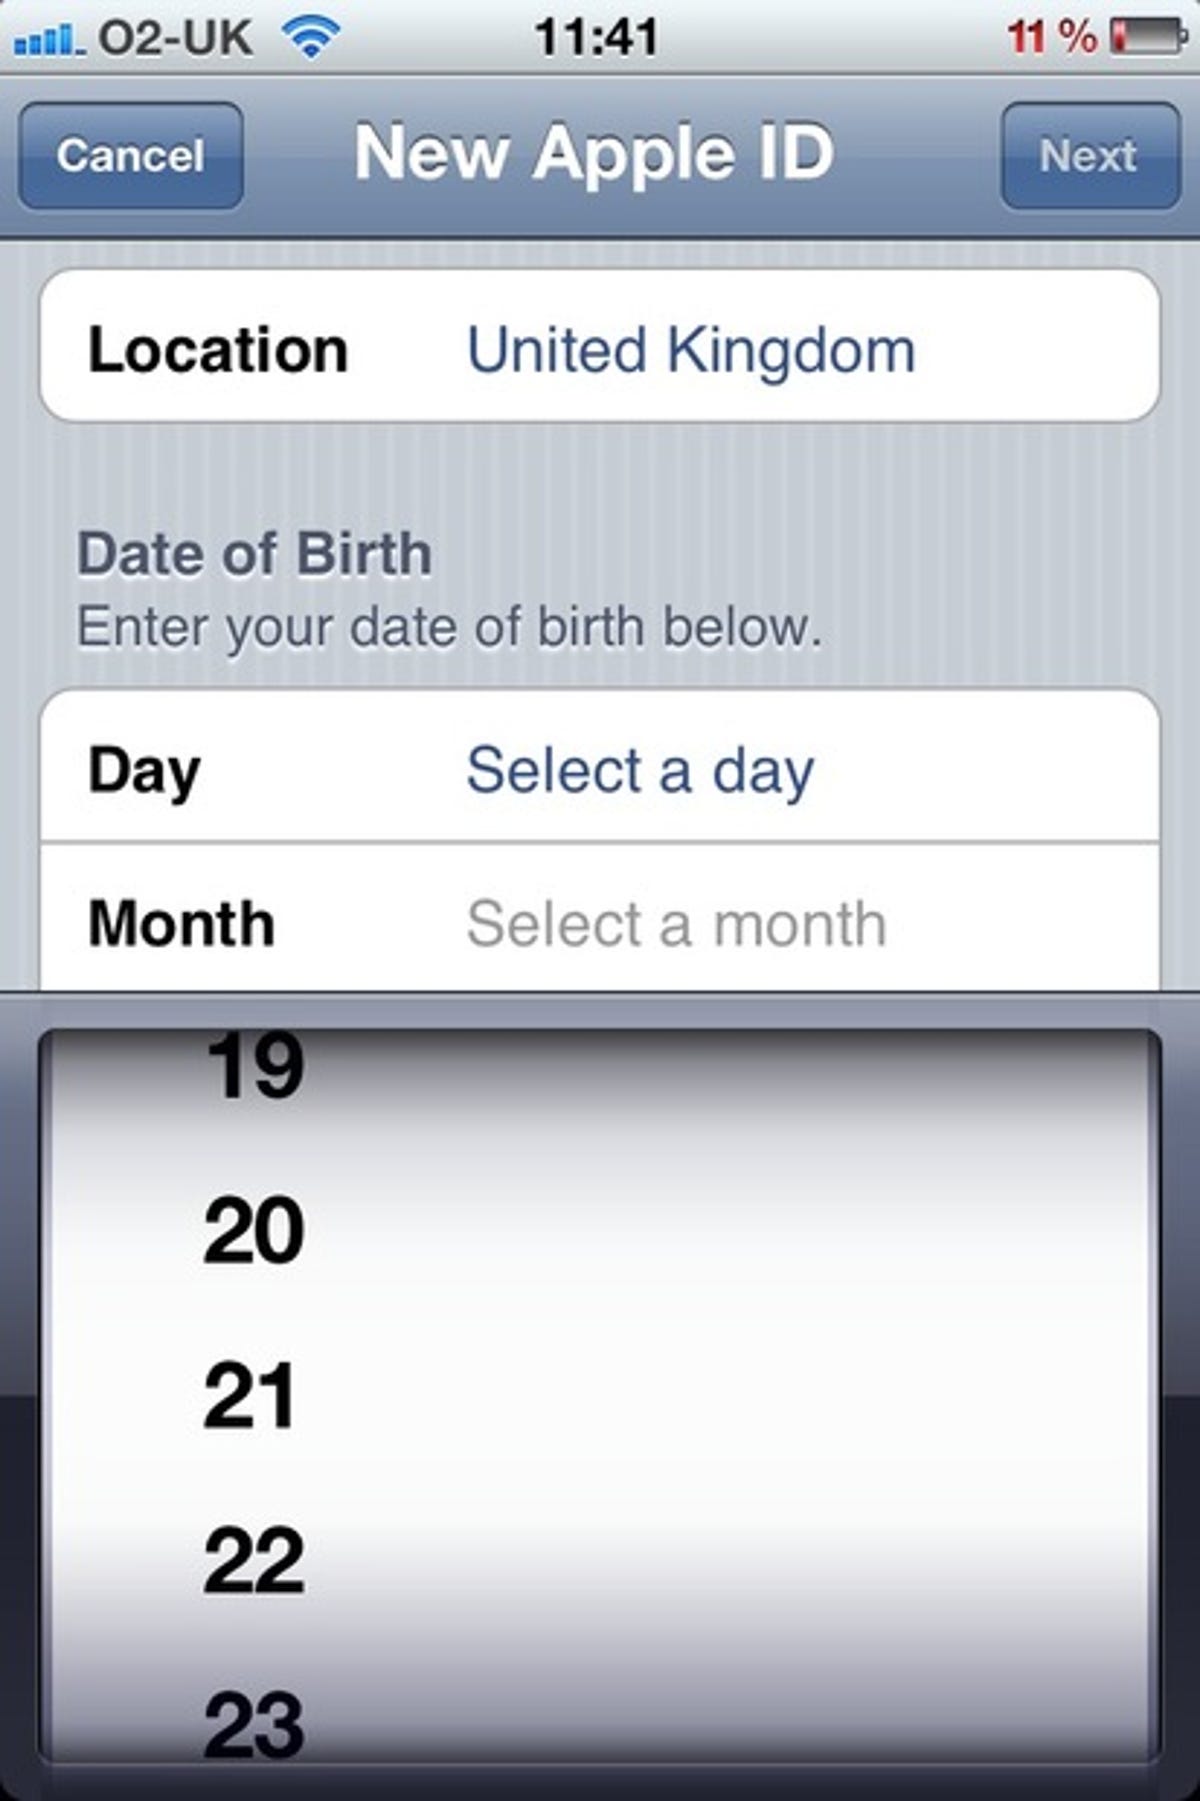
- 24. Bag yourself a free iCloud account from right inside your iPhone. Tap 'settings', 'mail', 'contacts', 'calendars', 'add account', 'iCloud', 'get a free Apple ID'. Fill in the form and you'll be set up with a free account for email, calendars, contacts and backing up your iOS device.
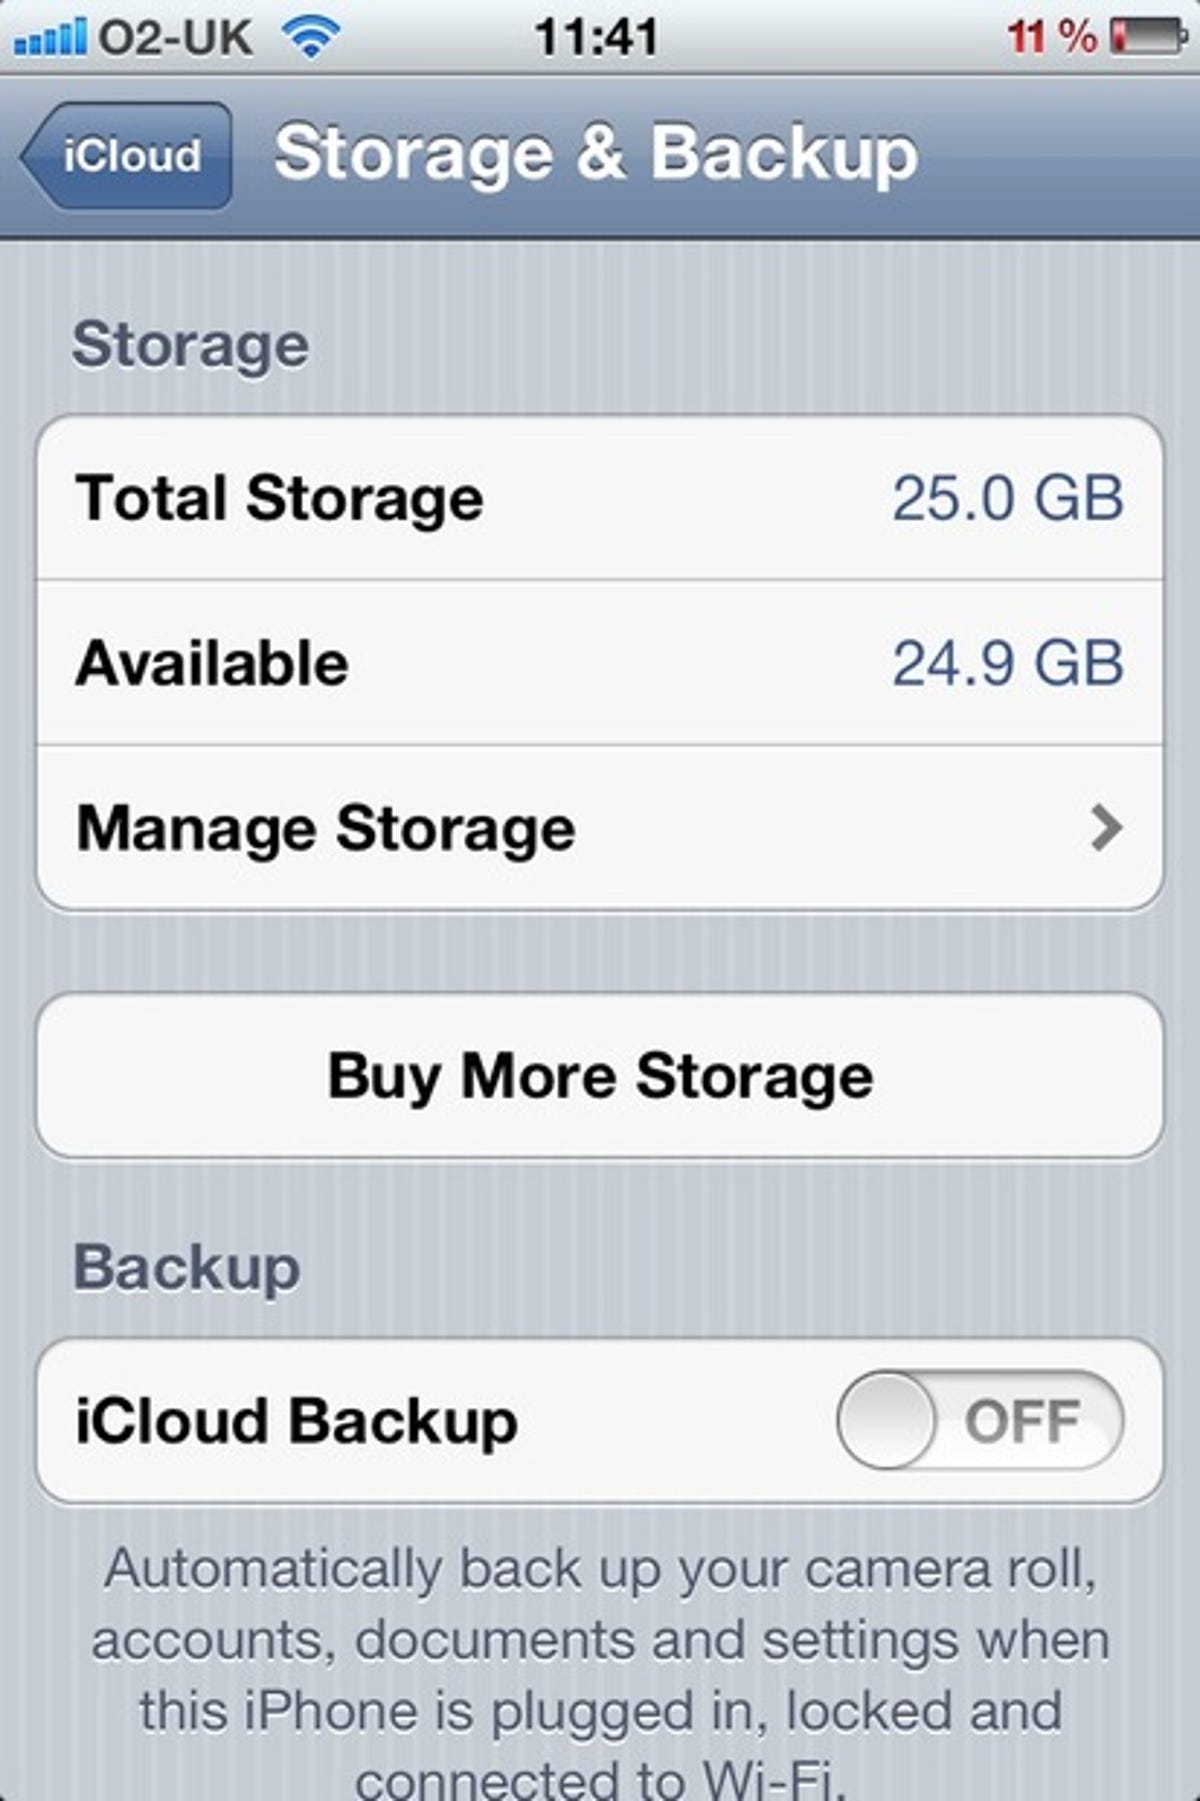
- 25. Check that you're not coming close to bursting your iCloud storage limit through 'settings', 'iCloud', and 'storage and backup'.
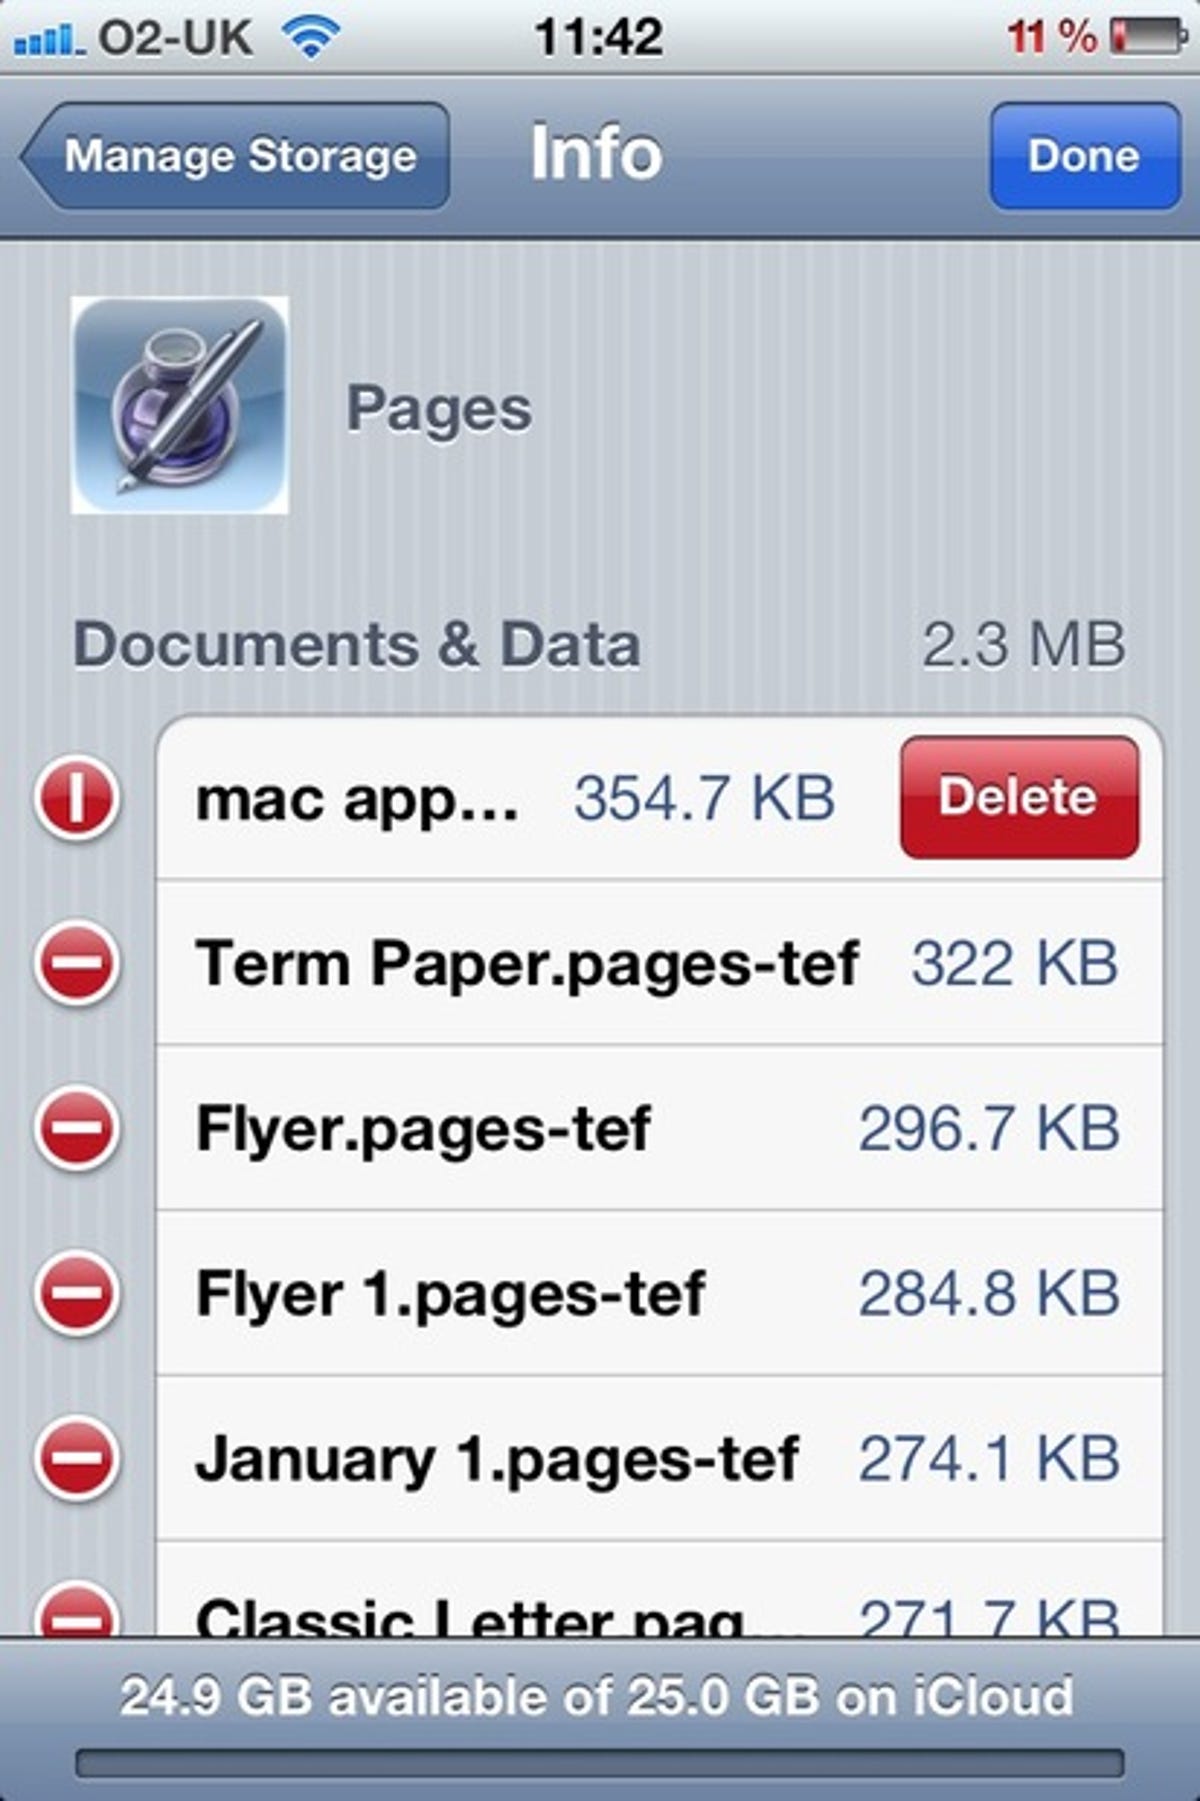
- 26. If your space is running low, check which files you don't need to keep synchronised on your account and delete them. Tap 'manage storage' and then the name of the app whose files you want to examine. The largest ones will be shown at the top of the list. To delete them, tap 'edit', followed by the red bars beside each one. 'Delete' appears beside the file names -- tap it to zap them.
- 27. Those applications that are persistent offenders, frequently using up more of your limited iCloud space than you like, should be removed. Audit your greedy apps by stepping back to 'manage storage' and checking out the data storage levels of each. Remove offenders by holding down their icon on the home screen until they start to shiver, then tap the 'X' on the icon's top left corner.
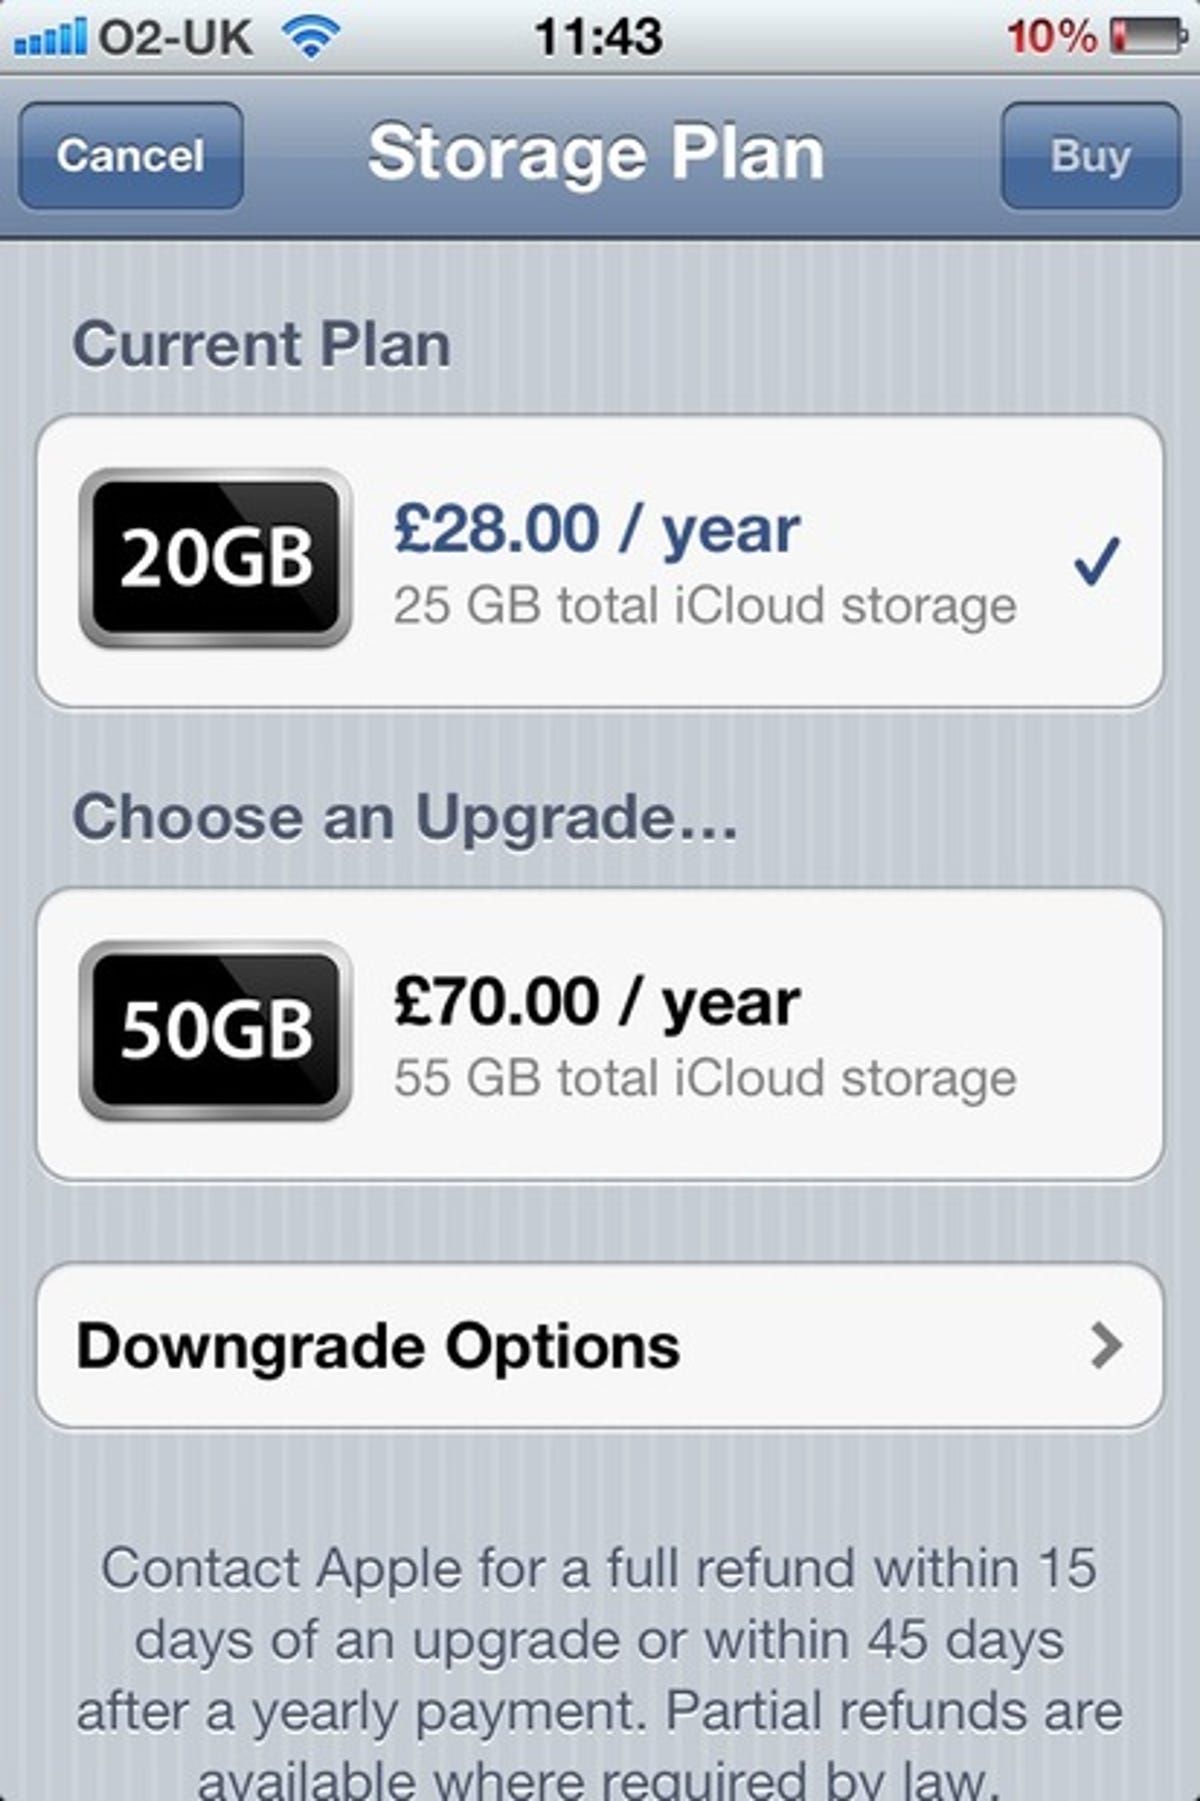
- 28. If you've paid for additional storage but you're coming nowhere close to needing it all, reduce it and, in some territories, Apple will process a refund. Tap 'settings', 'iCloud', 'account' and then the details of your storage plan, followed by 'downgrade options'.

- 29. Don't step through your junk mail one message at a time. Delete the messages en masse without even reading them. Tap 'edit', and then tap in the circle beside each message you want to get rid of. When they're all selected, tap 'delete'.
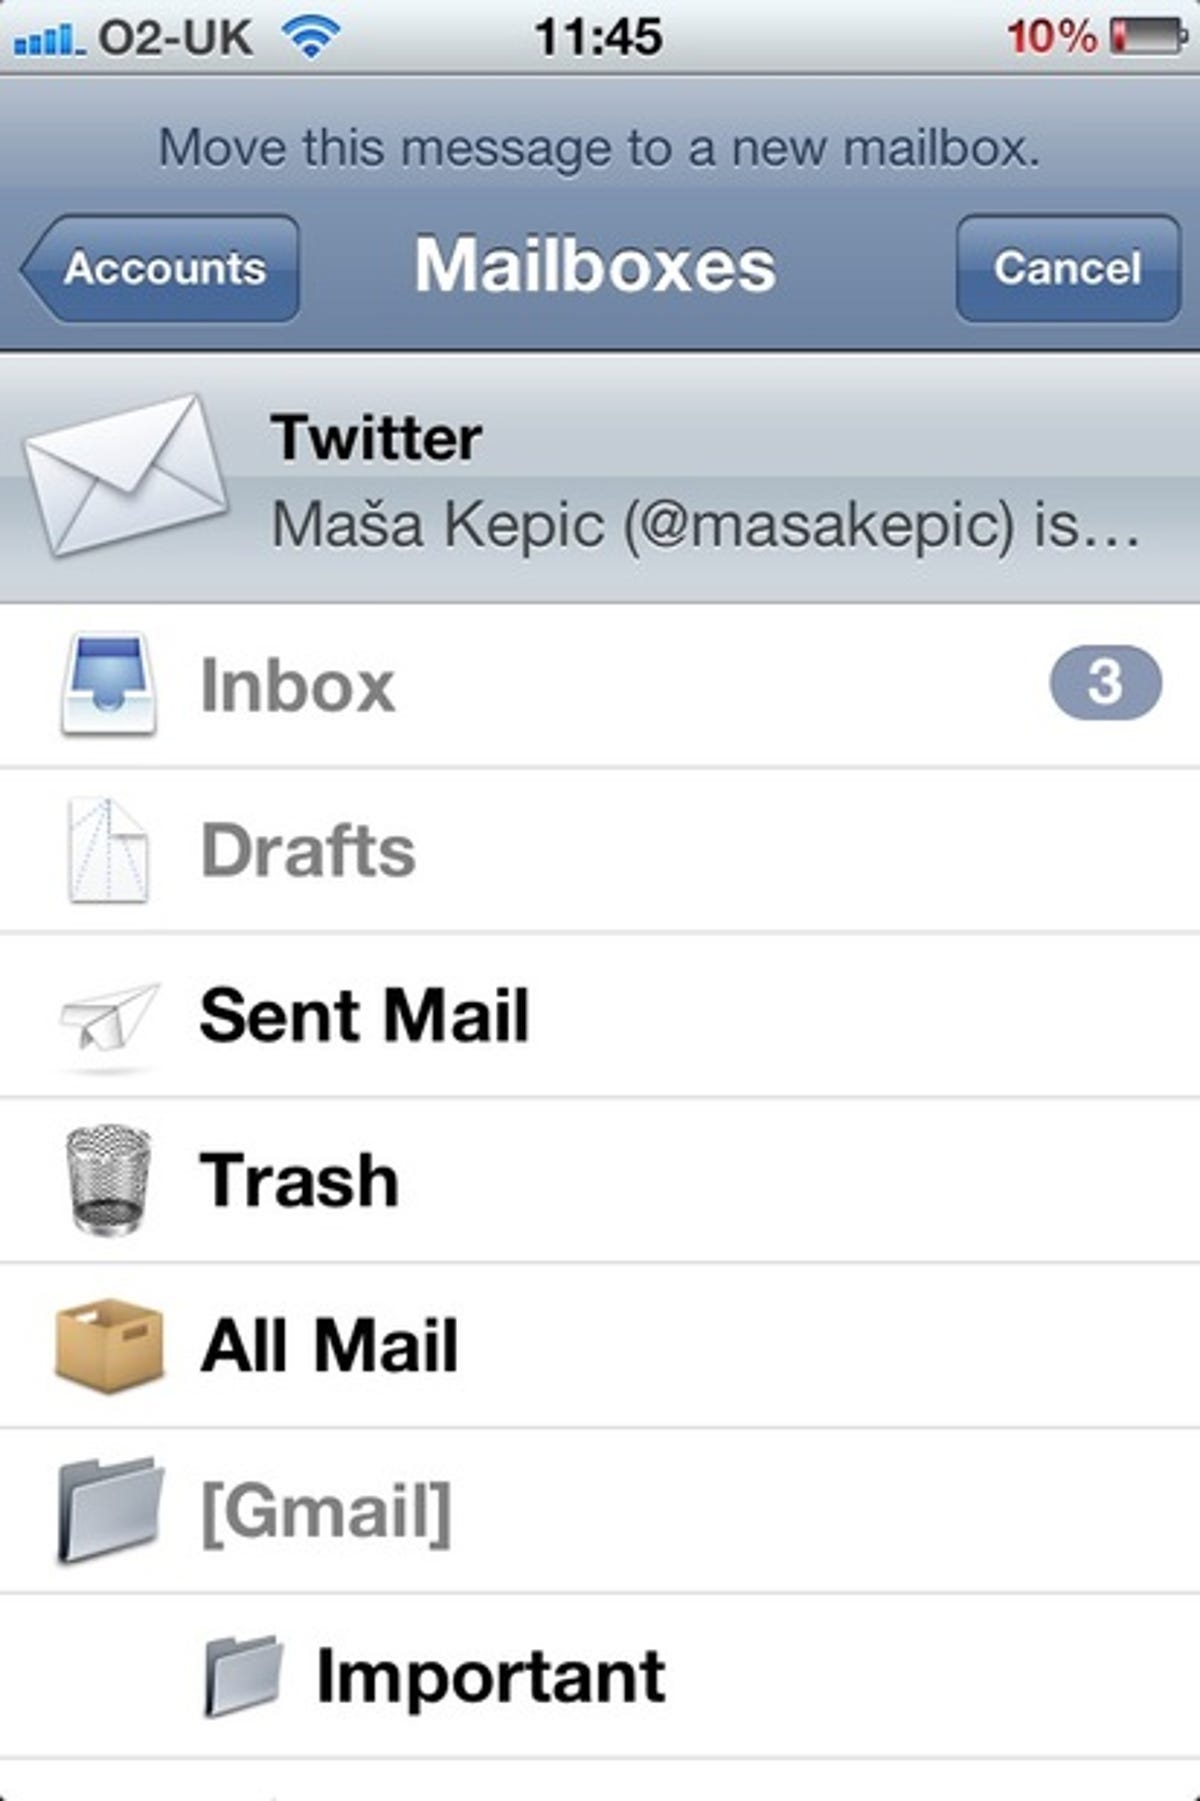
- 30. Don't wait until you get home to file your emails out of your inbox and into appropriate folders -- use downtime on your daily commute and do it on your phone. Create whatever new folders you need within the 'accounts' section of Mail, rather than the 'inboxes' section, and then, when you need to file a message, open it and tap the filing button -- a folder with an arrow -- and select the folder into which it should be filed. By the time you get home, your mirrored mailboxes will have been tamed.
- 31. In iOS 4 and earlier, you could only mark an email as unread. Now you can mark them as flagged, too. Tap the 'mark' link in the header and select from either 'unread' or 'flag' so that you can deal with it later.
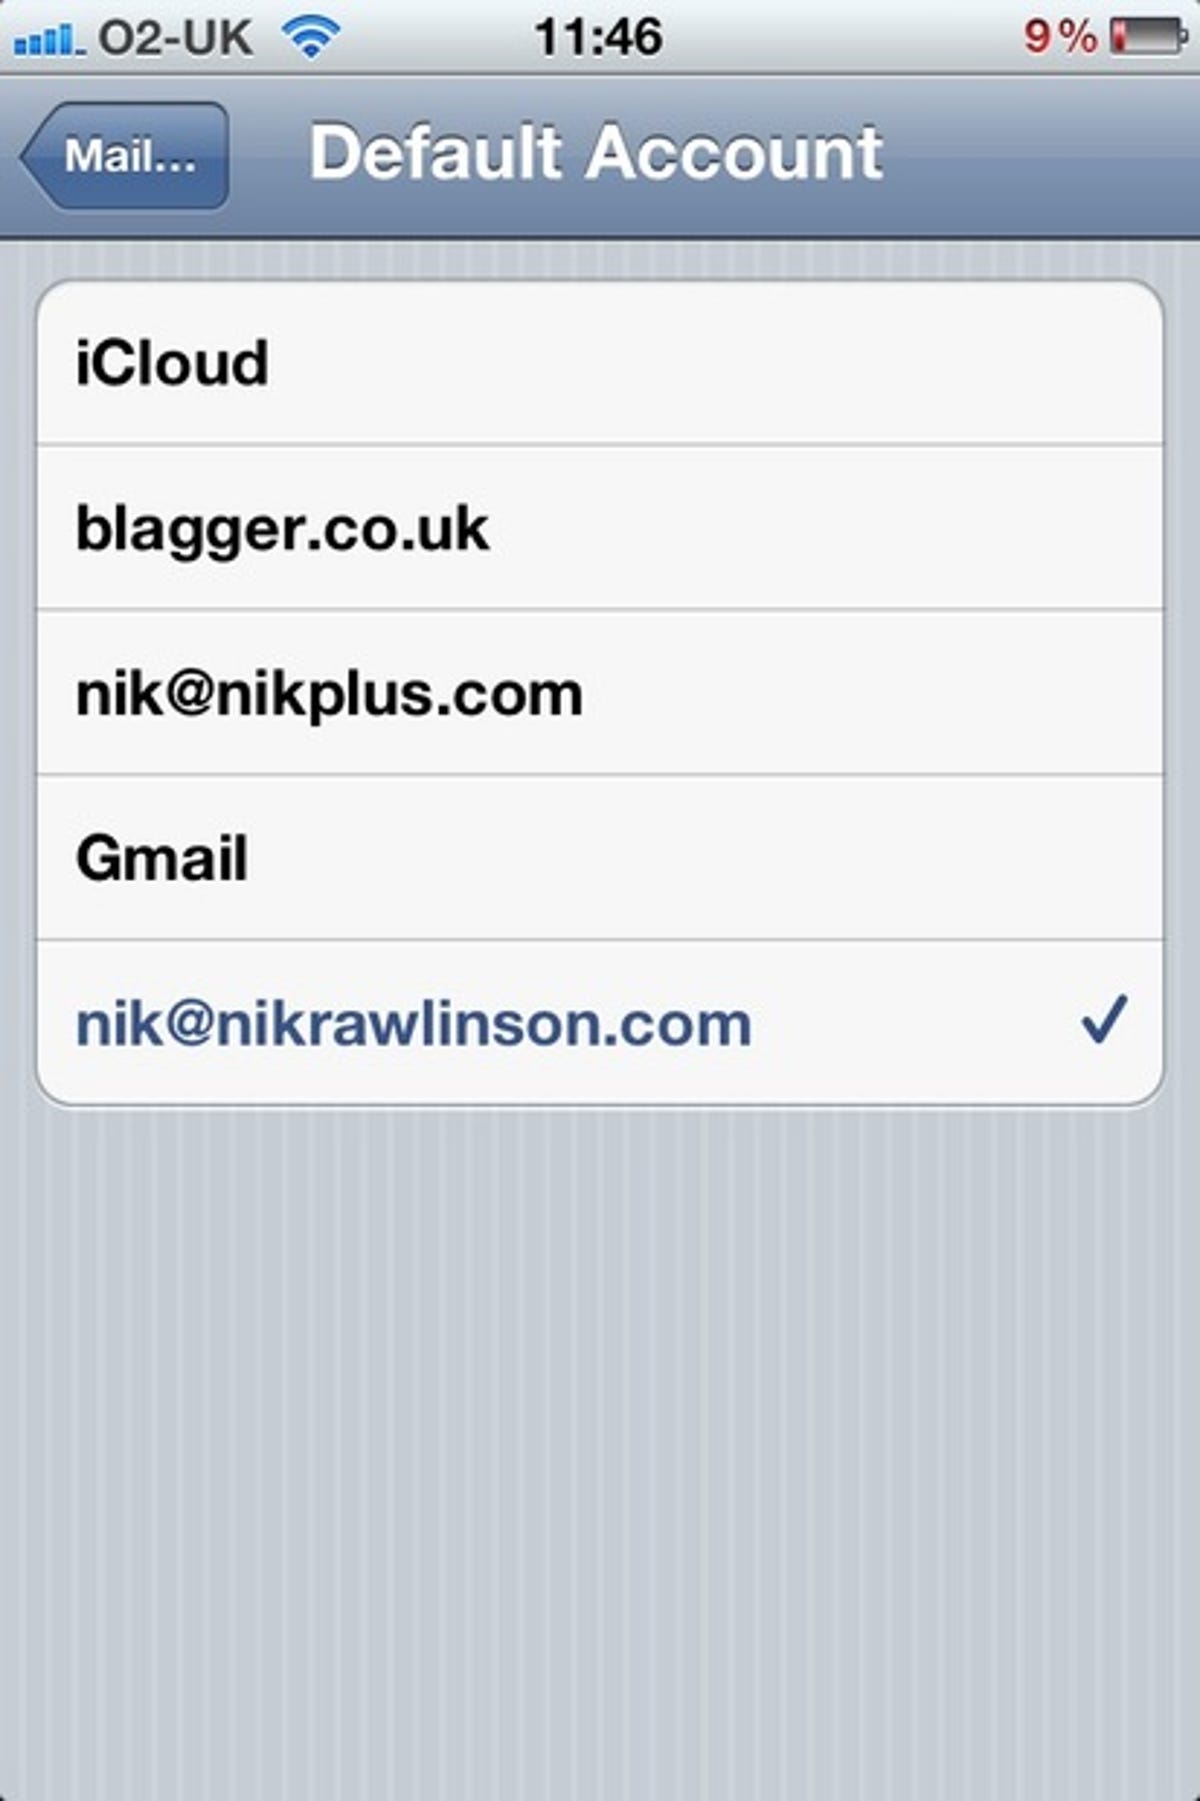
- 32. Various iOS apps use your default email address to send out communications. YouTube uses it to share links, and Photos uses it to post images. Your default address is whichever one you set up first, but, if this is inappropriate, tap 'settings', 'mail', 'contacts', 'calendars', 'default account' and then select an alternative.
Safari
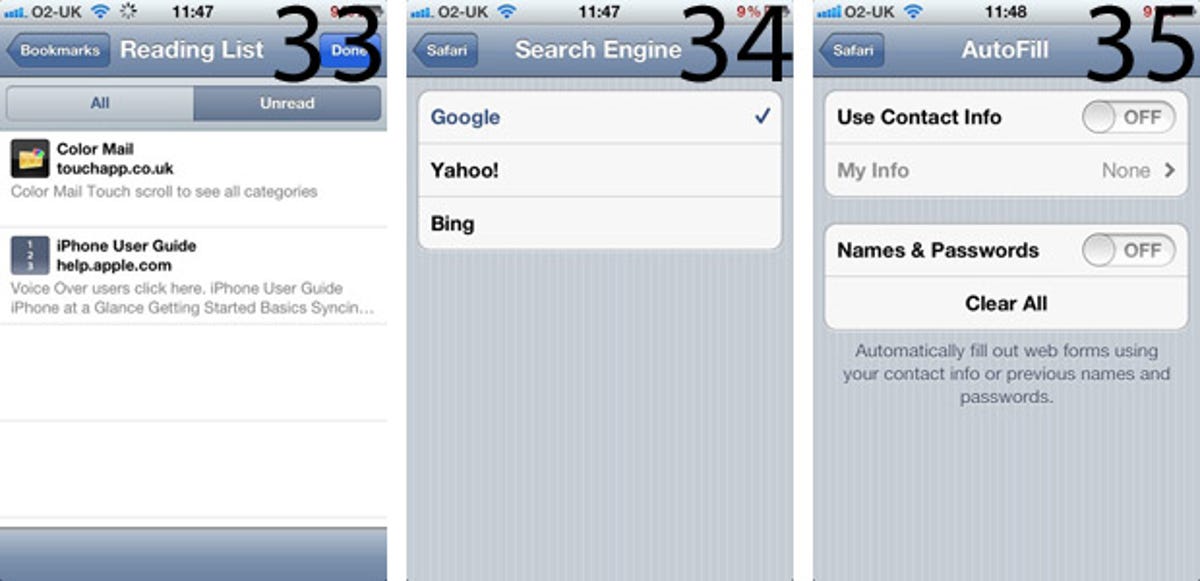
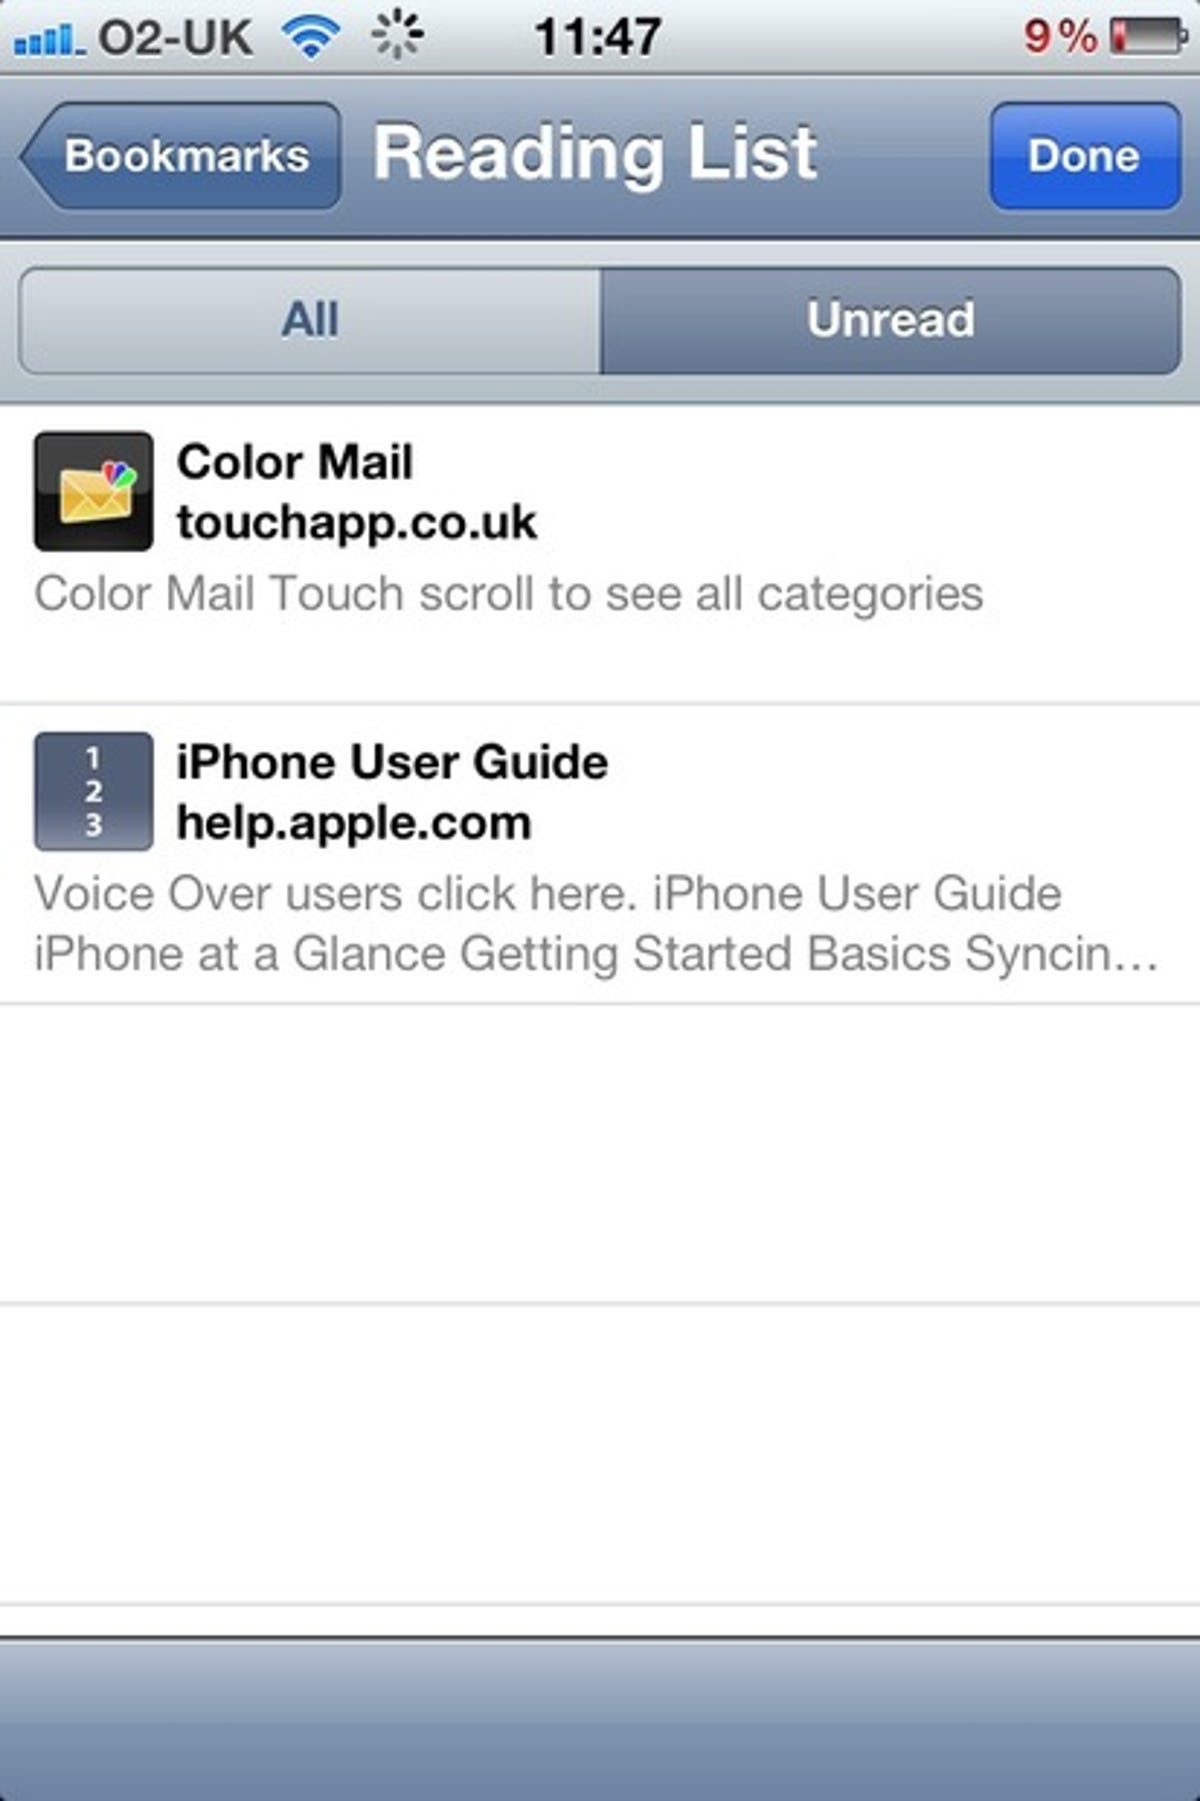
- 33. Reading List is new in Safari in both OS X Lion and iOS 5. It lets you save links to pages you want to come back to when you have more time, without having to set them as a bookmark. To save a page to the Reading List, tap the toolbar shortcut button (the curled arrow in a box) and select 'add to Reading List'. To find previously saved pages tap 'bookmarks' and then 'Reading List'.
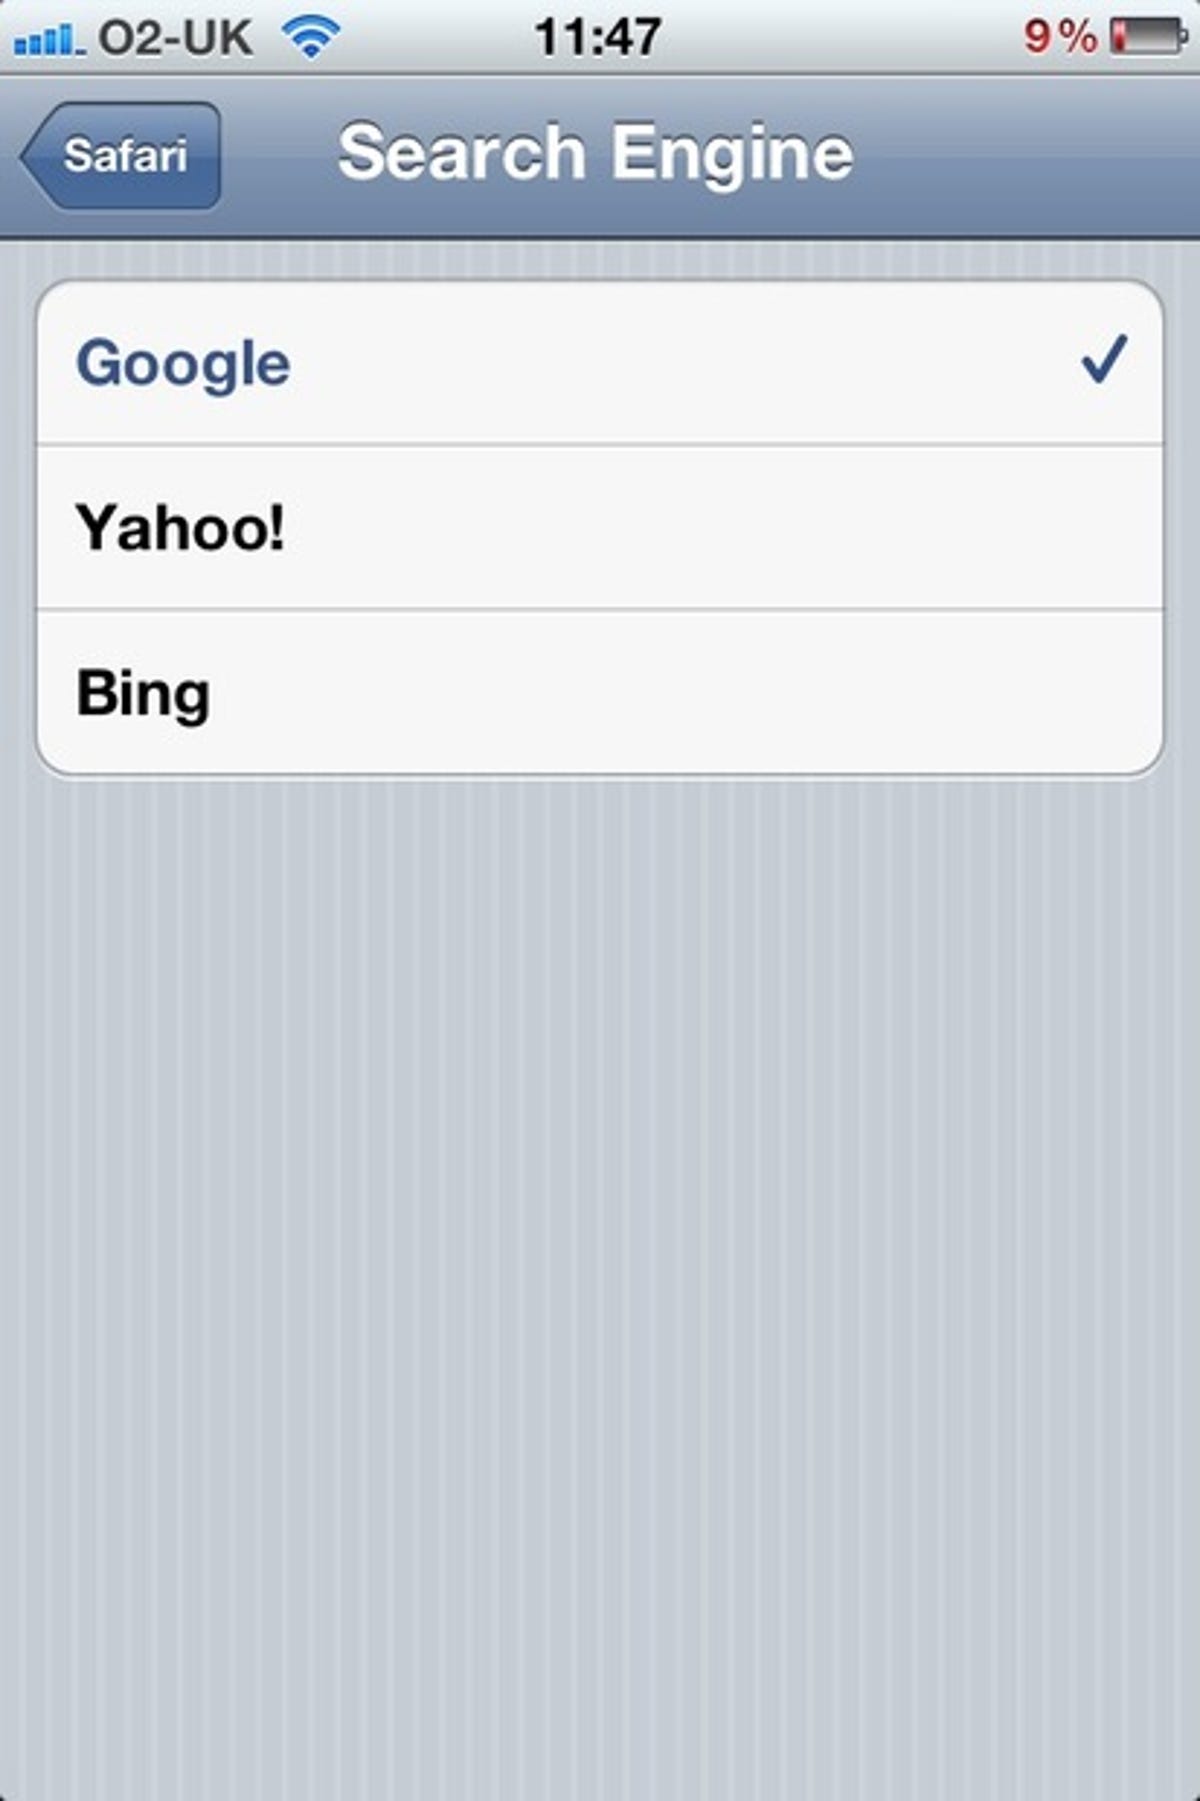
- 34. Don't like Google? Not a problem. Change the default search engine at 'settings', 'Safari' and 'search engine'. Unfortunately, the change only affects the browser, not the in-app searching on iBooks, which can only expand your query as far as Google.
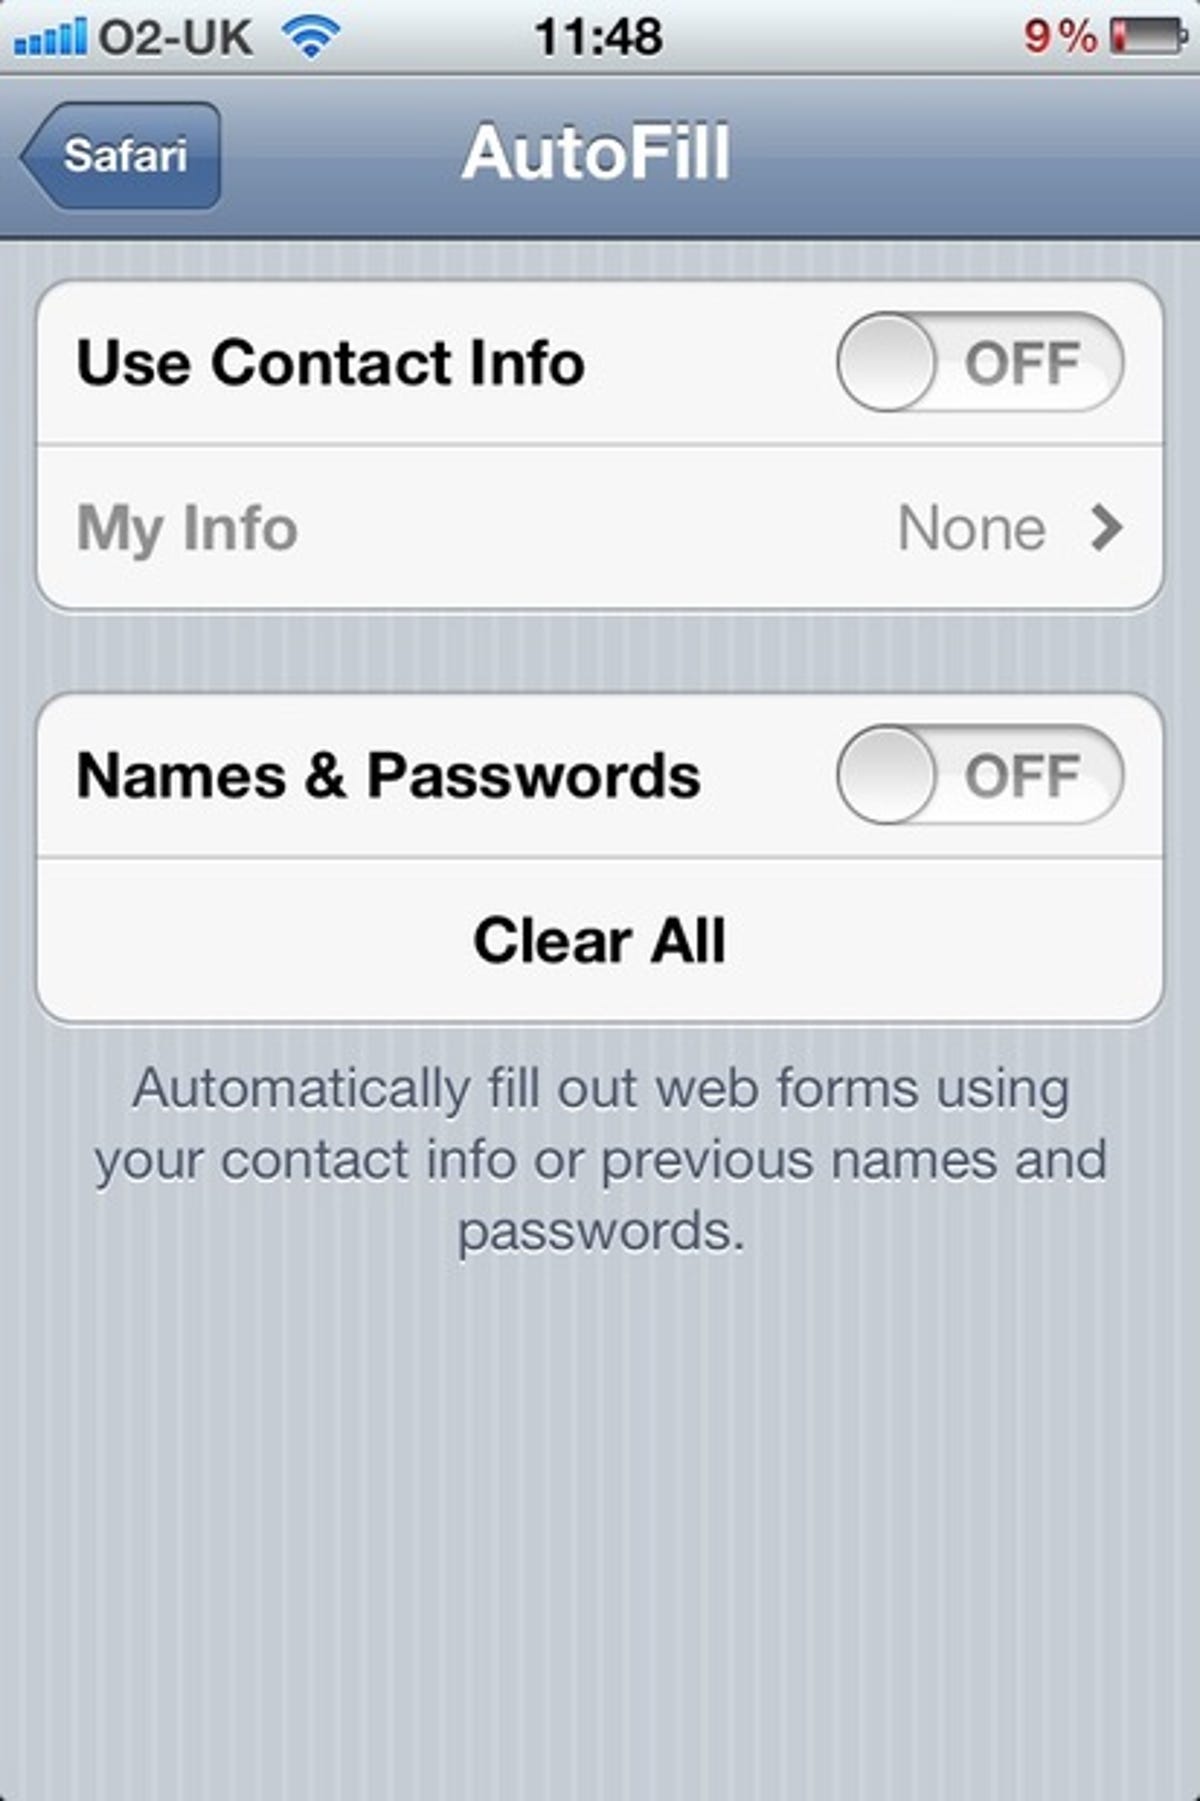
- 35. Save time when tapping in data on forms by allowing Safari to populate them with your personal data. Tap 'settings', 'Safari', and then 'autofill'. Tap the on/off slider and then select your personal card from the address book as the source of the data.
System tools
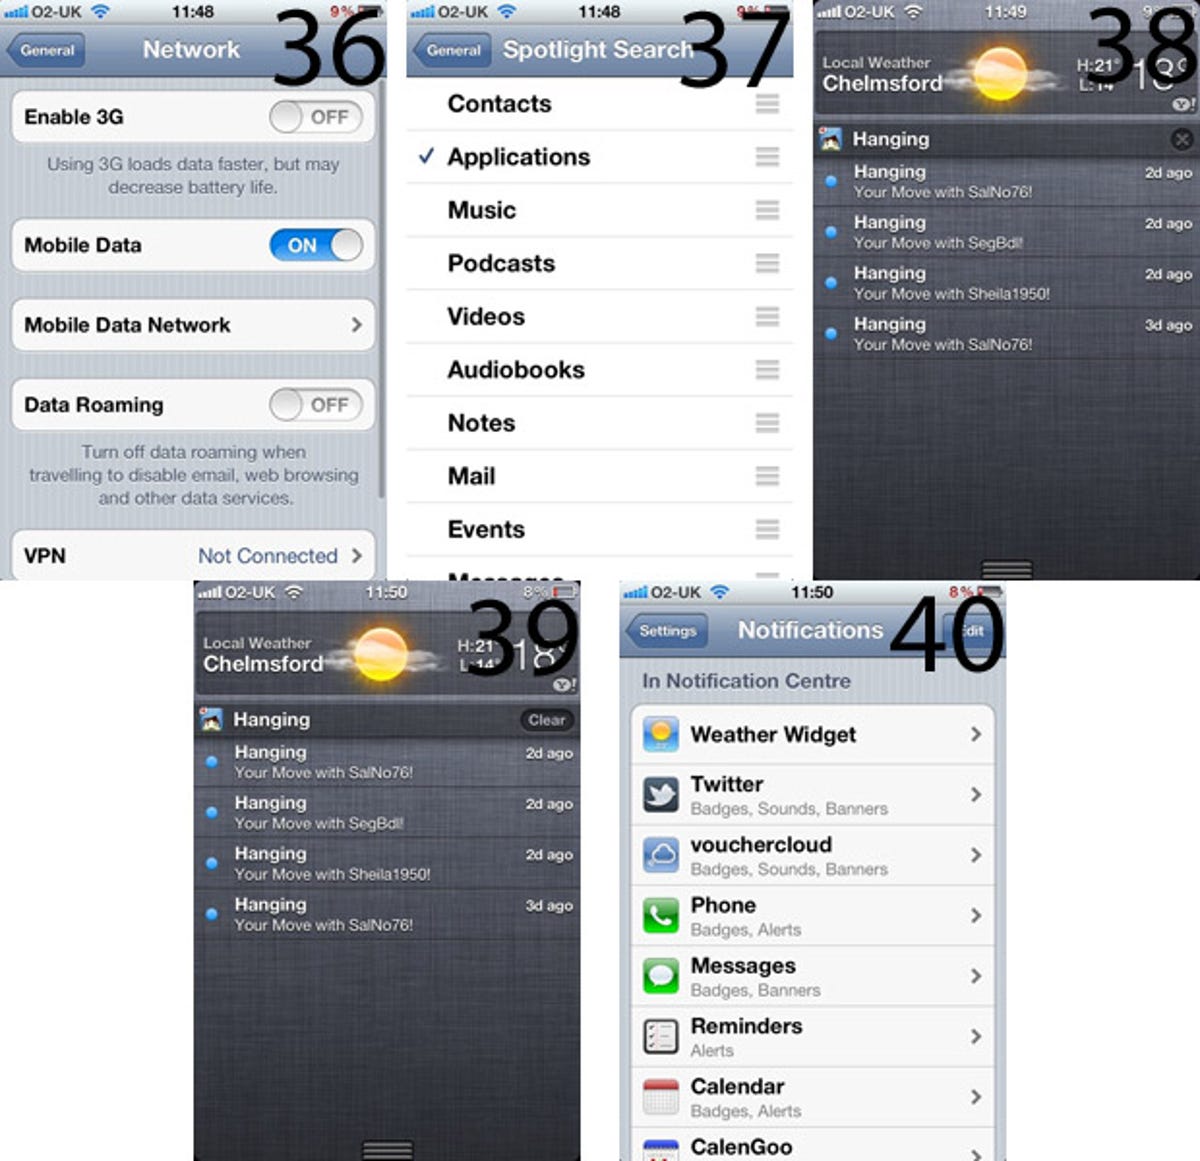
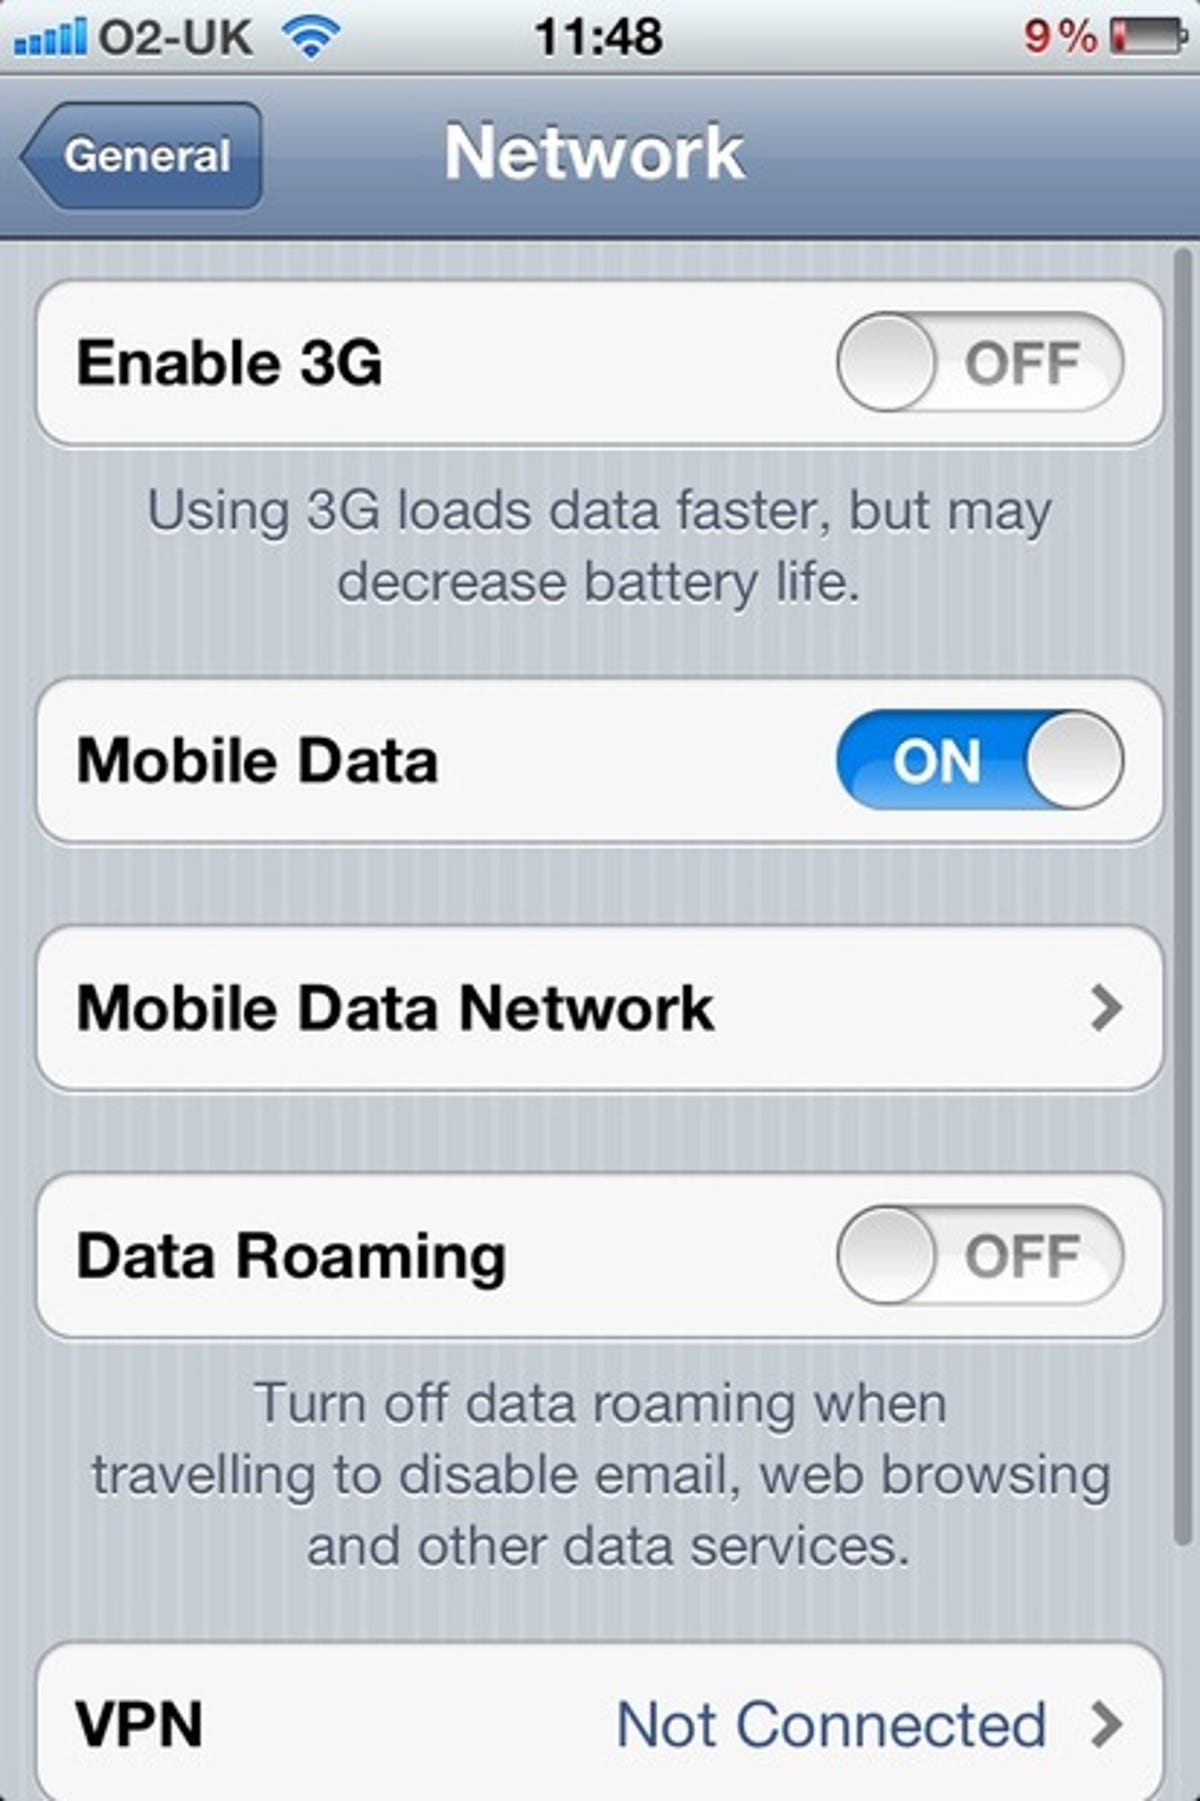
- 36. If your battery's running low, disable 3G. Your mobile Internet performance will become worse, but the power shouldn't drain so quickly. Find this option at 'settings', 'general', and then 'network'.
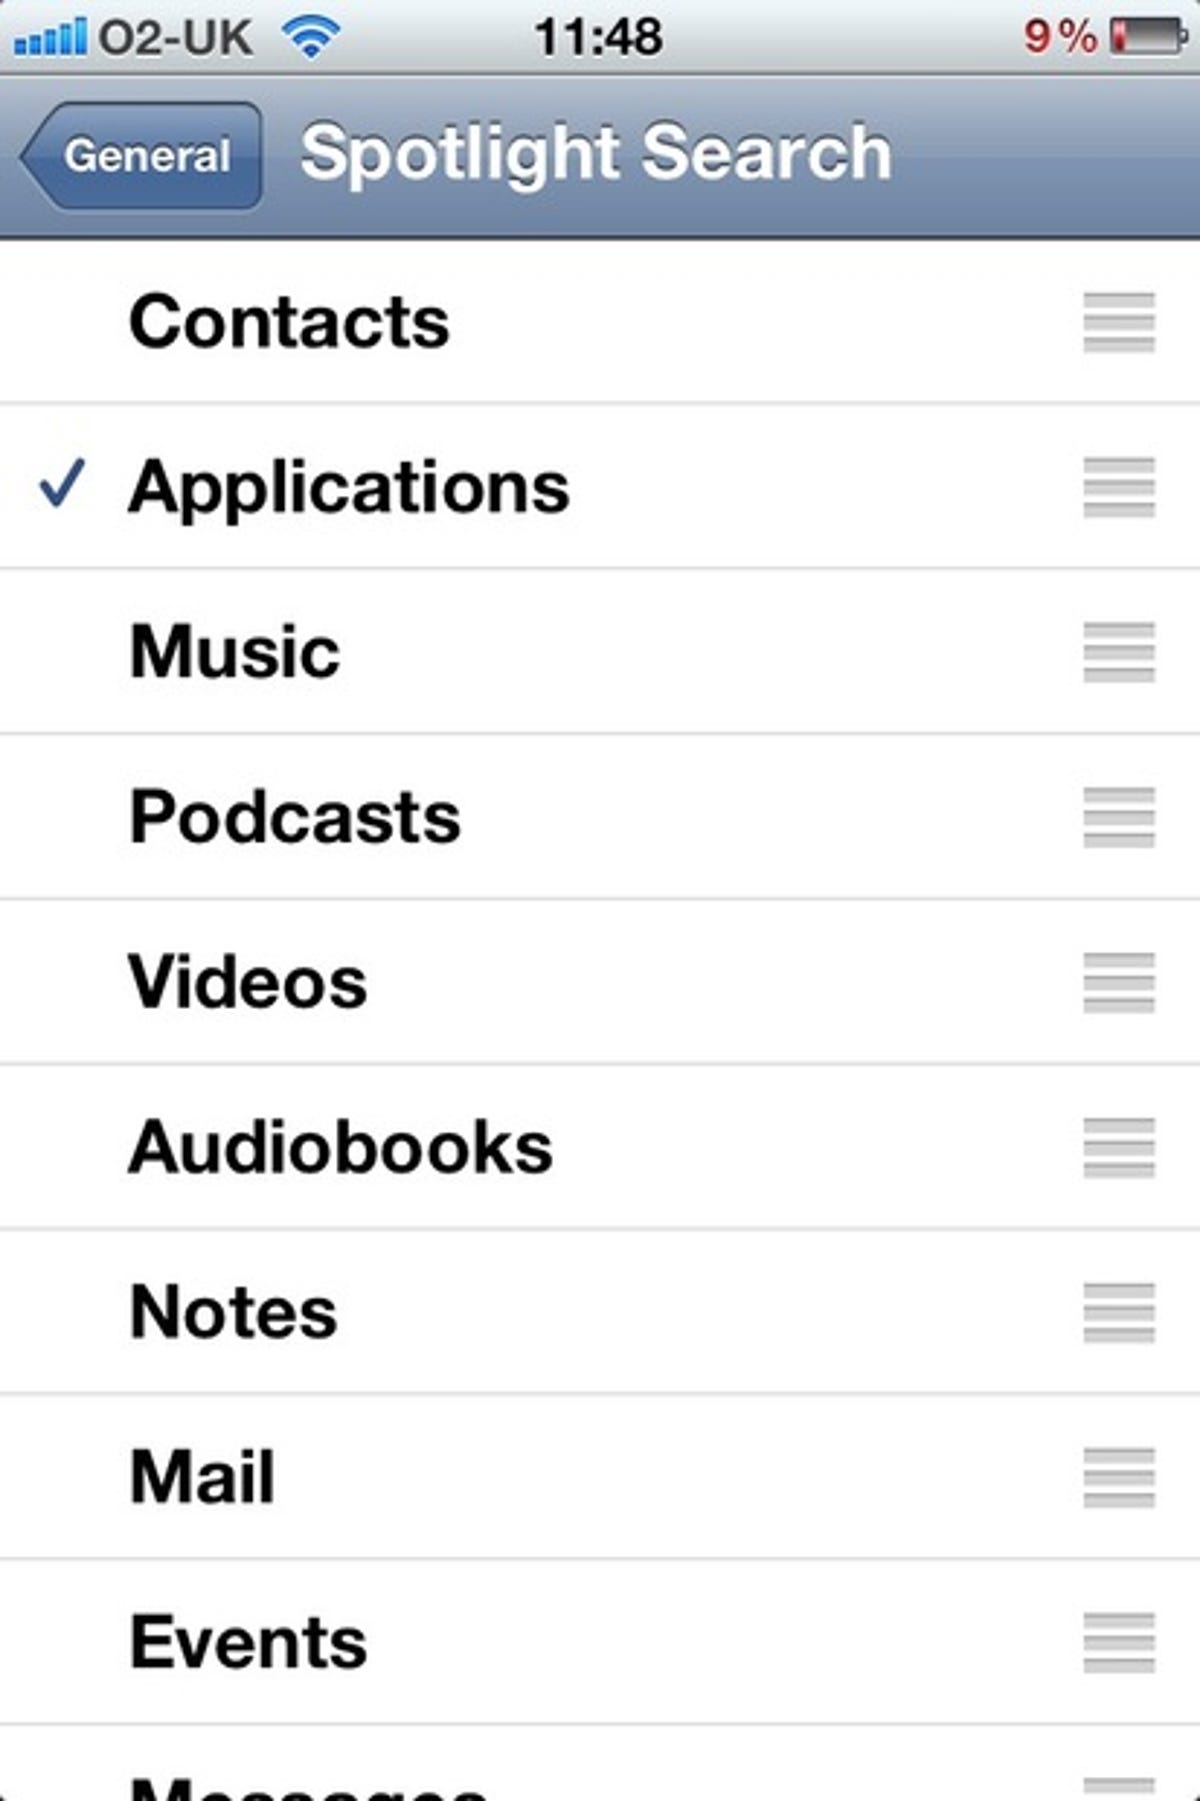
- 37. Are your Spotlight search results long and unwieldy? Trim the list of applications whose data it indexes by deselecting those you don't want at 'settings', 'general', 'Spotlight search'. Here you can also change the order in which the results are displayed, by dragging the categories up and down the list.
- 38. iOS 5 has done much to tame the behaviour of application notifications. They're now so discrete that they've almost disappeared entirely. To find out what needs attention, swipe down from the clock to pull down a list of recent notifications, and tap each one to deal with it.
- 39. Your notifications list can quickly grow to daunting lengths, particularly if you don't plan on paying any attention to game updates and so on. Tame it by clearing out whole sections. Tap the 'X' on each section divider bar, followed by 'clear' to remove it.
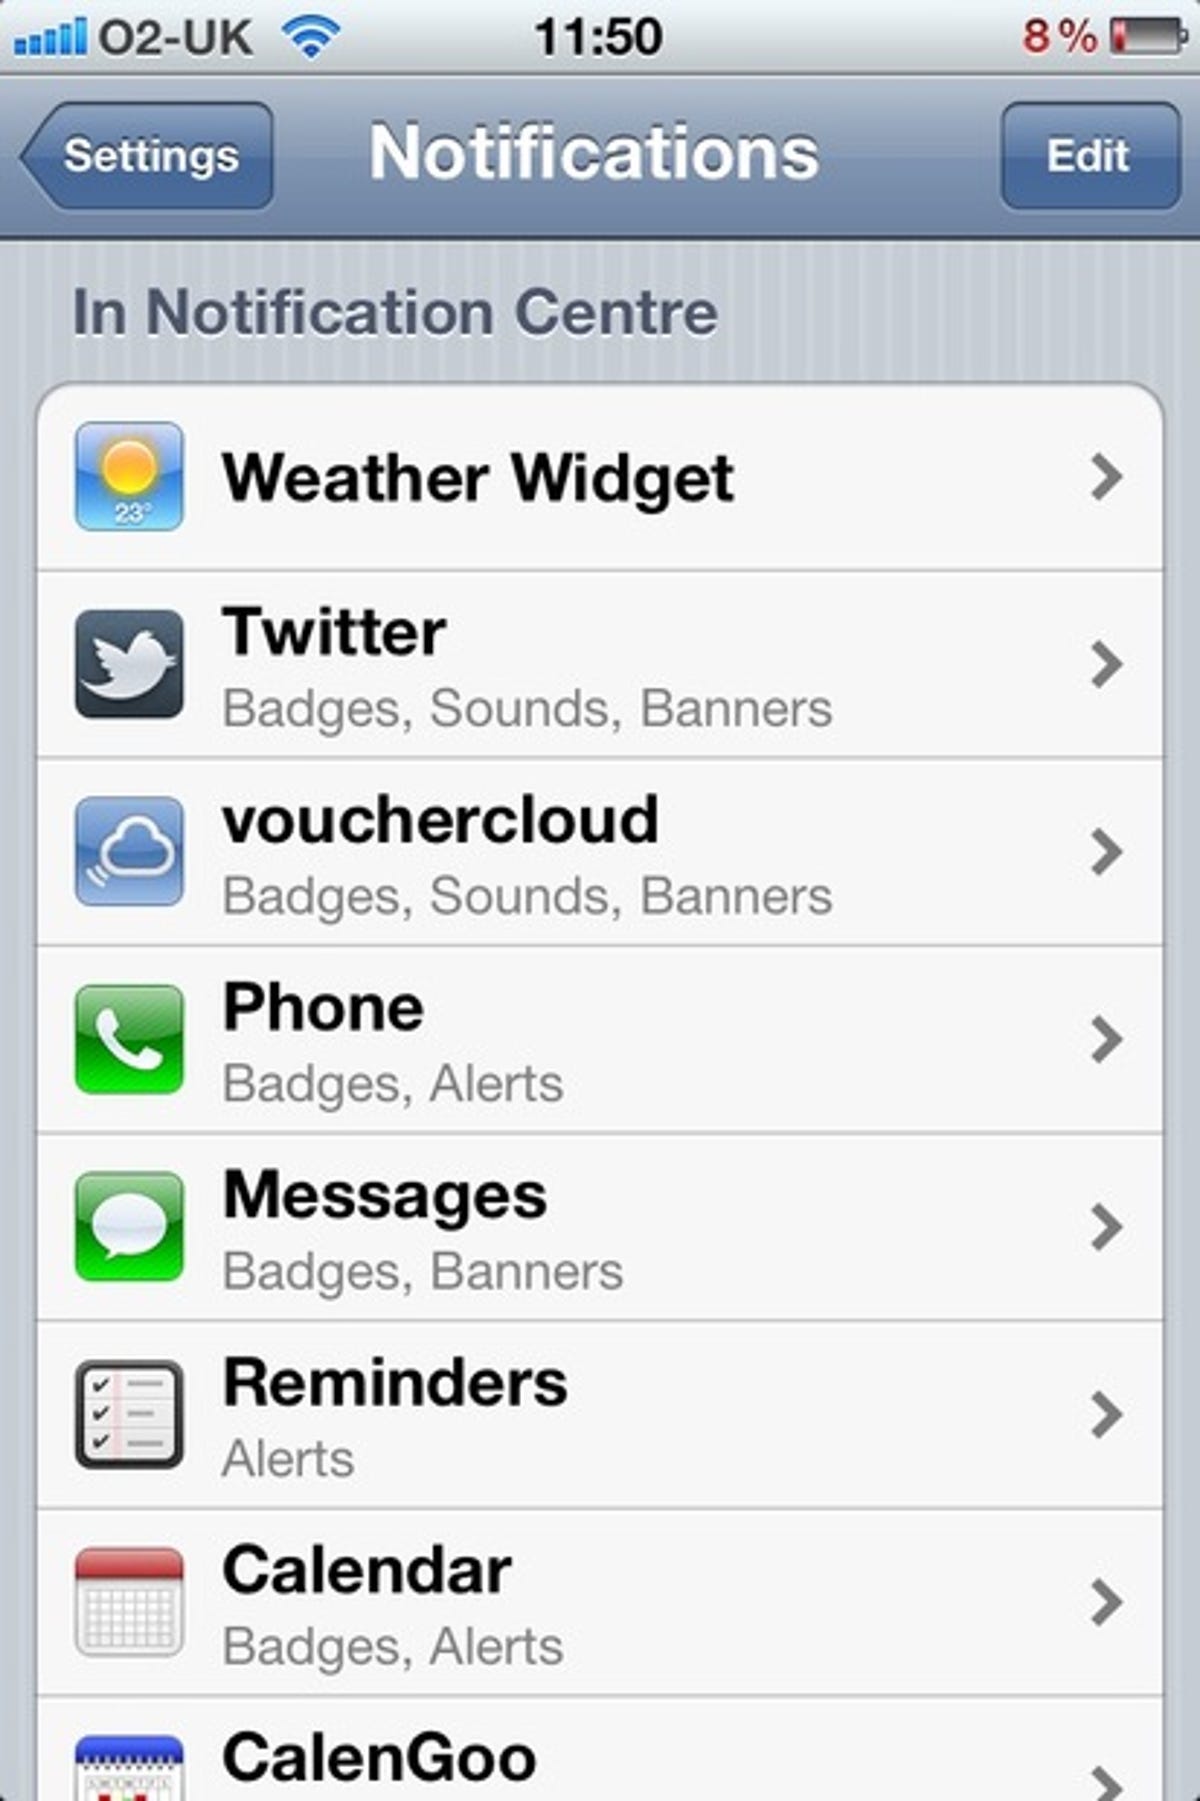
- 40. Better yet, reduce the number of applications that can send you notifications at all. Tap 'settings' and then 'notifications', and then the names of the applications you want to silence. Tap the on/off slider as appropriate on each one.
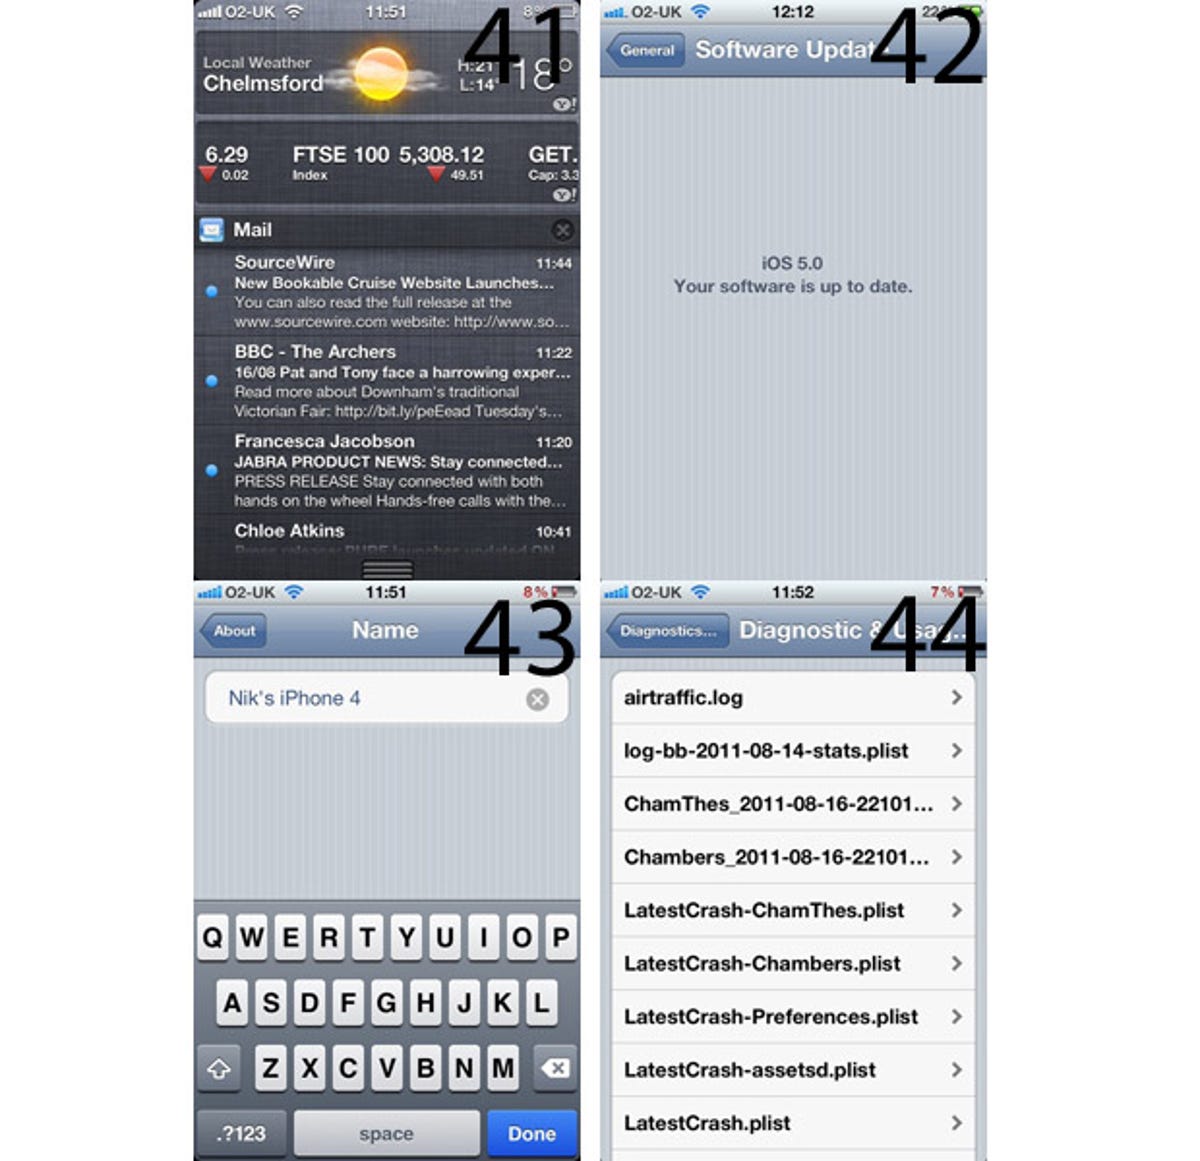
- 41. Two very useful notifications are the weather readout and the stock ticker. These only appear in the 'notifications centre', not on notification pop-ups, but, by default, the stock ticker is shunted to the bottom. If you follow the markets, bring this back up to the top by tapping 'edit' in the 'notifications' settings and then use the grab bars on the right of each entry to arrange them in a new order, dragging the stock widget up until it sits below the weather widget.
- 42. Update your operating system over the air, rather than through iTunes. Tap 'settings', 'general', and 'software update', and your iPhone will check in with Apple's servers for the latest releases.
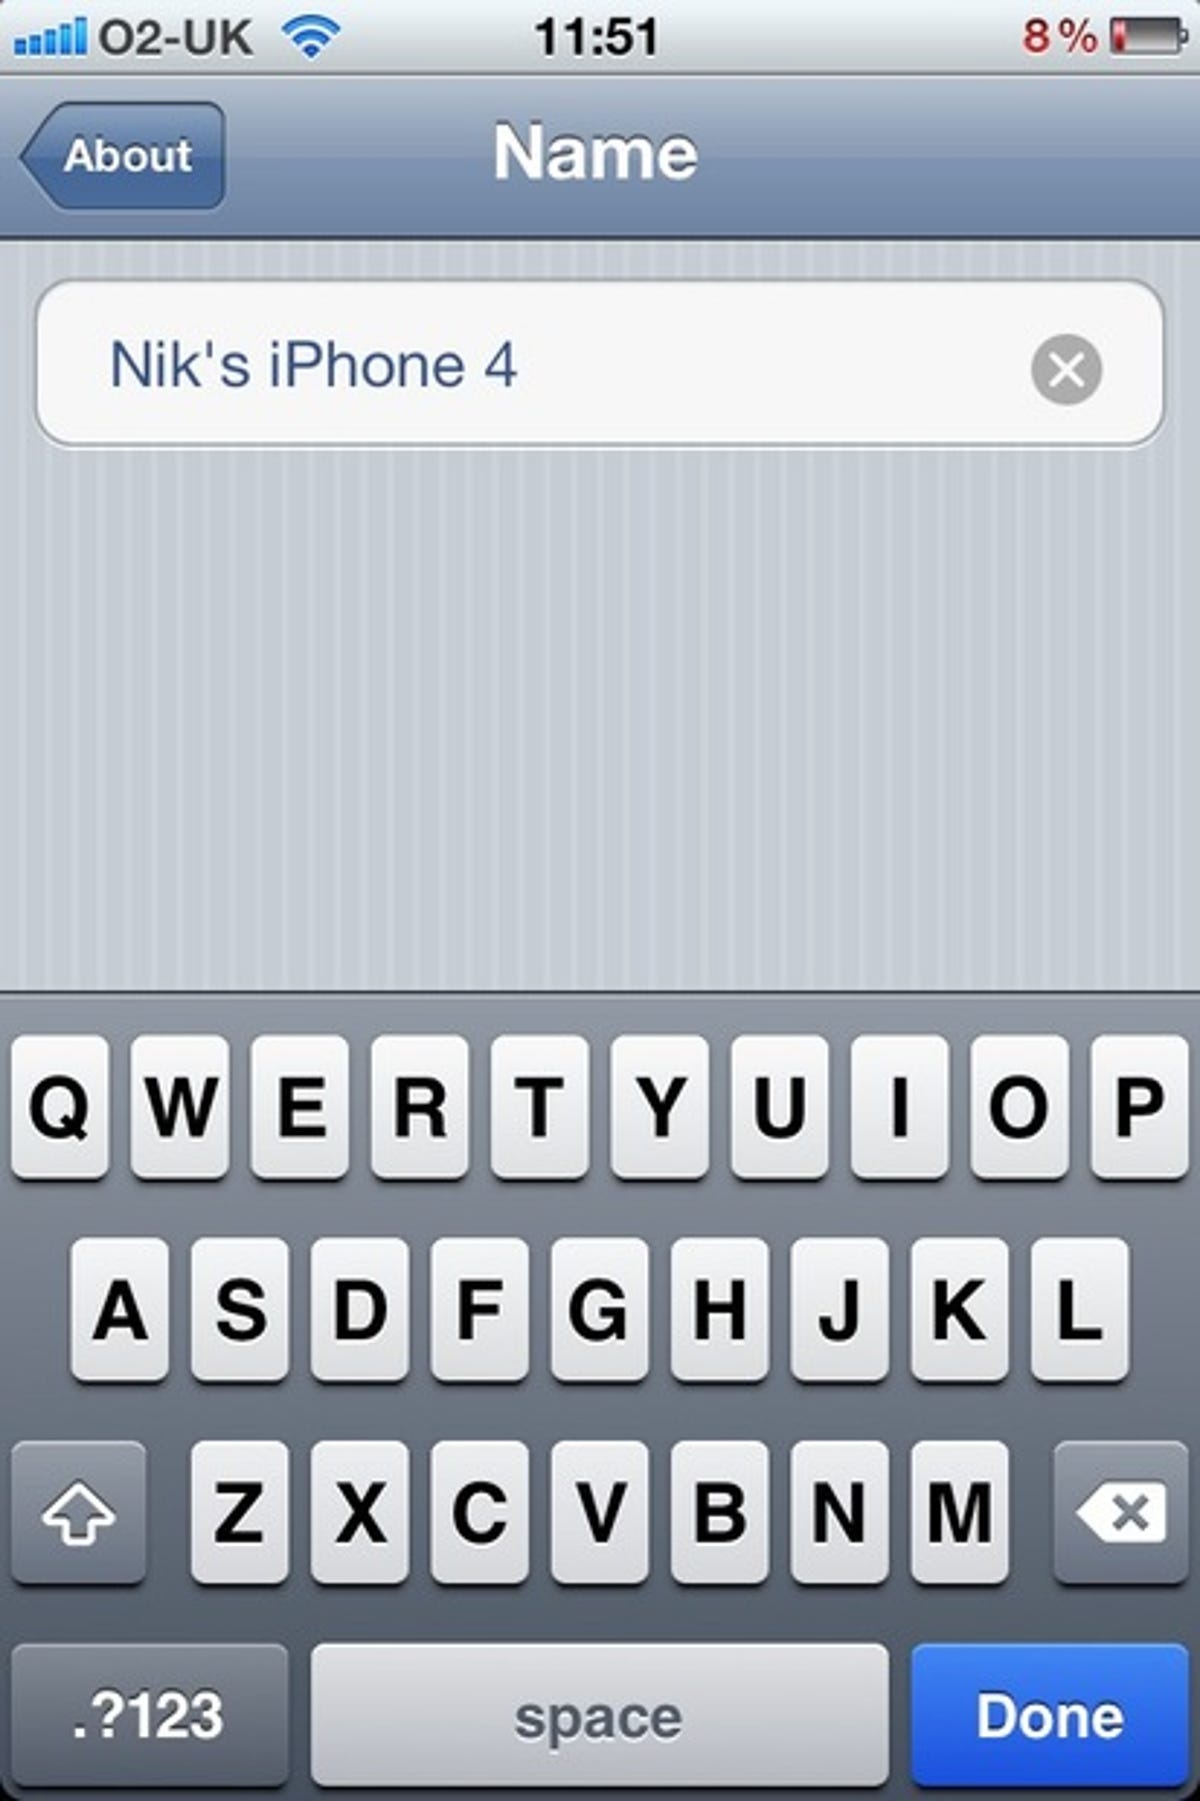
- 43. If you've copied your data to a new handset every time you've updated, your phone name may well bear little relevance to whichever model you're currently using. Change this so that it's correctly identified in the iTunes sidebar through 'settings', 'general', 'about', 'name'.
- 44. Having problems with a crashing application? Help the developer diagnose and fix what's going on by sending them a crash report. These are stored at 'settings', 'general', 'about', 'diagnostics and usage', 'diagnostics and usage data'. To copy a report, hold your finger on any part of it for a second or two, and then tap 'select all' and then 'copy'. The results can be pasted into an email.
Security
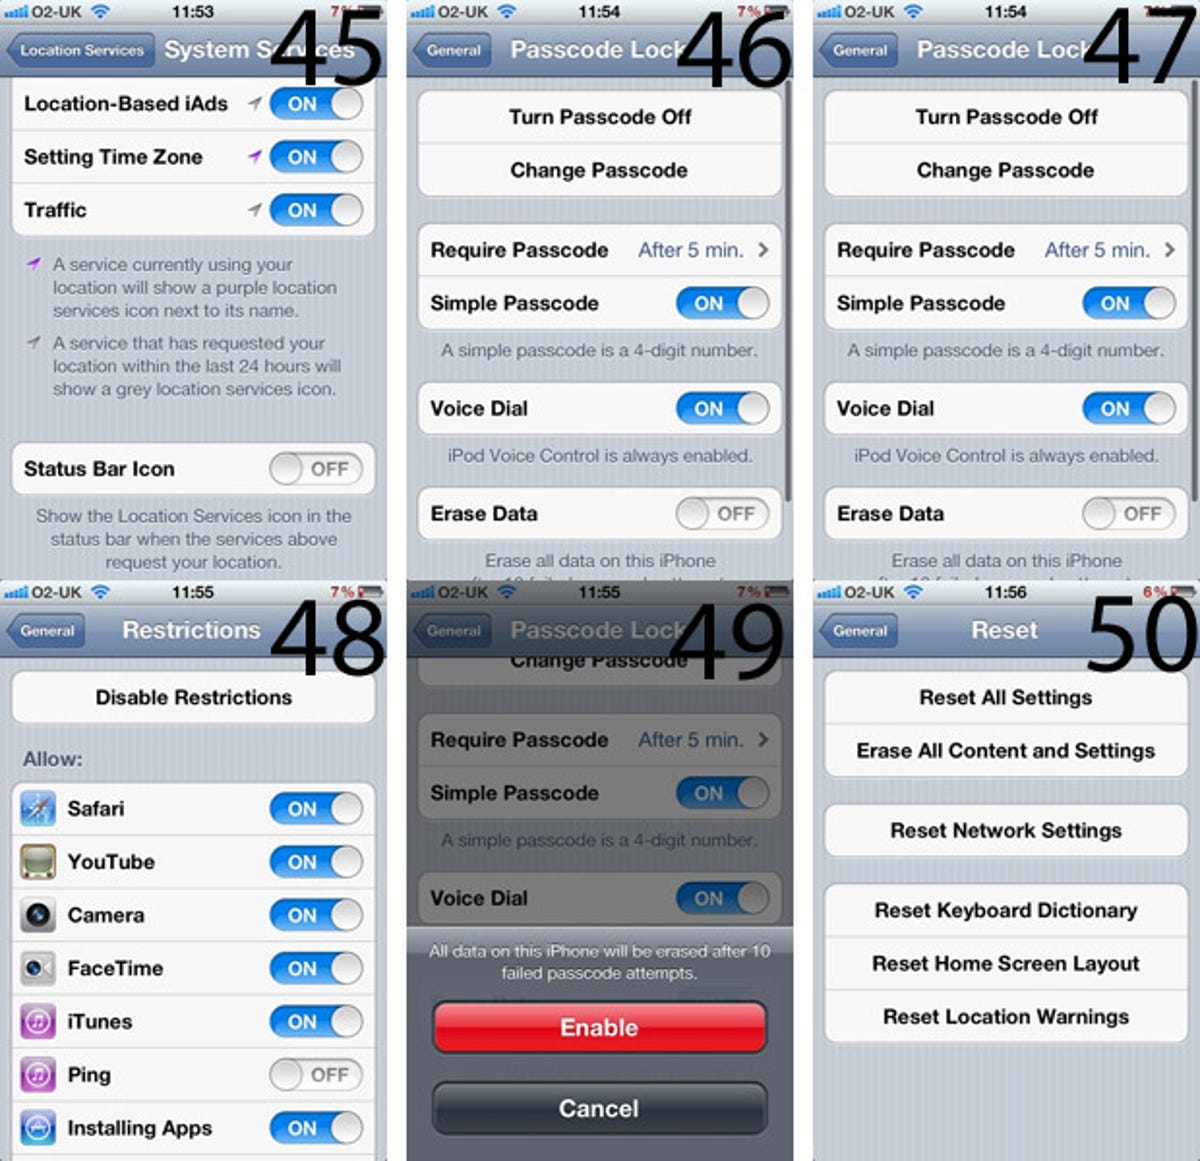
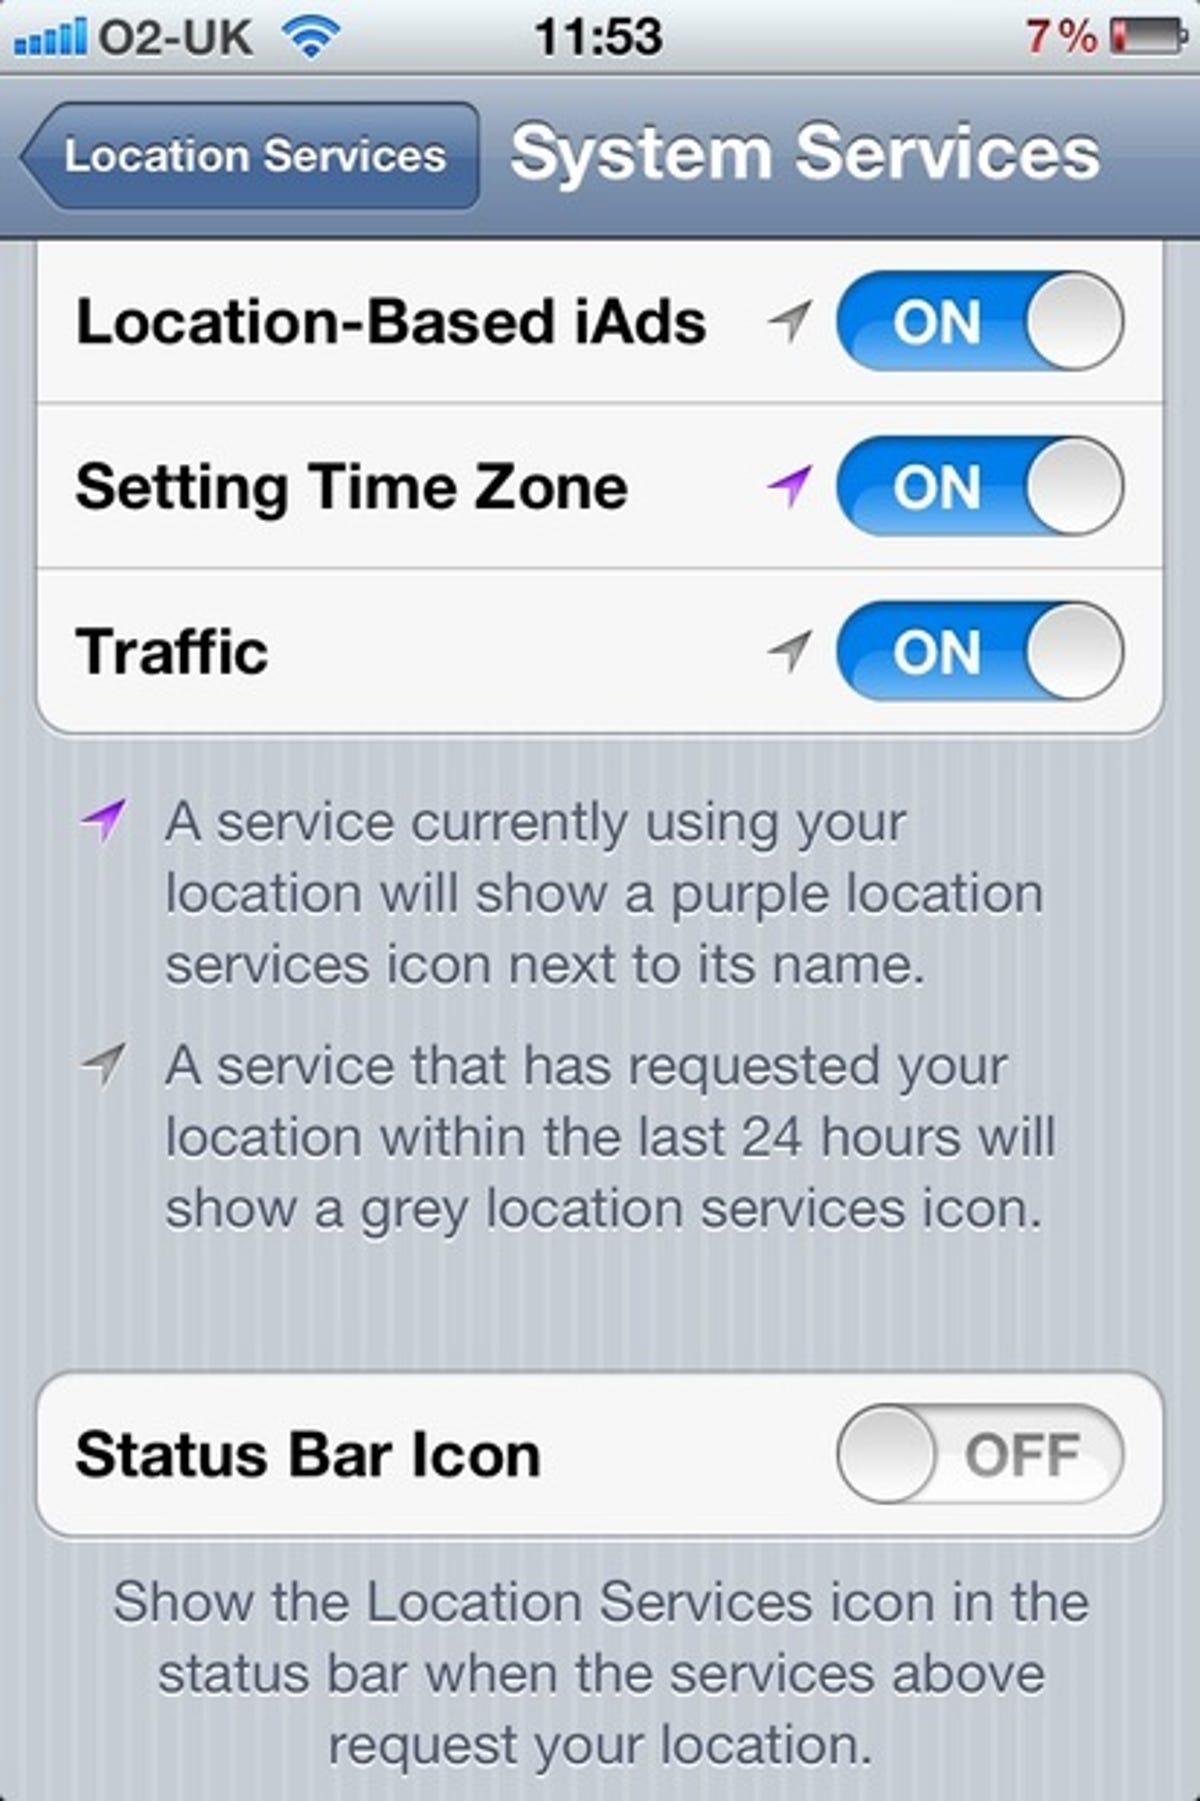
- 45. If you're worried about which apps are tracking you and when, keep yourself in the loop by forcing the iPhone to display the default location icon beside the battery meter whenever your location is being tracked. Tap 'settings', 'location services', 'system services', and then tap the on/off slider beside 'status bar icon'.
- 46. Check that your iPhone isn't set to automatically send usage data back to Apple, which can include your location. This setting is found at 'settings', 'general', 'about', 'diagnostics and usage'. Tap 'don't send'.
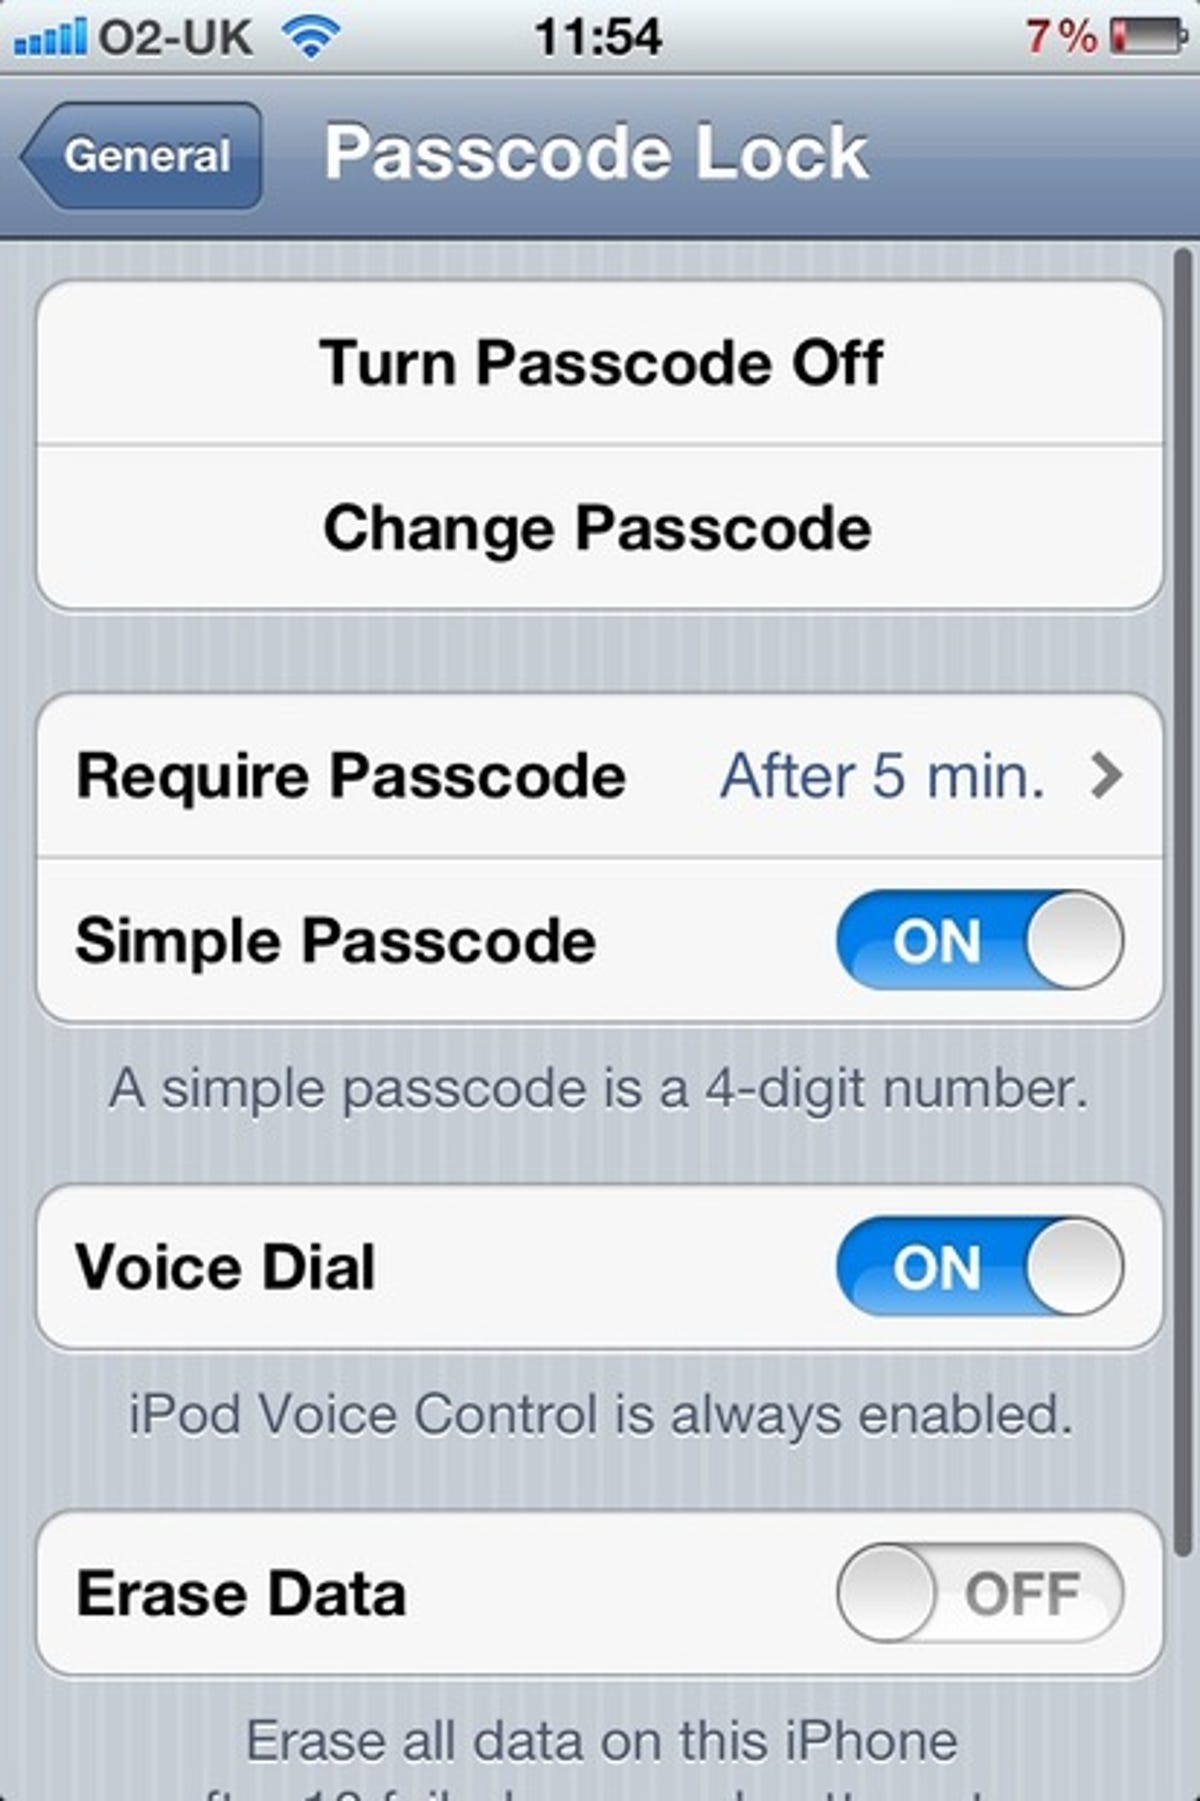
- 47. The iPhone's default passcode is a four-digit number. This opens up 10,000 combinations, so the passcode would be difficult to guess, but, if you want to make it really tricky, switch to the complex passcode and use a mixture of letters, numbers and special characters. Tap 'settings', 'general', 'passcode lock', enter your current passcode and then switch off 'simple passcode'. After entering your existing passcode yet again you can then use the regular keyboard to tap in a replacement.
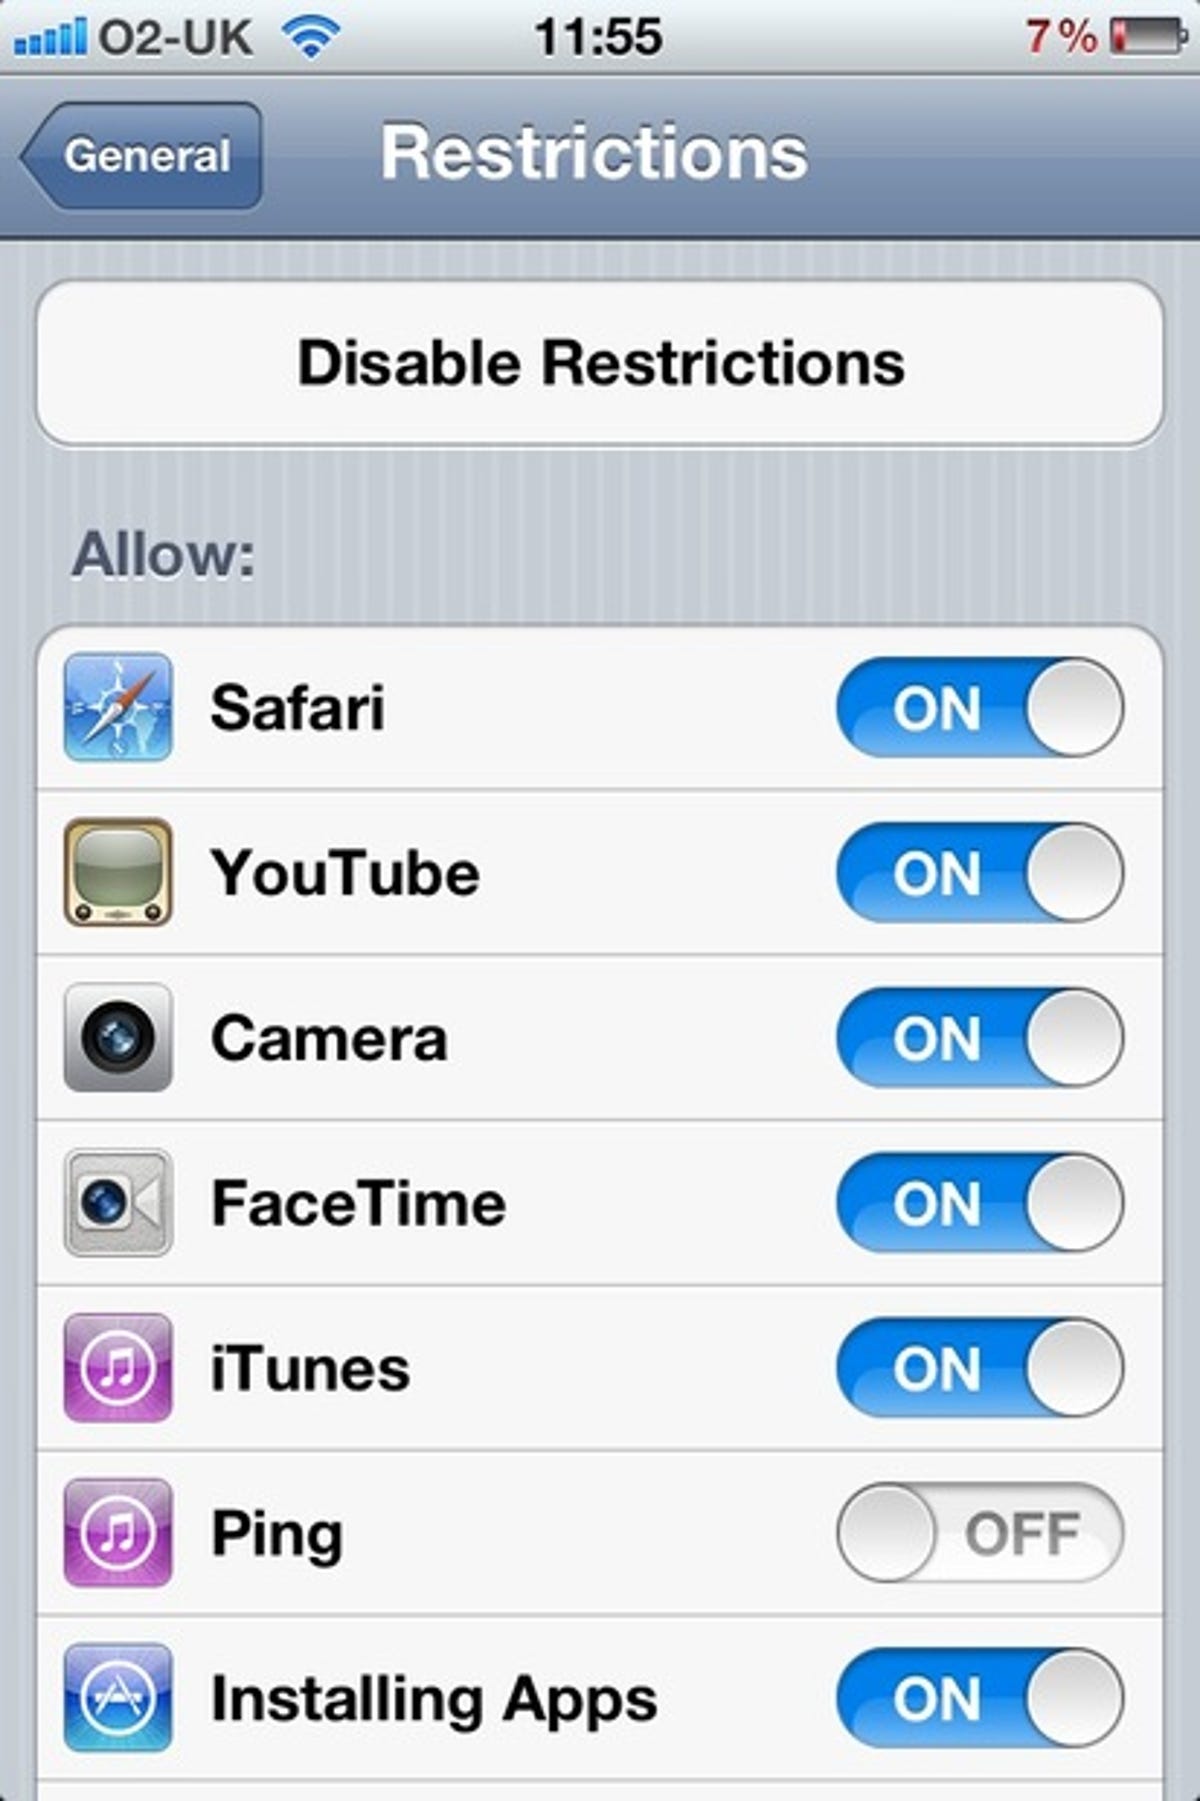
- 48. If you're handing on an old iPhone or iPod touch to your child, disable the apps you don't want the little terror to use, such as Safari or email. You'll need to set a passcode to do this, but you shouldn't set the code to also unlock the handset, as, if it did, you'd have to give this code to your child, which would mean they could use the same code to circumvent your restrictions. With the lock in place, tap 'settings' and 'restrictions', enter the passcode and then turn off the apps you want to disable.
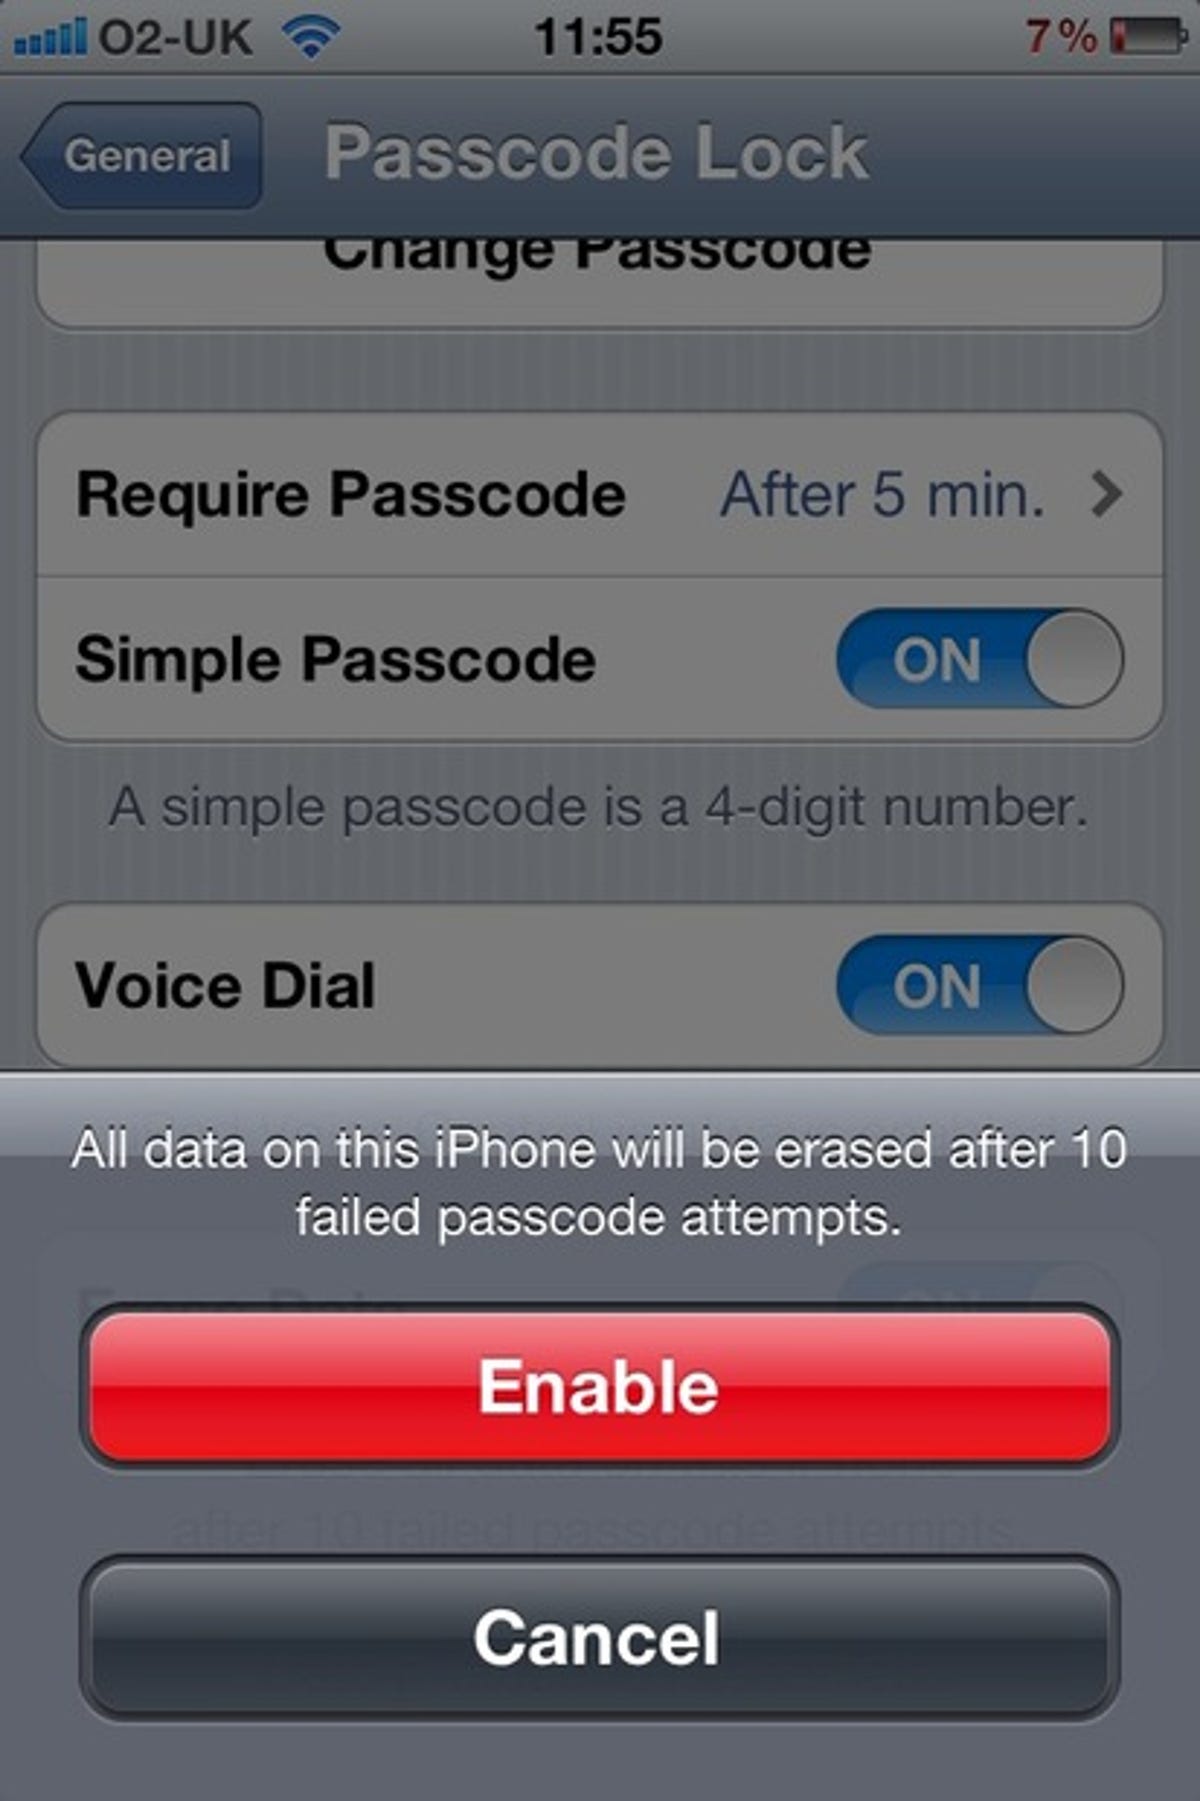
- 49. Your iPhone will cheerfully allow any thieving miscreant to enter a passcode as many times as they want, so, if they've got patience, they're guaranteed to unlock your phone eventually, even if it does take them 10,000 attempts. Thwart them by setting your iPhone to wipe itself after 10 failed attempts by going to 'settings', 'passcode lock' and 'erase data'.
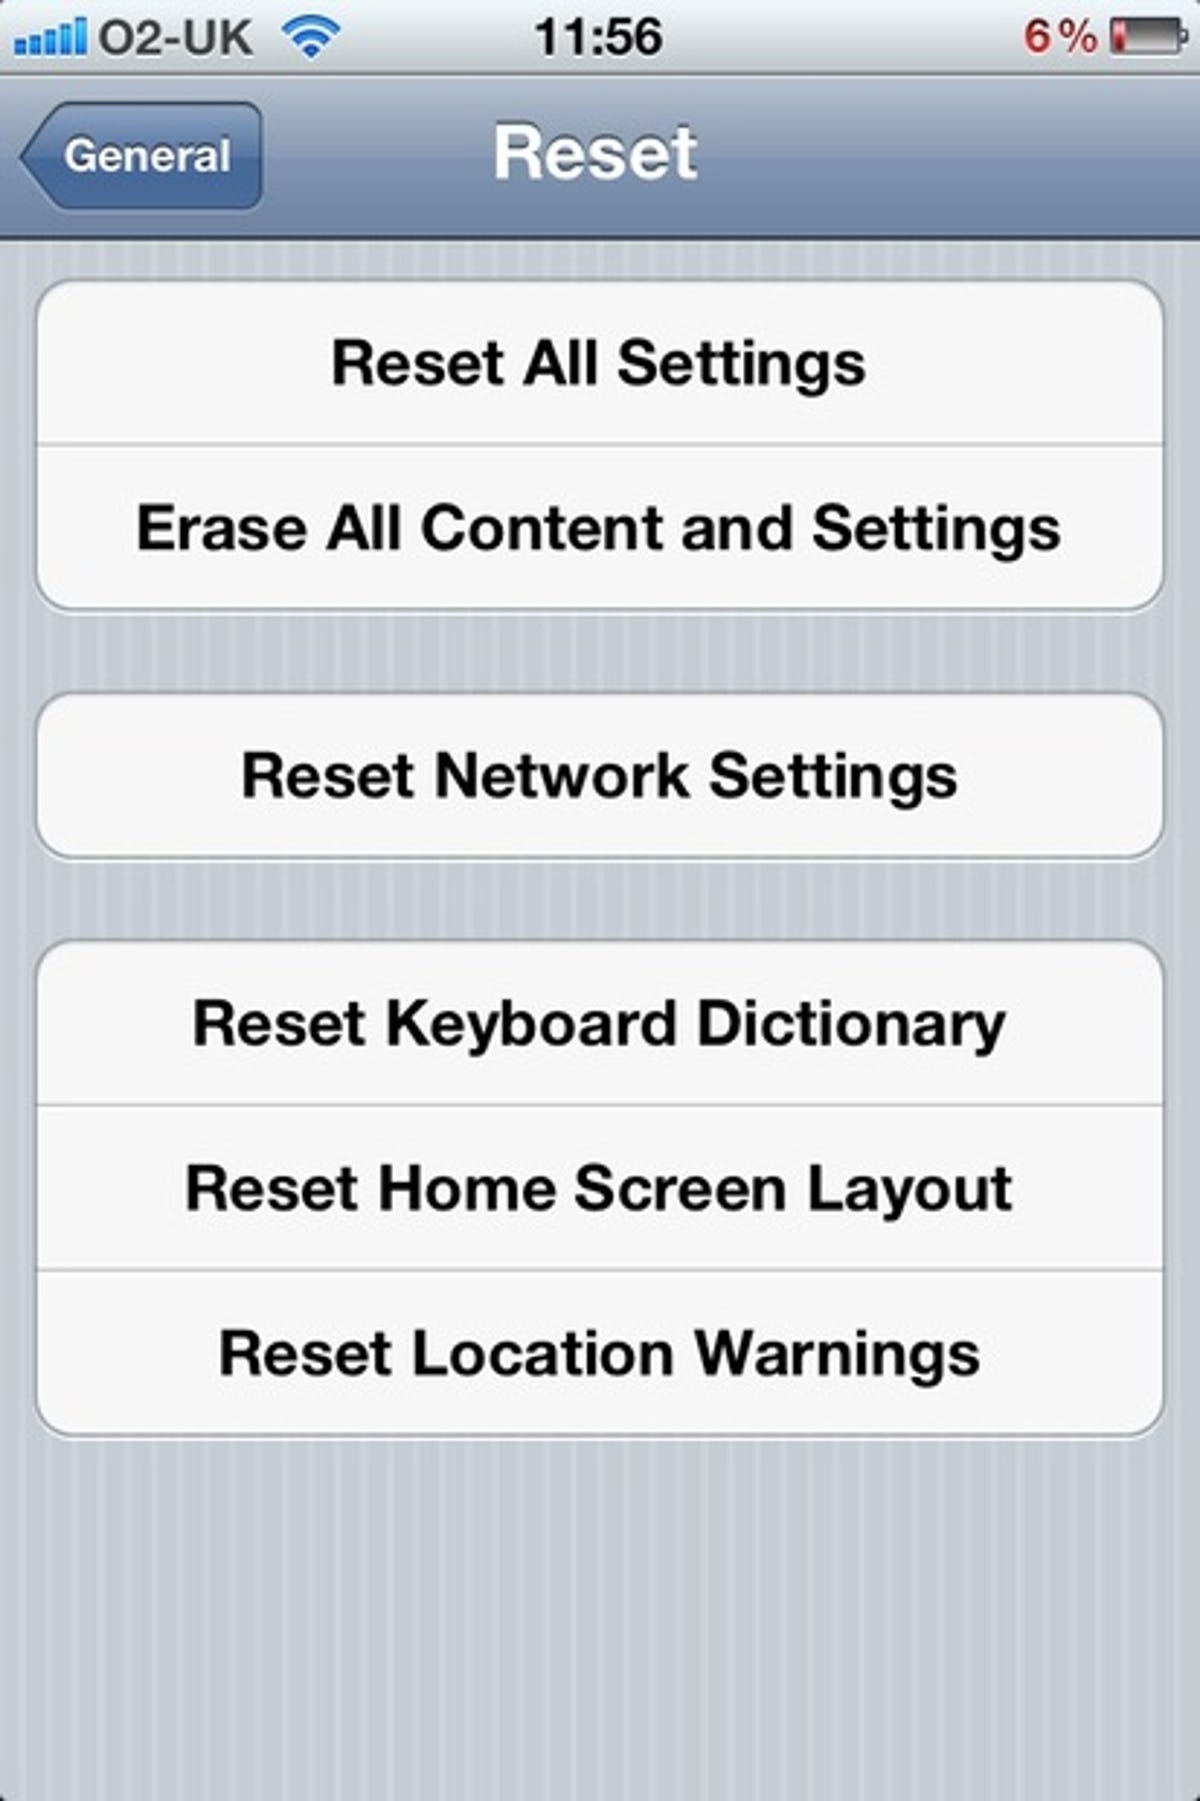
- 50. Before selling on your iPhone, clear all of your personal data at 'settings', 'general' and then 'reset'.


Services and Software Guides
VPN
Cybersecurity
Streaming Services
Web Hosting & Websites
Other Services & Software
Services and Software Coupons