 Why You Can Trust CNET
 Control a dSLR camera with your Android phone or tablet
Augment your dSLR camera with an Android app that offers advantages like better focus, time-lapse photography, and even the option to share photos the moment they're shot. Sharon Vaknin shows you how.


- Webby Award ("How To, Explainer, and DIY Video"); Folio Changemaker Award, 2020
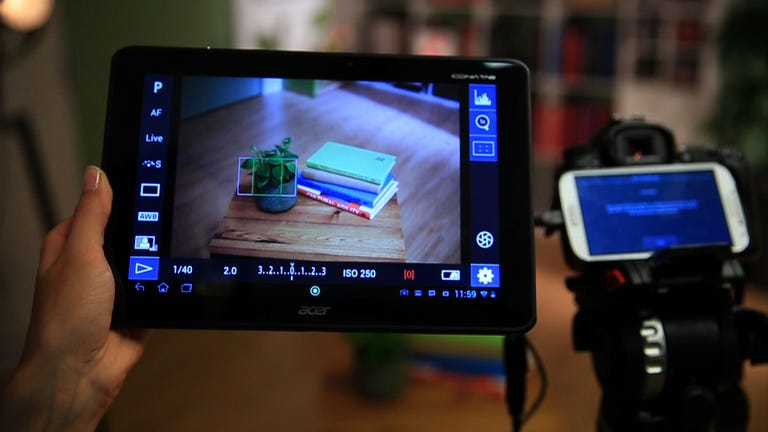
That Android phone or tablet you've got? Consider it your dSLR's best new accessory. With the help of a little adapter and an innovative app, you can use it to augment your camera, opening doors to a range of new shooting options and flexibility.
It's all thanks to the ever-useful USB On-the-Go adapter and an Android app. Once you're connected, every function available on your camera shows up on your Android device's screen and a large live view displays your shot. But there's more than meets the eye.
For the photography enthusiast, DSLR Controller includes tools that make shooting tasks like time-lapse photography, HDR, and focus bracketing otherwise complicated. For the social-media addicts, the app also makes it possible to store, view, and share your shots the moment you capture them. For many, that feature alone is worth the $8.
Photography pro or not, a camera-to-Android setup can add a lot of utility and fun to your normal shooting routine. Here's how.
Basic setup
Before you get started, ensure that both your camera and your phone are compatible with DSLR Controller. You can view a compatibility chart on the developer's Web site. In some cases, the app will work without any quirks, while some cameras can only partially take advantage of the features.
While most Canon cameras (2006 and later) are compatible with DSLR Controller, the app doesn't yet support Nikons. If you're a Nikon owner, check out DslrDashboard instead. The app has lots of the same features and is completely free.
For the sake of this guide, we'll focus on DSLR Controller, but no matter which app you go with, the setup is the same.
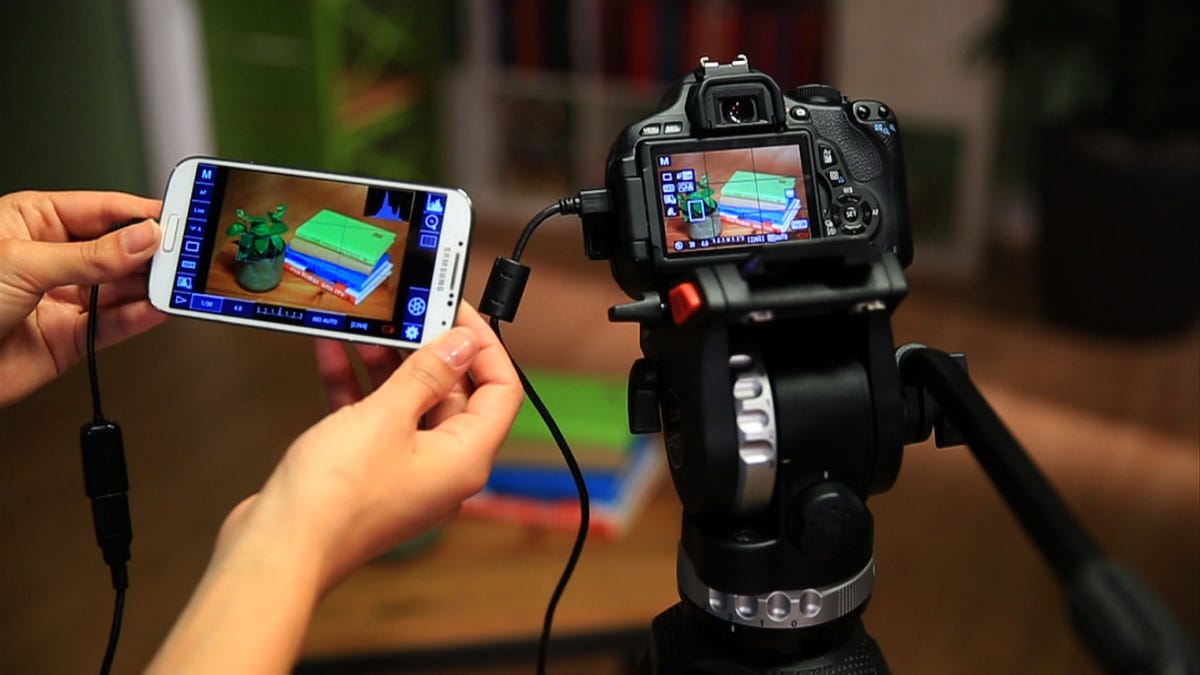
Download and install DSLR Controller on your Android device. Then, connect a USB OTG adapter to your phone. It's an incredible little accessory that turns your phone into a USB host, letting you connect a range of devices to it. Read more about it here.
Then, hook up a USB cable from your camera to the USB OTG adapter. Be sure to use the cable that came with the camera -- not all USB cables will function properly with the app. (Eventually, if you found yourself using this setup often, you might want to pick up a longer USB cable.)
Finally, switch on the camera. Once your Android recognizes it, DSLR Controller will launch.
Navigating the app
If you know your way around your camera, using the app will be pretty intuitive, too. That's because all the controls you're used to -- white balance, ISO, and so on -- are augmented in the app. On top of that, you've got a few tools not available on your camera.
But first, the basics. Shooting a photo is as easy as tapping to focus, then hitting the shutter button on the right. To reset your focus, long-press on a different spot in the frame. Then, check out the various tools along the edge of the screen.
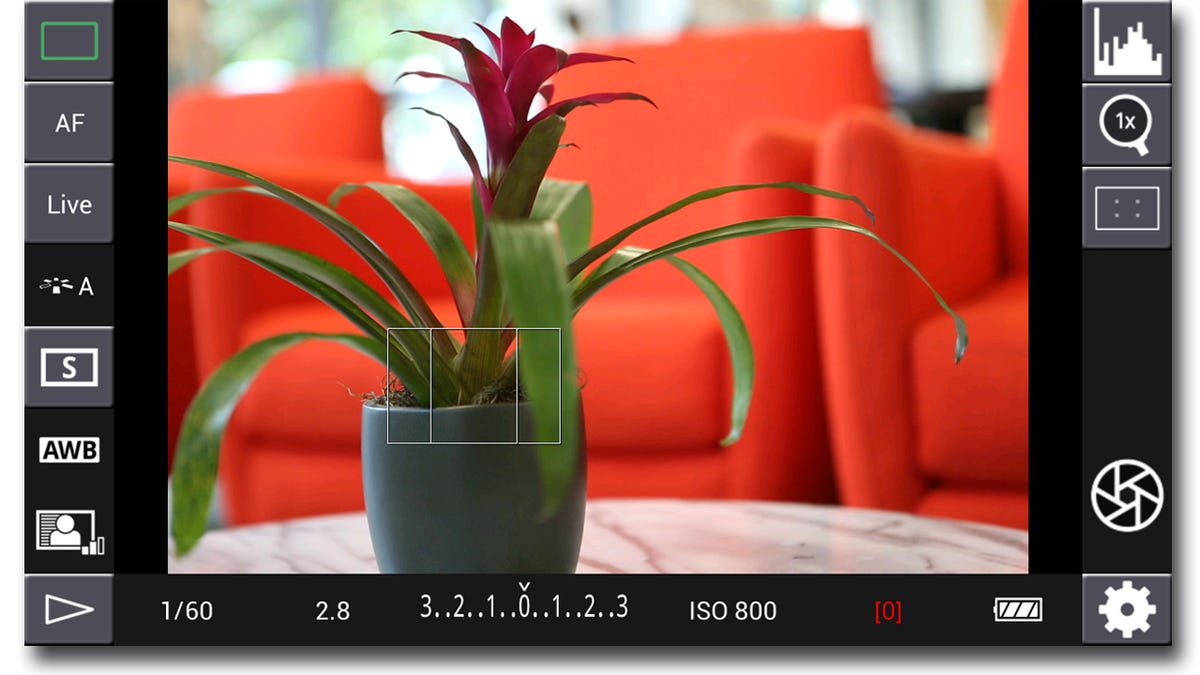
The left sidebar
On the left, you'll see all of your quick controls. Focus mode, picture style, drive mode, white balance, and other shooting mode-specific options can be tweaked from there.
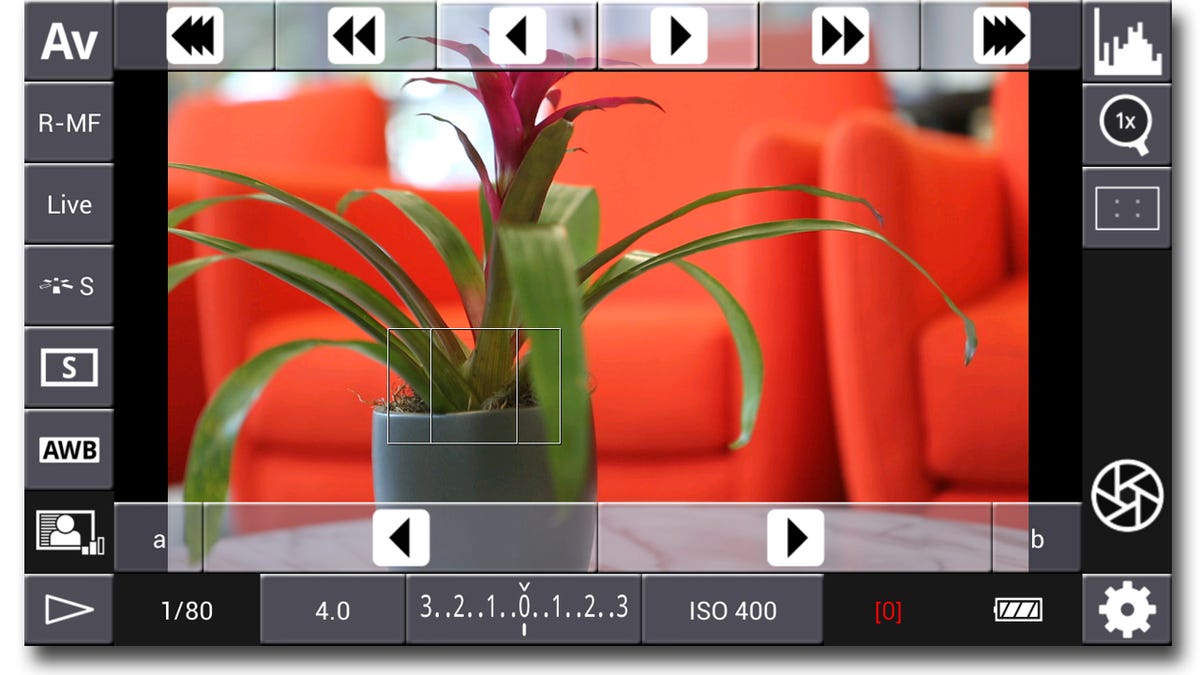
Focus mode is an interesting one, because manual focus actually has an automatic element. Instead of the focus being adjusted with the lens itself, it's fine-tuned with arrows in various increment ranges. First, select the increment at the top, then use the arrows at the bottom to adjust the focus. It's one of the tools that really exemplifies why a larger LCD screen is so useful; fine-tune and check the focus once, and you're set.
At the very bottom, you'll see a Play button, with which you can view all the photos stored on your camera's memory card. In that area, you can delete photos and save them to your Android device for quick editing and sharing.
Just remember that, obviously, the functions available in the sidebar correspond to whatever shooting mode you're in. DSLR Controller really works best when you're in Manual, Aperture Priority, or Shutterspeed Priority. The app also works in movie mode.
The bottom row
Along the bottom, the camera functions continue. In order, you can change the shutter speed, aperture, exposure, and ISO. To the far right are two very useful indicators -- shots remaining, and battery.
The right sidebar
Up top, tap the histogram button to quickly view an RGB or grayscale histogram, useful for evaluating the lighting and exposure. Below that is a magnification tool that you can use to zoom in on your shot and carefully check the focus. To use the tool, drag the white box to the area you want to home in on, then tap the magnification button.
Finally, you've got a grid tool, for maintaining a specific ratio or viewing the "rule of thirds" grid.
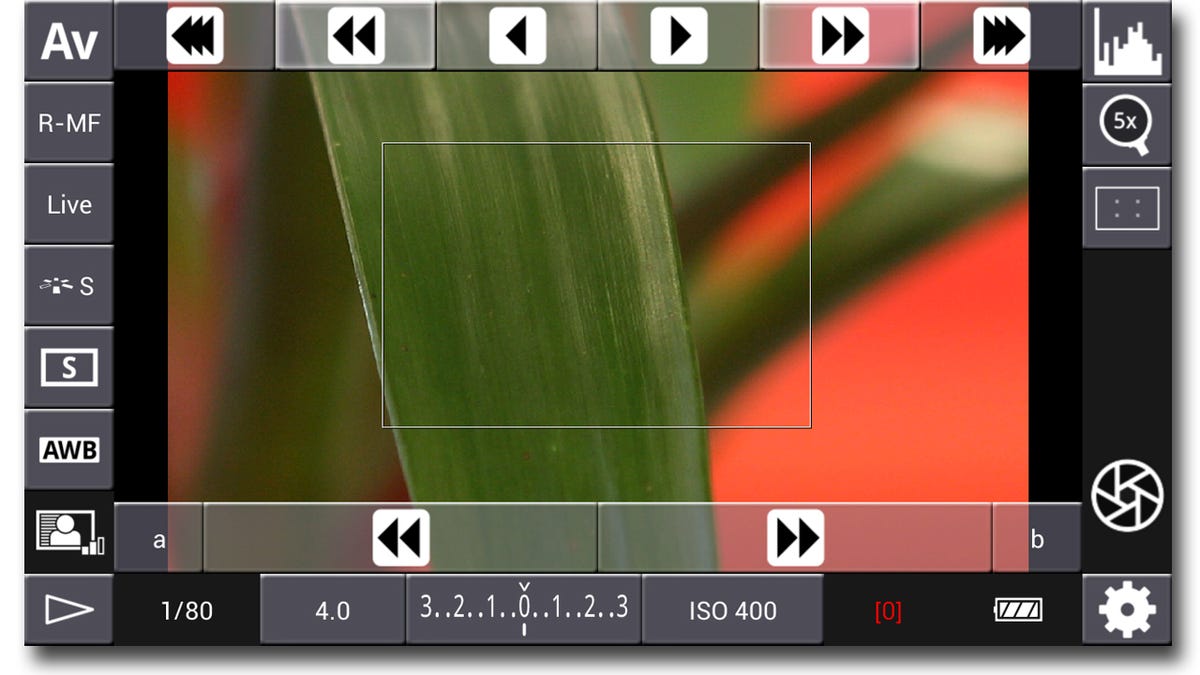
In the bottom-right corner are a big shutter button and settings. Settings is where app options can be tweaked, and that's also where you'll find the tools that make DSLR Controller that much more useful.
Advanced features and settings
Head to settings, and you'll see a mix of app options and advanced tools. There's a lot to dig into, but here are some of the most noteworthy ones:
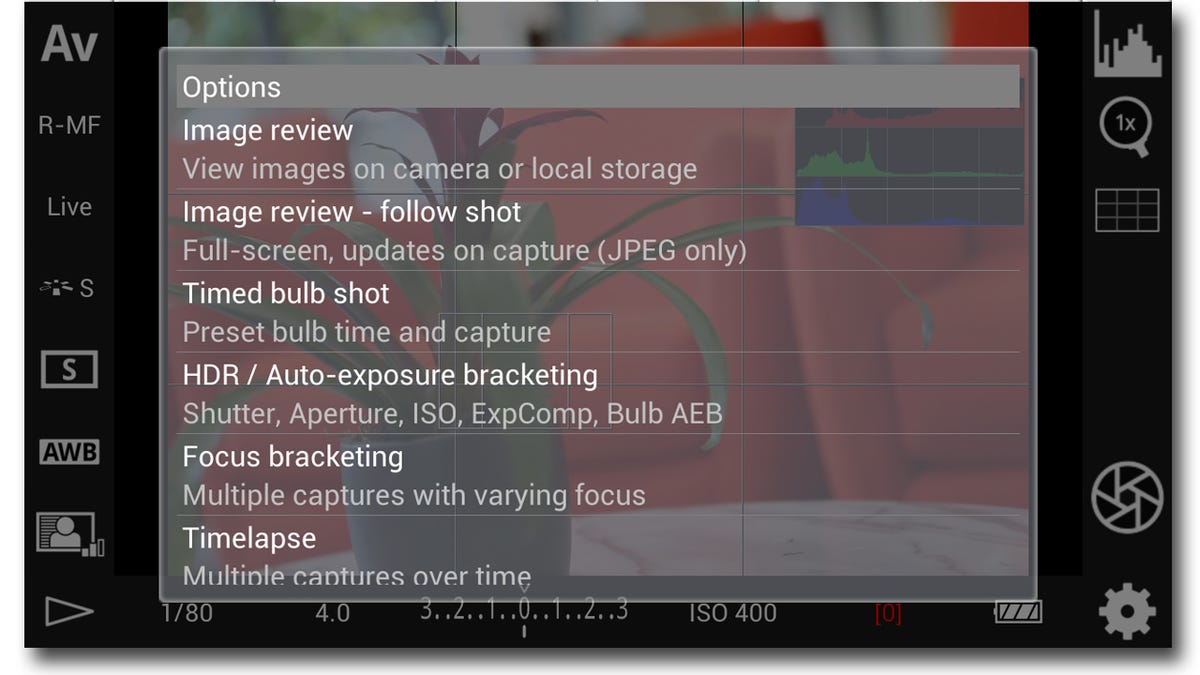
Image review
With DSLR Controller, you can choose to store the photos on your Android device in addition to your camera. If you absolutely want access to all your shots on your Android device, choose to save them there. Otherwise, it's better to import photos as needed, since saving to both devices could slow things down.
HDR/Auto-exposure bracketing
Instead of you needing to manually adjust exposure for HDR shots, DSLR Controller will do that for you automatically. It won't combine those photos for you, but it does expedite the shooting process.
Focus bracketing
The focus bracketing tool automatically shoots a sequence of photos at various focal lengths that can later be combined to create one photo with a wider focus range. This technique is especially useful with macro photography, but, of course, you'll need to continue the process of combining the photos on your PC.
Time-lapse
This here is one of the coolest reasons to snag DSLR Controller. Normally, if you want to shoot time-lapse images, you'd have to pick up an intervalometer -- a tool that automates shooting photos in intervals. But, with this app, there's a built-in tool that does just that.
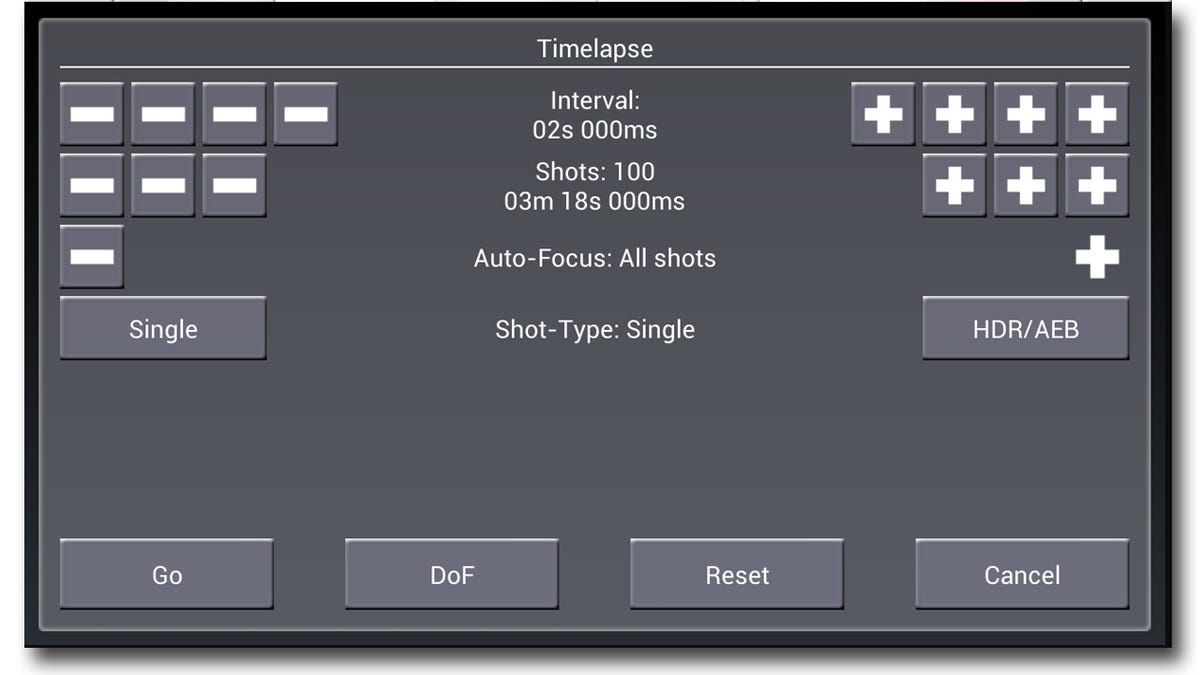
The setup screen for the time-lapse tool is a little confusing at first, so you may need to tinker with it a bit to get the hang of it. Essentially, the blocks on the left are "minus" buttons, and the blocks on the right are "plus" buttons. Use them to adjust the the elements down the middle of the screen (like interval, shots, and autofocus.)
When you're set, hit "Go," and your camera will start firing without any extra help.
Wi-Fi Passthrough
What's better than a camera-to-Android setup? A wired camera-to-Android setup. With the latest DSLR Controller setup, a second Android device can be tethered to the wired device, turning your second device into the primary, wireless controller.
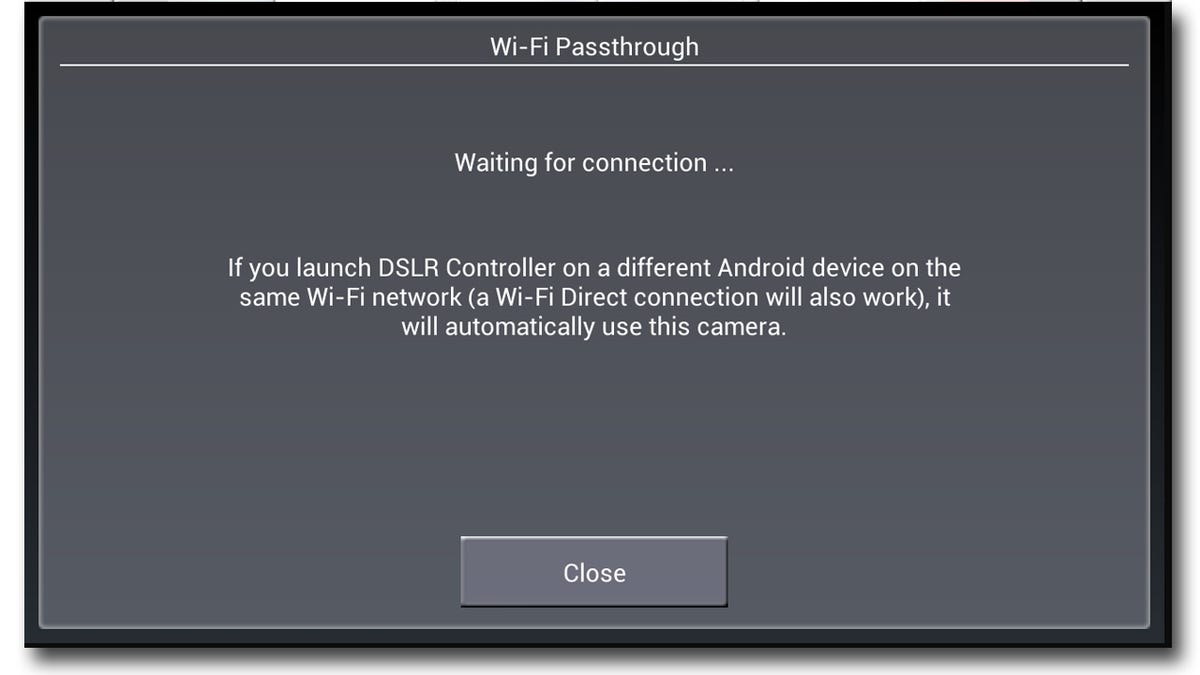
To use it, simply connect both devices to the same Wi-Fi network. Then, tap this setting option and launch DSLR Controller on the second device. You are now free to move about the cabin.
Optimizing the rig
This camera-to-Android setup isn't ideal for all shooting situations, but if you find yourself making use of it often, consider ways to optimize your rig. This will vary depending on whether or not you're utilizing the Wi-Fi Passthrough feature (above), but here are some ideas to get you going:
- As always, bring extra batteries for your camera, since being connected to your Android will draw more power than usual. Likewise, it's very useful to bring an extra battery for your device (if its battery can be swapped).
- Mount your phone on top of the camera using a hot-shoe mount and a compatible phone mount. The latter piece can get pricey, so you might also want to consider a DIY solution.
- Use a Gorillapod designed for smartphones to mount your phone on the leg of the tripod.
- Get a long USB cable to win some distance away from the camera, useful for self-portraits or setting up a photo booth.
- Attach some sort of pocket or sleeve to your tripod, so that you can store and grab your phone as needed. This one would do the trick.