3D Printer Build Week: Wrap-up
We succeeded in building a working 3D printer, but we still have a lot to learn.


I haven't left my office once today without bringing our octopus to show someone.
This thing is fascinating, both in terms of how it came to be, and also for how good it looks. It still has a few wisps of plastic hanging off it. Each eye socket also has a small loop of plastic drooping down from where it meets the head. For those few lines, gravity apparently overcame the adhesion properties of the melted filament.

But I still can't stop marveling at the contours of the design. From the shape of its bulbous head, to the way the mouth portion transitions seamlessly into the front tentacles, even though I can see and feel the ridges from the layered plastic, our octopus has the look and feel of a professional design. Many kudos to Thingiverse user Brian "yeoldebrian" Emerson for his excellent 3D modeling work.
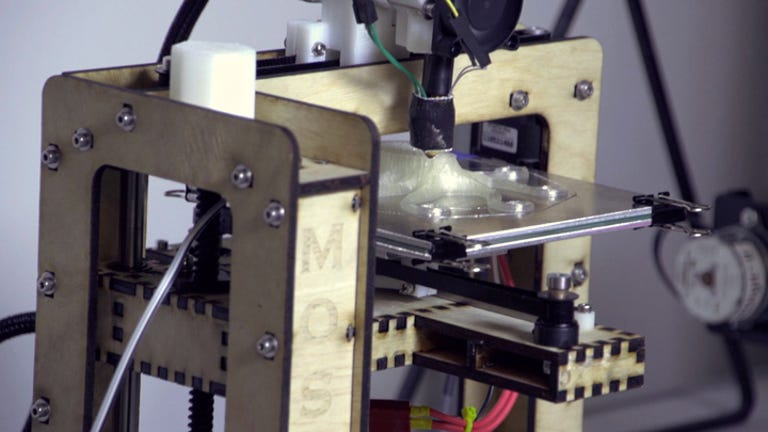
For all of the gee-whiz feeling I get from looking at our creation, as well as the printer itself, I also feel like we barely understand the full capabilities of our MakerGear Mosaic 3D printer, its software, and the plastic feedstock.

For example, there's a "skin" feature in the Skeinforge settings software that's supposed to smooth the outer layer of your object to give it a more polished feel. I'd like to try it.
I'm also interested to know how the output would differ if we switched to ABS (acrylonitrile butadiene styrene) plastic, instead of the 1.75mm PLA (polylactic acid) plastic included in our Mosaic kit. Or what if we used 3.5mm PLA instead?
Or what if we used a different infill pattern? Or changed the filament feed rate? Or upped the extruder speed? We can adjust all of those things and others in Skeinforge. The possibilities are exciting, and I expect many trial prints and a lot of melted plastic in the coming weeks.
The beauty of the Mosiac, and all of the 3D printers that support the various open-source printing apps out there is their high degree of tweakability. Skeinforge has a huge assortment of options, to the point that it's daunting. It has exotic-sounding functions like "clairvoyance," "oozebane," and "splodge." The Skeinforge wiki helps to a certain extent, but even after reading, how those functions ultimately affect the output is still a bit unclear.

That brings up another point. I didn't touch on this much throughout the week, but there is a passionate, active 3D-printing community available to help online if you're willing to seek them out. We found the answers to most of our problems via the MakerGear Google group, but MakerGear also operates an IRC channel, and owner Rick Pollack tells me that the community usually answers questions there within a few minutes. Rick says that might have shaved a few hours from our estimated 16-hour built-to-print time. Even beyond MakerGear-specific support, the 3D-printing enthusiast community has volumes of information available online.
As taken as I am by this still-emerging category, I have a pile of desktops in the lab that also need attention. The next time we check in with 3D printing hands-on will hopefully be when we have a pre-assembled 3D printer to subject to a full review. Between now and then, I hope to spend more time with our printer to experiment and dig deeper into the software.
Fun week. Big thanks to MakerGear for providing us with a Mosaic 3D printer kit. If we print anything else of note, we'll post it here.
3D Printer Build Week: Day One