Twitch streaming from your PC guide: Setting up a video stream in OBS
How to set up your first Open Broadcaster Software 'scene' with a webcam's video feed.


Time to set up your stream, including the feed from your webcam.
You don't need a webcam to stream gameplay on Twitch, but viewers like to see the person who is playing. This tutorial will walk you through setting up your first Open Broadcaster Software scene, complete with a game stream and a webcam video stream.
Step 1: Download Open Broadcaster Software
Before you can do anything with OBS, you need to...have OBS. You can download OBS here (Windows users should download the latest version of OBS, while Mac and Linux users should download OBS MultiPlatform).
Once OBS is installed, you will need to tweak the settings -- you should only need to do this once, the first time you use OBS. Open the settings by clicking the Settings button in the lower right corner. Under General, set your language. You can also create a Setting Profile, but you don't have to.

Settings in OBS can be tweaked for your streaming needs.
Under Encoding, in the Video Encoding section, make sure both 'Use CBR' and 'Enable CBR padding' are checked. Twitch recommends your Max Bitrate be 3300 or 80 percent of your upload throughput, whichever is lower. To find your upload throughput, do an upload test here, which will give you your upload speed in megabits per second. Multiply this number by 1,000 to get your upload speed in kilobits per second (Kb/s as reflected in the software). If this number is lower than 3,300, enter it in the Max Bitrate box.
In the Audio Encoding section, Twitch recommends using an AAC codec with a bitrate of 64 to 128 kbps.
Under Video, your Video Adapter should be set to your default graphics card. If you have multiple graphics cards, choose the one you'll be playing your game on. The Base Resolution should be the native resolution of your monitor (if you have more than one monitor, choose the monitor you'll be playing the game on).
The Resolution Downscale can be set to downscale your monitor's resolution to output a lower-resolution feed. A lower resolution will use less bandwidth; if your Max Bitrate from the Encoding section is low, you may want to use this feature. For this tutorial, the Filter should be Bilinear, FPS should be 30 and Aero should be enabled.
For Audio settings, check out Making yourself heard, and for Broadcast settings, check out Going live.
Step 2: Create a scene
When you use OBS to stream, you first build a "scene" of all the elements you want your viewers to see. These elements include things like the game you're playing, your webcam's video feed and your computer's desktop.
Creating a scene is easy: Just right-click in the Scenes box and click Add Scene from the dropdown menu. Name your new scene and then click OK.
To delete a scene, right click its name and click Remove. You can also rename, reorder and copy scenes.
You can build multiple scenes, which is useful if you stream different video games. For example, one video game might have its user interface in the upper right corner, so you put your webcam's feed in the upper left corner, but another video game might have its interface in the upper left corner.
Step 3: Add your gaming source
The first thing you will want to add to your scene is a gaming source -- the source that displays the game you're playing. There are three different sources you can use to do this: Game Capture, Window Capture and Monitor Capture.
To add a source to your scene, make sure the scene is selected and right-click inside the Sources box. Click Add and then choose the type of source you want to add.
Game Capture
Game Capture captures the feed from a single game. It's the only source that will capture games running in full screen mode, but it can occasionally be unstable.
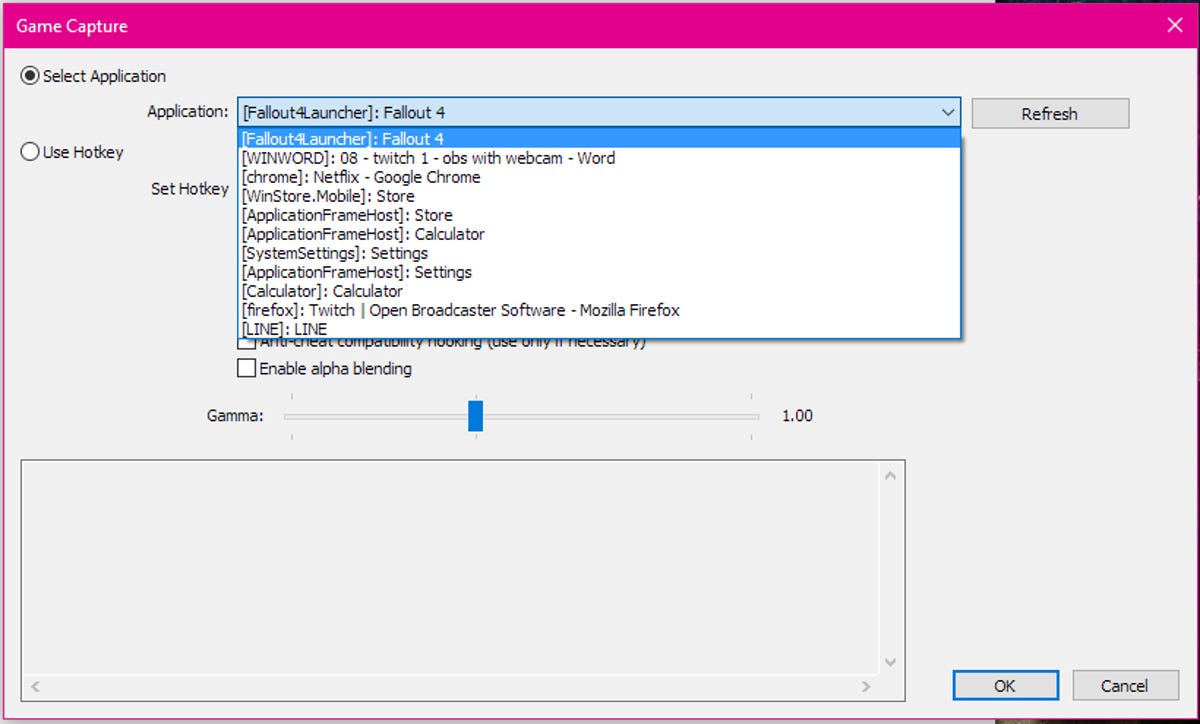
Pick out the game you want to capture for your Twitch stream here.
Add Game Capture as a source, name it (the name of your game should be fine) and choose the game you want it to capture. The game must be open for OBS to see it; if you don't see your game, make sure it's open and click the Refresh button. Game Capture only supports DirectX 8, 9, 10, 10.1, 11 and OpenGL games.
Window Capture
Window Capture captures the feed from a single window -- this could be a game (running in windowed mode), a Web browser or any other program/app. Window Capture is more stable than Game Capture, and works with all games (and windows), but will not capture a game running in full screen mode.
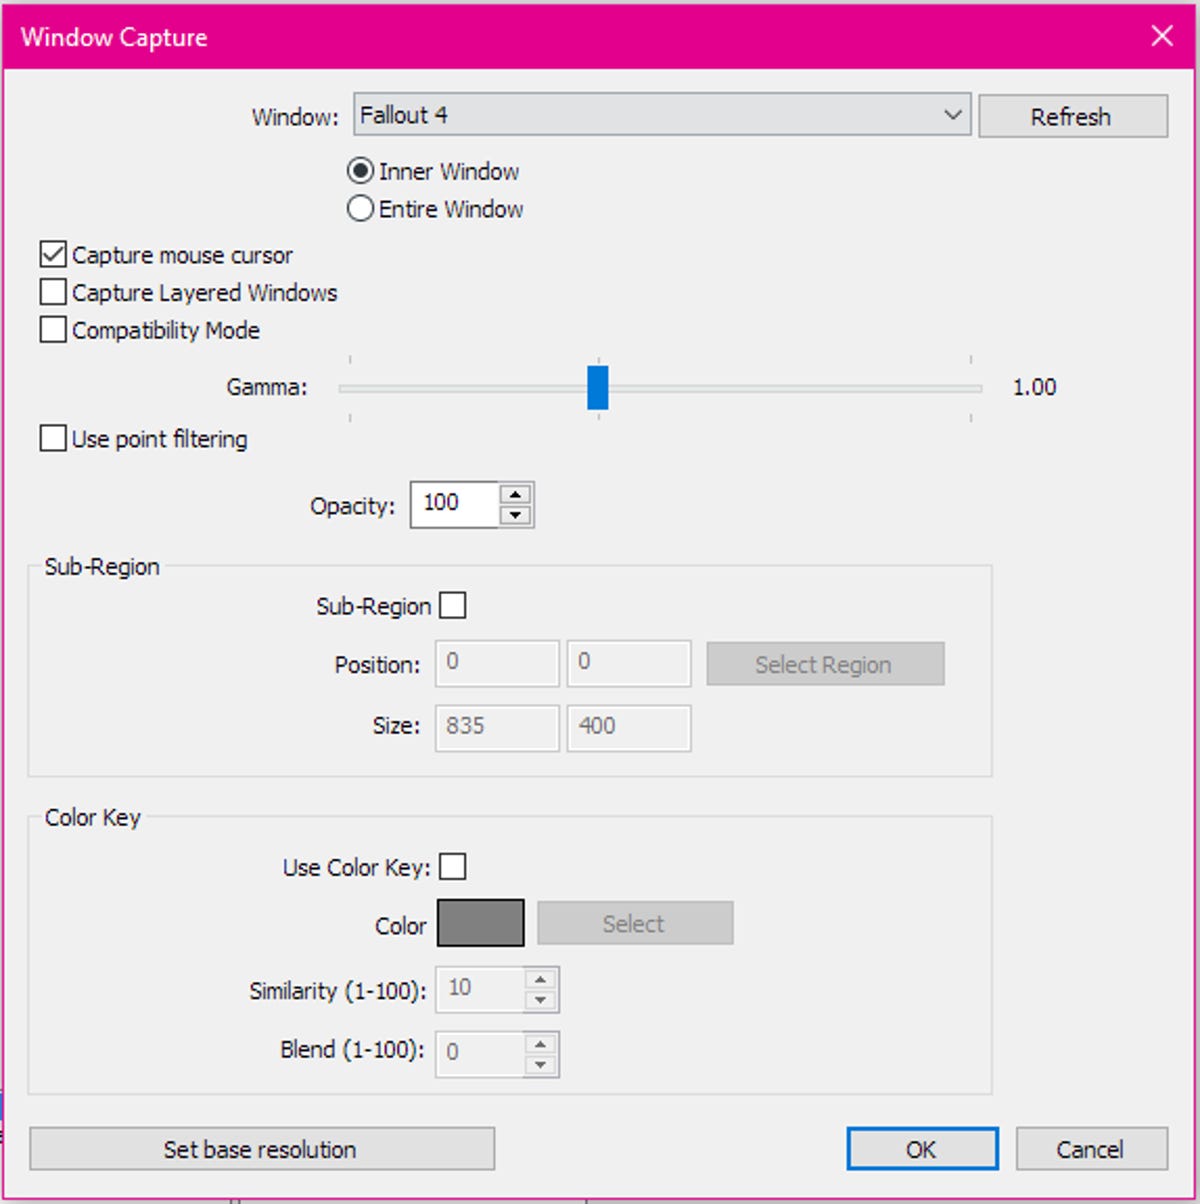
You can also choose to capture a specific window.
Add Window Capture as a source, name it and choose the window you want to capture. You can choose to capture only the inner window, or the entire window (including the title bar). You can also choose whether you want mouse movement to be captured. For this tutorial, don't worry about the other settings.
Monitor Capture
Monitor Capture captures your entire monitor. It's not very efficient if you're running Windows 7 or older, and it will not capture games running in full screen mode.
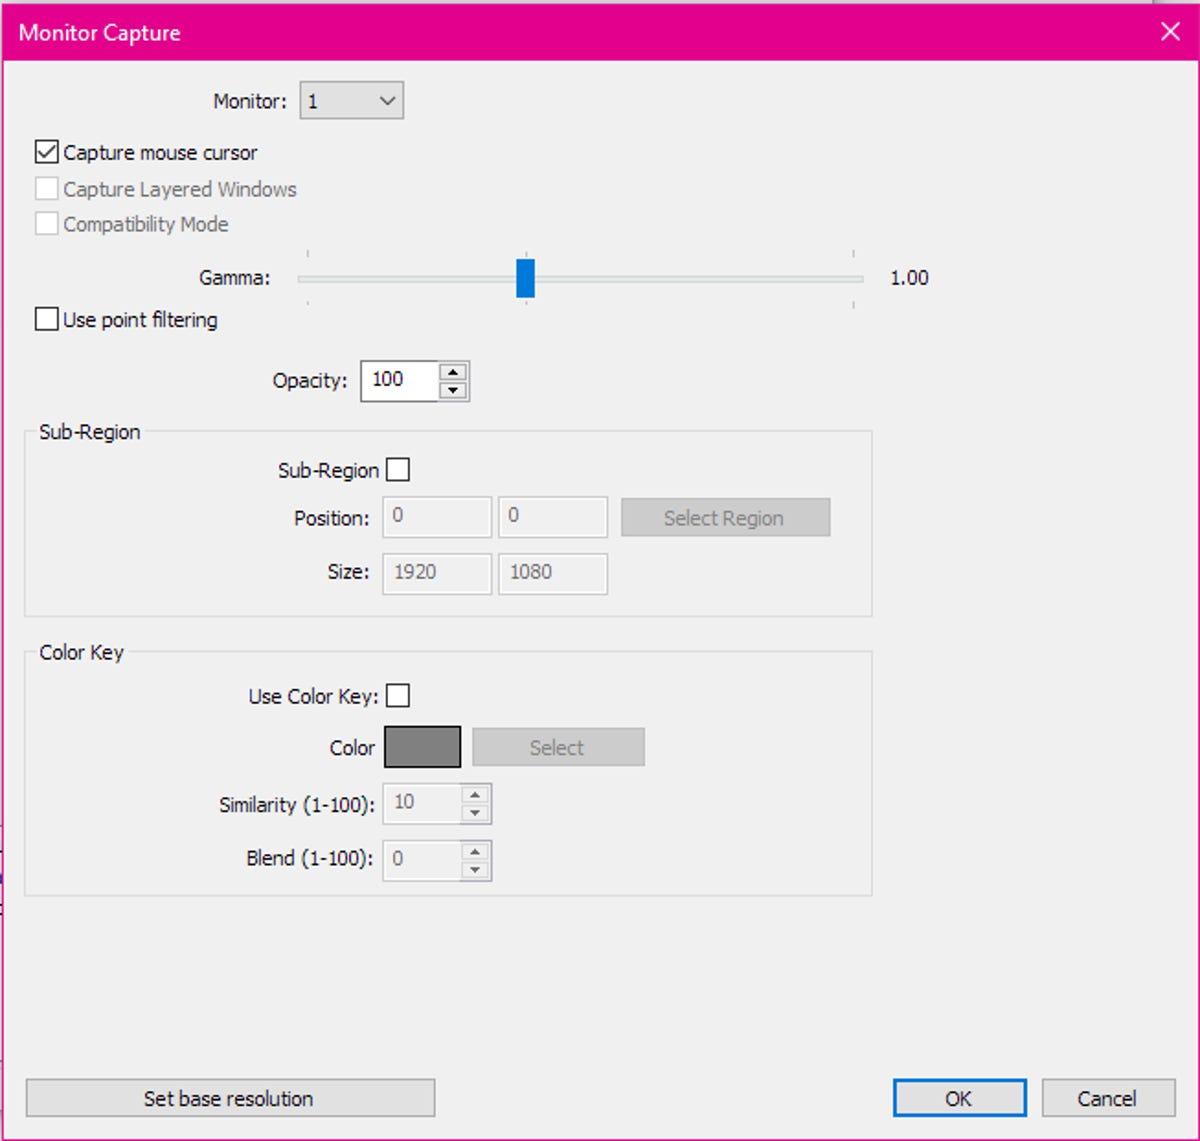
Monitor Capture allows you to capture your monitor's image.
Add Monitor Capture as a source and name it. Choose the monitor you want to capture (listed by number) and choose whether you want mouse movement to be captured. For this tutorial, don't worry about the other settings.
Step 4: Add your webcam source
Once you have your game source set up, you can add your webcam. Right-click inside the Sources box and click Add > Video Capture Device and type in a name for your source.

This window lets you choose your webcam for your stream.
A Device Selection window will open. In this window, you can choose your Device (if you only have one video streaming device, you should see your Webcam here) and tweak how your video looks. You can flip your image vertically or horizontally, choose a custom resolution and open up your webcam's settings by clicking the Configure button. Some webcams have built-in microphones, so you'll want to make sure the correct Audio Input Device is selected (in the Audio section).
Step 5: Edit your scene
You should now have two sources in your scene -- a game source and a webcam source. But you will not see any visuals in OBS until you start streaming, recording or previewing your stream. To see what your scene will look like to your viewers, hit Preview Stream.
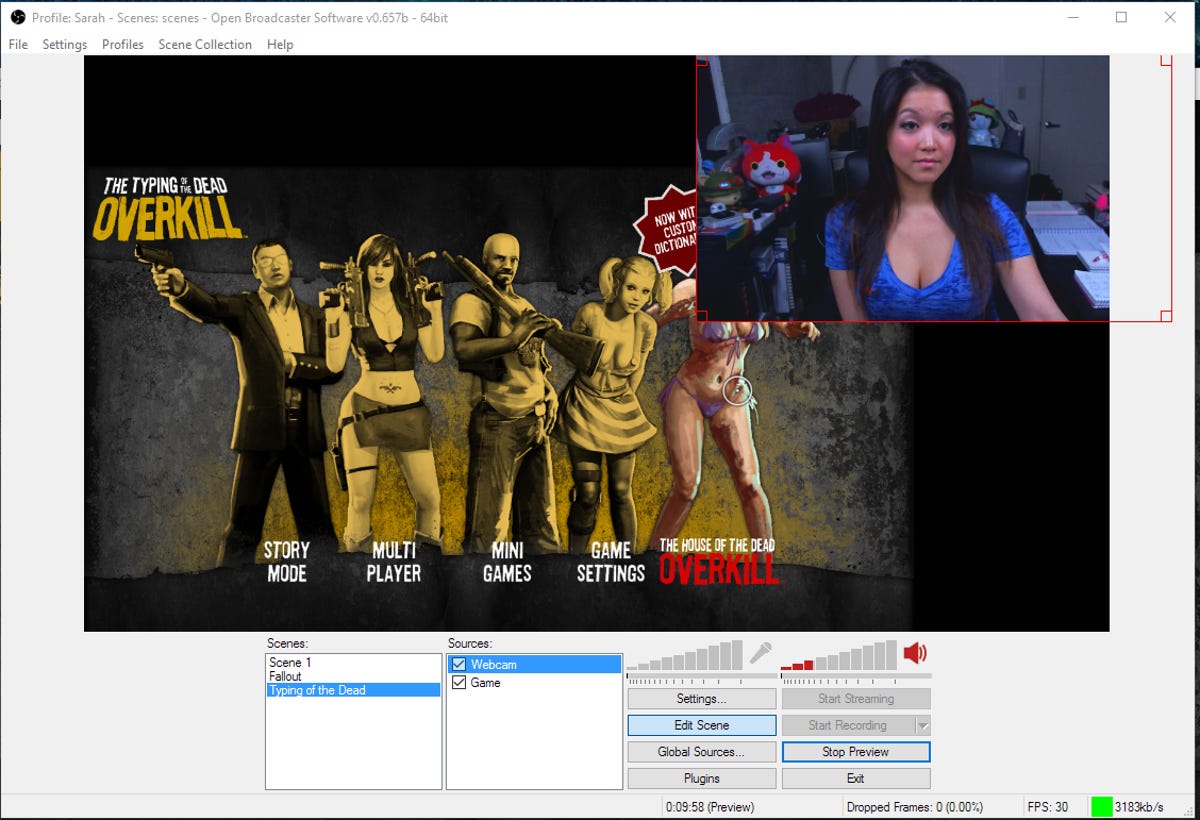
This preview can give you an idea of what a session of The Typing of the Dead Overkill will look like when streaming.
At first, your sources will be all over the place -- maybe your webcam feed is covering an important part of your game's interface. To move and resize elements, click Edit Scene. You can now drag elements around the screen and resize them with your mouse. If you want to bring an element forward, right-click on it in the Sources box and click Order > Move Up, Move Down, Move to Top or Move to Bottom. You can also position and resize elements from this menu -- right-click on the element in the Sources box and click Position/Size.
When your stream looks exactly the way you want it to, click Edit Scene to exit the editing mode.