Secure your Facebook account in six easy steps
View your Facebook profile as the public and your friends see it, and then use Facebook's global settings to restrict access to and use of your posts, photos, and other information.


If you're looking to completely customize your Facebook privacy, you're expected to work your way through 40 entries, many of which list multistep instructions for changing a single setting.
Wouldn't you rather spend your time on Facebook sharing pictures of your fast-food lunch or watching videos of grumpy cats? If so, you can skip scrolling through screen after screen of shag-carpet text and instead zip through this six-step Facebook privacy refresher.
Step one: See your profile as others see it
Once you know how forthcoming your current Facebook setup is, you can decide what changes you need to make to your share settings. To view your account as others view it, sign into your account, choose the gear icon in the top-right corner, click Privacy Settings, and select Timeline and Tagging in the left pane.
Next, click View As to the right of "Review what other people see on your timeline" in the "Who can see things on my timeline?" section. Click Okay to close the pop-up window, if necessary. Your timeline will then appear as the public sees it.
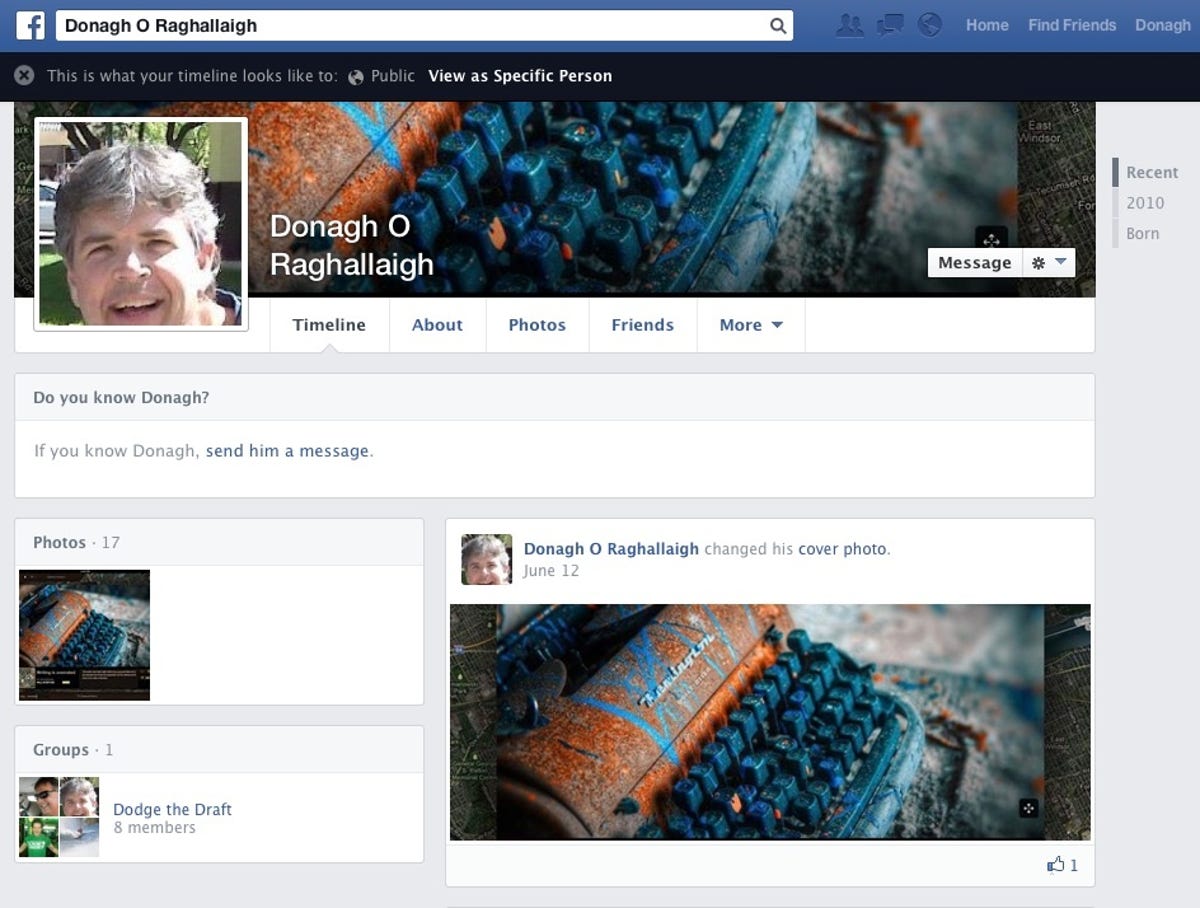
If you've limited access to your timeline to friends only, the public will see only your profile and cover photos, a link for contacting you (which you can limit to friends of friends), the people you're following, and the groups you belong to. To view your profile as a particular person sees it, click View as Specific Person at the top of the window and enter the person's name.
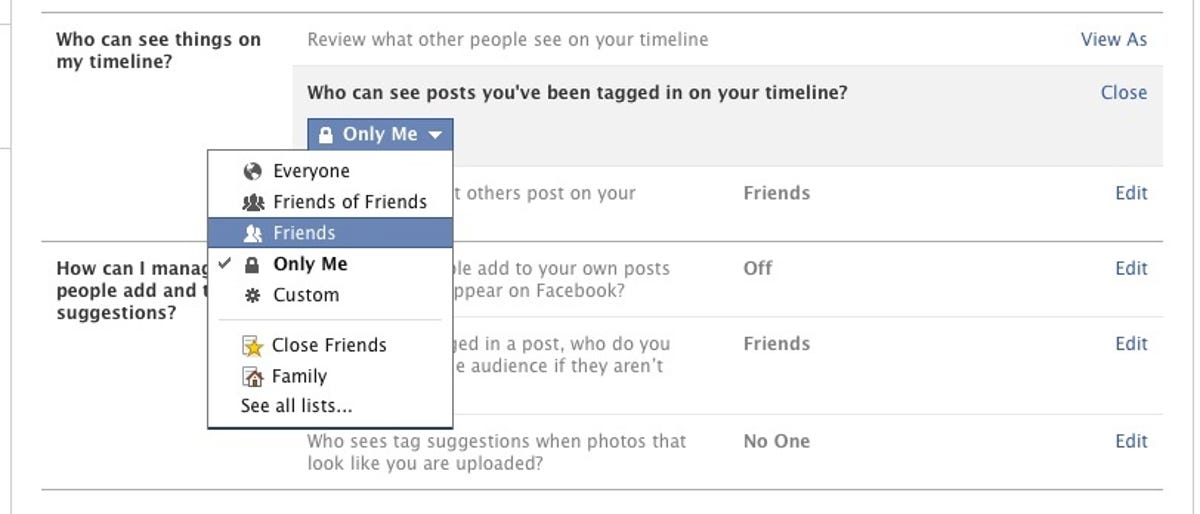
To change who can view your timeline, return to Facebook's Timeline and Tagging settings and click Edit to the right of "Who can see posts you've been tagged in on your timeline?" and "Who can see what others post on your timeline?" Make your selections for each setting on their drop-down menus and then click Close.
Step two: Make sure you're browsing securely
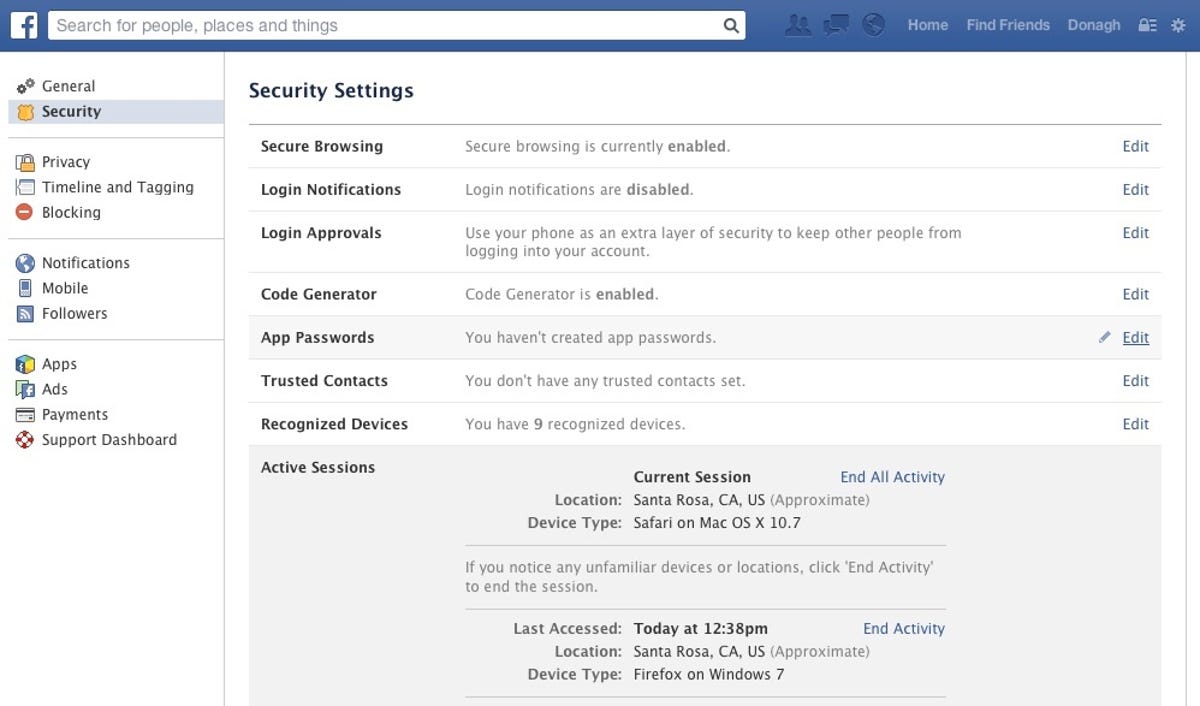
Last month Facebook made secure browsing the default for all users. To ensure you're using a secure connection whenever one is available, click Security in the left pane of Facebook's Account Settings and make sure Secure Browsing is enabled.
The security settings also let you enable log-in notifications and approvals, and view and edit your recognized devices and active sessions. To remove a device, click Edit to the right and then Remove next to the device's entry. Likewise, to end one or all active Facebook sessions, click Edit to the right of Active Sessions and choose End Activity or End All Activity, respectively.

Step three: Limit access to you and your Facebook stuff
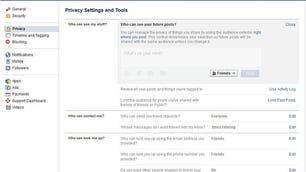
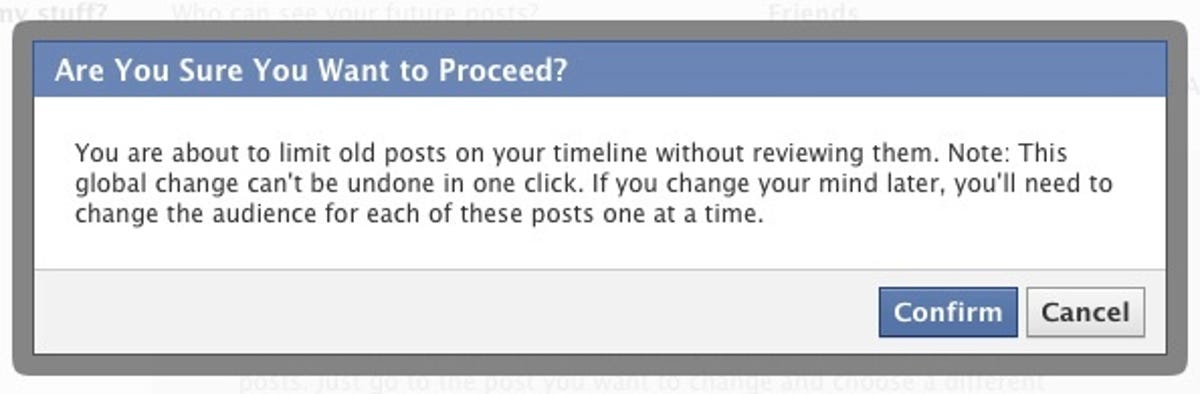
To restrict access to your past and future Facebook posts, click Privacy in the left pane of the Account Settings. Then choose Limit Past Posts under "Who can see my posts?" and Edit to the right of "Who can see your future posts?" in the same section. A warning appears when you attempt to limit access to all your past posts at once rather than changing the setting post-by-post.
The options under "Who can contact me?" let you limit friend requests and filter the messages you receive. You can also restrict who can look you up by e-mail address and phone number, who can look up your timeline by name, and whether your timeline will link to search engines.
Step four: Tame your timeline and tags
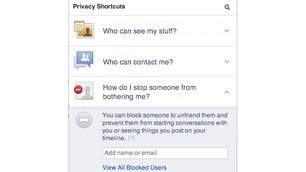
You've already determined who can view your timeline (see step one), but you can also block friends from adding to your timeline and review photos someone attempts to tag you in via the Timeline and Tagging Settings. The only two options for "Who can post to my timeline?" under "Who can add things to my timeline?" are Friends and Only Me. To enable review of posts your tagged in before they appear on your timeline, click Edit to the right of the entry and select Enable in the drop-down menu.
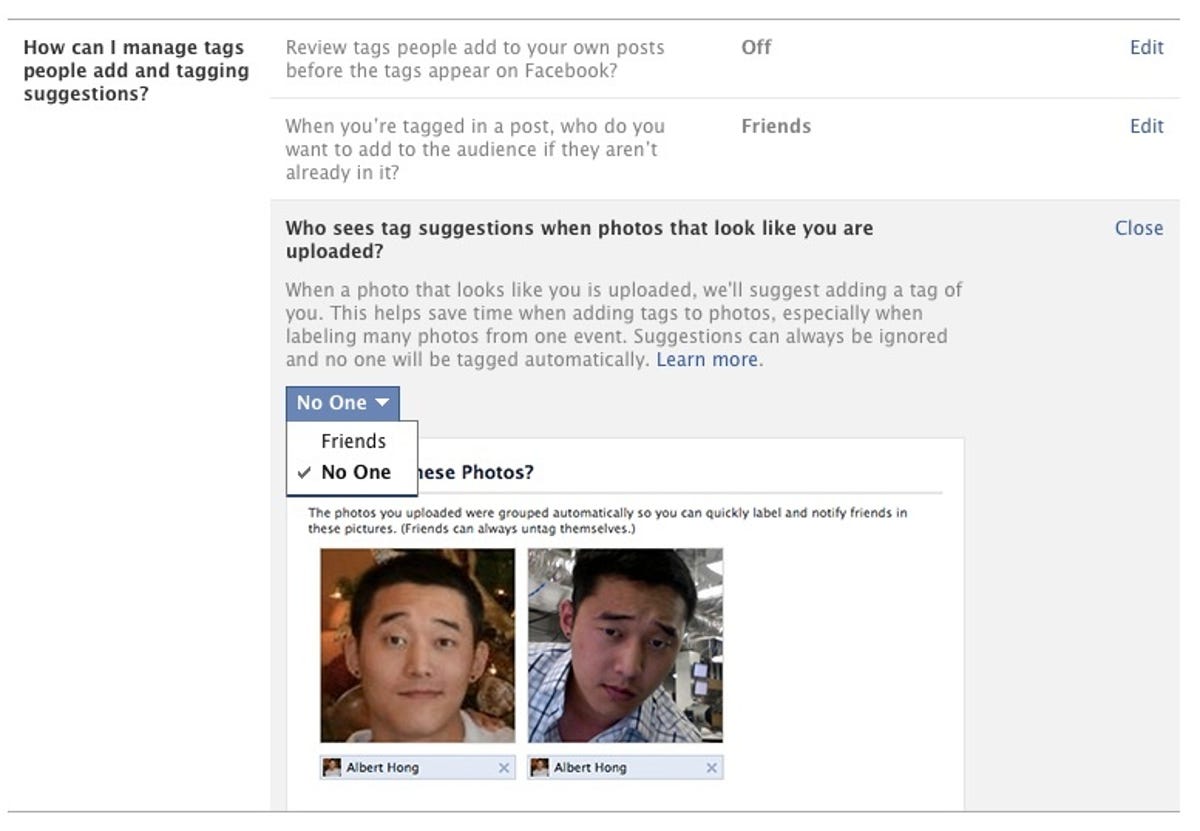
Under "How can I manage tags people add and tagging suggestions?" you can enable the feature that allows you to review tags people add to your own posts before they appear, set who besides the normal audience sees the posts you're tagged in, and decide whether tag suggestions appear when photos that look like you are uploaded.
Step five: Don't let your apps run amok
Some Facebook apps grab all the permissions they can, including access to your information and the ability to post photos and status updates "on your behalf." For example, the IFTTT app lays claim to your complete profile and all your activities, as well as some of the profile and activities of your friends.
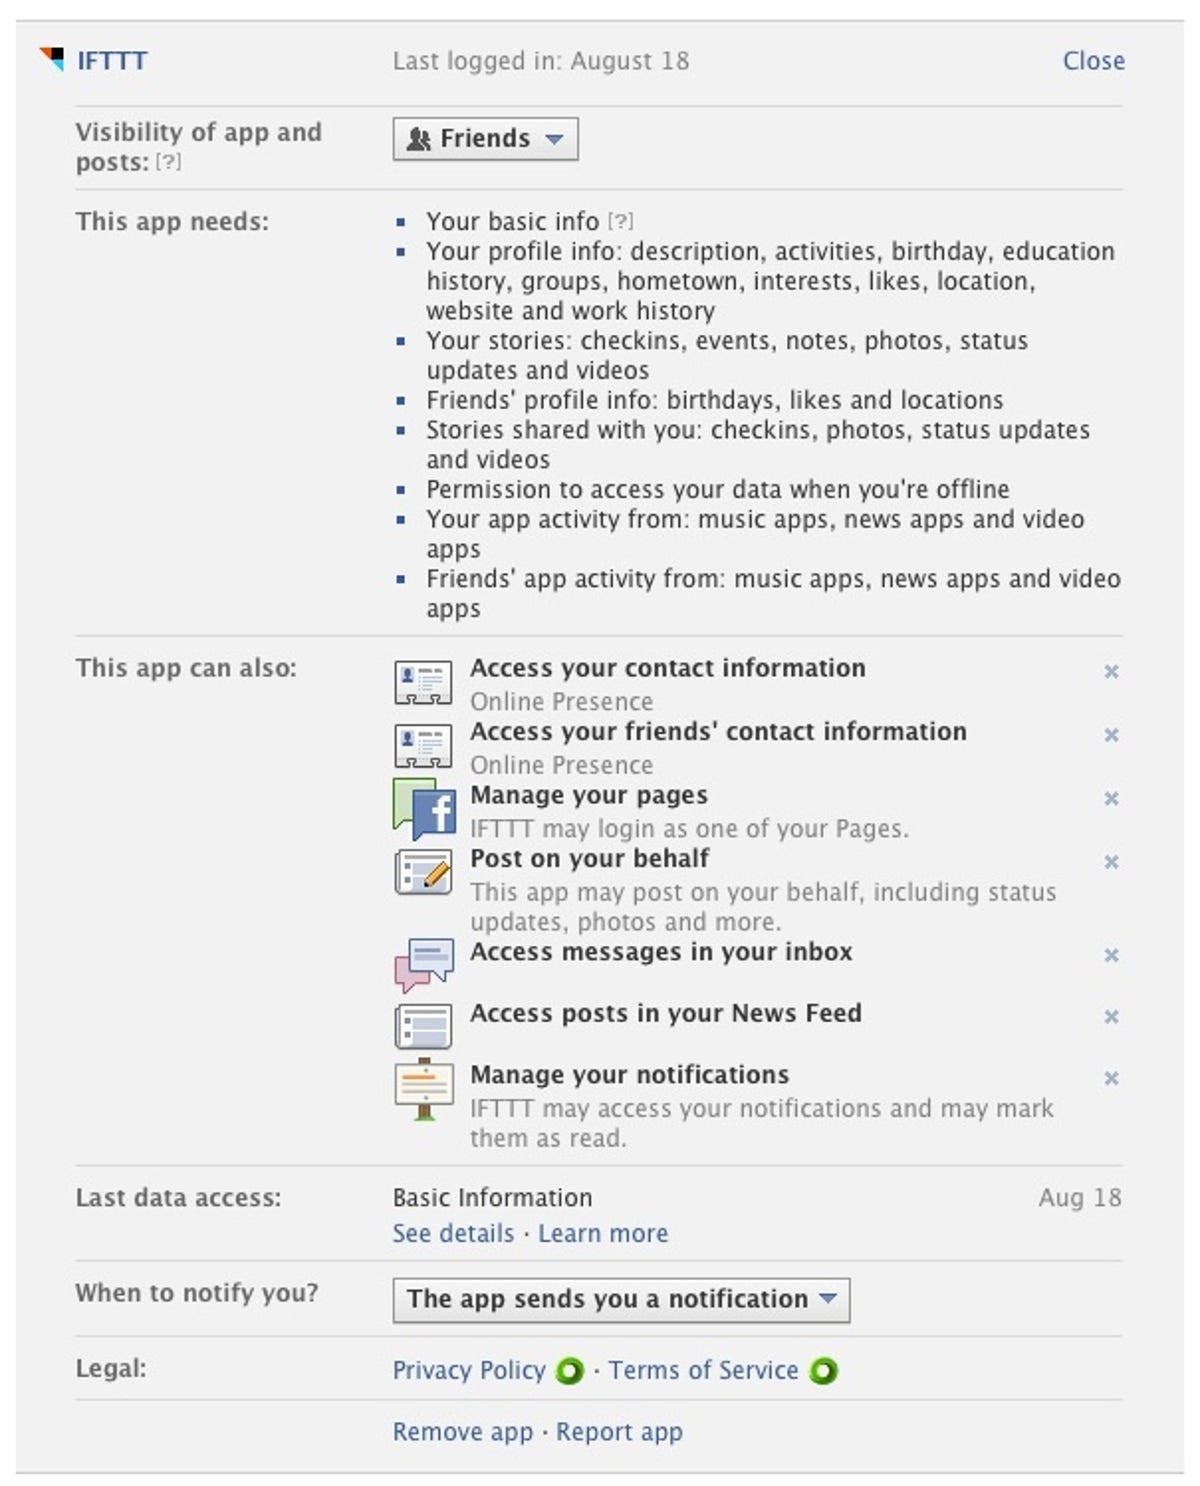
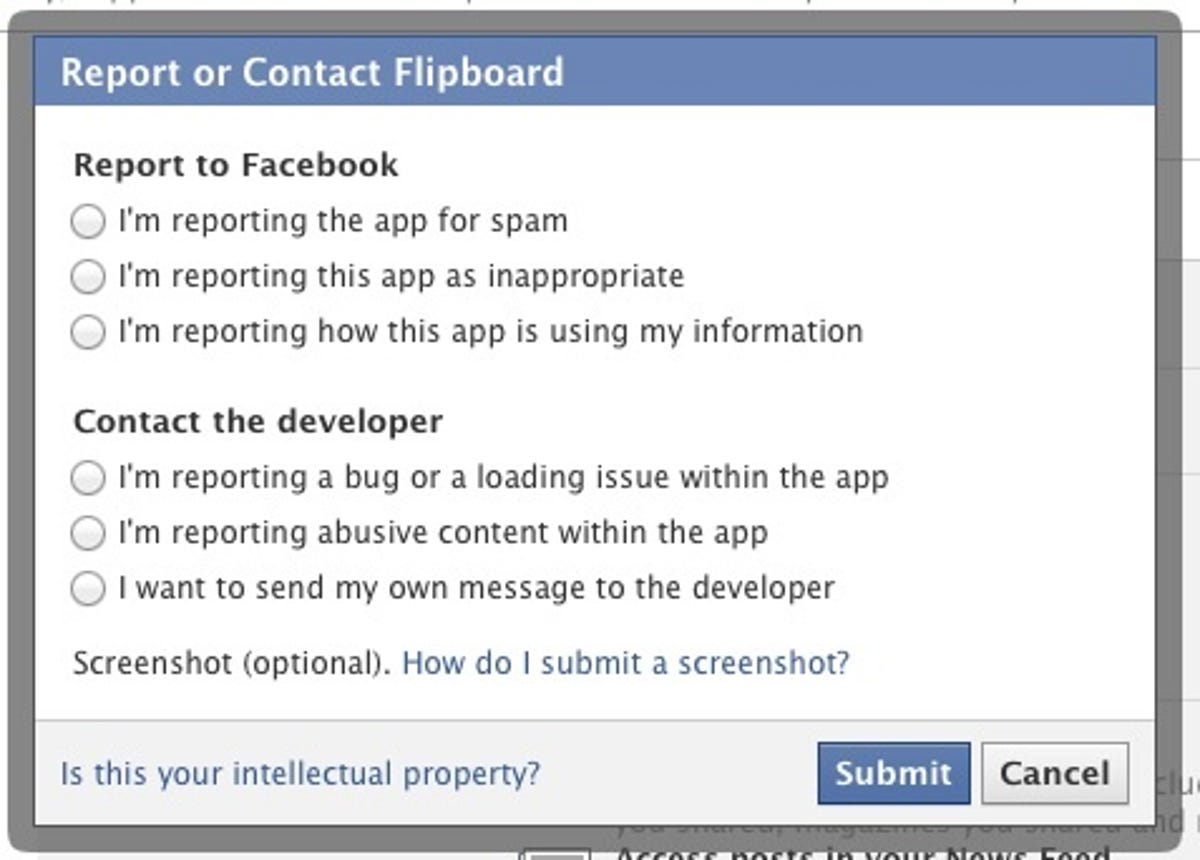
To review your Facebook app permissions, click Apps in the left pane of the Account Settings window, choose Edit to the right of the app's entry, and either change the app's visibility via the drop-down menu, or click "Remove app" at the bottom of the entry. You can also click "Report app" to let Facebook know the app is spam, inappropriate, or requesting too much information, or to contact the developer to report a bug or abusive content, or for another reason.
To prevent other Facebook users from volunteering your information to the Facebook apps they use, click Edit to the right of "Apps others use," uncheck the categories of information listed, and click Save Changes.
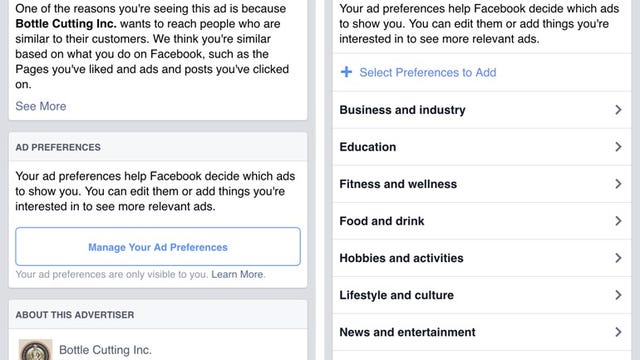
Step six: Opt out of Facebook ads
Facebook currently doesn't let third-party apps or ad networks use your image or name in ads, but that may change in the future. To opt out ahead of time, click Ads in the left pane of the Account Settings window and choose Edit in the Third Party Sites section. Select "No one" in the drop-down menu under "If we allow this in the future, show my information to" and then click Save Changes.
To exclude yourself from Facebook's social ads, click Edit in the Ads & Friends section, choose "No one" on the drop-down menu next to "Pair my social actions with ads for," and select Save Changes.