Renovating? Don't forget to network
Been doing a bit of renovating? Before you install the plasterboard and start painting, consider spending an afternoon to run a local area network (LAN) through your house.
Been doing a bit of renovating? Before you install the plasterboard and start painting, consider spending an afternoon to run a local area network (LAN) through your house.
LANs are becoming increasingly useful as people amass larger and larger collections of music and video on a single network-attached storage (NAS) device. Pull video from the NAS using a device like the Apple TV or DViCO TVIX 5130 PVR and you've got an easy way to watch those videos on your big-screen TV — as long as you have a network port near it.
Wired LANs offer more certainty than a wireless LAN, which will give you serviceable 54Mbps speeds or several times that using newer 802.11n technology. But wireless slows down as more people use it at once, and it suffers horribly through walls and in buildings with steel. Try streaming HD video over wireless, and you'll be crying out for the speed that only a wired network offers. Wired networks also offer lower latency, which is crucial if you're planning to do VoIP or networked games.
Locating local internet providers
Facing a large number of open walls during some recent renovation work, I decided it was worth a try. I had never installed a network before but wasn't keen to pay the electrician hundreds of dollars to do the honours (the going rate, I'm told, is around AU$150 per network port). With a bit of internet research and a whole lot of trial and error, I managed to do the whole thing. The following pages explain how.
DISCLAIMER | These instructions assume you have some basic DIY knowledge, and common sense. Make sure you turn off your electricity at the switchboard before messing around in the walls that have power points. Be careful when cutting, drilling, climbing ladders, and feeding crocodiles. Never stick a knife in the toaster. Wear appropriate safety gear, including clean underpants and sunscreen. Call your mother. And, of course, make sure you keep an ample supply of cold drinks handy. I think I've thought of everything. Basically, the following steps worked fine for me, but CNET and I accept no responsibility if you totally cock it up. Not that that's going to happen, since you're going to be very careful, pay good attention, and be very careful. Did I mention, be careful?
Locating local internet providers
Step 1: Design your network
Start by asking yourself what you want to do with your network — and where. My basic goal was to have fast access to the NAS — which stores thousands of digital photos, backups of each computer, home videos, and more from anywhere in the house. This meant I could go online from the office or bedrooms, stream music from the NAS to anywhere in the house, or watch videos on the TV using the Xbox 360 Santa is going to bring me for Christmas.
Strong reviews led me to the QNAP TS-209 as the centre of all this. With a pair of 500GB SATA hard drives, this unit offers RAID 1 (continuously backing up data from one drive to another, indispensable for protecting family memories) and every feature under the sun. For example, it lets you publish and host photo albums on the Web straight from the NAS; includes a BitTorrent client for downloads directly onto the drives; and can offer any stored music files as an iTunes server for access from networked PCs. It also includes a Universal Plug-and-Play (UPnP) feature, which means you can access your media straight from your Xbox 360 or other compatible device. Several other models offer similar capabilities; do your research before choosing one.
Another option was a wireless LAN access point. This wasn't necessary, but it's a nice option to have for casual network access — and it also provided another three switched network ports to connect more rooms. Also, if you often move files between computers, spend a bit more for devices that support gigabit Ethernet. It won't boost your internet connection speed, but it will speed movement of files between your computers — for example, for a networked backup.

A network diagram will guide your installation.
Step 2: Find your wiring cabinet
Home networks work on a hub and spoke basis: the hub is your NAS and related gear, and each room's network port is a spoke. This means you need to find a central place to store your gear. Since your wires will probably run through your roof space, an unobtrusive solution is to put everything in a closet or cupboard that abuts the ceiling. I laid claim to the top shelf of the pantry, which has ceiling access to the roof space, is out of the way, and behind doors that muffle the quiet but persistent noise of the NAS.
I had the electrician install a power point in the top of the pantry cupboard, then plugged in a surge-protecting power board and drilled a 25mm hole into the top of the cupboard through which to run all the wires from the roof space (top right-hand in the picture). The top shelf houses the power board, ADSL modem, D-Link gigabit Ethernet switch, and QNAP TS-209 NAS.
The central wiring cabinet posed one problem: I subscribe to a VoIP phone service, which is accessed by plugging an analog phone into the ADSL modem. But without running a 20m extension cord through the walls, I had no way to access the VoIP service outside of the pantry. I could have used a cordless phone, but I found another solution via a TRX Technology Wireless PhoneJack (AU$99 from Dick Smith Electronics), which uses DECT wireless phone technology to move a phone service anywhere within 50m of the phone. I plugged the DECT transmitter into the ADSL modem's VoIP port, then plugged the office phone into the companion unit. Voila — a VoIP service I can move anywhere in the house!

Cereal port: The pantry proved to be a good central location to bring together the network cables, ADSL line, VoIP extender and power cables.
Step 3: Get your tools and parts to hand
To install the network ports on your walls and the wires behind them, you'll need a Phillips head screwdriver, cordless drill, pair of scissors, duct or electrical tape, and a serrated steak knife or plaster saw. You'll also need a crimping tool for attaching your RJ-45 network plugs (below left) and a punch down tool for wiring your network ports (below right). I found both at a local computer fair for AU$20 together; ask at your local computer shop, or if you're in NSW, QLD, NT or ACT give your local John R. Turk a try.

Network crimping tool (left), and punch down tool (right). The latter is often sold in a more portable yellow "key" like shape, which also includes a handy wire stripper.
Your local computer or electrical retailer will have network cables, which come in 305m boxes. Category 5e (Cat 5E) cable costs around AU$55 per box, but Category 6 (Cat 6), a higher-quality cable that has an expanded bandwidth makes it better for gigabit Ethernet speeds, cost me AU$165. Since I was only going to do this once, I spent the extra AU$110 for a box of Cat 6 cable. These instructions work for either type of cable, which differ mainly in the X-shaped plastic insulator separating the Cat 6 pairs of wire.
We'll be installing an RJ-45 Ethernet plug (AU$1 each) at the end of the cable that terminates in the wiring closet, and an RJ-45 terminating block ("mech", AU$8 each) and faceplate (into which the mech snaps) for each room. Buy a few extra plugs to cover stuff-ups, and feel free to get a faceplate with several holes in it to accommodate extra mechs for your TV antenna, pay-TV or satellite box — or an RJ-11 port if you want to provide a standard phone jack as well.

The RJ-45 terminating block (left), and front and rear of the networking face plate (right).
You'll also need something to pull the wires through the walls. Electricians use yellow tongues — 3.6m yellow plastic strips normally used to connect two pieces of flooring. If your renovations involve flooring, you can remove the yellow tongue with pliers (you can put it back later). If not, get one from your local electrical supply store. If all else fails, Bunnings sells flooring for AU$35. If the cat's got your yellow tongue, you can also pull cable by dropping a 4m long piece of thin synthetic rope into the wall cavity, then pulling it through the hole you cut for the network plate; I'll describe how to do this later.
Step 4: Find the best place for your holes
Before you cut anything, it's also worth mentioning that, depending on the layout of your house, you can dispense with all this drilling, pulling and cutting by running your cables under your floor — if, that is, you have enough of a crawl space under your house and you're not afraid to get your hands dirty. In that case, you can run cable underneath your house and out of discretely placed holes drilled in wardrobes and behind desks; use cable clips to attach the cabling to the underside of your floor joists.
Some people do away with the drill entirely by running cable from underneath the house into rooms through the side of in-floor heating ducts. If you choose this option, you can skip to Step 5. If not, you'll need to figure out where you want your network ports. Since you're going to have network wires jutting out of the ports, consider access to your TV, hiding the plates behind furniture, and so on. You must also consider what type of walls you're dealing with (related to the style of your house).
- If your walls are open, or are going to be, you've got it made. Simply choose the place where you want to put your network port — either in the wall or in the skirting board — and follow a path straight up from there to the ceiling. If there are any noggins — short, horizontal pieces of 90x35mm timber between the two vertical studs, just drill a 25mm hole through the centre of each one.
- If you have plasterboard walls: choose an external wall, then cut a 9x5 cm rectangular hole in plaster where you want your network port (remember to turn off the power if there are electrical wires in the area and always cut slowly and carefully). Shine a flashlight into the hole and you'll see the aluminium lining of the insulating blueboard sheet that's attached to the outside of the studs. Cut a 25mm or larger hole in the blueboard with your knife, then feed your yellow tongue through the hole and up along the brick wall until nearly all of it is inside the wall.
- If you must cable an internal plasterboard wall, and don't mind painting it: tap against the wall, or use a stud sensor, to locate the horizontal noggin(s) in your wall. Cut out a 5x5cm hole just above the noggin (making sure to keep the plaster), then drill a 25mm hole through the top of the noggin by sticking a long drill bit through the access hole. Once you've successfully run your wire, you can patch your wall by doing the following:
- Glue your plasterboard onto a thin strip of wood (or a masonite packer) long enough so that the strip protrudes a few centimetres on either side.
- Drive a screw into the middle of the plasterboard, leaving it sticking up enough to grab securely with your fingers.
- Put some builder's glue on the wood on either side of your plasterboard, then feed the whole thing into the hole — holding it with the screw so it doesn't fall into the cavity.
- Once both of the wooden flaps are inside the wall, use the screw to hold the plasterboard piece firmly in place, and to pull the flaps tightly against the inside surface of the plasterboard. Feel free to put a screw through one or both flaps to make sure it's not going anywhere.
- Once it's dry, unscrew the screw you were using to pull the plasterboard against the wall, then use cornice cement or other gap filler to make the crack disappear for painting.
- If you have double-brick walls: these are easy to pull cable through, but hard to get inside. If you have builders on site, get them to use a brick hammer to chisel a 30mm hole between two bricks where you want the network port. This will involve chiselling through the two bricks and the mortar between them, creating a triangular hole deep enough to fit your mech behind the skirting boards which you'll eventually use to cover over the hole.
Step 5: Pull your cables
Once you have located the holes for your network ports, it's time to pull your cables. In theory, this is simple: put your network cable box in front of the hole, then use duct or electrician's tape to secure the cable to one end of your yellow tongue. Cross your fingers, then feed the other end into the hole and push.

Depending on your walls and your luck, this can be a quick process or an exercise in patience. For a single-brick wall, shine a flashlight into the hole in your wall to make sure the yellow tongue is running outside of the blueboard (as opposed to pushing into the cavity where it will hit a noggin) and is pointed upwards. Then, slowly and steadily, feed the yellow tongue into the wall cavity. Be aware that the mortar between the bricks of the outside wall is usually sloppy, which can create obstructions for the end of your yellow tongue. If you hit one of these, pull the cable back a few centimetres and try again. Try twisting the yellow tongue slightly to see if you can't get around the obstacle. If you're doing everything correctly, you'll hear the tongue scratching as it climbs up the wall. Once there is just about 10cm of yellow tongue protruding from the wall, you're done with this step.
Use a similar approach for double-brick walls: if it's working, you'll hear the tongue tapping against the bricks as it climbs up the wall.
Once you've fed the entire piece of yellow tongue into the wall, leave it there. Put your ladder against the wall outside where you're feeding the cable, then climb to your roof and remove a few tiles — not from the edge row of tiles, but one row inwards.

Have a look inside, and — if all is going well — you should see the end of your yellow tongue sticking up in plain sight. If it's not there, look a little bit in either direction, and use a flashlight to look down into the wall cavity. Note that in either case, it's perfectly possible to feed the yellow tongue completely into the wall and have it in utterly the wrong place. This usually happens because you've hit an obstacle and pushed the yellow tongue horizontally along the wall space. If you can't see the yellow tongue at all, you may need to pull it out and try again. Running the yellow tongue can be utterly frustrating, but you will get better with time.

Step 6: Cable to the cabinet
While on top of the ladder, pull the yellow tongue upward and out of the roof space. Once you can see the network cable at the end of the yellow tongue, feed the tongue back into your roof space and push it all the way through. Pull up enough network cable to reach your central networking point, then climb down the ladder and into your roof space.
Once you're in the roof space, crawl to the place where your yellow tongue should be poking through. Pull it, and the network cable attached to it, away from the wall and into the roof space, then pull the end of the cable over to the hole where your wiring closet will be located. You may want to use cable clips to secure the wire to your ceiling supports. Consider using a label maker to tag the end of the wire so you can tell them apart later.
Unwrap the electrical tape attaching the cable to the yellow tongue, then feed the end of the wire through the hole in the top of your wiring closet, ensuring there are a few metres of slack in the roof space. Go back to the room where the network cable is located, make sure there's about a metre of cable sticking out of the wall, and cut it off of the box.
Assuming you've done this right, you'll have a metre of cable sticking out of the wall in your room, and perhaps a metre sticking into your wiring closet space. There's your network connection, and we'll show you how to terminate it in the next steps. For now, go get a cold drink, remember that this is a lot easier the second time around, and think about how much money you're saving.
Step 7: Terminate your cables
Once you've repeated Step 6 for each room in your house, you'll have wires sticking out of your walls, and a wiring closet with a bunch of cables poking through the ceiling. Now, you need to attach the RJ-45 plugs to the end of each cable so you can plug it into the network switch. Here's how:
- Grab your crimping tool, Stanley knife or equivalent, and scissors
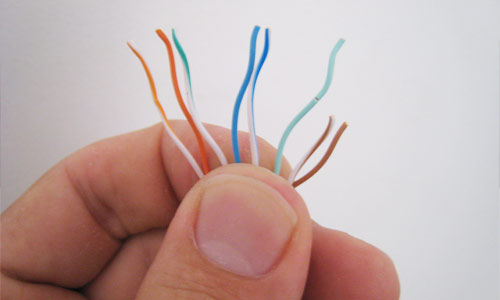
- Your crimping or punch down tool may include a wire stripper — if not, you can use the Stanley knife to cut off around 4cm of the grey insulation from the end of the cable (be sure not to cut any of the wires or insulation inside). You'll see the eight pairs of wiring that carry the data signal — blue, green, orange, brown, with one of each colour also having a white stripe.
- If you're using Cat 6 cable, you'll also see that each pair of wiring is separated by a cross-shaped plastic connector. Peel back the wires, then use your Stanley knife to cut off as much of the plastic connector as you can.

- Now, you need to arrange the wires in the correct order. All new networking equipment uses the same wiring arrangement, known as T568B, so make sure all your plugs use the same configuration of wires. Using your fingers, arrange the wires so they are (left to right): orange-white, orange solid, green-white, blue solid, blue-white, green solid, brown-white, brown solid.
- Once you have the wires in the right order, arrange them closely together and squeeze them between the tips of your thumb and index finger. Hold your RJ-45 plug next to the wiring so the end of the plug (the one without the metal connectors) sits about 1cm below the end of the insulation. Grab your scissors and cut all eight wires to be just shorter than the plastic connector. Make sure they're cut evenly and are all the same length when arranged in the correct order.
- Now, it's time to slide on the connector. While holding the wires between your thumb and index finger, orientate the RJ-45 plug so pin 1 — the leftmost pin when you're looking at the metal contacts, front on, with the plastic clip on top — lines up with the orange-white side of your wires. Slowly push the wires into the connector, making sure they go all the way across the metal contacts to the end of the plug. If you're using Cat 6 cable, you may need to squash the plastic spacer slightly to fit it into the plug.
- Take a moment to check both that your wires are all the way into the plug — if even one isn't far enough in, the cable won't work — and that they're in the correct order. Make sure the end of the insulation sits inside the plastic of the RJ-45 plug. If all looks well, insert the whole plug into the hole in the side of the crimper, then squeeze it hard. The crimper will push the metal contacts through your network wires, at the same time locking the clip onto the insulation so it can't be pulled out.
There you have it — your first RJ-45 plug. It took me a few tries to get it right, but once I figured out what I was doing I was able to do each plug in about two minutes. Attach one plug to the end of every cable you ran, then go have another cold drink.
Step 8: Punch down your plugs
Once you're done attaching plugs in the wiring closet, you'll need to "punch down" the other end of your wires into the mechs that you'll clip into.
Attaching the wires to the mech is much easier than attaching the RJ-45 plug. Strip 4-5cm of insulation from your network cable, then cut away the Cat 6 plastic separator if necessary as in Step 6.
Look inside the mech and you'll probably see two rows of colour guides — one showing the layout for the older T568A cable layout, and the other for T568B (Clipsal plugs like the ones we used only say "A" and "B" but this is what they're referring to).
Keep the end of the insulation as close as possible to the connectors, since leaving long bits of wire hanging out is just begging for interference you don't need.
It's easiest to show this in pictures, so scroll down and hit the captions as we connect up our wires.

Grab the wire that corresponds to the colour of one of the inside pairs of contacts on the mech, then lay the wire across the contact. Get your punch down tool, then align it over the contact so that the scissors part of the punch down tool is on the outside of the mech with the extra wire between the blades

Push down hard until you hear a loud click, which is the sound of the scissors cutting the wire, and your wire should be snugly seated inside the mech connector.

Repeat this for all eight wires, ensuring you do the two inside pairs of connectors first so as to make life easier.

Once you have done all eight wires, your mech is ready to go
Click it into place behind one of the holes in your faceplate (this can require a bit of pushing), and you're done. Don't screw the faceplate into place just yet, and don't do any other rooms yet; first, we want to make sure everything is working properly.
Step 9: Check your installation
Once you've terminated both ends of each cable, it's time to make sure everything is working properly (it's a good idea to do this after your first room, just to make sure you've got the hang of it).
Starting with one room and working your way around the house, plug one cable into the back of your ADSL or cable modem, then use a standard network cable to plug your computer — a notebook is a big help here — into the wall plug in the corresponding room. After a few seconds, your computer should be online; just start up your Web browser and, if you see the internet, pat yourself on the back and move on to the next room.
If there's nothing there, try rebooting your computer with the network cable plugged in. If you still get nothing, odds are that you made a wiring mistake. Check that the wires in the RJ-45 plug are in the right order, and that every one of them has made positive contact with the metal bits inside the plug; even a 1mm gap between the end of the wire and the metal contacts inside the adapter can be fatal. If anything is amiss, you'll need to cut the RJ-45 connector off and repeat Step 6 with a fresh connector.
If the connector looks fine, check your punch down block, first of all to make sure you've put the right colours in the right places. It's possible for the punch down tool to misfire and fail to make the right contact; try punching down each wire again.
Assuming you've handled both ends of the connection correctly, things should work fine; this is, despite the seeming complexity, basic electronics. Work your way around the house, testing each connection and screwing in each faceplate into the plasterboard or into your skirting board, then snap the cover on and — voila — you're done.

Step 10: Set up your switches
Once you have connectivity from every room, what you do with your network is up to you. Each computer connected to the network will get its own IP address and, assuming you've set up network sharing, will be able to see — and move files to and from — each other computer on the network.
This kind of configuration not only makes internet access and multiplayer gaming a breeze, but it makes things a lot easier when managing data for many family members.
For example, instead of having to figure out how to back up each computer, I just set up a share on the NAS device called Backup, and a subdirectory underneath that for every family member. Using a file replication tool like SyncBack on Windows or iBackup or Super Duper on Mac OS X, it's easy to back up each computer's documents directory onto the NAS for safekeeping.
The same approach works wonders for digital photographs: just set up a networked share into which each computer should store photographs when they're downloaded, and you'll have a central repository of everyone's photographs — and, again, one that is continually backed up. Move your family digital photo collection onto the NAS and everybody will be able to see whatever photos they want; the same thing works with your ripped CDs and video files, which can be stored on a central NAS and accessed from any computer — including a networked media player attached to your TV.
There are many uses for a home network, and you'll discover more as time goes on. If you're not into dirty work, or you don't have high-end needs, just installing a wireless LAN may be more than enough for you. But if your walls are open now, or are going to be, there's no reason not to spend a bit of time now to ensure high-speed networking in your future; it certainly can't hurt the value of your home. And, while it does take a little practice and a fair bit of patience, doing it yourself can be incredibly satisfying.