Turn any hard drive into networked storage with Raspberry Pi
A NAS solution can cost several hundred dollars. If you have an unused Raspberry Pi and a few hard drives lying around, you can make one yourself without spending a dime.


Networked hard drives are super convenient. You can access files no matter what computer you're on -- and even remotely.
But they're expensive. Unless you use the Raspberry Pi.
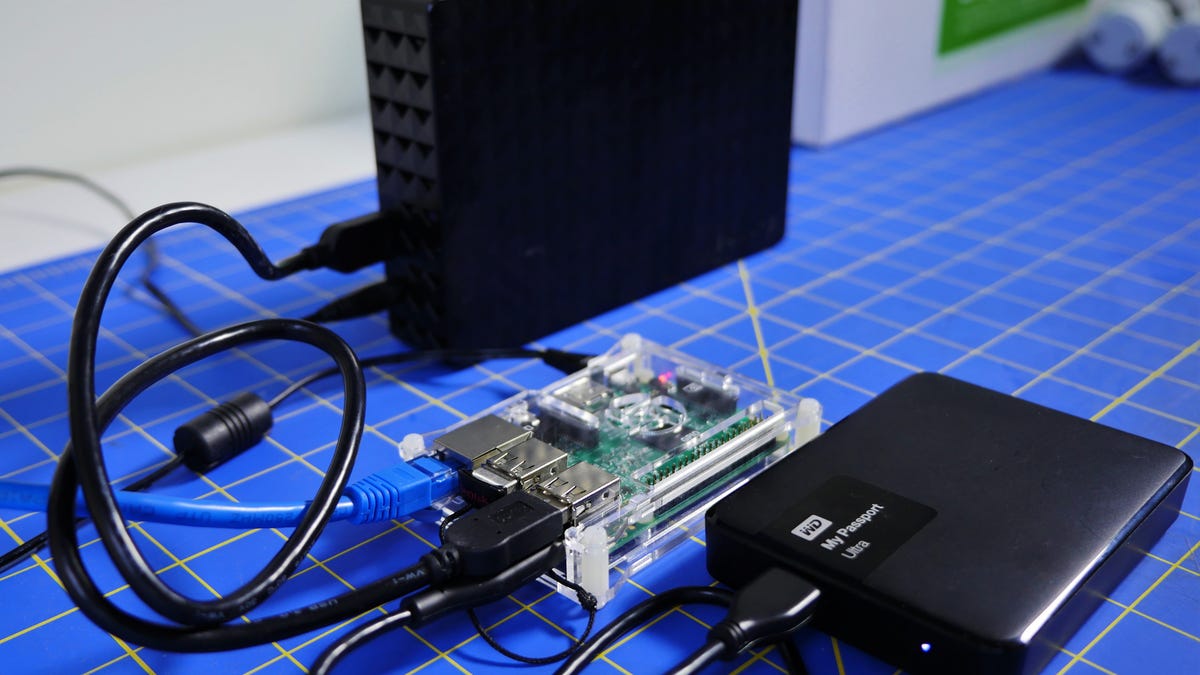
If you happen to have a few of hard drives laying around you can put them to good use with a Raspberry Pi by creating your own, very cheap NAS setup. My current setup is two 4TB hard drives and one 128GB hard drive, connected to my network and accessible from anywhere using the Raspberry Pi.
Here's how.
What you will need
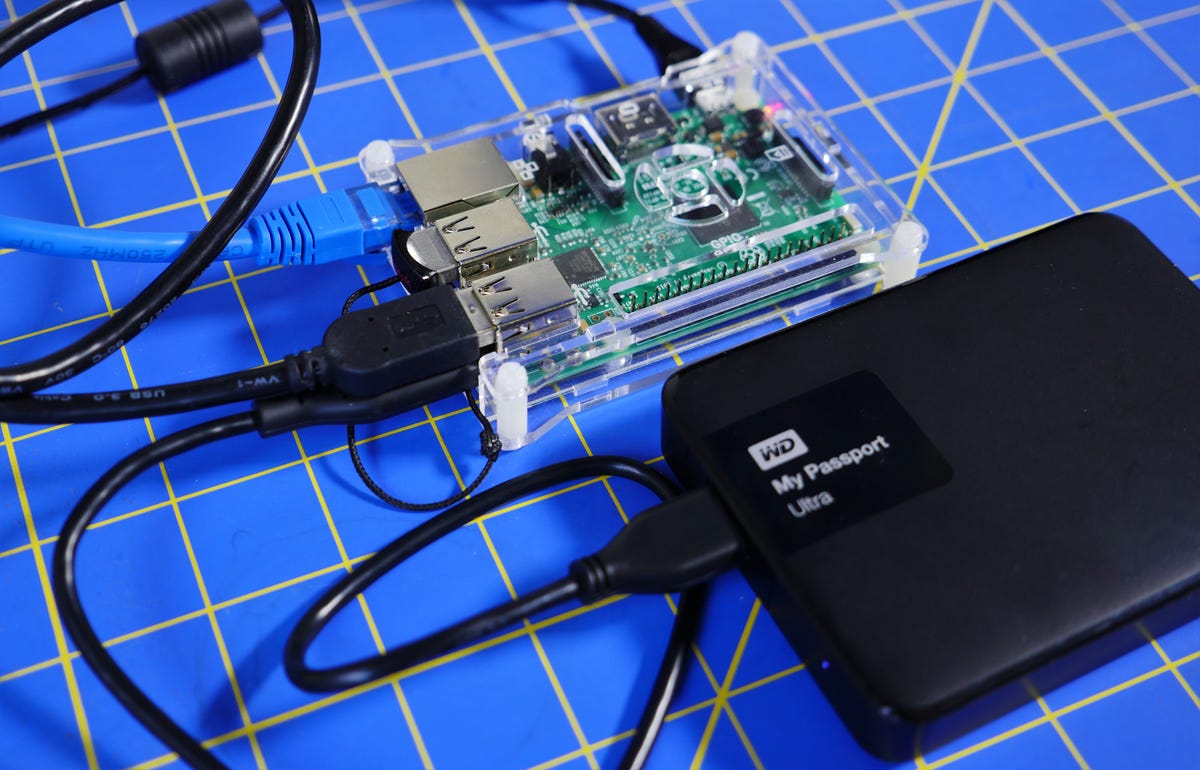
For starters, you need an external storage drive, such as an HDD, SSD or a flash drive.
You also need a Raspberry Pi. Models 1 and 2 work just fine for this application but you will get a little better support from the Raspberry Pi 3. With the Pi 3, you're still limited to USB 2.0 and 100Mbps via Ethernet. However, I was able to power one external HDD with a Pi 3, while the Pi 2 Model B could not supply enough power to the same HDD.
In my Raspberry Pi NAS, I currently have one powered 4TB HDD, one non-powered 4TB HDD and a 128GB flash drive mounted without issue. To use a Pi 1 or 2 with this, you may want to consider using a powered USB hub for your external drives or using a HDD that requires external power.
Additionally, you need a microSD card -- 8GB is recommended -- and the OpenMediaVault OS image, which you can download here.
Installing the OS
To install the operating system, we will use the same method used for installing any OS without NOOBS. In short:
- Format the SD card to FAT32 using SD Formatter.
- Download the image file from Sourceforge.
- Extract it using 7zip on Windows or The Unarchiver on Mac.
- Write the extracted image to the SD card using Win32 Disk Imager on Windows or ApplePi-Baker on Mac.
More detailed installation instructions can be found here for both Windows and Mac. Just substitute the Raspbian image with OpenMediaVault.
Setup

After the image has been written to the SD card, connect peripherals to the Raspberry Pi. For the first boot, you need a keyboard, monitor and a local network connection via Ethernet. Next, connect power to the Raspberry Pi and let it complete the initial boot process.
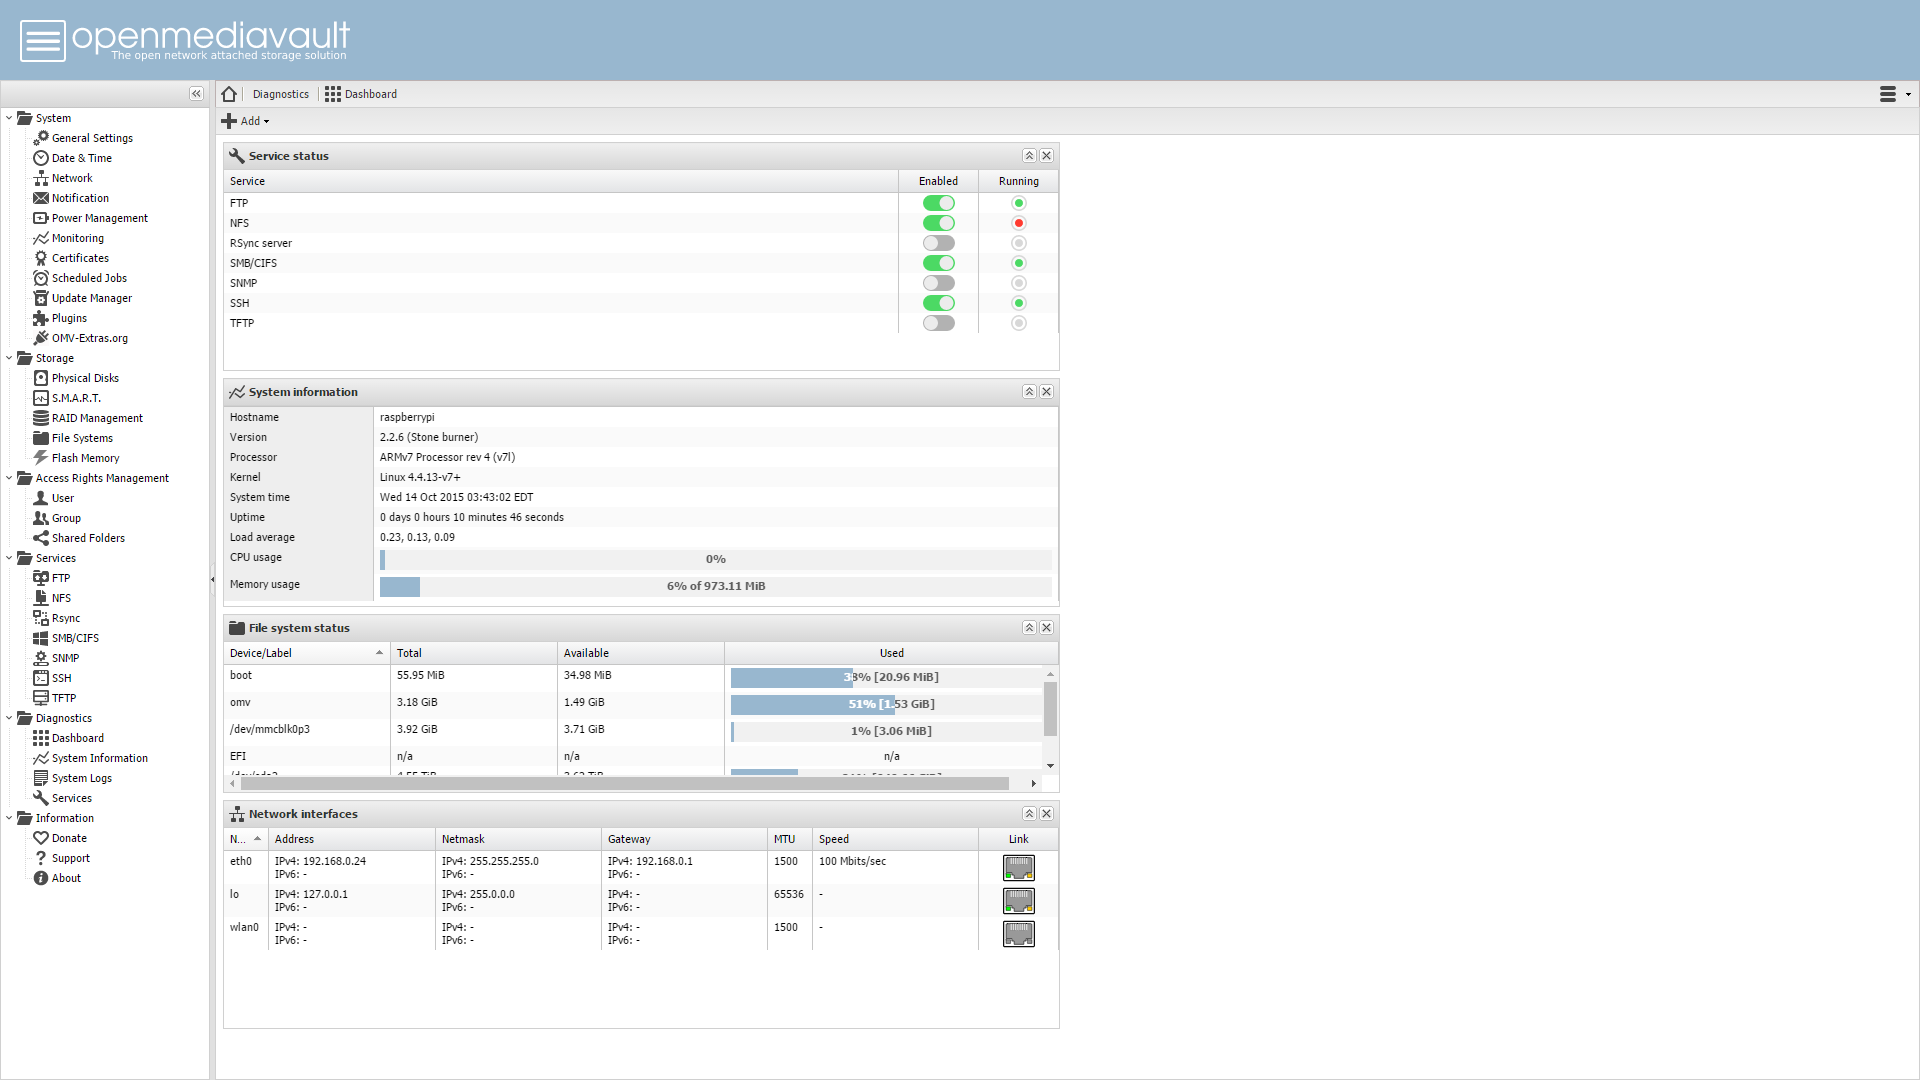
Once that is finished, use the default web interface credentials to sign in. (By default, the username is admin and the password is openmediavault.) This will provide you with the IP address of the Raspberry Pi. After you have that, you will no longer need a keyboard and monitor connected to the Pi.
Connect your storage drives to the Raspberry Pi and open a web browser on a computer on the same network. Enter the IP address into the address bar of the browser and press return. Enter the same login credentials again ( admin for the username and openmediavault for the password) and you will be taken to the web interface for your installation of OpenMediaVault.
Mounting the disks
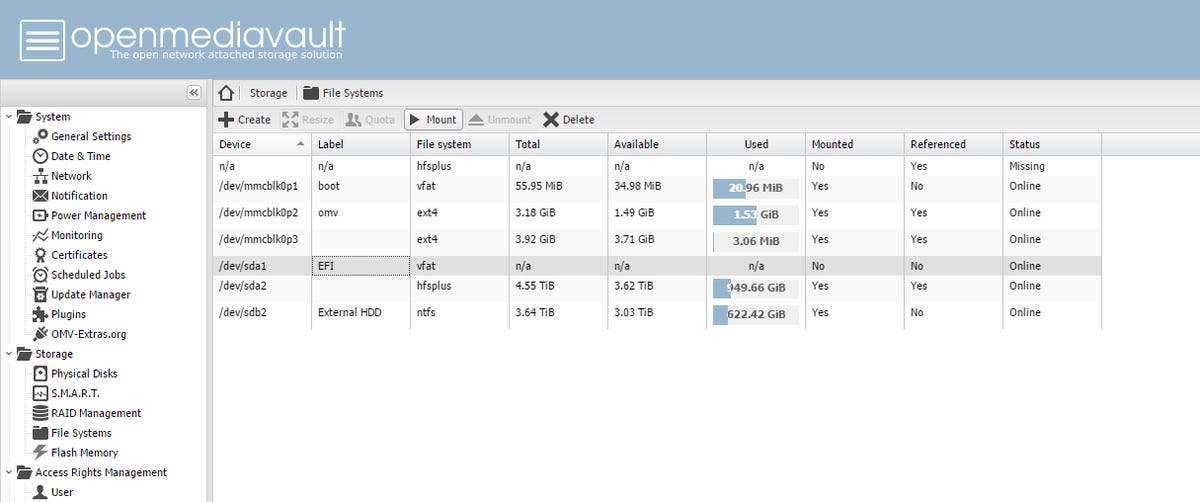
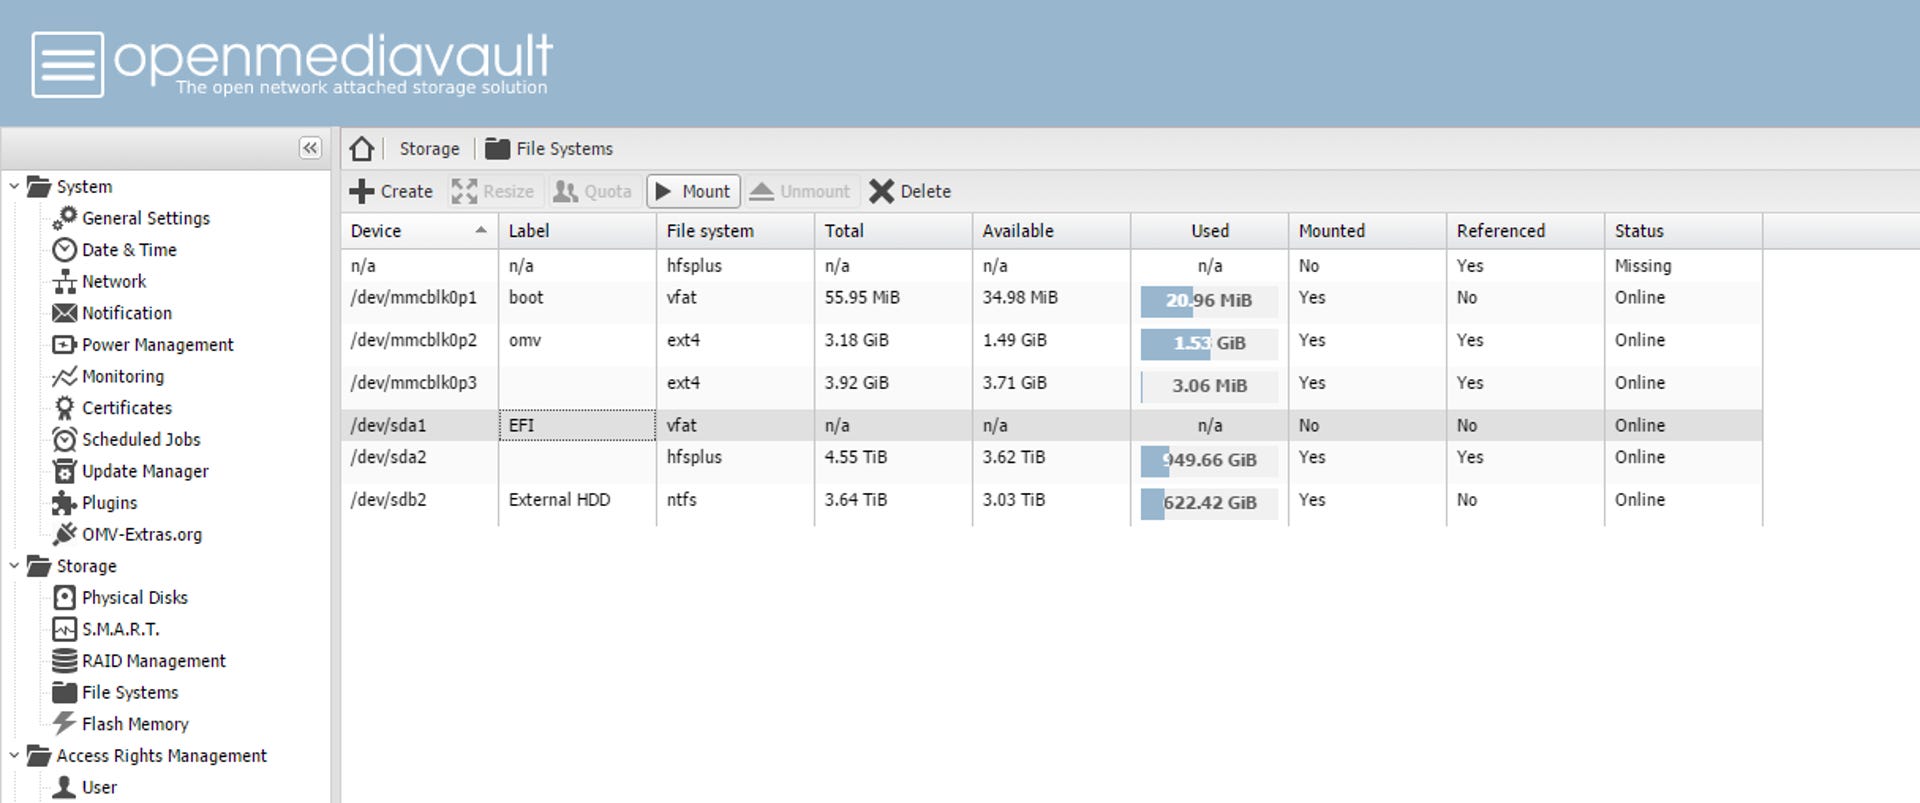
The first thing you will want to do to get your NAS online is to mount your external drives. Click File Systems in the navigation menu to the left under Storage.
Locate your storage drives, which will be listed under the Device column as something like /dev/sda1 or /dev/sdc2. Click one drive to select it and click Mount. After a few seconds have passed, click Apply in the upper right corner to confirm the action.
Repeat this step to mount any additional drives.
Creating a shared folder
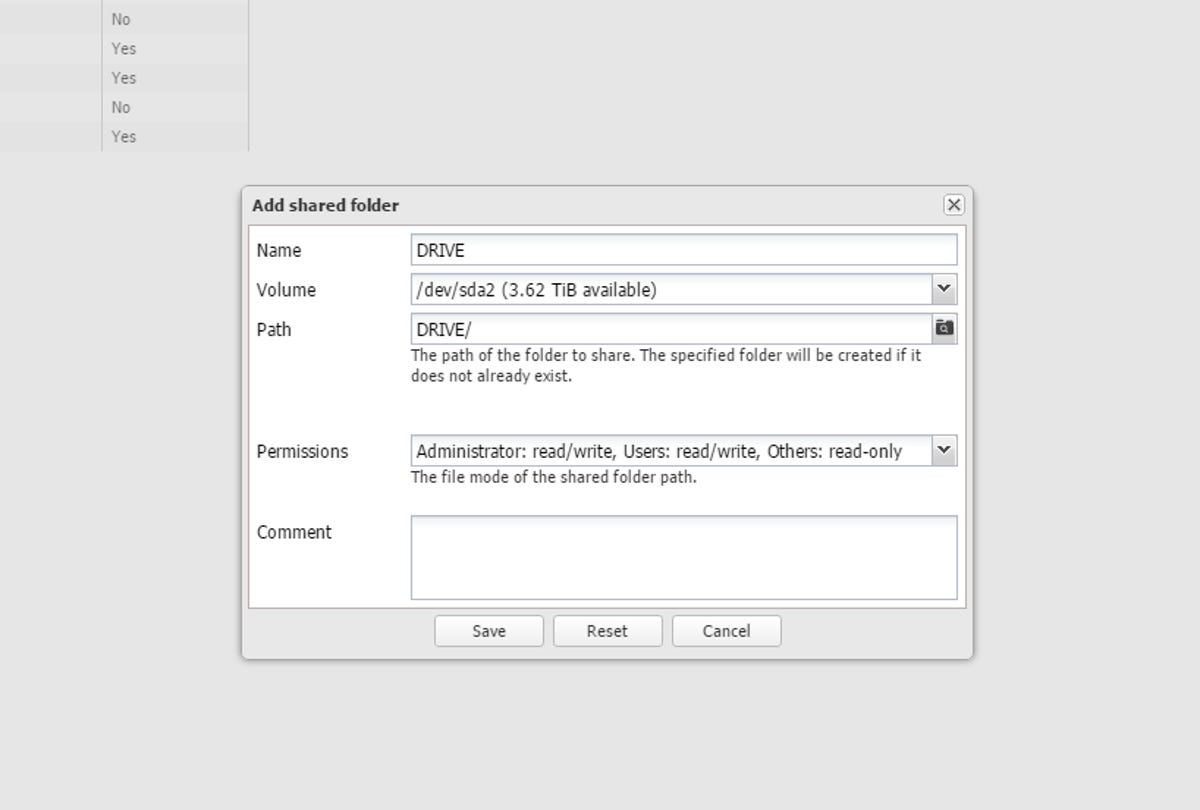
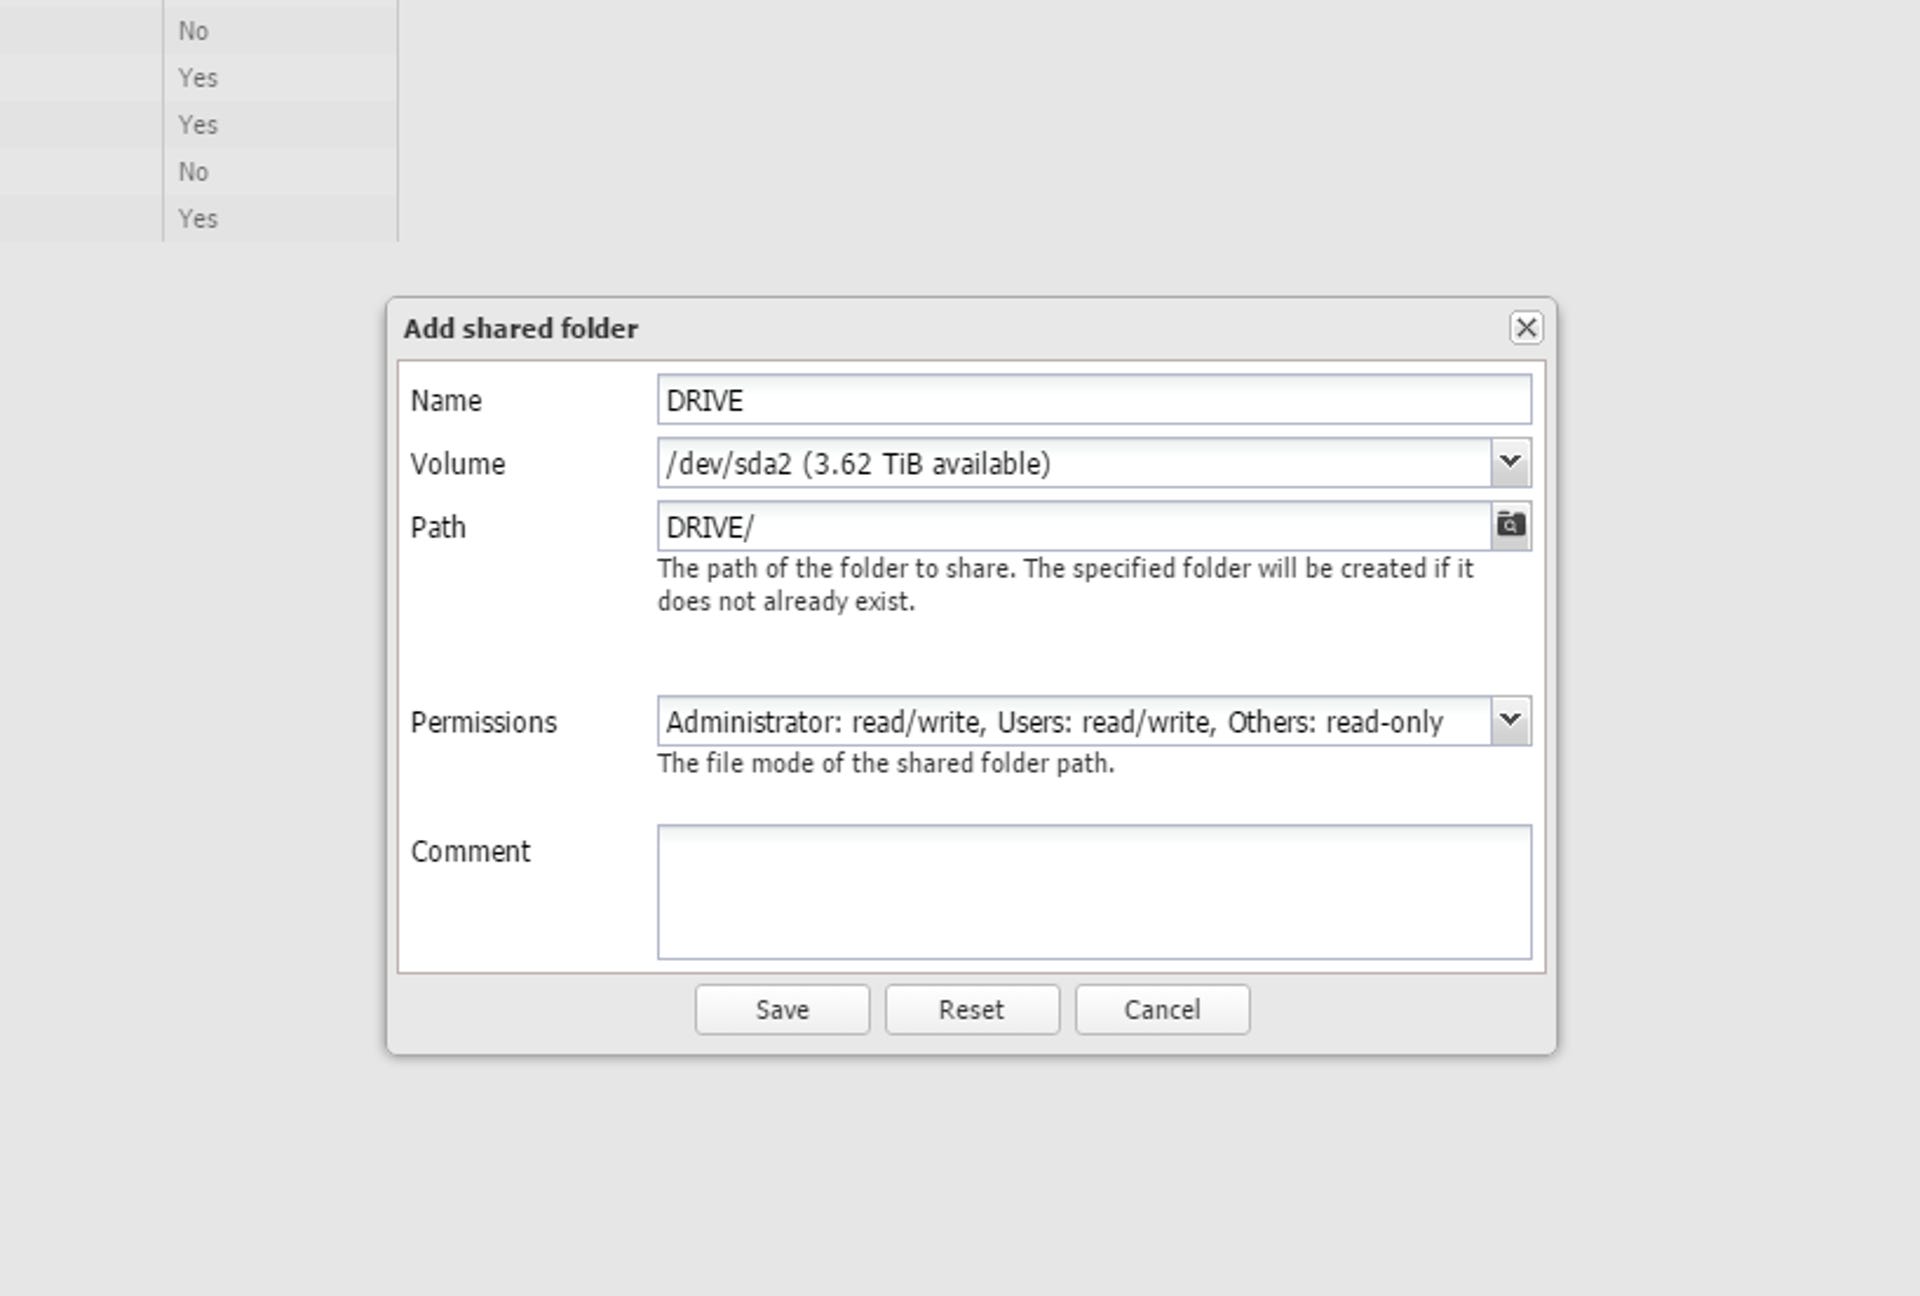
Next, you will need to create a shared folder so that the drives can be accessed by other devices on the network. To do this:
- Click Shared Folders in the navigation pane under Access Rights Management.
- Click Add and give the folder a name.
- Select one of the storage drives in the dropdown menu to the right of Volume.
- Specify a path (if you want it to be different from the name).
- Click save.
Enabling SMB/CFIS
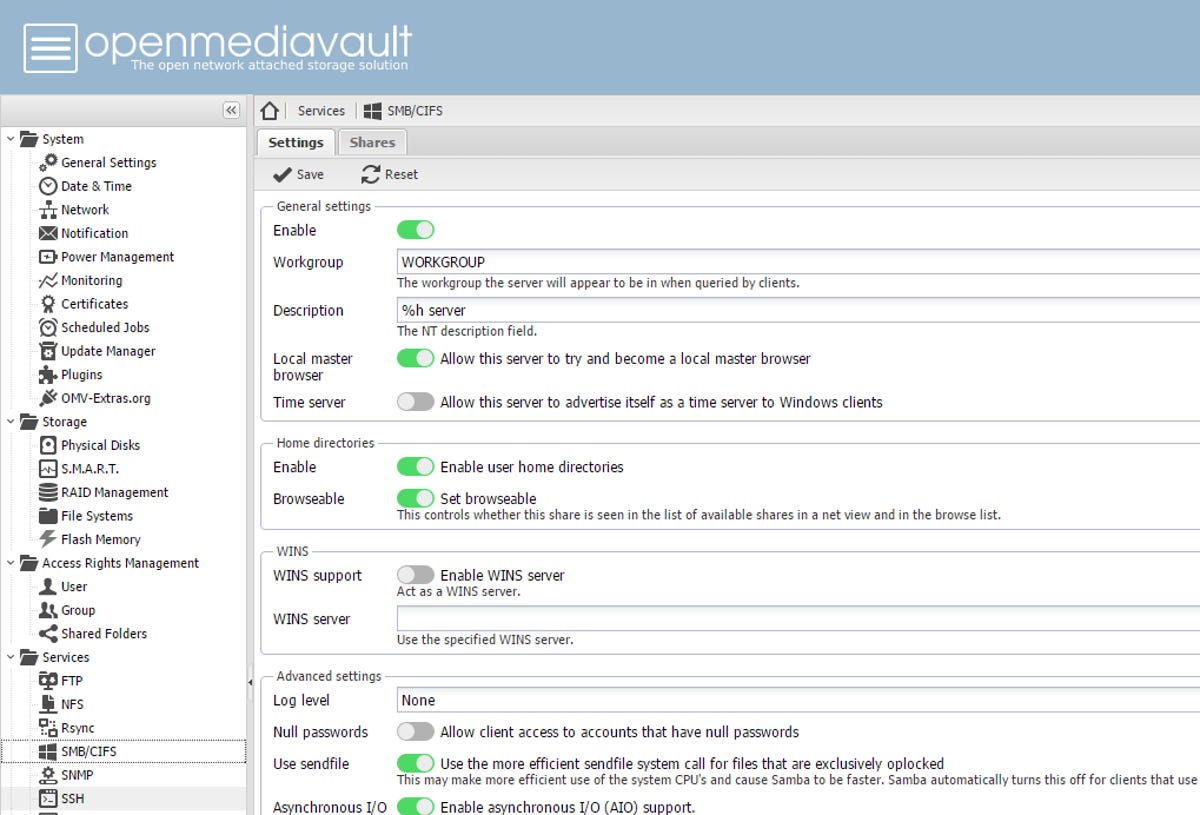
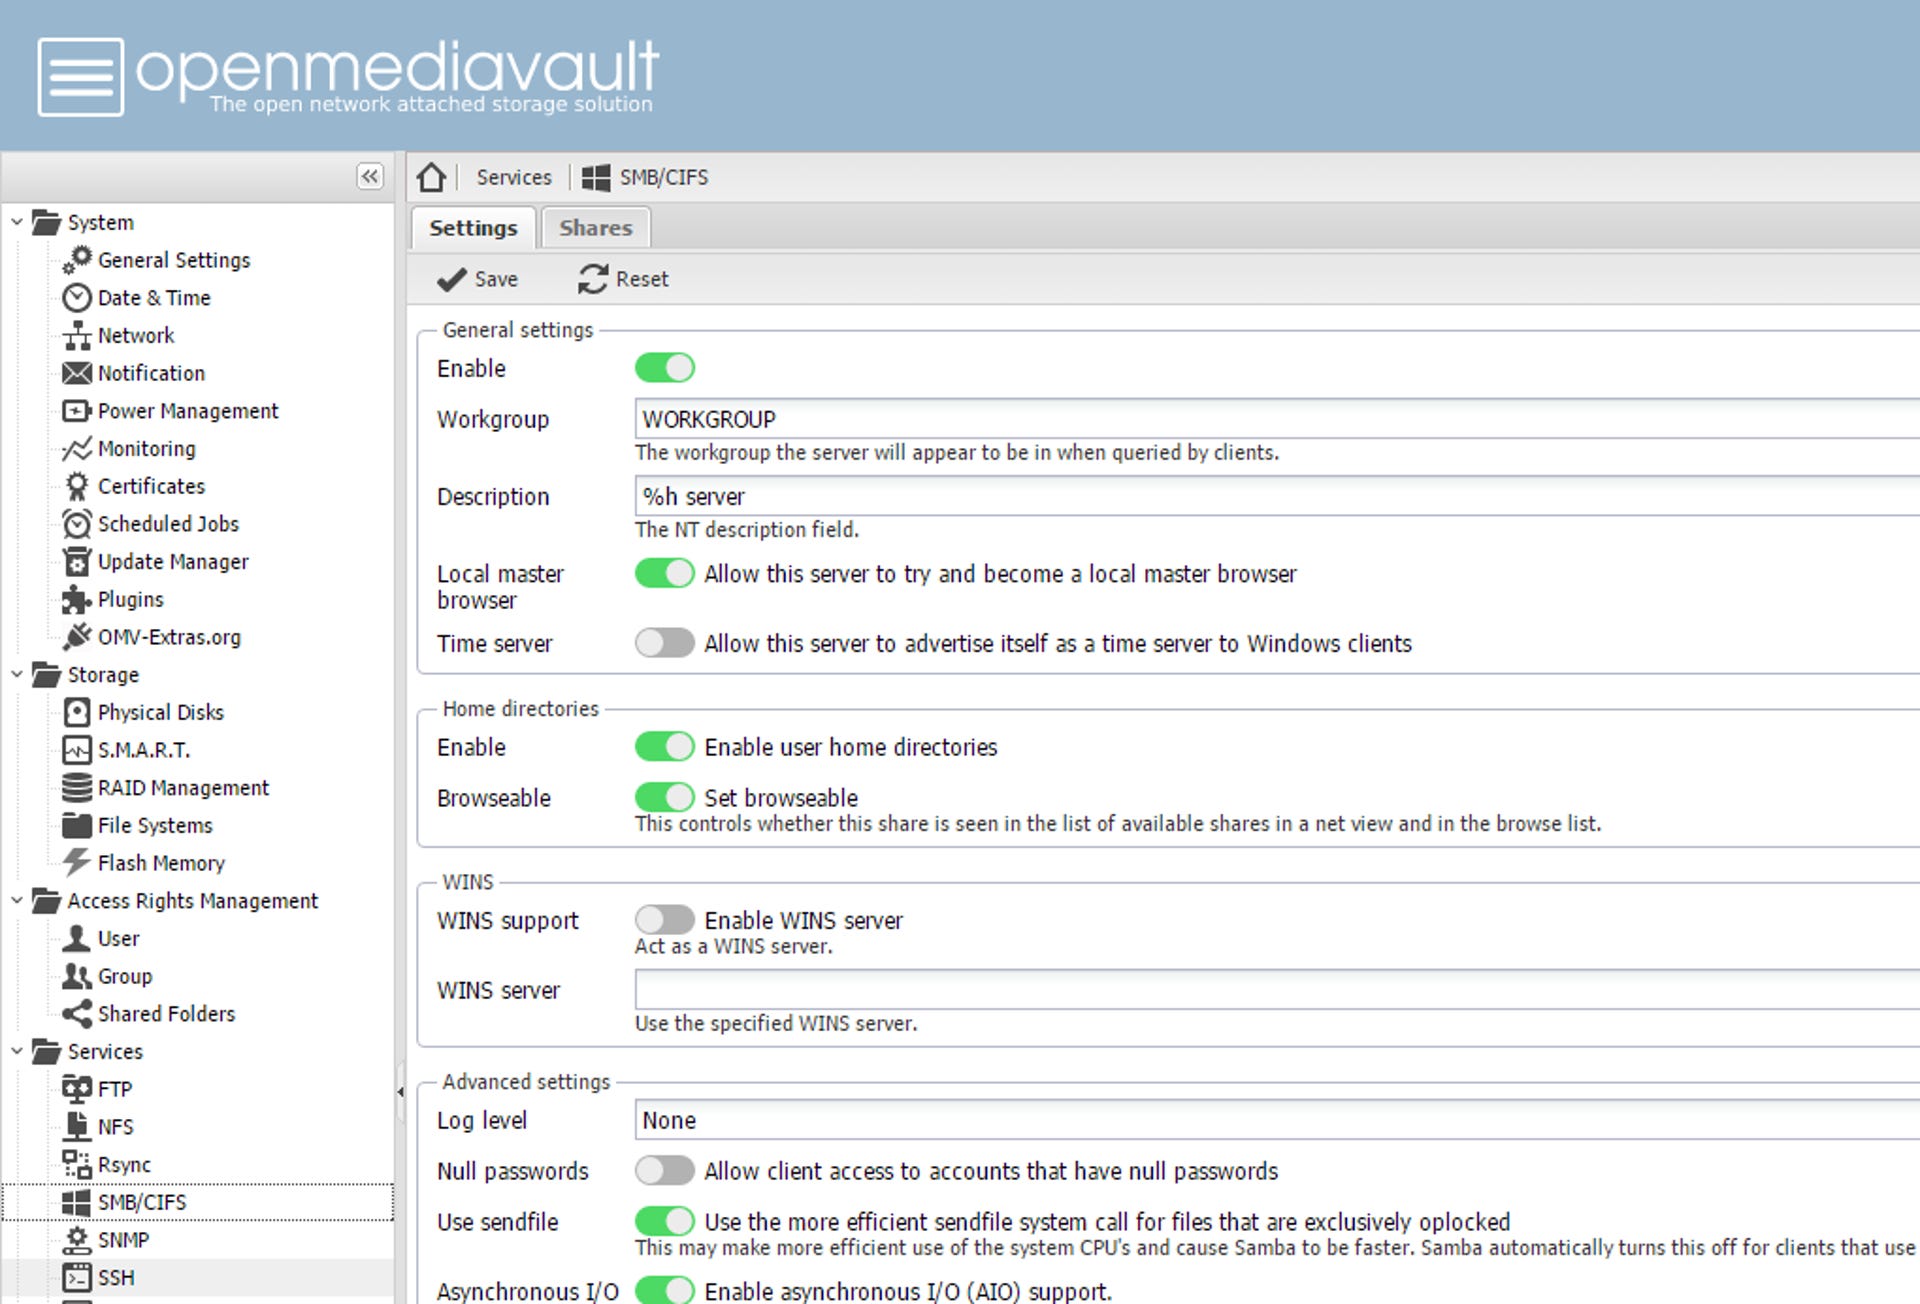
Finally, to access these folders and drives from an external computer on the network, you need to enable SMB/CFIS.
Click SMB/CFIS under Services in the left navigation pane and click the toggle button beside Enable. Click Save and Apply to confirm the changes.
Next, click on the Shares tab near the top of the window. Click Add, select one of the folders you created in the dropdown menu beside Shared folder and click Save. Repeat this step for shared folders you created.
Accessing the drives over your network
Now that your NAS is up and running, you need to map those drives from another computer to see them. This process is different for Windows and Mac, but should only take a few seconds.
Windows
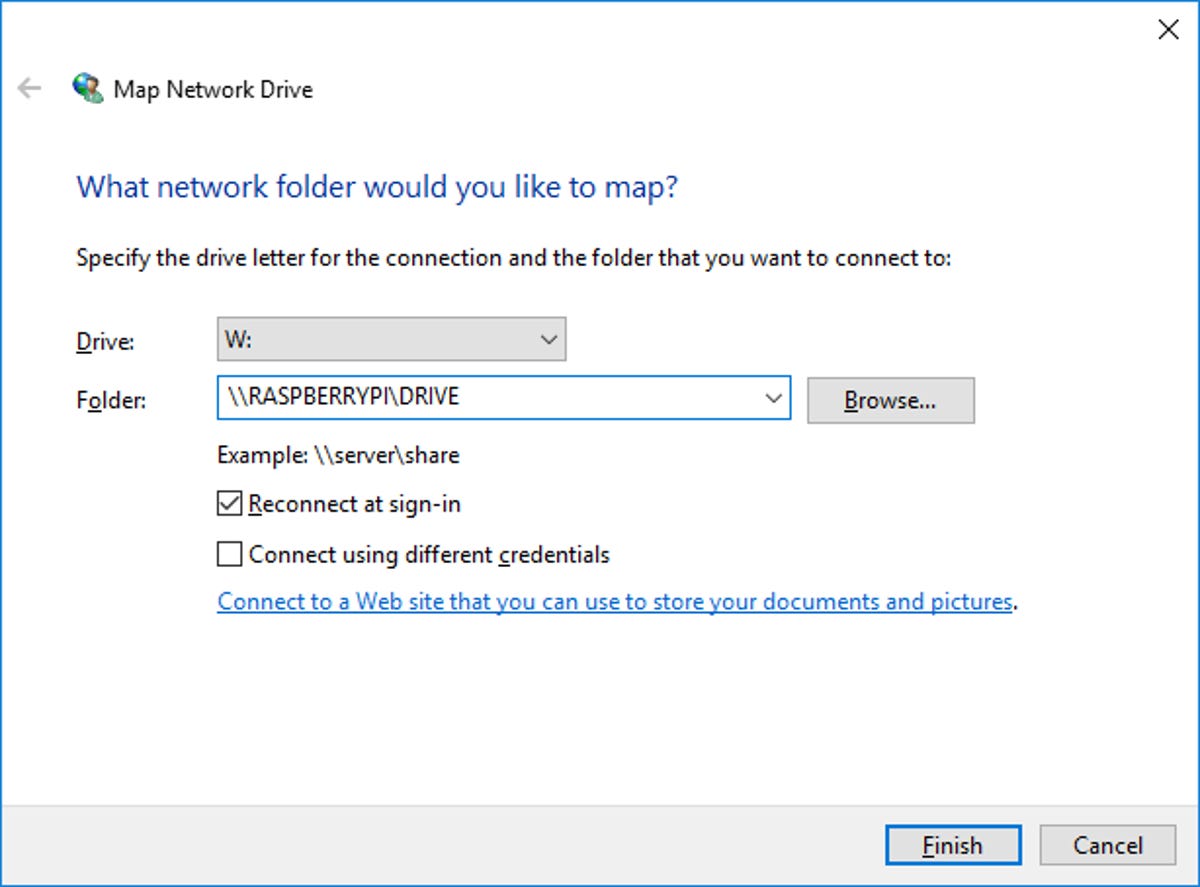
To access a networked drive on Windows, open File Explorer and click This PC. Select the Computer tab and click Map network drive.
In the dropdown menu beside Drive choose an unused drive letter. In the Folder field, input the path to the network drive. By default, it should look something like \\RASPBERRYPI\[folder name]. (For instance, one of my folders is HDD, so the folder path is \\RASPBERRYPI\HDD). Click Finish and enter the login credentials. By default, the username is pi and the password is raspberry. If you change or forgot the login for the user, you can reset it or create a new user and password in the web interface under User in Access Rights Management.
Mac
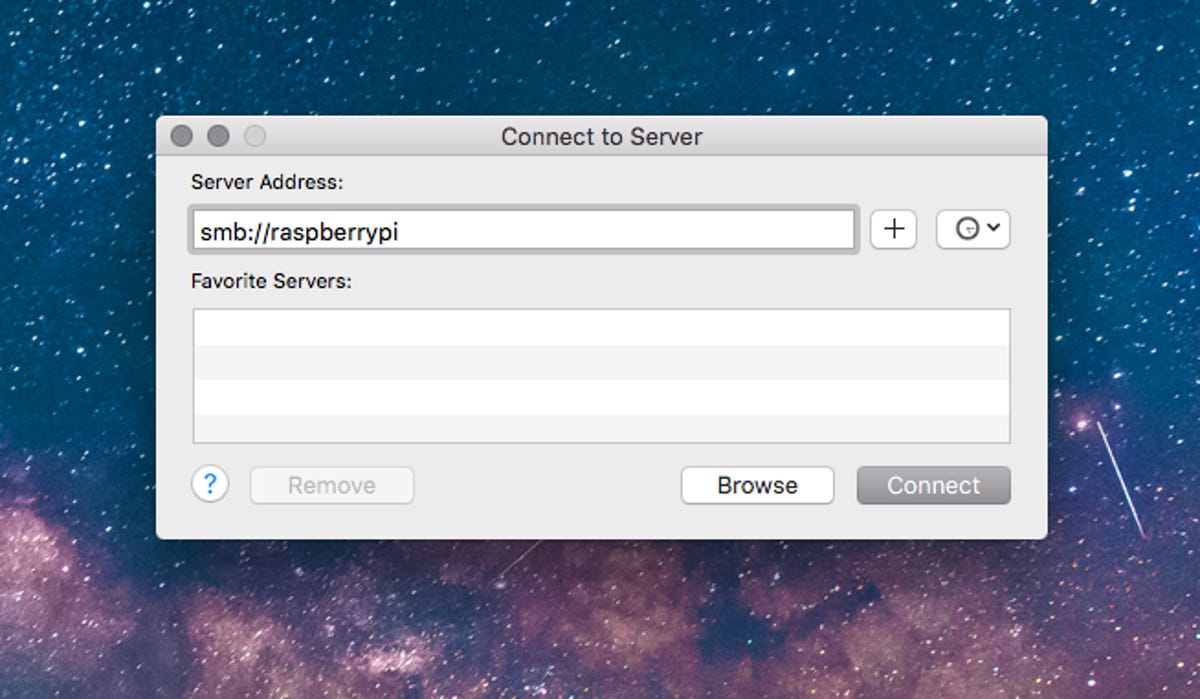
To open a networked folder in OS X, open Finder and press Command + K. In the window that appears, type smb://raspberrypi or smb://[IP address] and click Connect. In the next window, highlight the volumes you want to mount and click OK.
You should now be able to see and access those drives within Finder or File Explorer and move files on or off the networked drives.
There are tons of settings to tweak inside OpenMediaVault, including the ability to reboot the NAS remotely, setting the date and time, power management, a plugin manager and much, much more. But if all you need is a network storage solution, you'll never need to dig any deeper.