How to sync iWork with iCloud
No longer must you physically connect your iOS device to your computer to transfer work files. Here's how to do it with iCloud.


The first applications to take advantage of iCloud syncing all come from Apple, with the iOS versions of iWork's Pages, Keynote and Numbers apps leading the pack. That's not surprising, but we can expect to see other apps follow suit in short order, as Apple has already released a software-development kit for third-party coders who want to add iCloud syncing to their offerings.
While we're waiting, here's how to sync iWork with iCloud.
Syncing with iCloud
1. iCloud syncing is disabled by default. Switch it on by tapping 'settings' and 'iCloud' on your iOS 5 mobile device, and scrolling down to 'documents and data'. Hit 'documents and data' and tap the on/off button. The standard setting is to synchronise only when connected over Wi-Fi, to avoid tipping the limit on your 3G contract.

2. Launch Pages and start a new document. Here we're using the standard plain document type, but synchronisation works with any Pages document, Numbers spreadsheet or Keynote presentation created in the iOS apps or copied manually to your iCloud workspace. Resist the urge to specify iDisk as a storage device, as Apple will be retiring this in summer 2012, so it pays to get out of the habit of using it in advance of its eventual disappearance.

3. You don't need to manually sync your work with the server. The whole time you're working, iOS is backing up the file over your network connection.
Log into your iCloud account on your computer using a regular browser and, if it's not already set to view your iWork workspace, click the application icon and select 'iWork' from the menu. You'll see the files within this folder shuffle themselves around inside the browser window as you create new documents on your iPhone or iPad.

4. iCloud synchronisation also provides the best route to getting work onto your iOS device. With iOS 4 and earlier versions of iWork, you could only get files created on your Mac or PC onto your mobile device by connecting it over USB and dragging them into the 'file sharing' space of the iTunes apps tab.
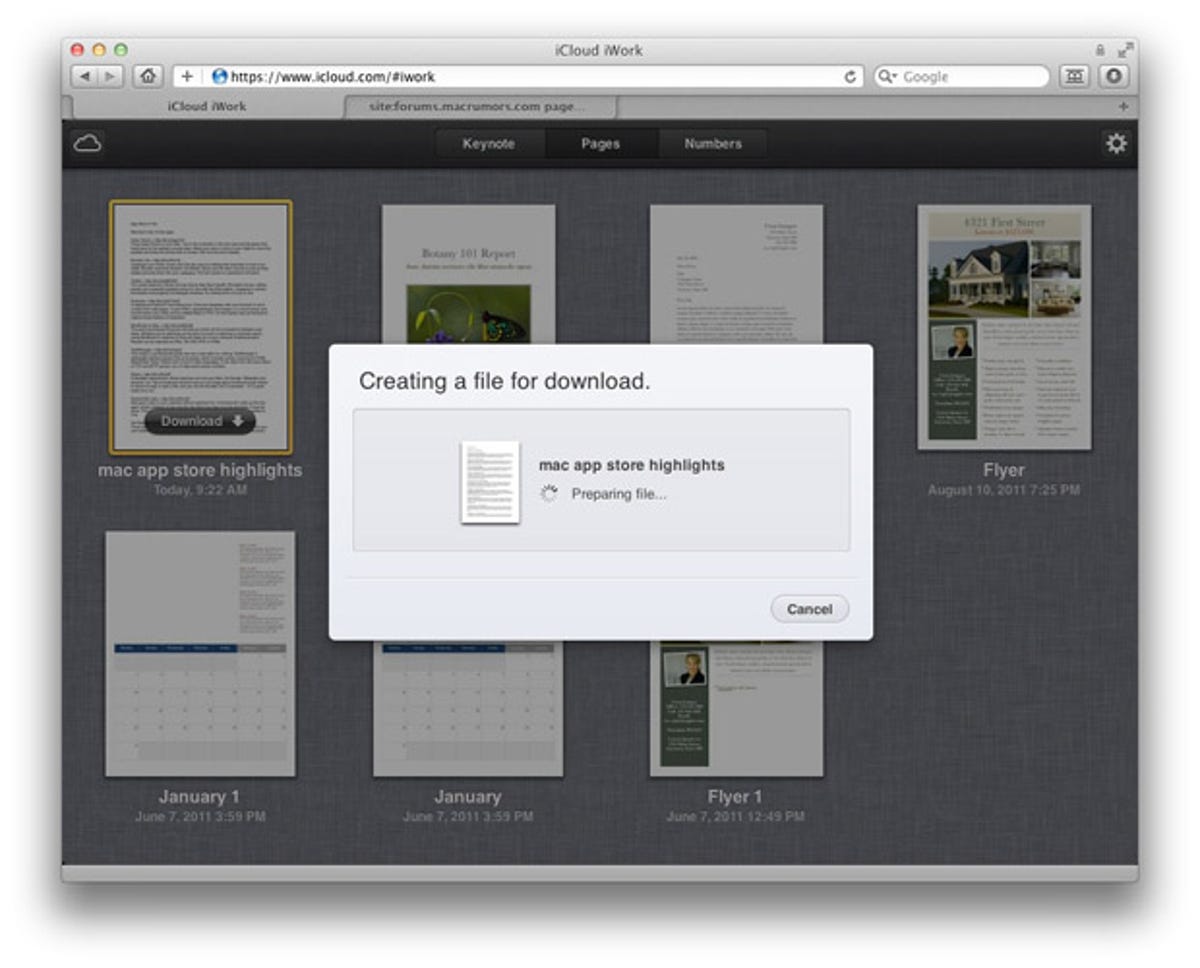
To upload documents wirelessly to your iOS device, click the cog in the iCloud iWork interface and select 'upload document', and then pick the file from the dialogue. When the upload is complete, the file will automatically appear on your iPad or iPhone when your mobile device next checks in with the server.

5. This process works in both directions, so it's no longer necessary to email a file to yourself if you don't want to perform a wired sync with iTunes. Because the files are stored on Apple's servers, they can be retrieved directly through your computer's browser in Pages '09, PDF or Word format. Click the thumbnail, followed by 'download' to retrieve a copy in the format of your choice.
6. Unfortunately, you can't share files in the same way without giving the recipient your Apple ID credentials. Sharing files from the cloud without doing this is only possible using iWork.com. Launched in January 2009, iWork.com remains in public beta, but it's stable and suitable for daily use.
To use iWork.com from an iOS device, return to Pages', Numbers' or Keynote's file menus and tap 'edit'. Select the file you want to share, followed by the shortcut button. Tap iWork.com and log in using your regular Apple ID. This will open a new email containing a link to the file, to which you can add a covering note if necessary.

7. The person with whom you've shared your document receives an email from your address with a link to the file. When opened in the browser it looks identical to the original, and, although they can't make changes, they can attach comments and notes that are shared with other viewers of the document, making this an effective, collaborative approval platform. To edit the document directly, they'll have to download their own local copy.

iCloud capacity
iCloud is a free service, so we can forgive it the fairly conservative 5GB limit on storage. Fortunately, it's possible to upgrade this from your iOS device. Tap 'settings', 'iCloud', 'storage and backup', and 'buy more storage'. An additional 20GB, taking you up to 25GB in total, costs £28 per year. An extra 50GB costs £70 per year. This is charged to whichever card is registered to your Apple ID.
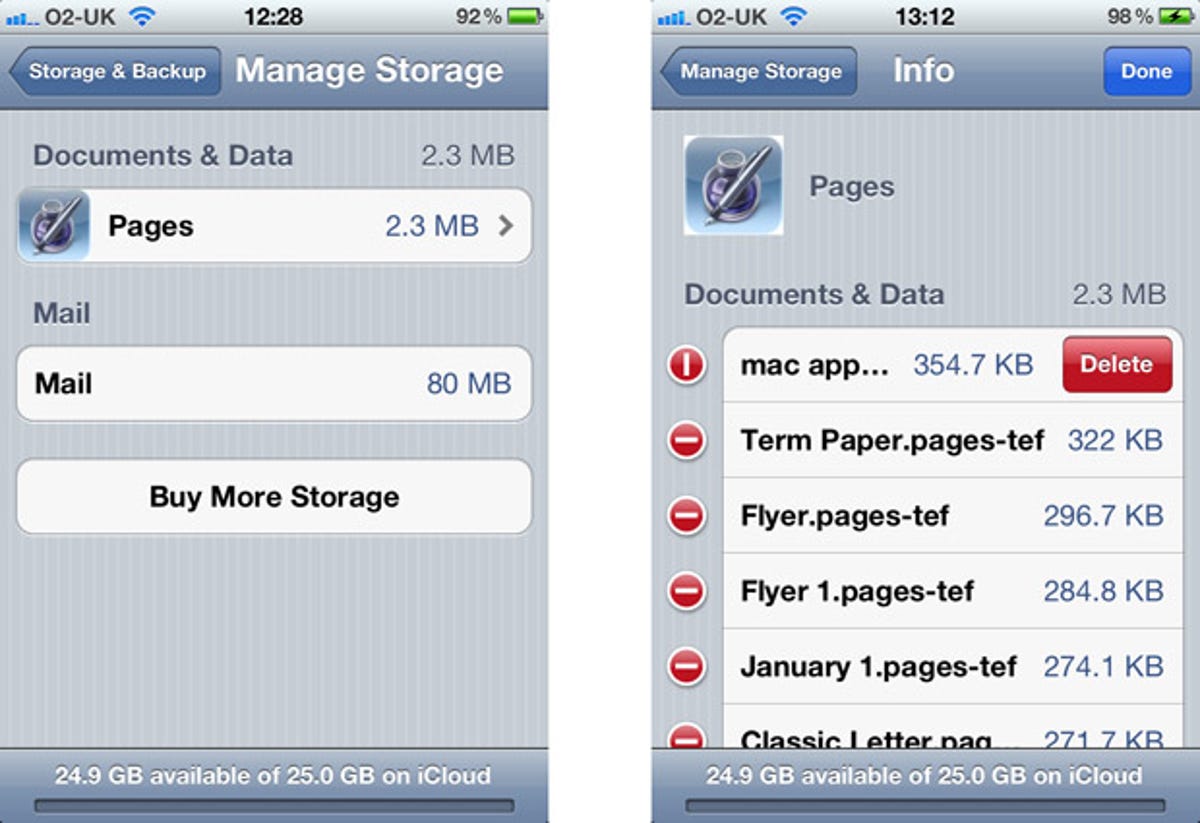
A cheaper option is to actively manage the files stored in your iCloud account. Tap 'settings', 'iCloud', 'storage and backup', and 'manage storage' to see which applications are consuming the greatest amount of space, and tap within them to view the constituent files.
To delete the most bloated documents, tap 'edit' and then use the red bars to the left of each one to call up their individual delete buttons. Use this feature with care, as it deletes chosen files not only from your device, but also all other devices logged into the same iCloud account.