How to set up the new Dropbox camera upload feature on Mac
You can now automatically upload your photos and videos to Dropbox just by plugging your SD card or camera into your computer.


Dropbox has released version 1.4 of its Mac and Windows app, which enables a feature called Camera Upload. If you're looking to get started with the Windows version, Lance Whitney explained how to set it up in an earlier post.
You may remember during beta testing of the camera upload feature, you had the chance to get up to 3.5GB of free Dropbox storage, just by uploading photos and videos. The additional free storage carries over with the official release, giving you 500MB on your first upload and up to 3GB of storage. If you don't want to keep your photos in Dropbox, but still want the free space, upload your 3GB of photos and videos and then delete them. The space will remain.
To get started, download and install version 1.4.0 of Dropbox for Mac.
After installation, you should be prompted to enable camera upload; if you're not, click on the Dropbox icon in the menu bar and select Preferences.

Under the General tab, there will be a check box to enable "Dropbox camera import." Check the box then close the preferences panel.
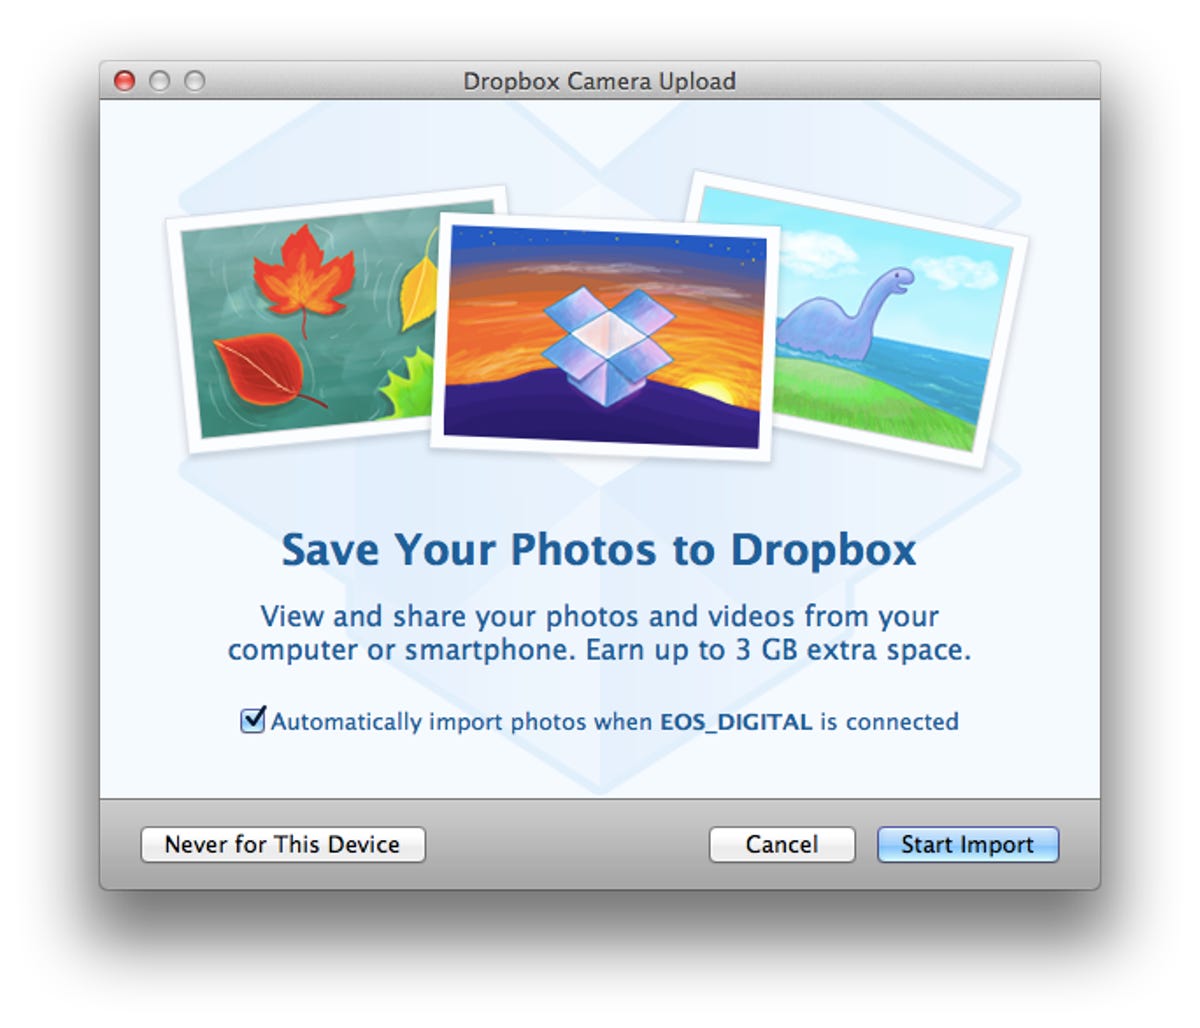
The next time you plug in a device that stores photos or videos, you will be presented with the screen above. From here you're able to set up how you want Dropbox to interact with the particular device you have plugged in. Leaving the box checked for automatic import will enable Dropbox to import your photos and videos without you having to do a thing when it's plugged into your Mac.
You can also elect to not allow Dropbox to upload your media from a particular device by clicking on "Never for this device."
If you prefer to be prompted each time you connect a device, uncheck the auto-import box and click on "Start import."
All the photos and videos on your device that haven't previously been imported by Dropbox will then be imported into your Dropbox account. Once the import is finished, a new Finder window will open revealing the files.
There are some caveats to the new feature, however. First, you can't pick and choose the photos you want to import; it's an all-or-nothing approach. Also, there isn't a way to manage the devices you set up. So, if you change your mind and no longer want to automatically import from a particular device, the only way to change that is to disable the entire feature in preferences, then re-enable it. Hopefully these features, among others, are what Dropbox is alluding to in the official announcement when referencing "Part III."
One more thing: if you took part in the beta and already earned your 3.5GB of free storage, you won't be able to claim anymore storage now that the feature is official.