How to set up a networked hard drive with a Mac
Sharing a storage drive over Wi-Fi is a great way to access all your important files across multiple devices. Learn how to set up a networked drive using a Mac.


Setting up a networked hard drive is a great way to access all your files from multiple computers. Maybe you want to share documents with coworkers without having to upload everything to Dropbox or share music files with the entire family.
Setup is easy, but if you have a Mac, you'll need a different set of instructions than PC users.
Here's how to set up a networked hard drive with a Mac.
Storage drive
You can choose just about any type of USB storage drive to add to your network. Older routers may not be compatible with larger storage drives, but with newer models, you can typically use anything from a small flash drive to a 5TB (or larger) external HDD will work. Check with the router manual to find out if there are any storage limits.
I'm currently using an SD card reader with my router (pictured above), so I can quickly share any pictures I take with my camera across the network.
Enable sharing
Once you pick which storage drive you want to share over the network, plug it into the USB port on the back of the router.
Next, open a browser window and navigate to the router settings panel.
For Netgear routers, navigate to http://routerlogin.net. For other brands or if that doesn't work, you will need to locate the IP address of the router. Go to System Preferences and navigate to Network. Highlight Wi-Fi and select Advanced in the lower right corner of the window. Open the TCP/IP tab and you should see the router's IP address. In my case, it is 192.168.0.1.
Enter this IP address into the browser address bar. You'll be asked for a username and password. This is typically pretty generic, such as admin as the username and password as the password. This differs by brand, but can be easily found with a quick Google search.

Once you're logged into the settings panel, look for an option titled USB Settings, USB Storage or File Sharing. Ensure USB access and the file sharing server are enabled.
Connect to the drive
Once the USB drive is connected and sharing is enabled, you're ready to access the drive from your Mac.

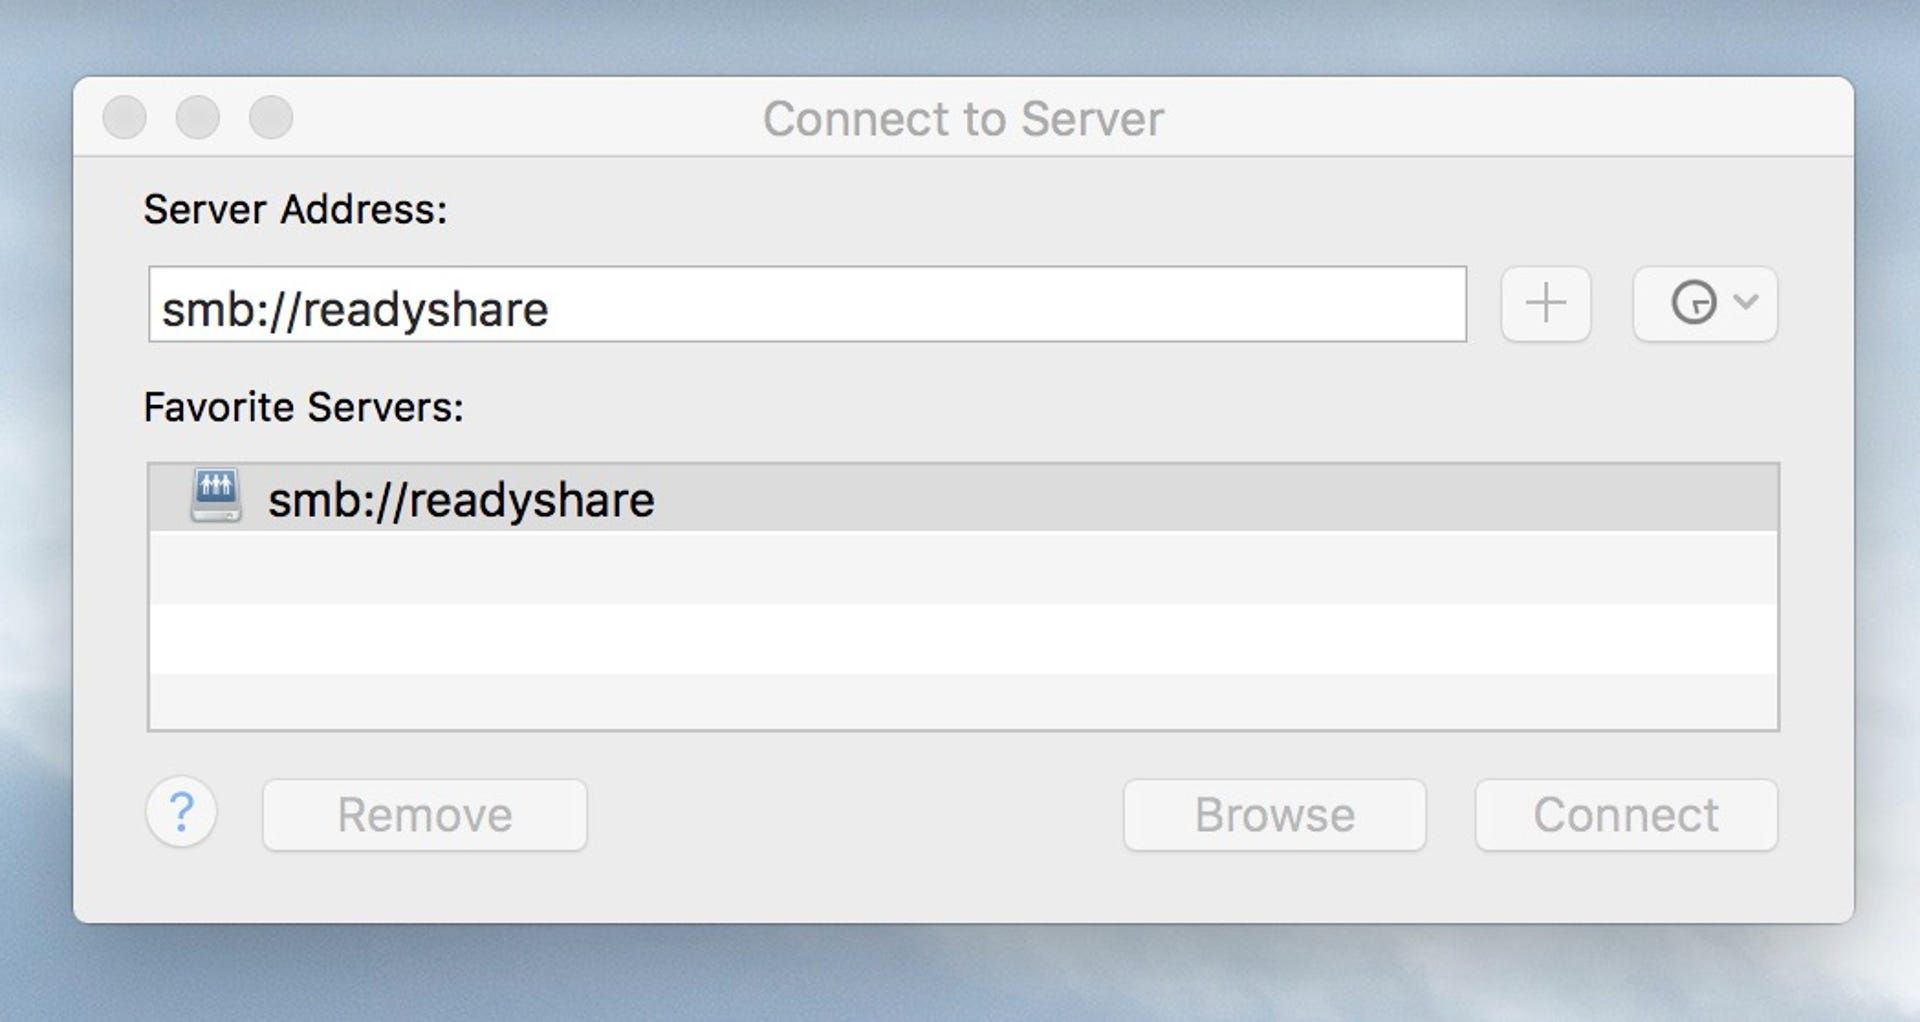
Here's how: Open Finder, click Go in the menu bar, and select Connect to Server (or press Command + K). A small pop-up window will appear. Paste the server address into the field. (This can usually be found on the same page as the USB settings in your router's admin panel.) It should be something like smb://readyshare.
Alternatively, you can enter the IP address of the USB drive (smb://192.168.X.X). Click the plus sign to the right of the address field to add the server to your favorites, and click Connect.
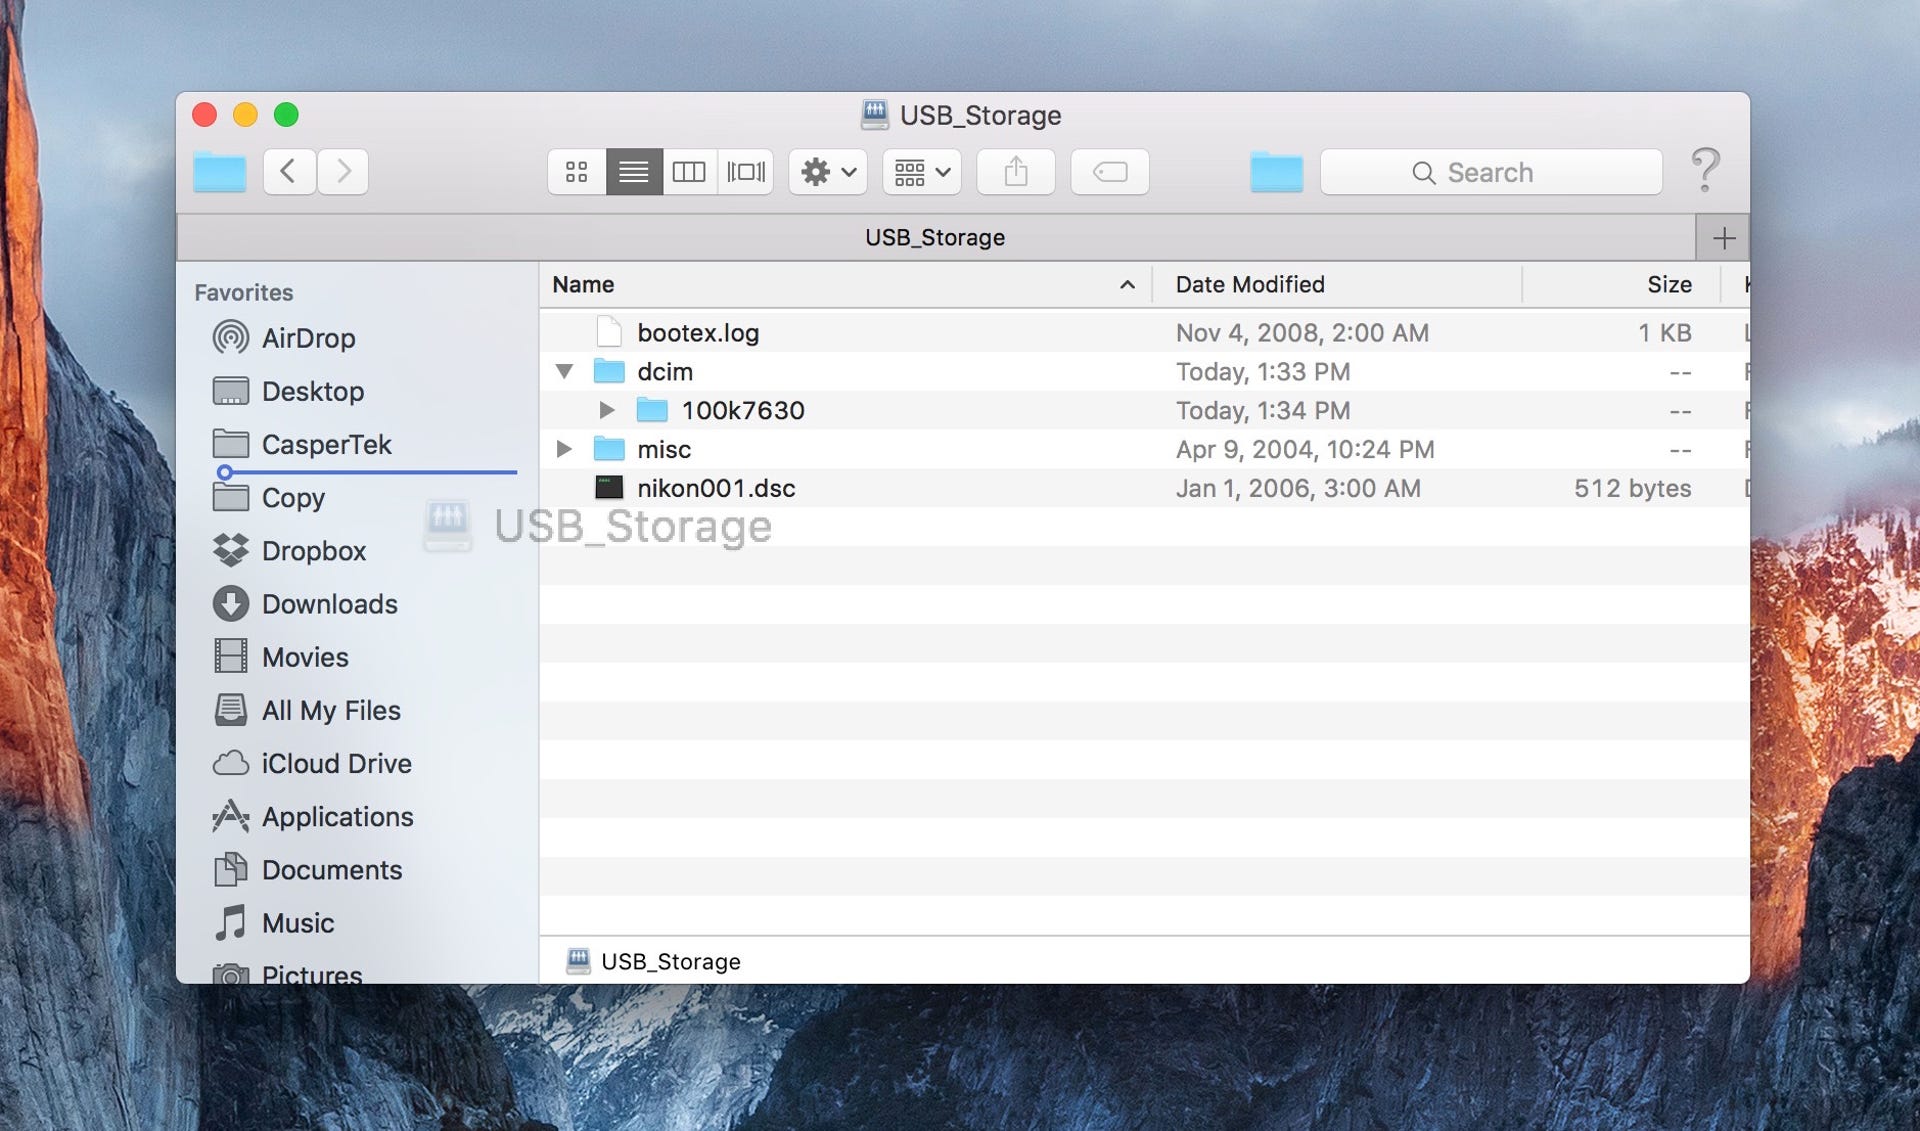
This will open the Network folder where you should able to view the shared drive and all its files.

Making it easier to find the drive later
To create a shortcut to this shared drive, open the networked folder. Click View in the menu bar and select Show Path Bar. You should see the name of the shared drive in the path bar at the bottom of the window. Click and drag this into your favorites menu on the left.
Auto-connect to the shared drive
If you restart your Mac, you will need to reconnect to the networked drive manually.
To automatically reconnect on a reboot, open System Preferences and select Users & Groups. Open the Login Items tab and click the plus button at the bottom. Select the shared drive from the Favorites bar and click Add. Finally, make sure the drive is checked.
You should now automatically connect to the drive whenever your Mac reboots.