How to make folders private on a Windows 8.1 family PC
Choosing File Explorer's "Stop sharing" option doesn't prevent other administrator accounts from accessing your default folders for pictures, documents, videos, and music. Here's how to privatize your personal folders on a multiuser PC.


A reader named Gary asks about keeping folders private on the PC his family shares:
I have Windows 8.1 and have set up my computer with myself, my wife, and two teenage daughters (19 and 16). I initially set up everyone as Administrators as I am happy for my daughters to install some software. My issue is that in the old Windows XP we had to decide to share folders for all users to see. Now in Windows 8.1 they can see my Pictures, Documents, and Music.
I have tried to turn off Sharing but I wonder if that is for other devices and not people. Is there anything I can do? Is this where HomeGroup comes into play? I hope you can help. It's not that I have anything rude or anything like that but I like everyone to have their own stuff on the computer away from everyone else.
A HomeGroup is created automatically in Windows 8.1 even if it's the only PC in the vicinity, as explained on Microsoft's Windows Support site. However, HomeGroup settings apply only to two or more networked systems, not to multiple users on a single PC, as in Gary's situation.
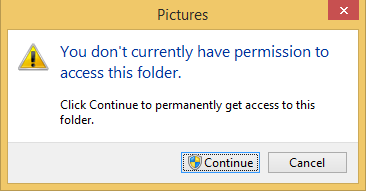
You might think that File Explorer's "Stop sharing" option would keep your personal folders private on a multiuser Windows 8.1 PC. When I tested this feature, I was able to override the no-sharing option when I accessed the folders while using another administrator account on the machine. You simply select the Continue button in the warning that appears when you attempt to open the folder (the pop-up is shown at the top of this post).
To enable the stop-sharing option, open File Explorer, right-click the folder, and choose Share with > Stop sharing. Alternatively, you can highlight the folder, choose the Share tab, and press or click the Stop sharing icon.

When another administrator account attempts to open the folder, a message pops up stating "You don't currently have permission to access this folder." You're prompted to click Continue to get permanent access to the folder. If another standard-user account tries to access the folder you've stopped sharing, the same warning appears, but the user is prompted to enter an administrator password before being given permission to open the folder.
To prevent other administrator accounts on the PC from accessing your personal folder, open File Explorer, right-click the folder (such as Pictures in the screen above), and choose Properties. Click the Security tab, select the account (or accounts, in Gary's case) you want to block from accessing the folder, and click the Edit button. Click Deny to the right of "Full control," and choose Apply and OK.
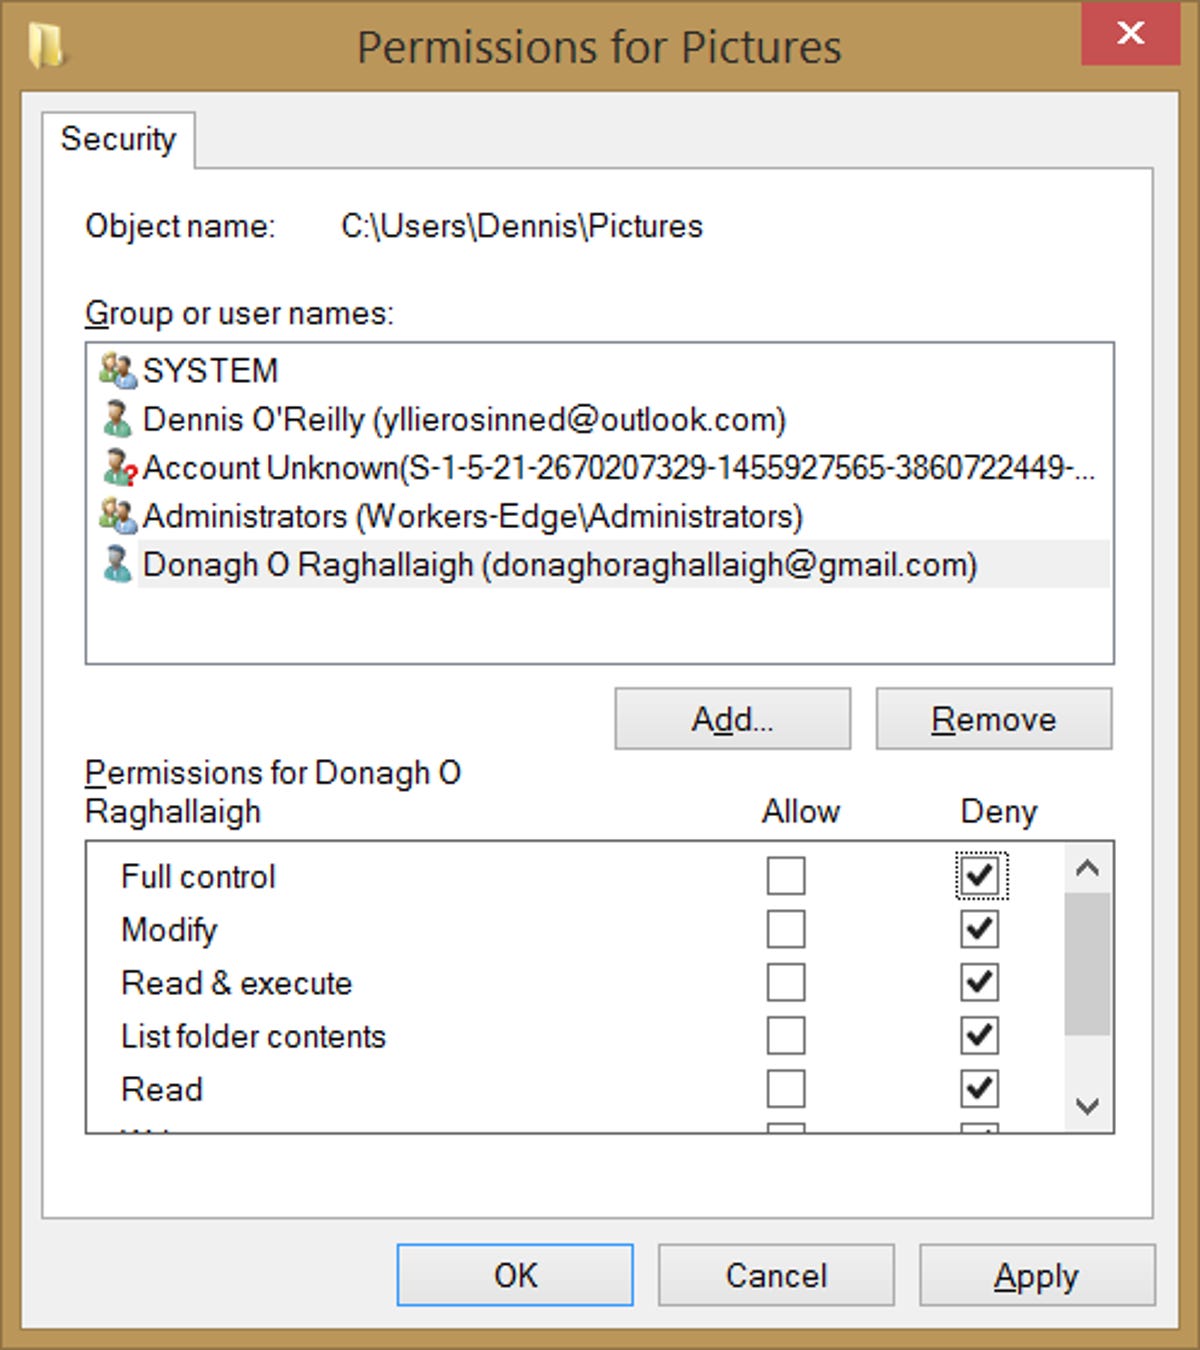
Once you've denied the other users access to your personal folders via the Properties > Security > Edit (Permissions) dialog box, any user who attempts to open the folder sees the same access-denied warning. The pop-up prompts them to open the Security tab of the folder's Properties dialog.
From this dialog the user is prompted to open the Advanced Security Settings dialog, where the user can "try taking ownership of the object, which includes permission to view its properties" by choosing the Change option next to Owner.
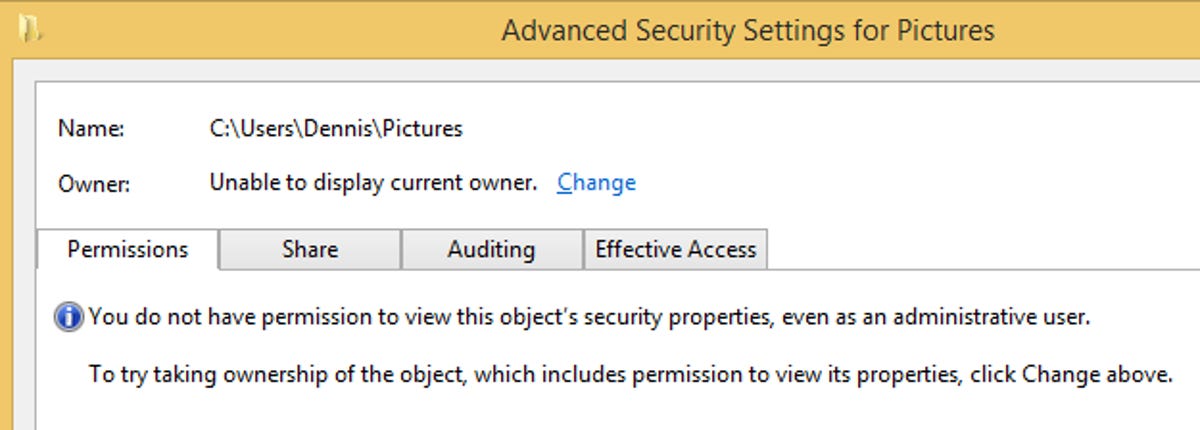
When I attempted to take ownership of another administrator's private folder, I was sent into a loop of error messages prompting me to close and reopen the folder's properties, telling me that I had "failed to enumerate objects in the container," and informing me that I needed to "apply the correct permission settings immediately."
In the end, I wasn't able to access from one administrator account any folder that another administrator account on the PC had designated as private by changing the folder's Permissions options to "Deny" as described above.
A 'backup' administrator account comes in handy
In a post from the dark ages of 2008 I covered how to " Enable Vista's hidden administrator and password-protect its XP equivalent." That article pointed out the benefits of having an extra administrator account on a Windows system to help troubleshoot any problems that may arise with the machine's primary account.
The Microsoft TechNet site explains how to enable and disable the built-in administrator account in Windows 8 and 8.1 (as well as in Windows Server 2008 and Windows Server 2012).
To add a standard or administrator account in Windows 8.1, open the Charms bar by pressing the Windows key + C. Alternatively, you can swipe the screen from the right on a touch screen, or move the mouse to the top right or bottom right corner. On the Charms bar, choose Settings > Change PC settings. Select Accounts > Other accounts > Add an account.
Another route to your account settings is to press the Windows key + X, then P, and click User Accounts. Select "Manage another account," choose "Add a new user in PC settings," and click "Add an account."
You can either use a Microsoft ID or create one by entering an email address, password, and other information, including a Captcha to prove you're human. Uncheck the offers to participate in the Microsoft advertising network and promotions, if you wish.
You're also prompted to enable Family Safety if you're creating a child's account, which allows you to receive a report of the person's PC use, among other features.
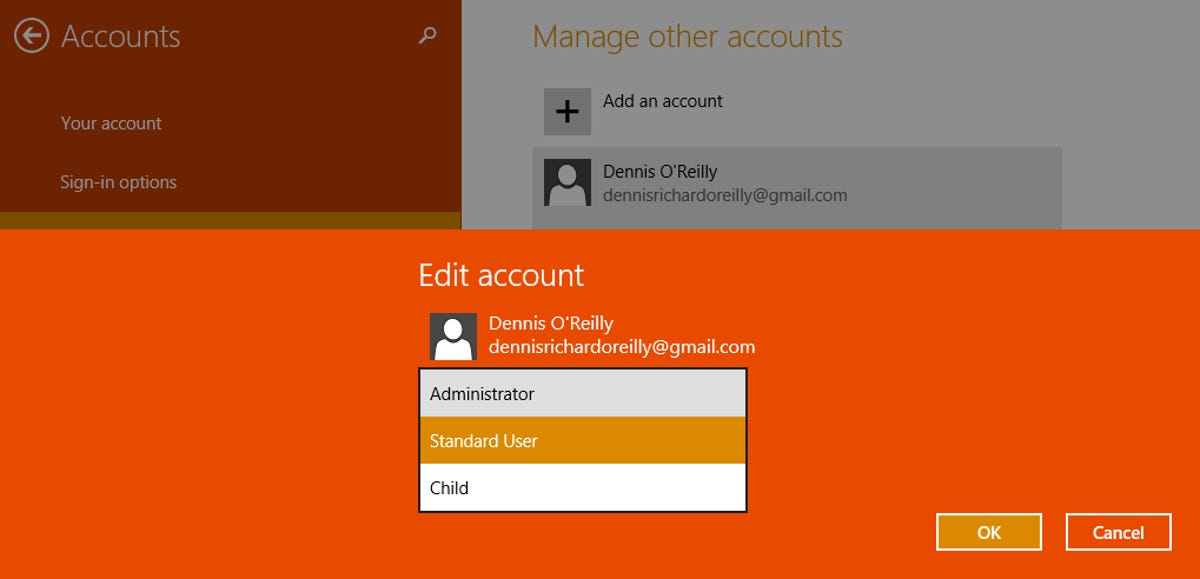
By default, the new account is assigned Standard User privileges. To grant the account Administrator privileges, which include the ability to install software and change system settings, select the account, click Edit, choose Administrator in the "Account type" drop-down menu, and click OK.
There are many good reasons why Microsoft defaults to Standard User for new accounts. Using a standard account was one of the recommendations in November 2011's "How to secure your PC in 10 easy steps." Standard accounts can't install software or make other system changes without first supplying a password for an administrator account.
It is a minor hassle to enter a password whenever you want to add a program or adjust some setting, but most people will go many days or weeks between such system changes. The extra step also helps prevent inadvertent changes and guards against installation of potentially unwanted programs (PUPs), although these sneaky puppies often attach themselves to software you intend to install, as I described in last February's "Free utility finds unwanted programs uninstallers miss."