How to install Jelly Bean on the Samsung Galaxy Ace 2
Frustrated at being stuck on boring old Android Gingerbread? Once you've rooted your Galaxy Ace 2, you can zip to brand-new Jelly Bean.

The Samsung Galaxy Ace 2 may be a cracking choice for the Android lover on a budget, but it doesn't have the latest version of Android on it. Today we're going to set that straight, by switching the stock Gingerbread ROM for one that emulates the sweet delights of Jelly Bean, skipping Ice Cream Sandwich altogether. For the good of our teeth, as much as anything else.
If you're happy to wait for the official update from Samsung, I definitely recommend doing that, especially as this isn't the full Jelly Bean experience (note: see the update at the bottom of the article). Also just rooting your Ace 2 -- essential for this process -- will void your warranty. Can we take as read that anything you do to your phone is your responsibility and CNET takes no responsibility for loss or damage caused by following this guide?
Good. Here's how it's done. It's a little messy, and this particular ROM required some repeated steps on my part, but if you want a Jelly Bean-style experience on your Ace 2 today there's not much choice.
If all this is a bit daunting, Samsung has officially confirmed that the Ace 2 will
be getting Jelly Bean in time, but if you want something resembling it today,
follow these steps and enjoy.
1. Root your Ace 2
You won't get anywhere without a rooted Ace 2. Go and look at this handy guide I wrote. Read it, follow the steps, then come back here when you're ready. That guide is for the GT-I8160 model -- so is the ROM we're going to use. Before we go any further, double and indeed triple-check you have that model in your phone's settings menu (Settings > About phone > Model number).
2. Download the stuff you need
Speaking of which, that ROM is the JellyCream 2.0 for Galaxy Ace. Go ahead and download it and its two patches to your computer from here, here and here.
I should mention that this isn't official Jelly Bean, as you might be able to tell from the name. As commenters below pointed out, it's a version of Gingerbread that's been made to look like Jelly Bean.
Plug in your Ace 2 with the USB cable and copy all the files onto your phone's SD card. Make sure your phone is on 75 per cent battery or more, too.
3. Back up!
Installing a new ROM to make it stable is something that requires deleting all your data. Everything: contacts, text messages, photos, emails, documents... everything. If you have anything of sentimental value, back it up now or forever hold your peace.
Photos are a simple drag and drop via USB, and there are apps that can back up your texts and other bits and pieces simply and painlessly, such as MyBackup (you'll need the paid version, £3.15 at time of publication, because as commenters point out below, rooting your phone will cause MyBackup to think it's a new phone, so you need a cloud-based solution). There are hundreds of other backup apps on Google Play to choose from.
4. Install the ROM
Turn off the Ace 2, then reboot it into Recovery Mode, by holding down the power, volume up and menu buttons. Scroll down with the volume down button to 'wipe data/factory reset' and press the menu button to select -- then scroll down to 'yes' (below left) and wait.
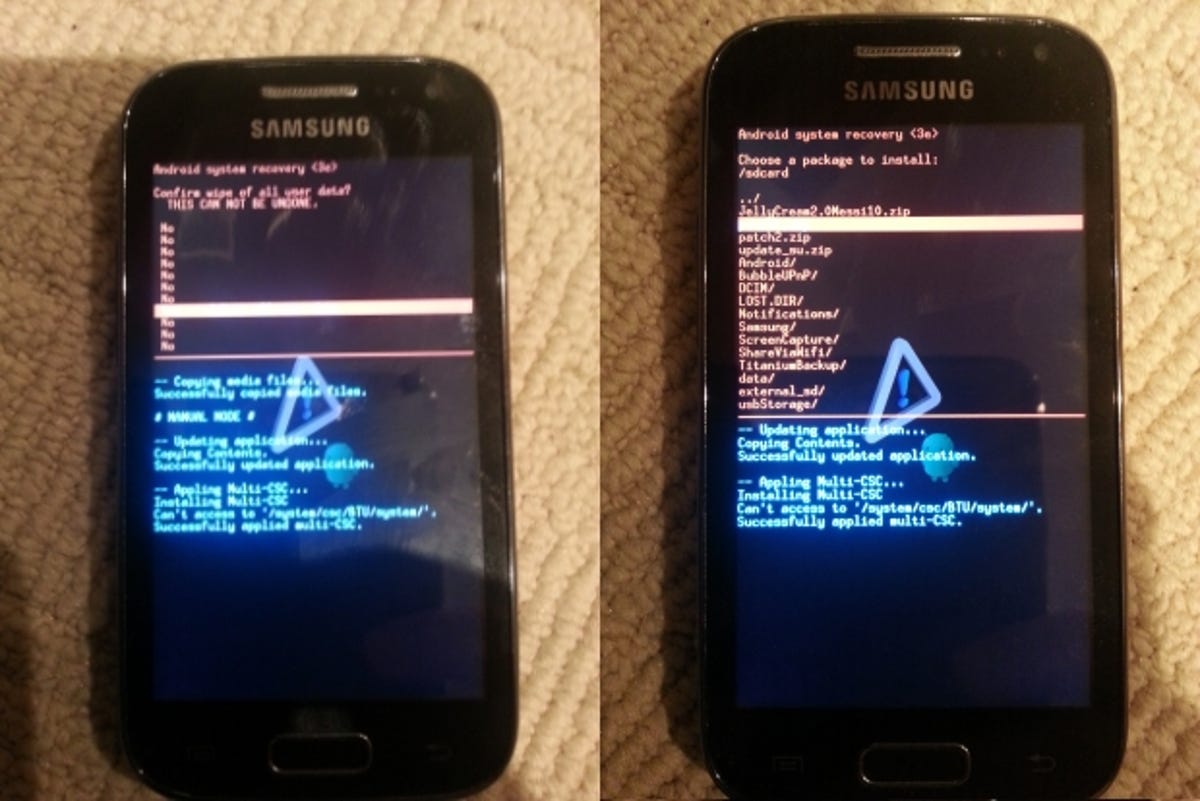
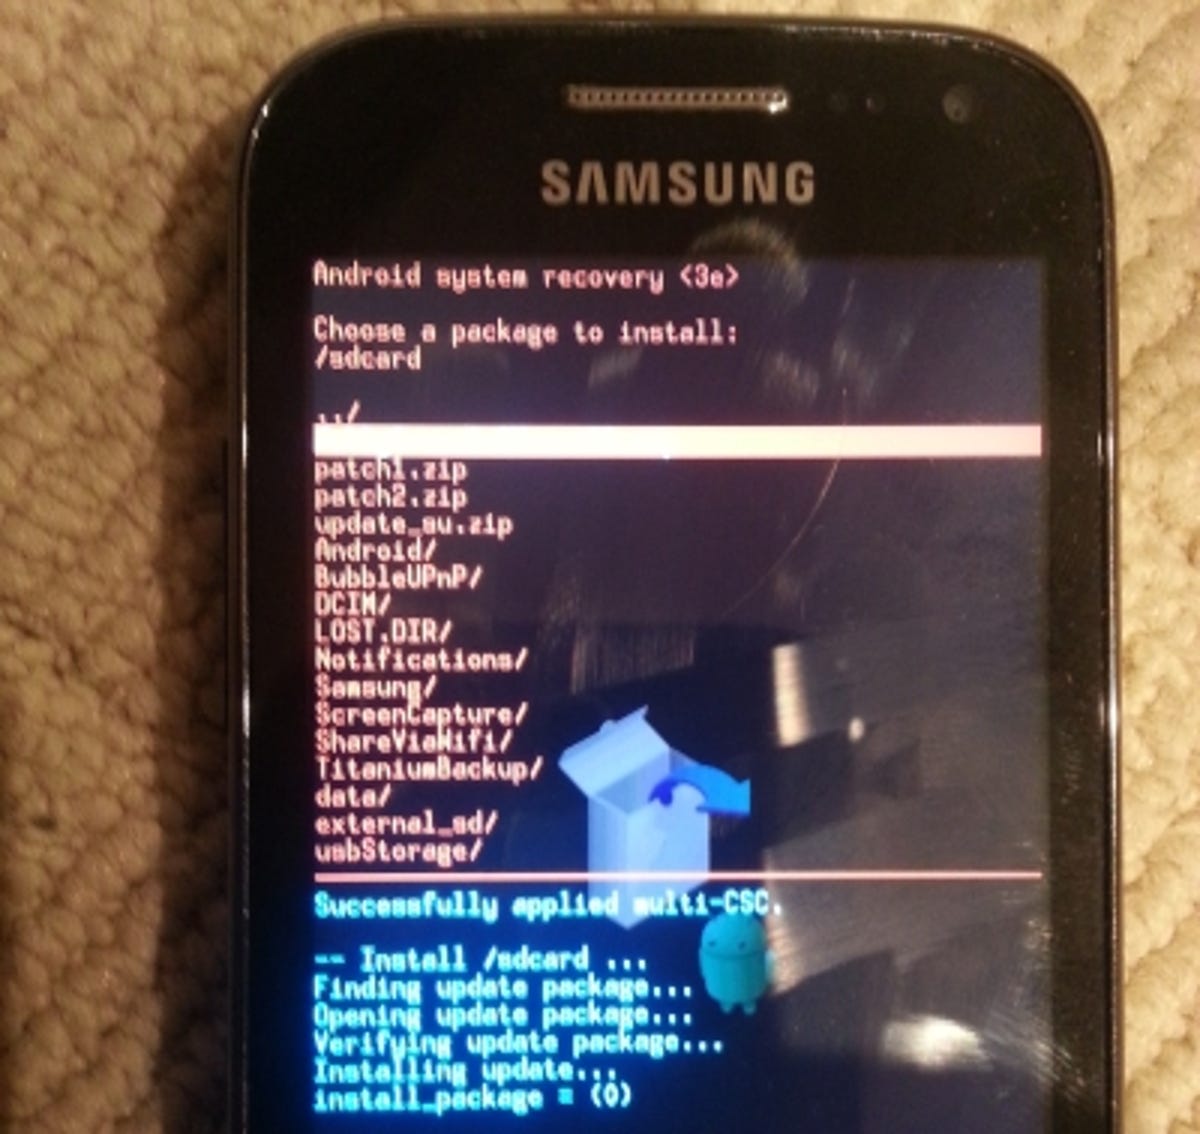
Now it's time to install the ROM, so scroll to 'apply update from sdcard' (above right) and press menu. Scroll down to the ROM file we downloaded earlier -- 'JellyCream2.0Messi10.zip' -- and press menu again.
The phone will do some magic, and then try to reboot, but we're not done yet. My Ace 2 got caught in a boot loop here: if this happens to you, don't panic, just switch it off and go through the last step again and it should work. (The ROM's creator even mentions in his guide that you need to install it twice.)
5. Softly, softly patchy monkey
Still not done! Go back to the main menu of the Recovery Mode and scroll to 'wipe cache partition', and press menu. When that's done, reboot the phone and let it load fully. You'll now be in Jelly Bean, but there's a couple of patches we want to install first, so once loaded, turn it off and boot back into Recovery Mode (power, volume up and menu, remember?).
Once again, scroll down to 'apply update from sdcard' and press menu -- this time, we want 'patch1.zip'. Do it again, then clear the cache. Once that's done, do the same for 'patch2.zip', again, twice (the developer says this is to be on the safe side). Wipe the cache partition one more time for good luck, and then reboot.
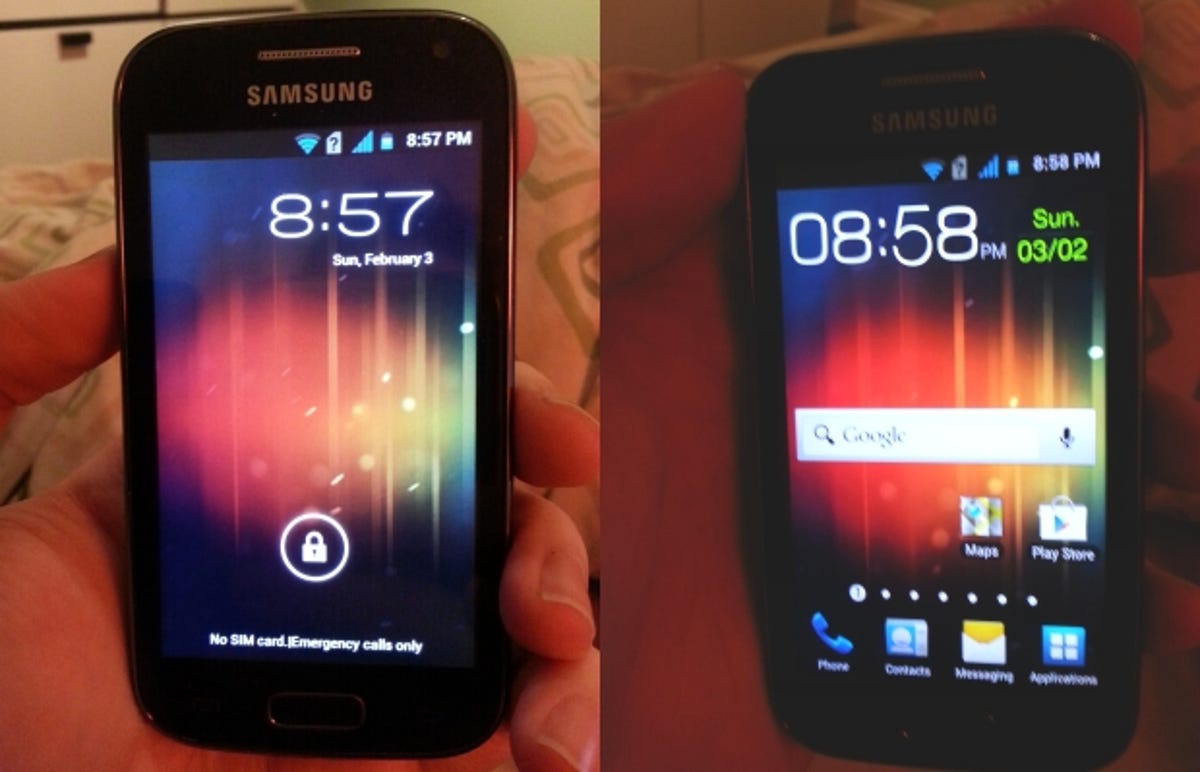
You're done, and now enjoying all the pleasures of the Jelly Bean version of Android on your Ace 2! If you have problems with Wi-Fi not connecting, go through the process with patch2.zip again, as this is a fix specifically for Wi-Fi problems -- this worked for me.
Update: Added some text clarifying what the JellyCream 2.0 software is, which version of MyBackup you need, and further warnings.
Update 2: Since we last updated this article, a fully fledged version of Jelly Bean for the Ace 2 has been leaked. I've tested it on my handset and it comes with all the bells and whistles you'd expect -- proof is in the screenshot below.
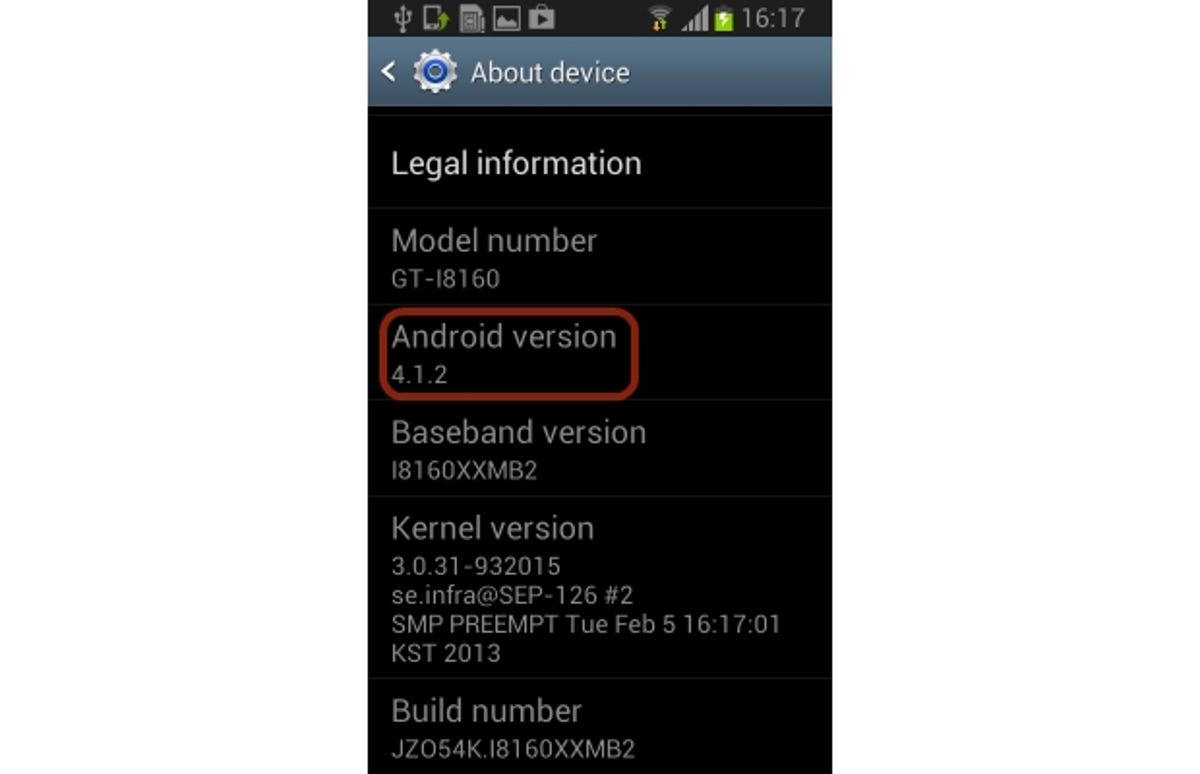
An official Jelly Bean update is expected in April, or soon after, so if you'd rather wait then feel free. For those who want the sweet treats of Android 4.1.2 a little earlier, here's how it's done. Remember to back up your stuff first:
1. Download the JellyBean ROM. It's in 7 parts on Hotfile, so if you're not a member, this will take a little while:
2. Unzip the combined file and boot up Odin. Unlike other ROMs I've used, this one has three separate files you need to put through Odin:
a) Press PIT and select: GT-I8160_EUR_XX_4G.pit
b) Select PDA and select: CODE_I8160XXBM2_932015_REV00_user_low_noship.tar
c) Select CSC and select: CSC_OXA_I8160OXAMB2_932015_REV00_user_low_noship.tar
3. Turn off your Ace 2, and reboot it into download mode by holding down Power, Volume Down and Menu. Press Volume Up to confirm you know what you're doing.
4. The ID:COM section of Odin will turn yellow. Press 'Start' and let the program do its magic. Your phone will reboot a couple of times, and will take a bit longer to boot up the first time.
5. Voila! The phone will boot up into Jelly Bean, asking you to enter all your details afresh.