How to import sound clips into the iOS Voice Memo app
If you are switching to an iPhone and want to bring your voice notes with you, or perhaps you have some hilarious sound clips you like sending to your friends, but can't quite figure out how to get them on your iPhone, follow along as we show you how simple it is!


A Twitter follower recently asked how he could go about importing some MP3 files into the iOS Voice Memo app. After doing some research, and trial and error, we were able to come up with a solution that worked.
Using iTunes, people can import their own voice notes or sound clips, regardless of device or platform they were originally made with. In just a few short steps you will convert the files, import into iTunes, mark as a Voice Memo, and finally sync them to your iPhone.
Let's get started.
First, you will need to convert any sound clips that are not in M4A format, which will more than likely be most of the clips you want to import. The easiest way to do this is to use a free app, for both Mac and Windows alike, called Adapter.
Part of the trial and error mentioned above was concerning the file format. In some instances iTunes would allow an MP3 or even a WAV to be imported and synced to the iPhone without issue. Upon the next device sync, the sound clips would disappear from the Voice Memo app, and iTunes would state they were not compatible. The easiest way we found to reliably sync files to the Voice Memo app was to convert them to M4A files.

After downloading and installing Adapter, you can drag and drop any audio file into the queue. Make sure to identify where you would like Adapter to place the new files, as well as change the Output Format to M4A. Once all the settings are right, click on Start Conversion!
The conversion process won't take long. Once it is finished, import the new files into iTunes by either drag and drop, or going to File>Add to library and selecting the files.
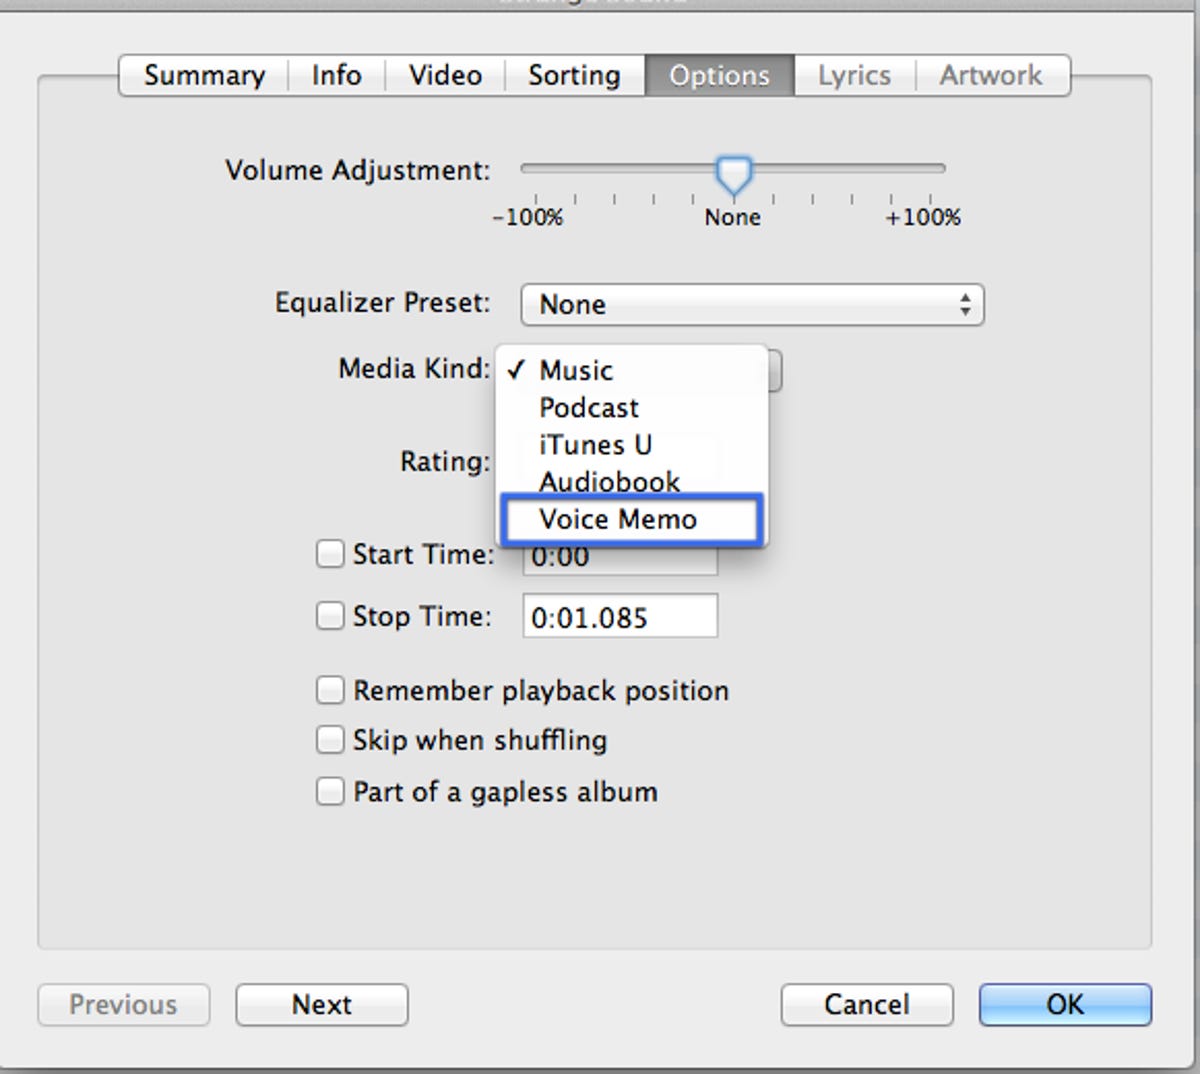
Next, you will need to change the Media Kind setting for each file from Music to Voice Memo.
- Right-click on the file
- Select Get Info
- Select the Options Tab
- Change the Media Kind from Music to Voice Memo
- Press OK
After you have changed the media kind on all the files you wish to import to your iPhone to Voice Memo, you are ready to sync the files to your device.

With your iPhone connected to your computer via the sync cable, select the Music tab. Here you want to make sure you have the "Include voice memos" option turned on by checking the box next to it. Sync your device.
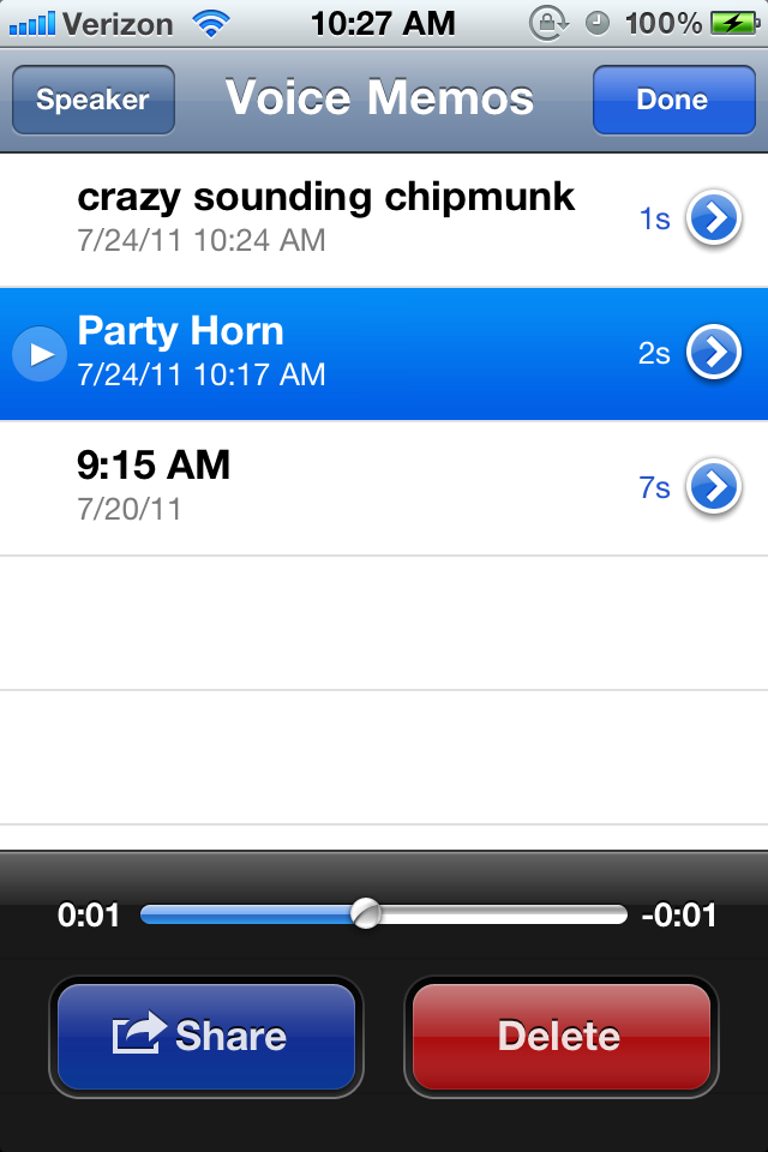
After iTunes has finished syncing your device, when you view the voice memos in the iOS app, you should then see your files. From here you can either listen to them, or share them via e-mail or MMS.
One more thing, to help organize your Voice Memos in iTunes, making them easier to keep track of, change the Artist Name to Voice Memos or create a Voice Memo playlist and import only your voice memo files into the playlist.
By importing prerecorded voice memos you can easily listen to and share them, whether you recorded them yourself or they are a favorite movie clip or sound.