How to enable 'Send Mail As' for Google Sync on iOS
Google recently rolled out some changes for Google Sync users using iOS. One of the changes, was the ability to customize the e-mail address e-mails are sent from on the device. Follow along as we show you how to set up the new Send Mail As feature on your iPhone, iPad or iPod touch.


Setting up your Gmail or Google Apps account using Google Sync on your iOS device has many advantages. One of the advantages is that you are able to receive push e-mail, calendar and contact updates. Google recently added some new features to its Google Sync solution for iOS users, one of which was the ability to choose which e-mail address sent e-mails appear to be from.
Before we begin, make sure you have your Google Apps or Gmail account set up using Google Sync on your iOS device. If you are unsure how to do so, read this post.
There are a few different steps involved in setting up the new Send Mail As feature. Some are done through the Web browser on your computer, others on done on the iOS device of choice. The first series of steps are carried out in your Web browser.
- Log in to your Gmail or Google Sync account
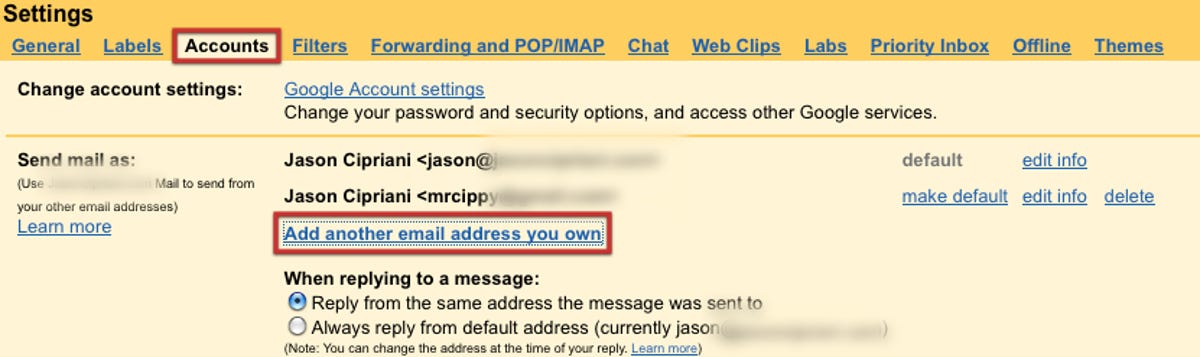
- Navigate to Mail Settings (click on the gear icon in the upper-right-hand corner of the screen)
- Click on the Accounts tab
- Click on Add another email address you own
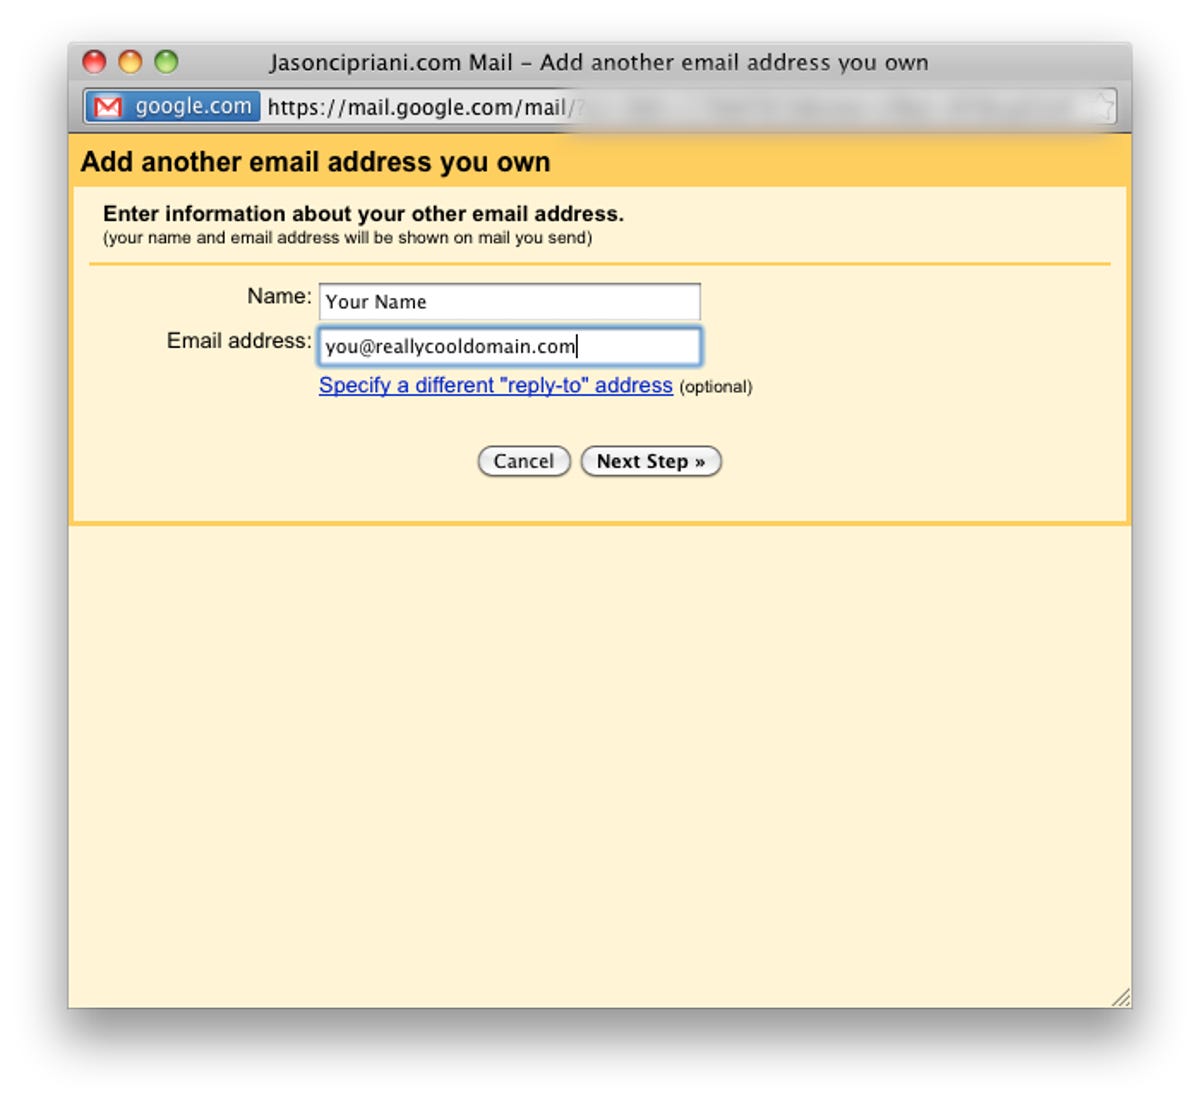
You will then be presented with a pop-up. Enter your name and e-mail address. You will then be asked if you want to use Gmail, or a third party to send the e-mails through. For simplicity, select Gmail. (If you are using a Google Apps account you will be presented with your domain's name instead of Gmail, select this option)
Google will send a verification e-mail to the address you are attempting to add. Once you have received the verification e-mail, click on the link embedded in it.
You should then see a new e-mail address listed under your Accounts settings tab, as seen in the first screen shot above. If you wish to send e-mail on your iOS device from the new address, click on the "make default" link, next to the address you would like to be the default address.
Now that we have set up a new address on the Web, we need to activate the service on an iOS device. The next set of instructions are carried out on your iOS device.

- Open Mobile Safari
- Go to m.google.com/sync
- Login to your account
- Select the device you wish to activate the Send Mail As feature on
- Check the Enable box
- Press Save
Now that the Send Mail As feature is enabled on your iOS device, when you send an e-mail using your Gmail or Google Apps account, your e-mail will appear to have been sent from the default e-mail address on the account.
One thing to keep in mind: after enabling the feature on your device, the change can take up to 24 hours to complete. But there is a trick to getting it to go through right away. To force the change to go through nearly instantly--enable the feature, disable the feature, and then enable it again on your device. The next time your device syncs with Google's servers, the change will take effect.