How to create a movie trailer project with iMovie for iOS
Learn how to make a Hollywood-style trailer with iMovie on your iPhone and how this project differs from the standard iMovie movie project.


There are two types of projects you can create with iMovie on your iPhone: Movie and Trailer. The Movie template is by far the more flexible of the two, letting you adjust the length of each clip in your movie and, thus, the length of your movie. The Trailer template is much more rigid, with an outline that features fixed lengths for each clip and fixed transitions and theme music.
You'll likely use the Movie template more often than the Trailer template, but creating a Trailer project can be fun if you want to create a quick video that mimics the look and feel of a Hollywood movie trailer.
To create a Trailer project in iMovie for iOS, open the app, tap the big "+" button on the Projects page, and then choose Trailer. Next, you will need to choose one of the 14 trailer templates. When you tap on the thumbnail for a template, you can view the length of the trailer and the number of cast members it supports (if any). When you have made your decision, tap Create in the upper-right corner.
After choosing a template, there are two main views -- Outline and Storyboard -- to use to put your project together.

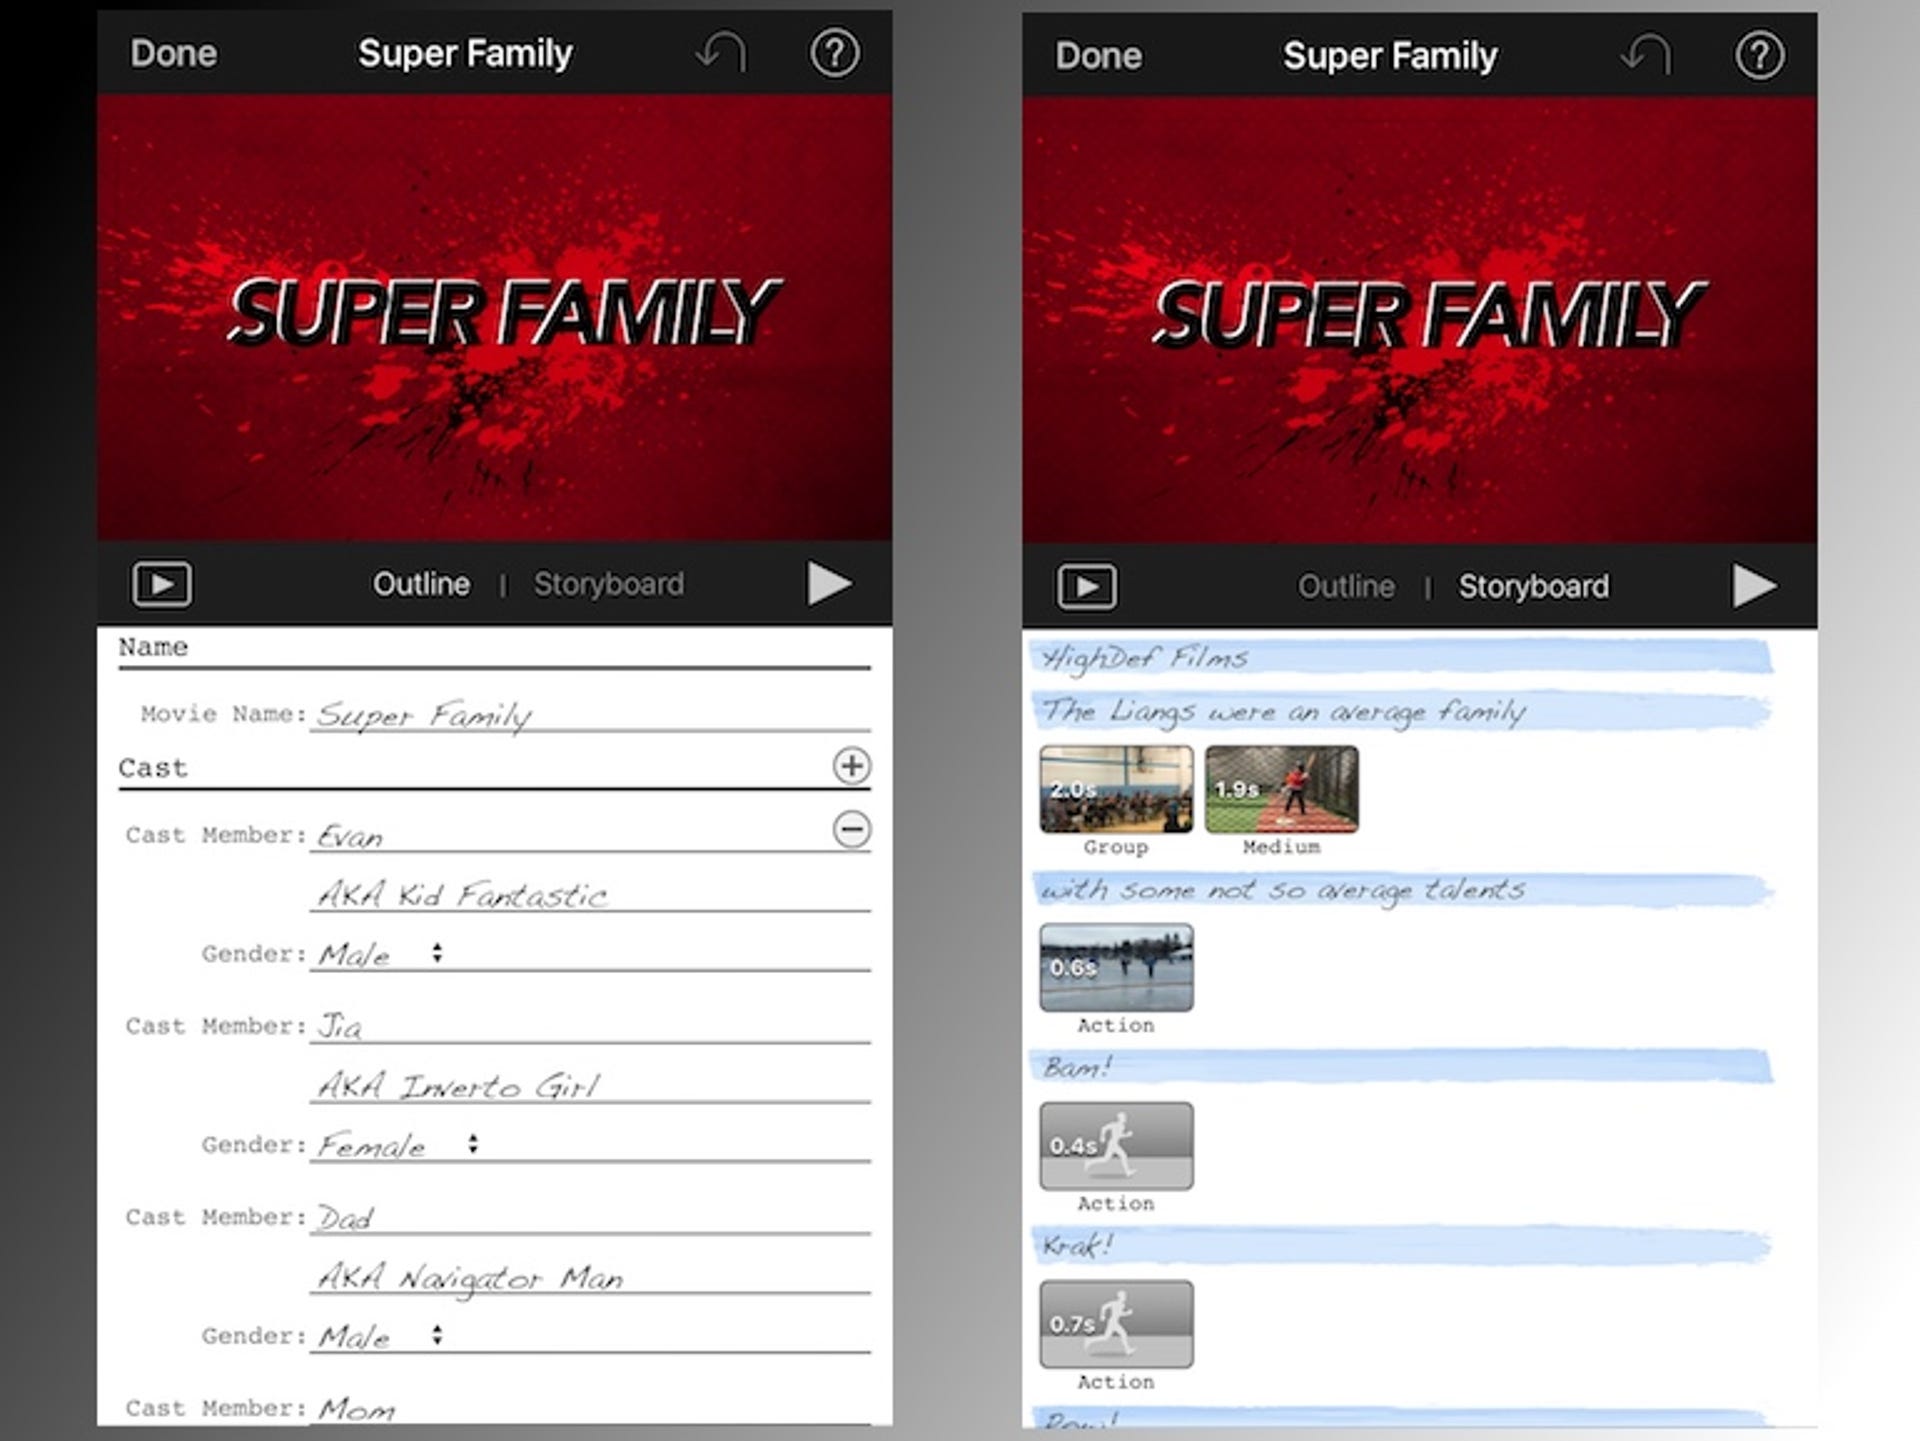
On the Outline view, you can change the text for the various transitions. Just tap in the text field to edit the dummy text. For trailers that feature cast members, you can tap the "+" and "-" buttons to add and subtract cast members.
On the Storyboard view, you can add in video clips and photos. Tap on a scene in the Storyboard and you can then choose to add a video or photo from your library or direct from your iPhone camera. For videos, tap on a video and then move the yellow selection tool to the part of the clip you want to use. Tap the up-arrow button to add it to your project or the play button to preview the portion of the clip you have highlighted.

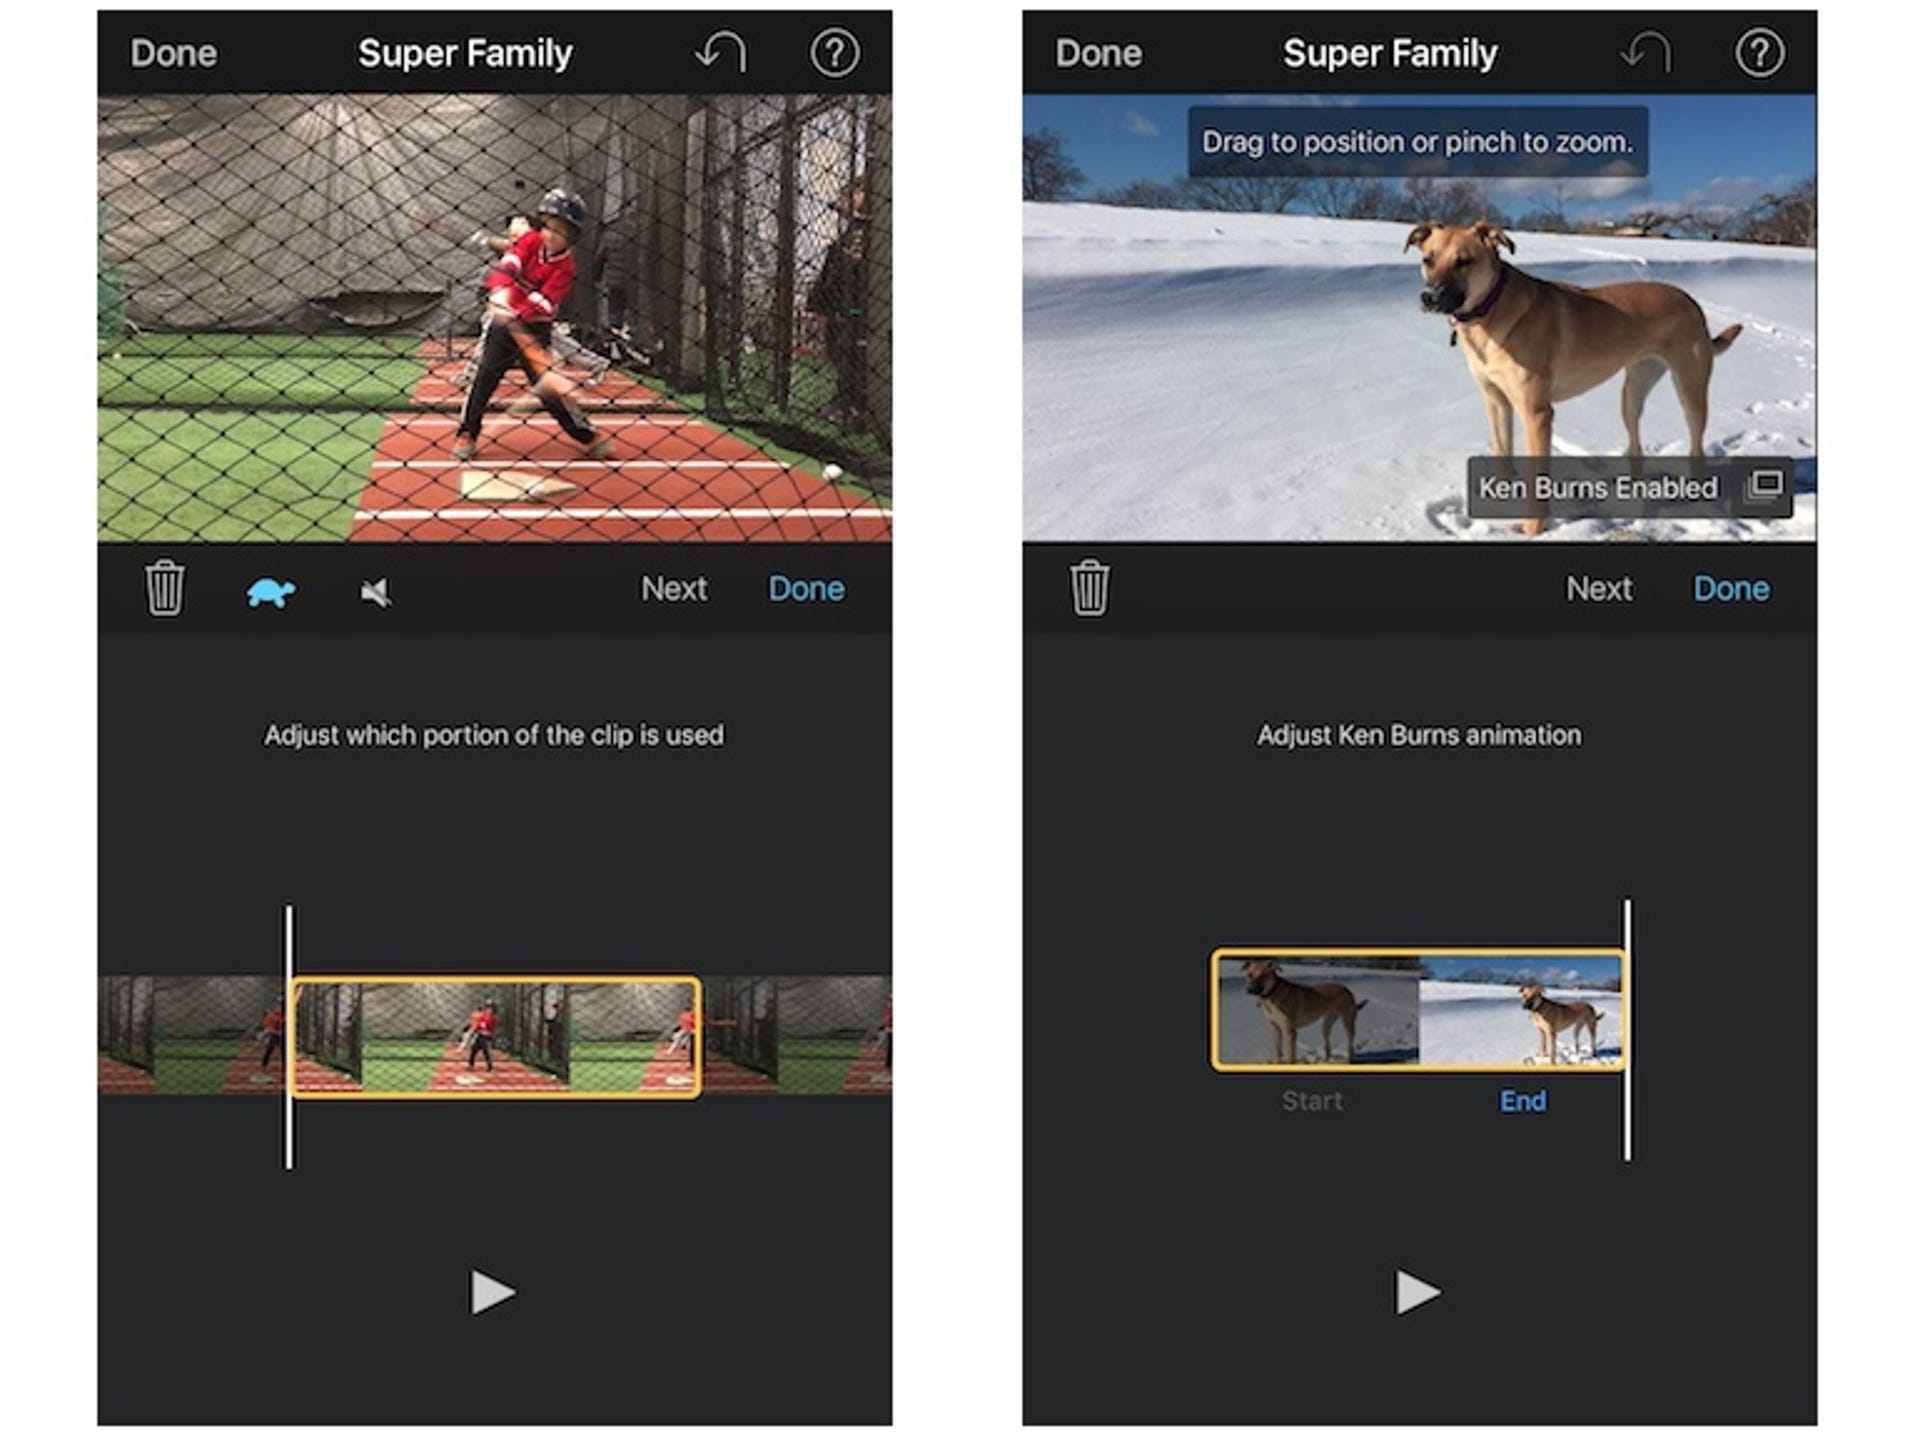
For video clips, I found it easier to fine-tune the start and end points of a clip after adding it to my project. Because the length of each clip is so short in the trailer template, it's hard to scrub the video when selecting a video to add to the project. You will find you have much more room to work with much greater control after you have added the clip to your project. Just try to get close to the clip you want when adding a video and then tap on the clip in the Storyboard view after it's been added, where it is much easier to choose which portion of the clip to use. You can also choose to have it play in slow motion, and you can mute the audio of the clip, too. For photos, you can select the start and end points if you have the Ken Burns effect enabled.
In both Outline and Storyboard views, there are two play buttons to preview your trailer. The one on the left displays a full-screen preview while the one on the right previews your trailer right in the small window above your work area. There is also an undo button at the top if you make an unwanted addition or edit, and the "?" button in the upper-right corner adds helpful yellow tags to your work area that can guide you if you get lost.