Home networking explained, part 5: Setting up a home router
CNET editor Dong Ngo explains the best way to set up most Wi-Fi routers: via the web interface. This guide can be applied to all consumer-grade routers in the market, save for those from Apple.


Editors' note: This article was first published on March 26, 2013 and updated on July 1, 2016 with up-to-date information.
It might seem like a daunting task to set up a new home router. But it doesn't have to be if you understand the most common way routers are managed: through the web interface. The hardest part of using the web interface is getting to it. Once you have accessed it, the rest -- at least most of it -- is self-explanatory.
Most routers' web interfaces are similar and self-explanatory.
Note: Almost all home routers on the market come with a web interface; that is, a web page from which users can view, manage and monitor the router's settings and features. The only company that doesn't offer a web interface for its routers is Apple. There are also some new types of routers with vendor-assisted setup and management using a mobile app, such as the Google OnHub, the Eero or the Starry that also don't have a web interface. With that in mind, this guide is intended only for routers with a web interface.
In this post, I'll talk about how you can quickly set up any router by accessing its web interface using a browser and manage it from any connected computer or even a tablet or smartphone.
Let's start with the basics.
1. What is a browser?
A web browser is a software application designed for retrieving, presenting, and exchanging information resources on the internet. All browsers have an address bar where you can type in the web address of a website, such as www.cnet.com. After that, you hit Enter and the browser will let you browse (hence the name) the content of the site. As you surf the internet, the address bar automatically displays the current address of the web page you're looking at, whether you typed in the URL or got to it by clicking on a link, such as one from within an email or from another web page. This web page address is called a uniform resource locator (URL).
Among the most popular browsers are Google Chrome, Mozilla Firefox, Apple Safari, and Microsoft Internet Explorer. You'll find at least one of these browsers on any computer, tablet, or smartphone, and any of them can be used to manage a router's web interface.

2. Setting up the hardware
When you get a new router, setting up the hardware is very simple. (If this part of home networking is new to you, check out part 1 of this series first). All you need is a computer that has a network port (most computers do) and two network cables (a new router comes with at least one network cable). Follow these steps, regardless of what the router's included setup guide might say:
- Connect the router's WAN port to your internet source, such as a DSL or cable modem, using the first network cable. All home routers have just one WAN port (sometimes labeled the internet port); this port is always separate from the other network ports and often is a different color to further differentiate it. Note: If you do not have internet access at home, or want to have an isolated (non internet-enabled) network, you can skip this step. Later on you can always complete this step when the internet is available or needed.
- Connect one of the router's LAN ports (most routers have four LAN ports) to the computer using the second network cable.
- Plug the router into the power outlet using its power adapter, as you would with most electronics. If the router has an on-off switch, make sure the router is on. Many routers don't have this switch and will turn on as you plug it in.
That's it -- you have just finished the hardware setup.

A router's WAN (internet) port is always clearly distinguished from the LAN (Ethernet) ports. Also note the reset button, which brings the router's settings to default value.
3. Accessing the web interface
The next step is to use the web browser to display the router's web interface. Basically, you will need two things: the router's URL, which is always its default IP address, and default log-in information. You'll find this information in the router's manual, and sometimes it's printed on the underside of the router, as well.
Most, if not all home routers on the market have a default IP address in this format: 192.168.x.1, where, depending on the vendor, x tends to be 0, 1, 2, 3, 10 or 11. For example, routers from Trendnet almost always have a default address of 192.168.10.1, while D-Link routers use 192.168.0.1 or 192.168.1.1.
And the log-in information is also quite predictable. The username (if any) is almost always admin and the password (if any) tends to be one of these: admin, password, default, or 1234.
Once you have gotten these two pieces of information, just type the router's IP address in the address bar of a browser on a connected computer, press Enter, and then enter the log-in information, after which you'll be greeted with the web interface.
| Vendor | Default IP | Default log-in (username/password) |
|---|---|---|
| Most AT&T gateway | 192.168.0.254 / 192.168.1.254 | (blank)/(the device's serial number or access code) |
| Amped Wireless | 192.168.3.1 | admin/admin |
| Asus | 192.168.1.1 | admin/admin |
| Belkin | 192.168.2.1 | (blank)/(blank) or admin/1234 |
| Buffalo | 192.168.11.1 | root/(blank) |
| D-Link | 192.168.0.1 or 192.168.1.1 | admin/(blank) |
| Linksys | 192.168.0.1 or 192.168.1.1 | admin/admin or (blank)/root or (blank)/admin or Administrator/admin |
| Motorola | 192.168.0.1 | admin/motorola or admin/password |
| Netgear | 192.168.0.1 or 192.168.1.1 | admin/password or Admin/1234 |
| Trendnet | 192.168.10.1 | admin/admin |
| ZyXel | 192.168.1.1 | admin/1234 |

You can quickly find out the router's default address by using the ipconfig command on a Windows computer.
Also, from a connected computer, you can always find out what the current IP address is of the local network's router. This is helpful if a router's default IP address has been changed. On a Windows computer do this:
- Run the command prompt (you can find it in the Start menu, or in Windows 8 just type cmd when you're at the Metro Start menu, then press Enter).
- At the Command Prompt window, type in ipconfig then press Enter. You will see a lot of things, but the IP address following the Default Gateway is the address of the router.

On a Mac, it's also quite easy to find out the default IP of the local network's router.
On a Mac: Head to System Preferences > Network > select the current connected connection (it's likely Ethernet) > click on Advanced > on the first tab, TCP/IP, the router's IP address is shown next to Router.
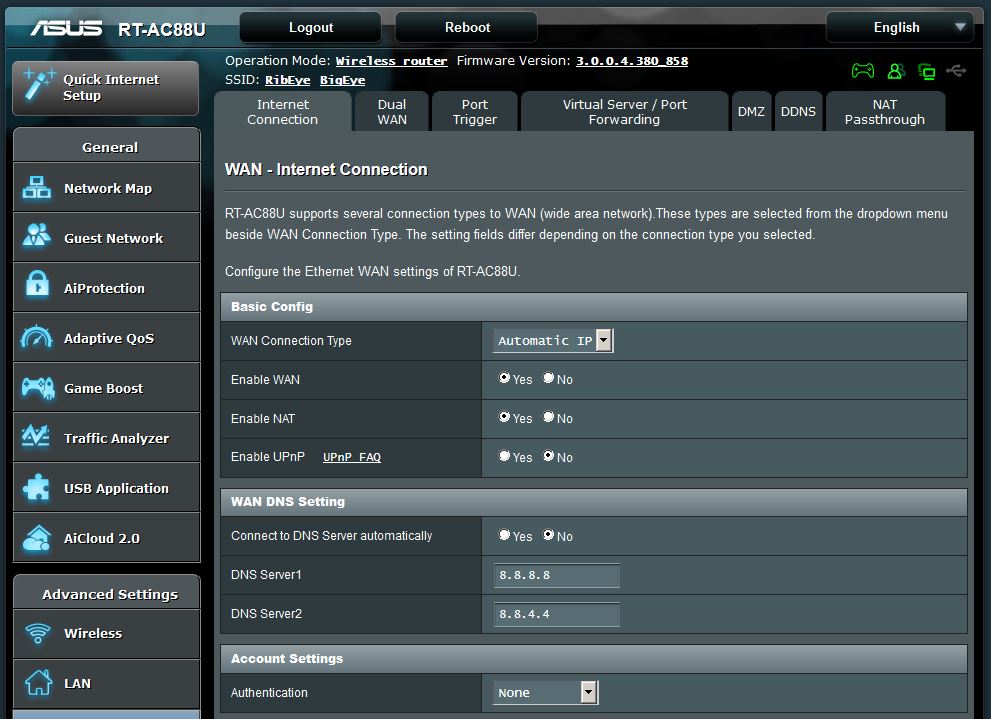
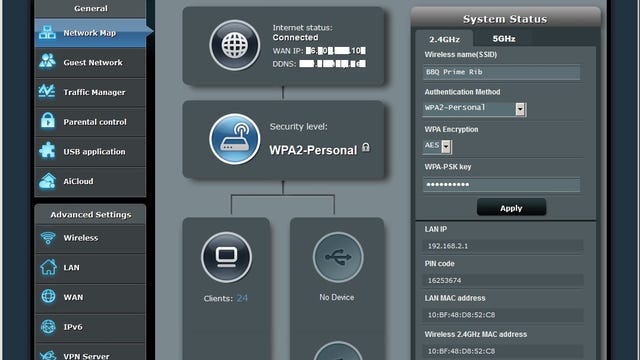
4. A new router's basic settings
Though the design of the web interface is opened varies from one vendor to another, most of them have granular menus. Listed below are typical main menu items and what they do.
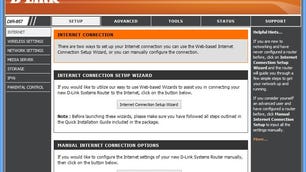
Wizard: This is where you can start a step-by step guided setup process. Many routers' interfaces show the wizard when the web interface is accessed for the first time. You just have to go through and set up a few of the routers' settings, such as its log-in password (to be changed from the default -- you should definitely do this to keep your network secure) and the name and password for the Wi-Fi network (or networks, for dual-band routers). Some wizards also ask for your time zone, the current time and date, and so on. With most routers you can skip the wizard and set up the router manually, if you want to, or you can finish the wizard and get back to the interface to further customize the network.

It's a good practice to save the router's current settings before making changes. This way you can always restore the previous settings if something goes wrong.
Setup section
Wireless (or Wireless settings): Where you can customize the router's Wi-Fi network(s). You can pick the name of the network, change the password, turn the Wi-Fi Protected Setup feature on or off, and a lot more.
WAN (or Internet): Most of the time you should use the Auto setting for this section. However, some ISPs might require special settings; in those cases you can enter them here.
LAN (or Network settings): This is where you can change the local network settings, including the default IP address of the router itself. (Note that if you change the router's default IP address, which is recommended for security reason, you'll then need to use the new address to access the router's web interface.) Here you can also change the range of IP addresses used for local clients, and add clients to the DHCP Reservation list. Once on this list, the clients' IP addresses will remain the same, which is required for some internet applications. Most of the time, you don't need to change anything in this section at all.
Tools (or Administration) section
Admin password (or Password): Change the router's password. This is the password required when you log in the router's web interface.
System: Where you can back up the current settings of the router to a file, or restore settings from a file; update the router's firmware; and so on. It's always helpful to back up the router's settings before you make changes.
You'll find a lot more settings and features on a router's web interface, and when have time, you should try them out. If worst comes to worst, you can turn to the last-resort step below to restore the router to its default settings.
5. The last resort
All routers come with a reset button. This is a tiny recessed button that can be found on the bottom or side of the device. Using something pointy, such as an unfolded paper clip, to press and hold this button for about 10 seconds (when the router is plugged into a power source) will bring its settings back to the factory default. In other words, the router will be reset to the state it was in when you bought it. You can set it up again from the beginning, or you can log in to its web interface and restore the router's settings from a backup file.
To learn some simple tips on keeping your home network secure, check out Part 6 of this series.