Getting started with Notability for iPad
Notability is a versatile note-taking iPad app. Learn the ins and outs of this wide-ranging yet intuitive app.


If you have been back in school and are still searching for the right note-taking app for your iPad, Notability brings a lot to the table, or desk in a lecture hall, as it were. This 99-cent app combines note-taking via keyboard of apps such as Drafts and Outline+ with the inking capability of a sketch app such as Paper. If your note-taking needs require both methods, I think you'll find a lot to like about Notability.
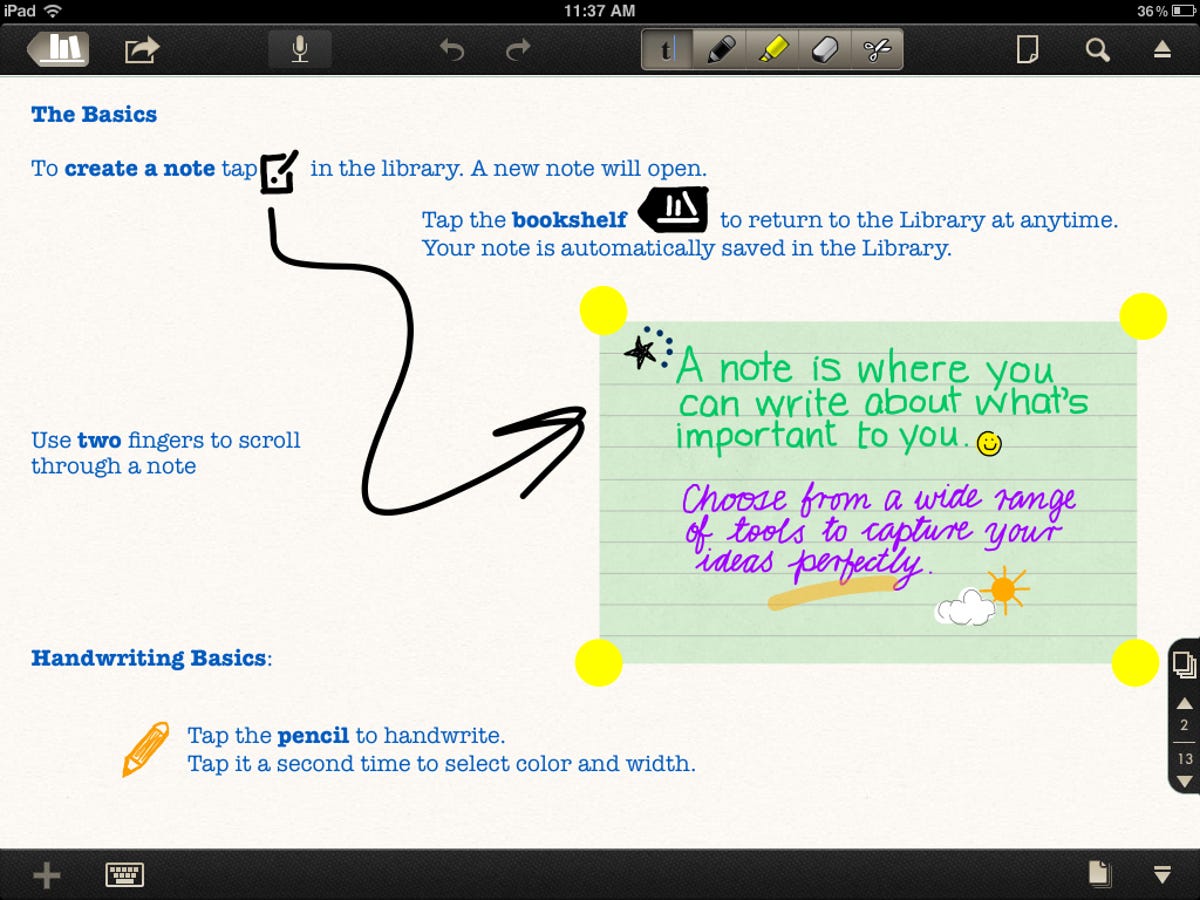
When you first launch the app, it opens to a document titled "Welcome to Notability." It's an interactive guide that shows how to navigate the app. In summary, a menu bar runs along the top of the screen. At its center are five tools buttons, which let you choose to type, write, highlight, erase, or select a section to cut, copy, delete, or restyle. To the immediate left of these tools buttons are undo and redo buttons. There is also a microphone button that lets you record voice memos to attach to a document.
You can customize the look of a note by tapping on either the pencil or highlighter tool button to choose the size of the point and color. Tap the paper-icon button to the right of the tool buttons in the menu bar to select a paper type -- color choices along with it being blank, lined, or grid-lined.
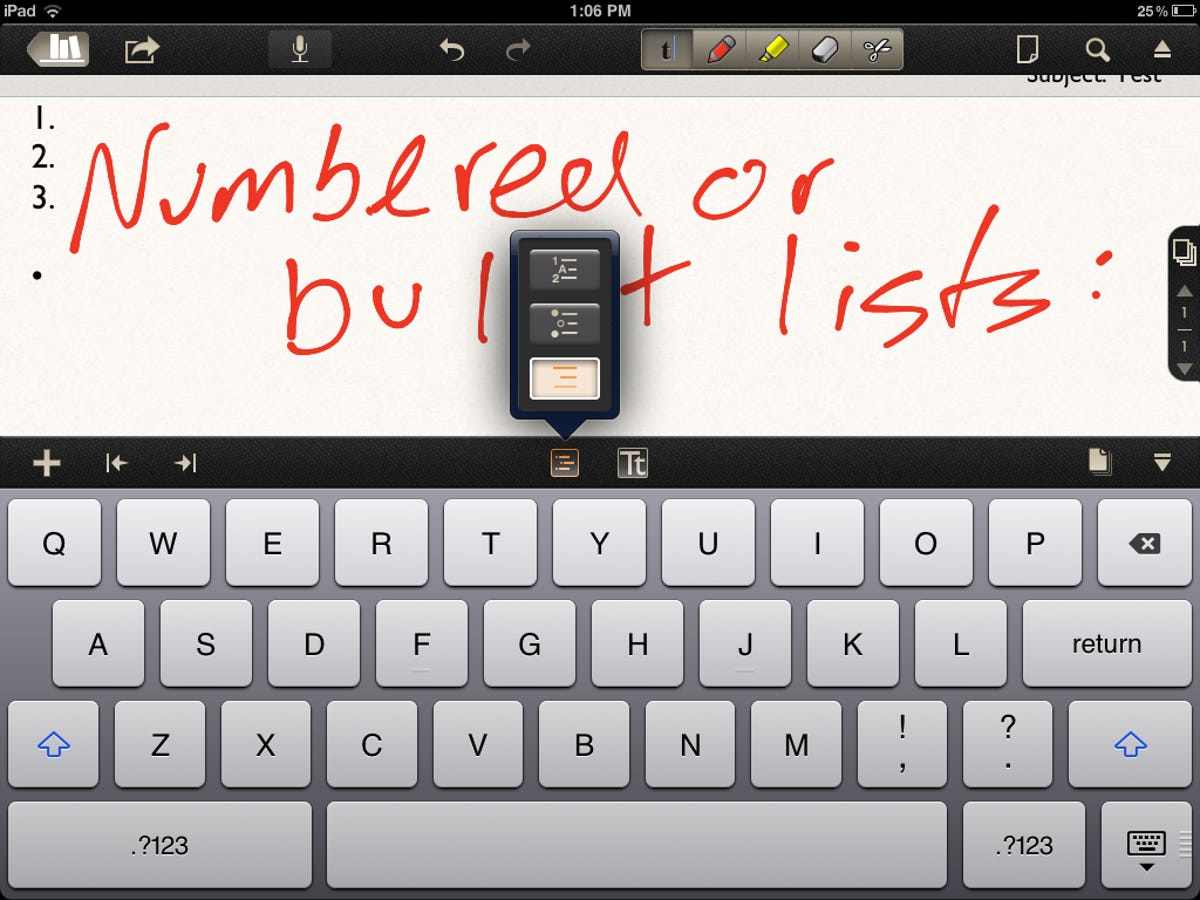
Notability uses the standard iPad keyboard, but places a row of its own buttons along the top. The most helpful of theses buttons are the two in the middle. One lets you create numbered or bulleted lists, and the other lets you change the style, size, and color of your font.
Three buttons sit at the bottom of the screen. The "+" button in the lower-left corner lets you add a photo, an image of a Web page, or text boxes of typed or written text. These text boxes are handy because you can resize and reposition them on a note. Two buttons reside in the lower-right corner. One lets you zoom in on an area of your note for finer control, and the other offers you a virtual and resizable palm rest should your palm interfere with your inking.
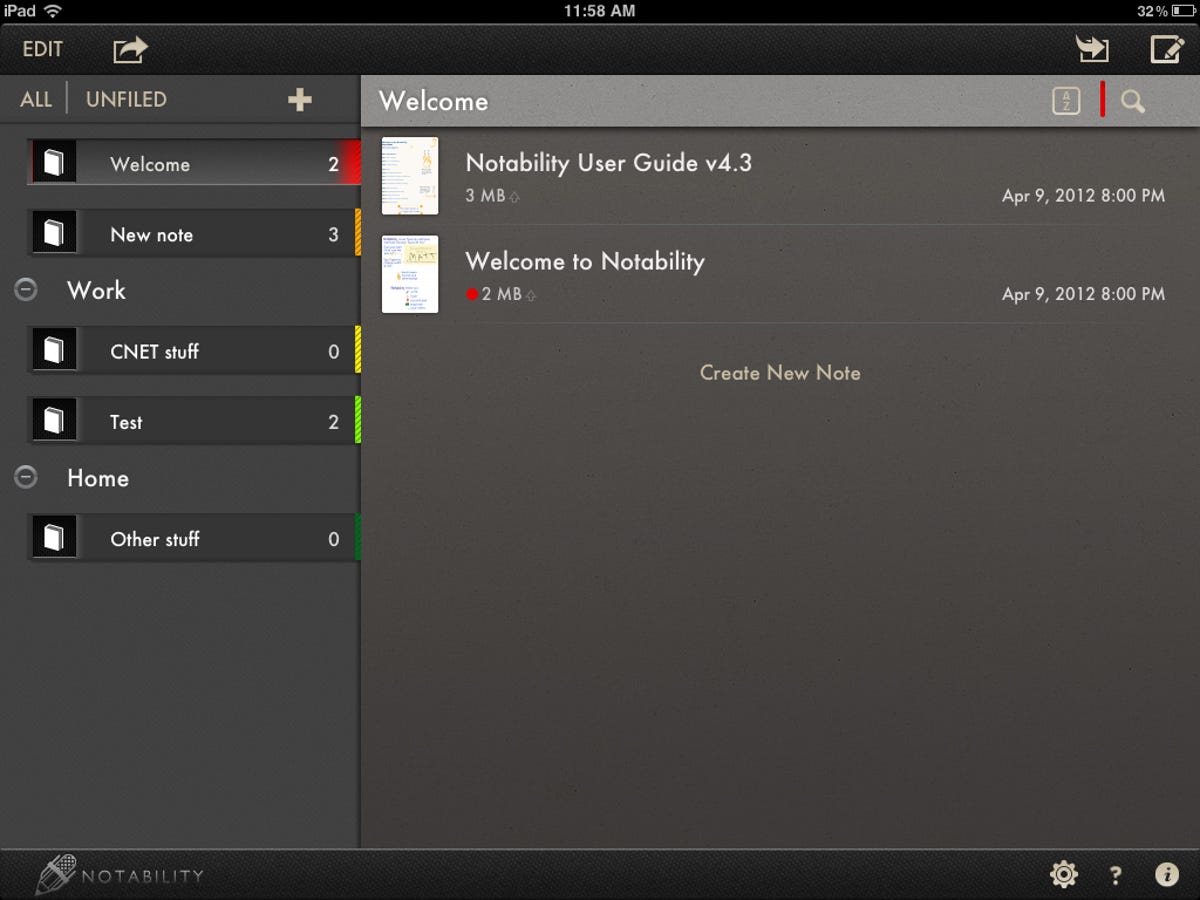
Tap the library button in the upper-left corner of the screen to return to Notability's home screen. Here, you can organize your notes. On the left pane are your categories and subjects, and on the wide right pane are your notes. (In Notability's organizational scheme, categories contain subjects, and subjects contain notes.) Each subject has an icon to the left and a color tab to the right. You can change the icon and color by tapping the edit button in the upper-left corner and then tapping the gear icon at the top of the right pane for a subject. You can also password-protect a note using this method.
When in this library view, you can tap the button in the upper-right corner to create a new, unfiled note. You can tap and hold to drag a note to a new subject. You can also create a new note within a subject by tapping the "Create New Note" link below the existing notes in a subject.
You can also move documents into and out of Notability. When in library view, the share button on the left lets you e-mail or print a note or send it to Dropbox, Box, iDisk, WebDAV, or iTunes. Moving in the other direction, the import button on the right lets you import PDFs from Dropbox, Box, iDisk, and WebDAV.
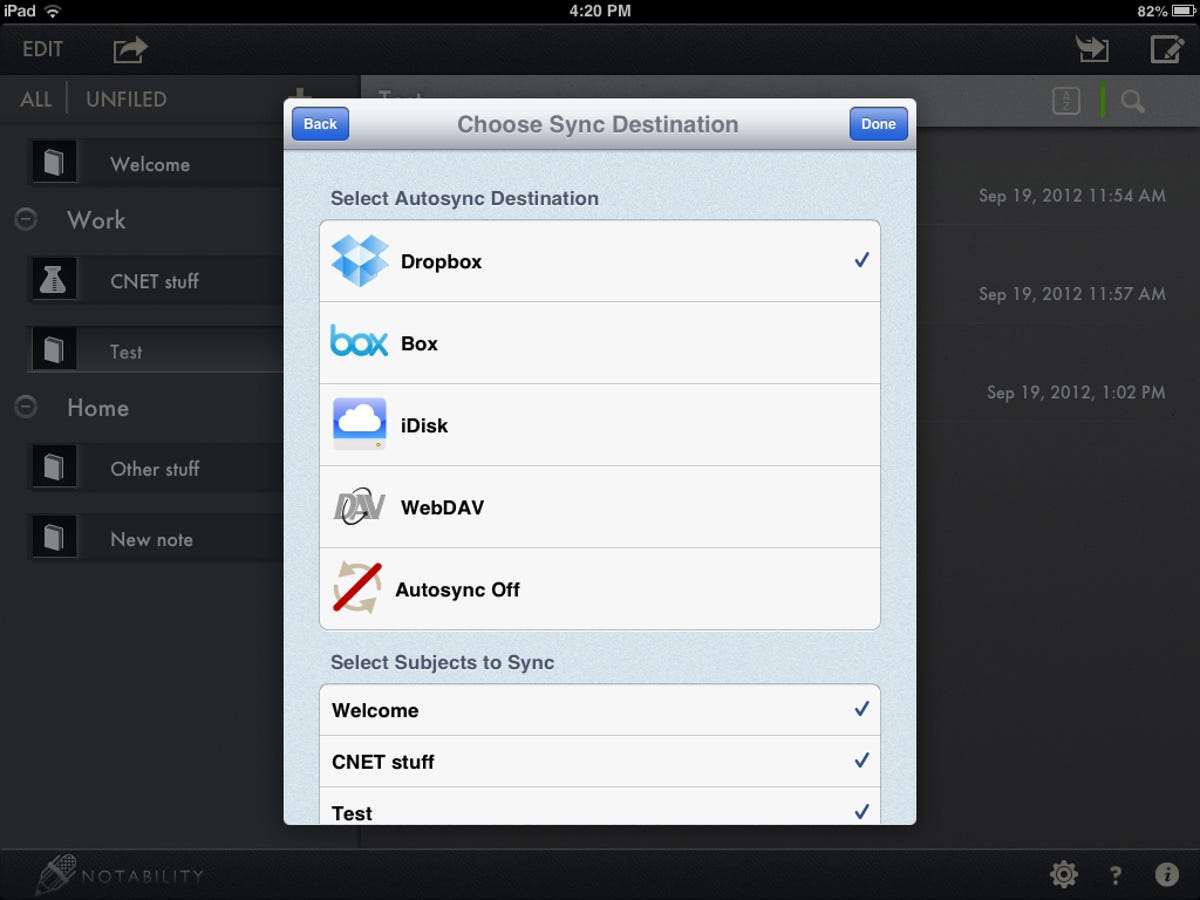
Lastly, you can access settings when you're in Notability's library view. Tap the gear icon in the lower-right corner to access the settings, the most notable of which is Auto Sync. It lets you sync your notes with the same four cloud services that are listed as import options. This lets you keep backups of your notes that you can access from any Internet-connected computer. Synced notes can be saved as RTFs, PDFs, or .note files.
Do you have a favorite note-taking app for the iPad? If so, please share in the comments below.