Five tips for using iBooks in OS X Mavericks
You likely won't use iBooks on your Mac for much pleasure reading, but for research projects or other school work it can be a useful tool.


One of the bright, new features of Mac OS X 10.9 Mavericks is iBooks. Now, you can use your Mac to read and annotate books, just as you can with your iPhone or iPad. With its physical keyboard, your Mac is better suited for schoolwork than pleasure reading, letting you easily add notes as you go. Also, iBooks for OS X lets you open multiple books at once, useful for research projects where you are using multiple sources.
Still, the new iBooks app for OS X has a few kinks to iron out. For example, if you have multiple books open and minimized, and want to switch between them by using the icons in the Dock, you'll need to guess because instead of labeling each with the title of the book or document, the icons all share the same title of iBooks. Not helpful. Instead, you can use the Window menu for iBooks, where each book is listed by its title, to switch between multiple open books. Also, many menu options are available only for textbooks.
With my preamble complete, I present five tips to get you started on the right foot with iBooks on the Mac.
1. Set up and sync
After launching iBooks and signing into your Apple account, the app builds your library by syncing any purchases you made with the same Apple ID on an iOS device. Moving forward, you can sync your library and grab any new purchases made on another device by going to Store > Check for Available Downloads. In preferences, you can check a box so new purchases made on other authorized devices are automatically downloaded. It's not checked by default.
2. Add and remove highlights and notes
To highlight a section of text or add a note, drag your cursor across an area of text, wait a beat, and a menu will appear that will let you choose one of five highlighter colors (or underline), add a note, and copy the text. If you hold down the Command key while highlighting a portion of text, it will save you the step of choosing a color from the highlights/notes menu and will use the color you previously used.
To remove a highlight from a section of text, click within it and a Remove Highlight option will be offered in the menu which pops up.

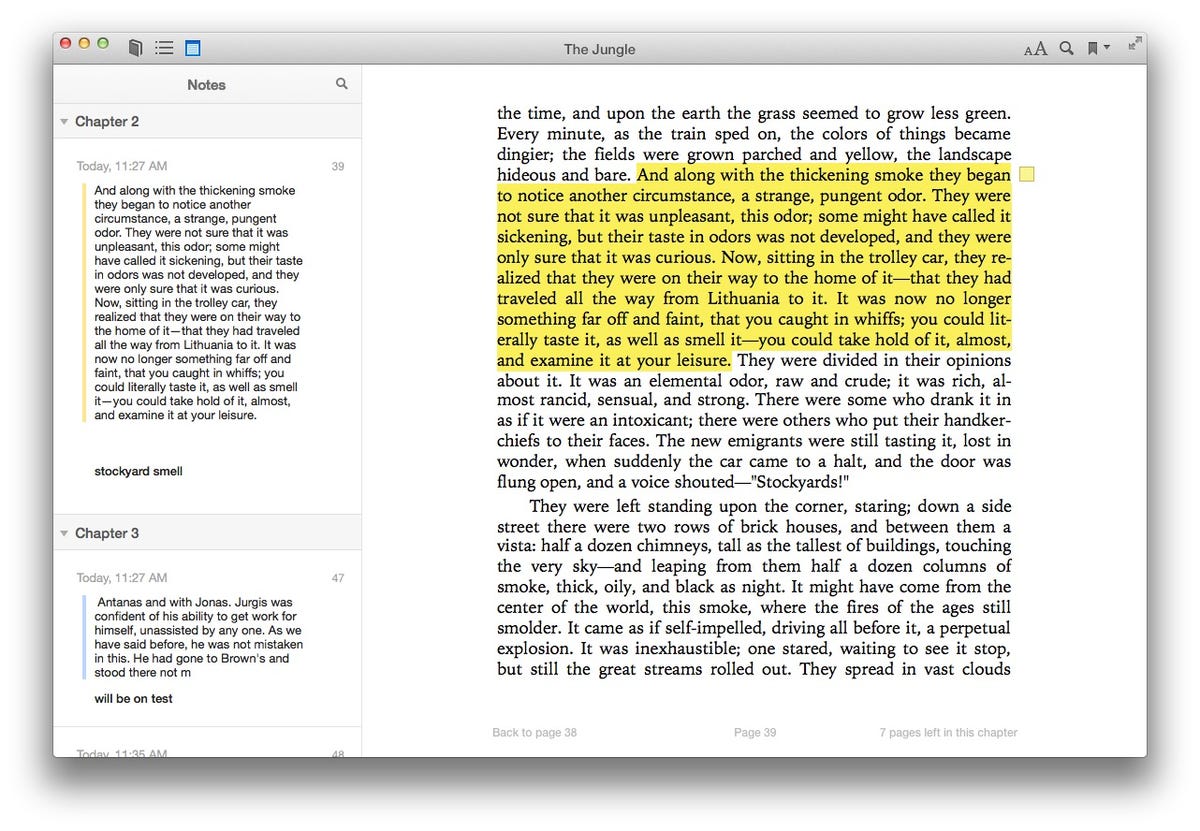
3. View all of your highlights and notes
To view all of your notes, click on the right-most button of the three (the one that looks like a Post-it) in the upper-left corner of iBooks, or hit Command-4. This opens your Notes, showing all of your highlights and notes along a narrow left pane, with a single page of your book on the right. Above each highlighted portion of text in the Notes Panel is the time and date of your annotation and its page number. Click on the page number to view the page of the highlight or note on the right pane.
I was curious to try out the Study Cards feature that turns your notes and highlights into virtual note cards with a highlighted section text on one side and your note for it on the other but, alas, the Show Study Cards menu option was grayed out as it's only available for textbooks and lessons.
4. Get back to the two-page view
When you close out of the notes pane in iBooks, if iBooks reverts to a one-page view, you can select the two-page menu option (View > Two Pages). In my case, a bug occurred and this option was grayed out; unfortunately the keyboard shortcut (Command-2) did not work either. If this happens to you, in order to get back to the two-page view, you can drag to resize the iBooks window until it reached a point where it's wide enough to fit two pages.
5. Jump to the next chapter
While a two-finger swipe or the left and right arrow keys let you turn the pages in iBooks for OS X, there is also a way to jump directly to the start of the next chapter. You can use the Table of Contents to select a chapter, but if you want to jump to the next chapter without leaving the book you are busy reading and highlighting, hit Command-Shift-Right Arrow. Press the left-arrow key while holding down Command-Shift to jump, you guessed it, to the previous chapter.
If you are using iBooks on your Mac and have any helpful tips, please share in the comments below.