Can an ordinary Joe replace a busted iPhone screen?
The DIY route costs significantly less than hiring a pro. But how hard is it really? And was this intrepid reporter successful?


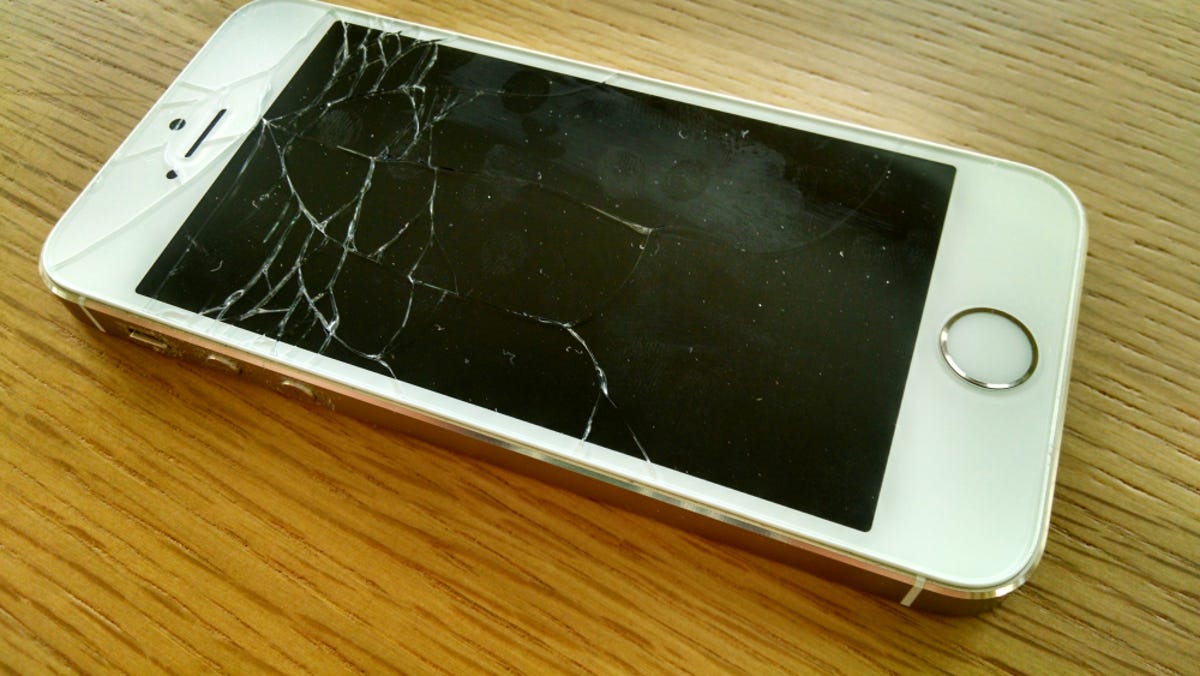
Late last week, my barely 2-month-old iPhone 5S made an unfortunate new friend: the driveway. The dog yanked hard on his leash, the phone went flying, and sure enough: spider-glass cracks from top to bottom. This was despite my iPhone 5S residing in a seemingly durable wood case.
Crap.
It still worked, thankfully, but obviously the screen needed to be replaced. I'd been down this road last year when my wife's iPhone 4S met a similar fate, and had a found a local shop willing to do the repair for $70 -- painful, but a penalty I could swallow. So I called to inquire about my 5S.
Price for a new screen: $130. Double-crap.
I investigated other shops and even some iPhone-repair services found on Craigslist (read: guys with pentalobe screwdrivers). At best, I was still looking at $90. And if I went to an Apple Store, I'd be on the hook for $150.
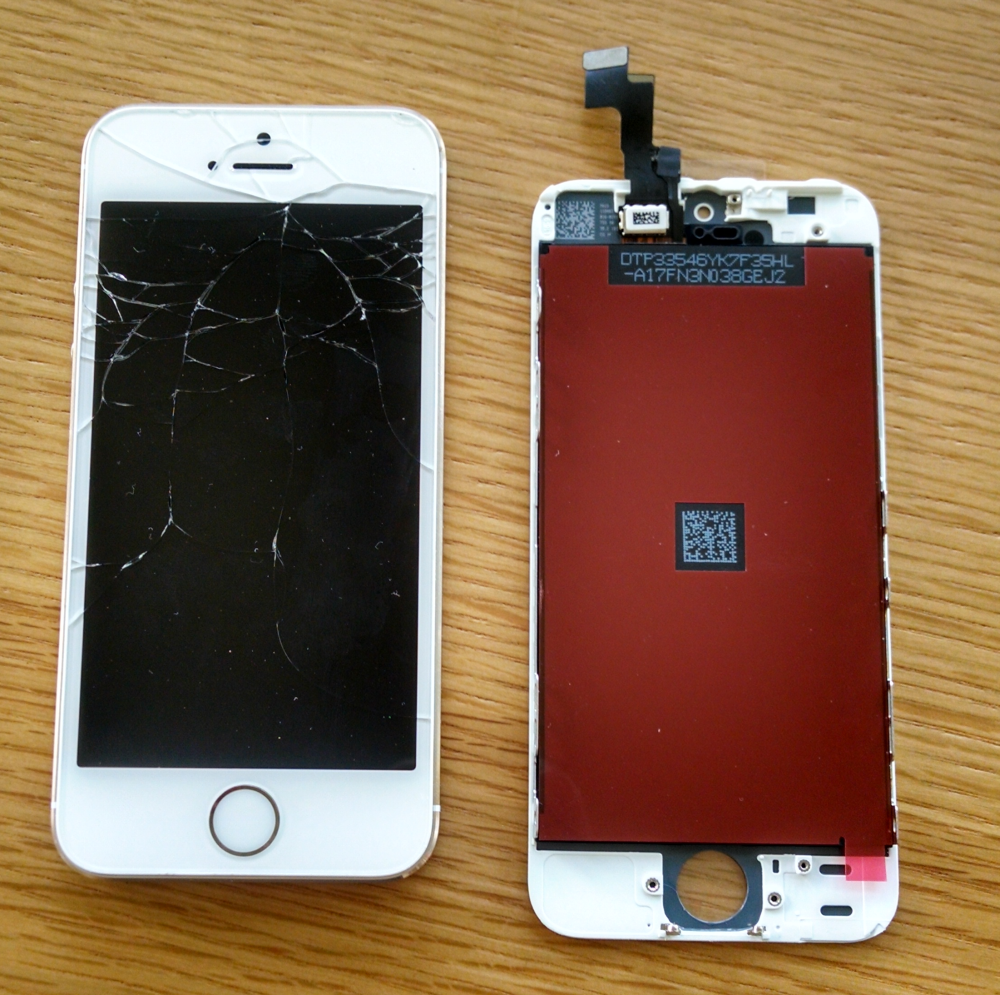
The other option: Fix it myself. I remember shopping for DIY repair kits for the iPhone 4S and finding them on eBay for as little as $15 to $20. That sounded a lot more palatable. Alas, most iPhone 5S replacement screens (consisting of new glass and LCD) were priced around $40. But that was still a lot better than $130, or even $90, so I ordered one.
It arrived in just a few days. What follows is a blow-by-blow description of what happened next. As of this moment, I don't know if I'll be successful or not.
1. I hit up YouTube
I can operate a screwdriver, but beyond that I have no special skill at working with electronics. I do know how easy it can be to foul up something as delicate as an iPhone, because my attempt at replacing an iPod Touch screen was an utter failure. (Everything is really tiny in there.)
Thus, I head to YouTube and find several walkthrough videos on replacing an iPhone 5S screen. I settle on this one and watch it through from start to finish before even picking up a tool. It doesn't look that complicated, I lie to myself, and I know that if it doesn't work, I can still go to a repair shop -- even if it means spending more in the long run.
2. Here goes nothing
I know from past experience (see "tiny," above) that my eyes are ill-suited to working with this stuff, so I've already invested in a gooseneck magnifying glass with LED lighting.
I also have a smattering of screen-removal tools from the aforementioned iPod repair; many kits come with them. Most important, I have a suction cup.

However, I'm really nervous about taking something as sharp and metal as a razor blade (as suggested in the video) to my iPhone's frame, so first I try a plastic wedge. Then, at the suggestion of a friend, a guitar pick. Neither one seems to budge the screen.
After a solid 30 minutes of fiddling with these implements, I throw my hands up in frustration. Then, after a break, I watch a bunch more screen-repair vids, hoping for clues as to what I'm doing wrong. Eventually I hit on it: With the iPhone flat on the table, I use my left hand to lift (hard!) on the suction cup, then gently guide a razor under the lower-left corner of the screen (closer to the bottom edge than the actual corner).
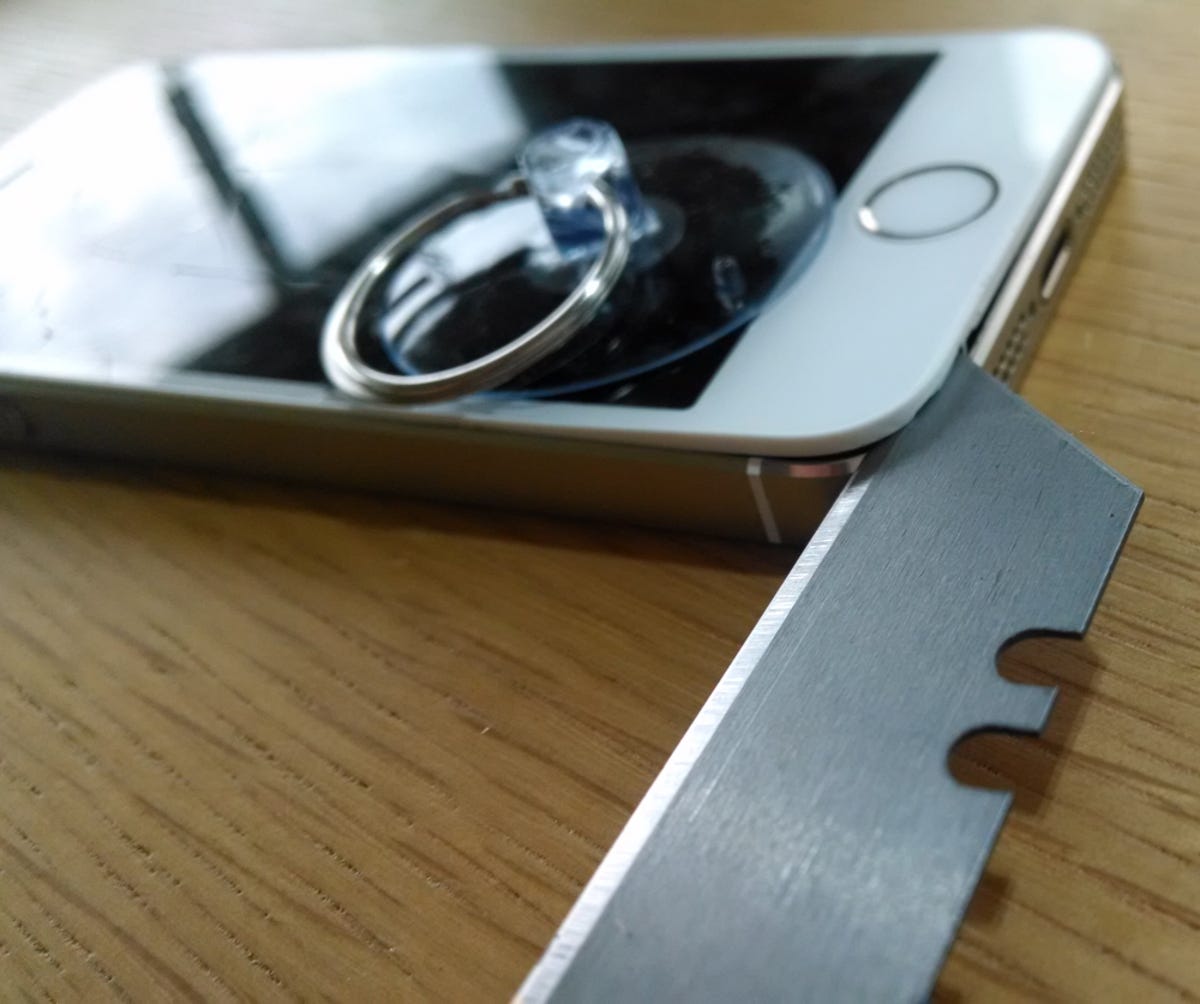
My mistake had been trying to push down, perpendicular to the phone, rather than more parallel to the screen and wiggling in under it. From there I'm able to use the guitar pick (still squeamish about the razor) to gently pop the screen loose a little at a time. Whew.
3. Serious surgery
The process of removing, and then replacing, an iPhone screen involves a lot of very delicate work. There are fragile ribbon cables, wee connectors at the ends of those cables, and screws so tiny I have to marvel at humanity's ability to mass-produce them.
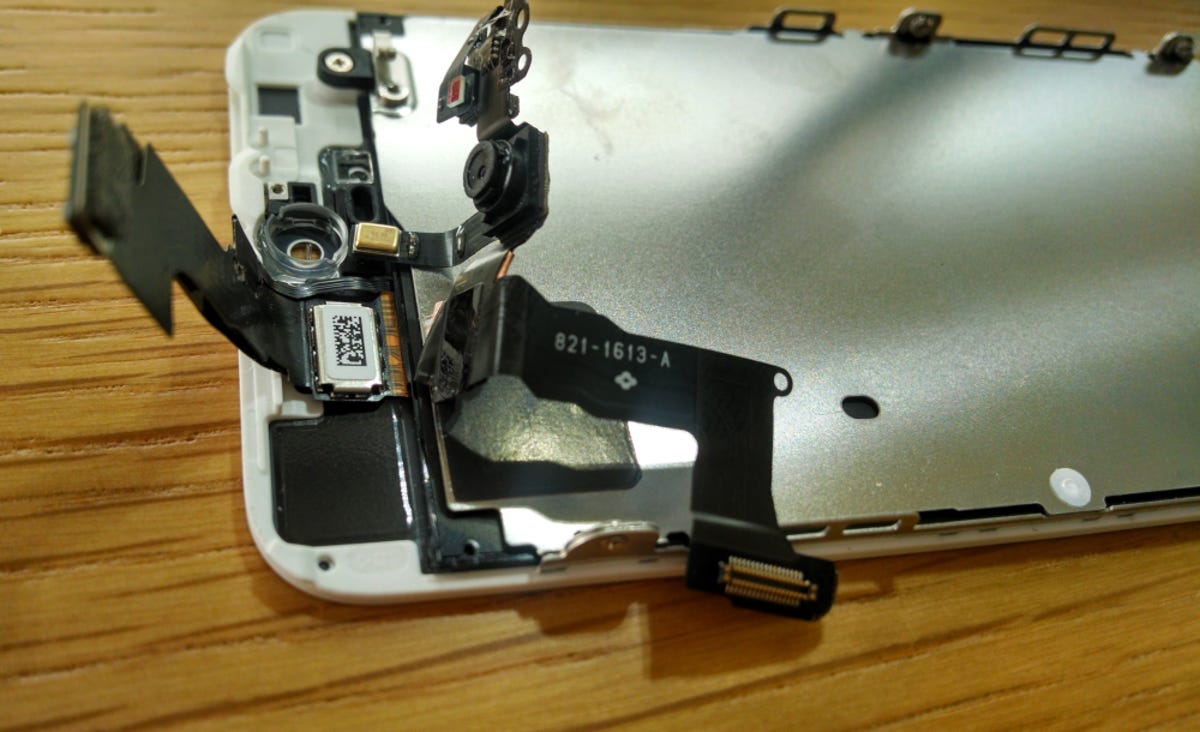
Thanks to my magnifier, though, I'm able to do the work while following along with the video. Over the course of about an hour, I remove the cracked glass/LCD and then carefully install the new one. It's not difficult, just slow going and a little nerve-wracking. The how-to vid has great angles and close-ups for some steps but seems to gloss over others. A few times I refered to other videos for clarification, which proves helpful.
4. Did it work?
Amazingly, I'm able to get the iPhone back together, and it looks perfect. You'd never know the screen had been replaced. But will it actually function?
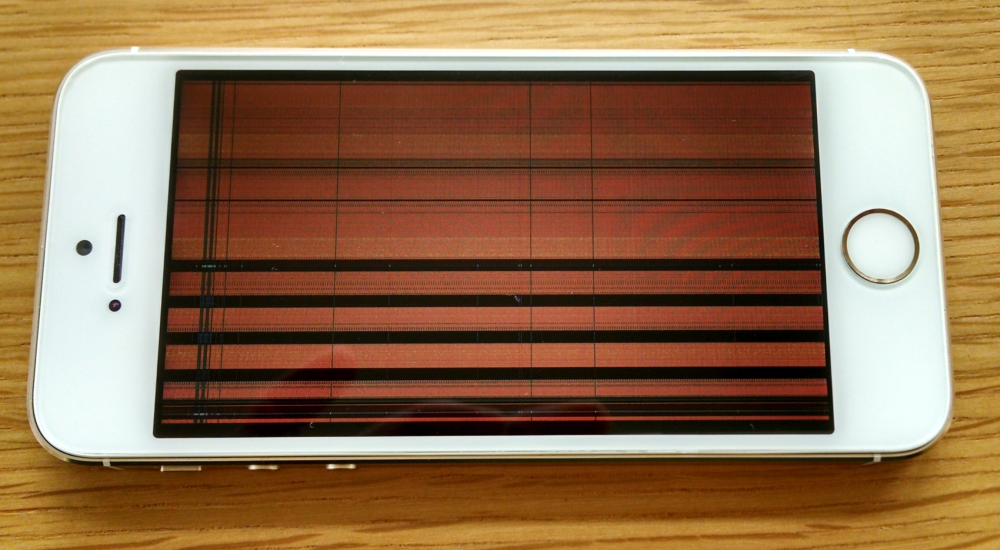
I press the power button and...the screen lights up with colored bars intersected by black lines. Crap.
Did I crimp or tear a ribbon cable? Fail to properly reseat a connector? Or perhaps just get a bad replacement screen? It's hard to know for sure, and although I could open the phone again and try to fiddle with the connectors, I've had enough. Time to call in a pro.
This is not to say you won't have better luck. But, one CNET colleague had more or less the same outcome when she tried fixing her own busted iPhone screen: Everything seemed to go fine, but the new screen just didn't work. And a Facebook friend reported two failed attempts to replace his iPhone 5S screen.
The moral of the story, for me at least, is to make sure my iPhone is adequately protected, even if it means using a case that adds extra bulk. And if I end up needing a repair that's not covered under warranty, it's probably worth letting a pro do it -- painful as it may be on my wallet.
If you've had a different experience repairing an iPhone, by all means share it in the comments!